Software
Houzz Logo Print
susiequsie60_gw

ikea countertop

15 years ago

I know this has been discussed, and I tried to do a search, but maybe someone can just point me in the right direction.

Continuing on my countertop saga.....we've pretty much decided to go with granite on the perimeter, and wood on the island. (Yay - I think it's a really good compromise that will make us both happy.)

So, I went to Ikea on my own the other day just to check it out. I can get the apprpoximately 3' x 6' (which happens to be the exact size I need) for $195!!! So even if it turns out to be a "mistake" it's a very reasonably priced "mistake!"

My builder told me he would do some type of nice "edge" so that makes my husband happy. I want to go and actually buy it as soon as possible so that I can "do" to it whatever needs to be done. Now, neither my husband nor I are really DIYers. But, I think I can handle this prep. However, I'd like to find (and I think I've seen on here) EXACTLY what I should be doing to get my countertop ready for use. I'm actually interested in everything I need to know and do once I buy it. There are 3 choices of wood (birch, beech and oak I believe) - is one preferable? Am I then staining it or prepping it or.......

Again, if someone wants to just point me in the right direction to find this info, I'm pretty sure it's been discussed before. Basically, any info I can get I would appreciate. I'd like to show my husband any posts that discuss the pro's and con's of the Ikea countertop as well. (Of course, I'd prefer them to be HEAVY on the pro's....)

Thanks!!

Comments (28)

  • 15 years ago

    The traditional wood chopping surfaces are maple but you would need to custom order that - costly! You can see one we used for maybe 8 years in the foreground below. I believe it was Beech, maybe birch but definietly not oak. Easy care - I kept it oiled with mineral oil and of course wiped of any liquid or food spills. It was as usable when removed as the date installed, no problems whatsoever. Wood will darken a bit naturally over a year or so. I wouldn't stain as the stain probably is not food safe - just mineral oil, Ikea sells it too.

    We initially installed ours as a quick and cost effective way to gain overhang space for our grandchildren to watch me cook. But with the added benefit of additional work space it was much more useful than the builders laminate.

    We've since replaced with granite but kept the size/shape.

    {{!gwi}}

  • 15 years ago

    Lot of good threads/info here. Check out reshal's dark stained beech ikea countertop- it's beautiful!

    http://ths.gardenweb.com/forums/load/kitchbath/msg0822575125735.html

    and on ikeafans:

    http://www.ikeafans.com/forums/kitchen-fixtures/9221-best-numerar-countertop-darken.html

    not sure if you plan to stain them but just good overall advice anyway re treating the wood.

  • 15 years ago

    I am doing the same for my island. the 3x6 is perfect size! I'll decide which one I like better when I see them in person.

    I'm going to just finish with dark tung oil.. there's a link below that shows it on differnet wood varietites.

    Unfortunately none of them are Ikea butcherblock, but I like the look of all the dark woods.

    Here is a link that might be useful: Tung Oil

  • 15 years ago

    I have an oak one, simply oiled with mineral oil. It came with one of the Ikea free standing units and just has a squareish slightly beveled edge. Very simple. I didn't even sand it before oiling it, although the instructions recommend it.

    I like it. I wouldn't chop directly on it, but the oil was adequate for repelling red wine and general baking mess.

  • 15 years ago

    I have the Beech Ikea counters. I stained them with special walnut from Minwax and then put four coats of Waterlox over that.

    It was VERY hard to get the wood to soak up the stain. I don't know if it would have been easier with Birch or Oak, but the Beech took at least 6 coats of the stain before it would darken up and it's still not as dark as I would like. To compare, the pine beam took only one coat of stain and it's nice and dark.

    It was lightly sanded before staining so that wasn't the issue.

    Anyway, good luck with yours and I hope you have an easier time staining that we did! I love how it turned out and I'd do it again but would be nicer to not have to use 6 coats of stain.

  • 15 years ago

    I thought like you - cheap enough to buy even if we change our minds.

    So I bought 3- 8 footers - and in the boxes they are a bit more than 8' long - we had to cut then ends off the boxes to get the tailgate shut. We had the truck full and they were on end so we could not tip them. But we got them home - 300 miles away.

    Then I changed my mind - and we only used one in the kitchen, but the other two went to good use - one in the sewing room and one in the laundry room.

    Two of the three were just fine, the third has some problems were it wasn't glued as well between a few strips - guess which one ended up being in the kitchen - we didn't know it was a problem until we cut it and it came apart.

    The one in the kitchen is finished with a food grade hard finish, the other two are still bare wood that I plan to put mineral or tung oil on this summer when I can have the house open to deal with the smell.

  • 15 years ago

    We bought the beech because we wanted a light countertop that would fade into the larger look, unstained red oak cabs. Has proved to be a good choice. Totally inconspicuous. I don't think it will ever look very dark, although it darkens to honey when oil is applied (but within a day or so it lightens again).

  • 15 years ago

    A GW poster recently added some instructions for the IKEA wooden counters, showing how her husband had made a fancy edging on the edges... she gave the bit size etc that her husband had used. I have lost the link.. Does anyone happen to have it? If so I would be very grateful if you could repost. Thanks:)

  • 15 years ago

    We just cut my birch and routed a roman ogee edge yesterday! It looks so great, is totally manageable as diy. I will post a pic later if I can figure out how to upload. My plan is the following: sand to 150 or maybe 220, then wood conditioner, then aniline dye instead of stain, then 3 coats of water lox original and two of satin.wish me luck!

  • 15 years ago

    >I will post a pic later if I can figure out how to upload

    Yes, please do!

  • 15 years ago

    We used the IKEA Beech, the actual size is 39" X 73", and we had it cut and routered by a professional woodworker for $150 or so. We used Waterlox original and satin for our finish.

    We love our BB, but we do not cut on it.

    I was hesitant to stain it because I wasn't sure how it would take, but if I had to do it over, and since we do not cut on it, I would have stained it.

  • 15 years ago

    Greenhousems - I think this is the one...

    Here is a link that might be useful: Reshal's beautiful butcherblock

  • 15 years ago

    I can't thank you all enough for coming back to this thread and adding the super-fantastic posts & information!!!

    shelayne - soooooo very beautiful

    jalsy6 - I can't wait to see your finished product. I know it will be spectacular

    joyjoyjoy - thank you very very much for posting that link BECAUSE

    Reshal - you got the exact look I want!!! I wish I could just reach into the computer and grab that baby!!!!

    Thanks to all. Can't wait to get going on my island countertop! (Even my doubting husband is going to be impressed when I show him this stuff.)

    SQ

  • 15 years ago

    I can't for the life of me get a picture into my post! The instructions only talked about uploading from the web...
    Reshal- yours was my inspiration for the staining, but is your wood beech? Mine is birch, so I'm using dye instead of stain.

    Will keep trying to figure out how to post a pic.

  • 15 years ago

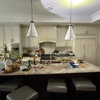
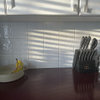
    I've been drooling over Rashal's counters since she posted eons ago. I haven't seen her around in a while. Here's the pictures of her counters:


  • 15 years ago

    >The instructions only talked about uploading from the web...

    Yes, that's right, jalsy6. You have to put the photo on the web someplace and then you can embed it into a post or link to it. Some forums use software that lets you upload attachments, but not here.

  • 15 years ago

    Thank you Joyjoyjoy, shelayne and writers block...( I look forward to your photos whenever you can). These counters look amazing. Greenhousems.

  • 15 years ago

    Okay, I'm attempting to upload my shutterfly link...

    Here is a link that might be useful: My Ikea Birch Island Top

  • 15 years ago

    Okay, so that is clearly not right- can someone tell me where good uploading directions are?I'm trying to avoid linking to all my albums...can someone tell me what happens when you click on that link that I gave? Sorry!!!

  • 15 years ago

    jalsy6 - I JUST (10 minutes) ago was able to successfully embed pictures into my post!!! I put up my layout hoping for some advice. I wasn't able to do it successfully when I had my pictures in Shutterfly, but when I made a PhotoBucket account, it worked like a dream. If you put your pix in PhotoBucket, there is a little pull-down at the bottom of each individual shot. If you click on the HTML code box, you can copy that info, then when you paste it into your post, the picture is there - it's like magic!!! Very simple....

    GIve it a try. (I don't mind typing this "off topic" stuff here because I'm the person who started the thread...and I'm so excited that I learned to embed pictures I want to share the knowledge!!!!) Besides, I'd LOVE to see your Ikea Birch Island Top.

    SQ

  • 15 years ago

    Okay, so that is clearly not right- can someone tell me where good uploading directions are?I'm trying to avoid linking to all my albums...can someone tell me what happens when you click on that link that I gave? Sorry!!!

  • 15 years ago

    Okay, as soon as I stop freaking out about thinking I just linked the world to all my albums!! Thanks for the guidance!

  • 15 years ago

    jalsy6 - When you click on your link it brings you to the Shutterfly sign-in page. When I signed in, it brought me to MY albums. So unless you've linked the world to all of my albums, I don't think you have to worry!! Good luck with the "embedding" of photos. I got so excited when I finally did it you'd have thought I found the cure for the common cold!!!!!!!

  • 15 years ago

    Pictures, take 2...trying the photobucket thing, thanks Susie!
    http://i1140.photobucket.com/albums/n570/jalsy6/DSC_0008.jpg

    Here is a link that might be useful: Ikea Birch Island Top

  • 15 years ago

    I'm giving up if this doesn't work!


  • 15 years ago

    Ooh, very nice, jalsy6. I really like the way the routing makes the countertop look thicker than it really is, on both yours and shelayne's. Can't wait to see it finished.

  • 15 years ago

    oooh!! I emailed the dude at the store that I linked above to make ask about using their milk paint under the tung oil on my perimeter countertops. I want them dark brown, nearly black, but the peninsla more natural looking. He replied saying that it would do fine but since I wanted it dark, that I could ebonize it with steel wool and vinegar. I googled and think it will be GORGEOUS!! I am soo incredibly excited!!