Software
Houzz Logo Print
orourke_gw

? How do I install drop ear on old framing ?

17 years ago

I want to install the typical PEX drop ears, like the ones shown here (not my picture):

{{!gwi}}

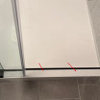
However my existing wood framing is as shown belowÂ

In the particular case shown here (kitchen sink) the wall is open so, I imagine the easiest thing is to go ahead and remove the old 2x4 and put a new one in the location appropriate for drop ears. But in my other bathroom, I do not intend to tear up the wall, so I guess IÂm stuck with the old framing. How do I install the drop ear?

{{!gwi}}

Comments (12)

  • 17 years ago

    Add some framing.

  • 17 years ago

    So, I guess, there's no way to avoid opening at least a 14 1/2" x 4" hole in the wall ? No I guess the hole will have to be even bigger since I'll have to add framing to nail the wall patch too!! Yeekes!!

  • 17 years ago

    If you use the correct procedure and work carefully it is very easy to do.

    First off, give yourself plenty of room to work. Begin by marking where you want the stub out to be, then make a horizontal line on the wall about 4" above and a second horizontal line about 4" below.

    Begin on either line at a point about directly above the point where you wan the stub out to be and punch the saw into the wall, then cut horizontally until you feel a stud. Next gpo back to your starting point and continue cutting the horizontal line in the opposite direction until you feel the stud on the opposite side.

    Now go to the other line and repeat the process.

    You can then cut down on each end, keeping the saw tight against the stud and remove the sheet rock. Keep the sheet rock intact because it will fit back in the hole perfectly to close up when your done.

    Cut two pieces of 2x4 about 3" longer than the distance from the bottom to the top of your hole. On either side of the hole slip a piece of the 2x4 in so that the 2x4 is sistered tight against the existing stud and the tips of your 2x4 are slightly behind the sheet on both the top and bottom. Secure the short 2x4 to the stud with a couple screws. Now measure the horizontal distance between your new 2x4's and cut a piece of 2x4 to make your blocking. Insert the blocking and secure each end with a couple screws, then you can attach your drop ear to the blocking.

    Once you have the drop ear mounted mark the location of the drop ear on the sheet rock panel you cut out, drill a hole for the stub out, then set the sheet rock back in the hole and secure it to the 2x4's on each end with a couple sheet rock screws. At this point you will have a slight gap equal to width of the stab saw blade to mud and tape.

  • 17 years ago

    Thank you. I had not thought about cutting the hole in the way you explained.

    However, seems like one of my bathrooms remains problematic nonetheless, since some hole larger than a flange is still needed. I did not mention that one of my bathroom walls has paneling on the bottom half, while the back side of that wall is a textured bedroom wall. I guess I can attempt to replicate the texture, but IÂm not optimistic about the outcome.

    DonÂt they just make drop ears that attach to the side of a stud without the need for the horizontal 2x4? Say, like the typical electrical outlet box attaches to the side of a stud? Perhaps theyÂre not called drop ears but something else? That would make things so much easierÂ

  • 17 years ago

    Generally we do not use drop ears except when installing an a shower arm or an outside hose bib.

    The fitting you are asking about is called a fixture stubout. The fixture stubout is a 90 degree bend of 1/2" copper pipe. The PEX is attached to the bottom of the 90 then the 90 is attached to a stud in the manner you suggest and it leaves about a 6" long 1/2' copper pipe extending out of the wall. Oncce the wall is closed up you then slip a trim escutcheon on the copper pipe and slide it tight against the wall, then cut the stubout to desired length and attach a 5/8 x 3/8 compression angle stop on the copper.

    NOTE-copper pipe is measured by the inside diameter while the compression stops are made to copper tube standard, which is the outside diameter. 1/2 ID copper pipe has an OD of 5/8" thus you would use a 5/8 compression stop. The discharge side of the compression stop is then 3/8" to fit your fixture supply tube.

  • 17 years ago

    Aha! I see - Basic plumbing knowledge missing on my part.

    So, since I do not currently have fixture stubouts, can I open a small round hole next to the stud and install the stubout through it (and hopefully be able to cover the entire hole with the trim escutcheon)?

  • 17 years ago

    Allow me to help solve your first problem; the lack of plumbing knowledge and in the process you should find your answer.

    There are a number of good books on PEX available for free downloads in PDF format from the PPFA (Plastic Pipe & Fitting Association).

    I would highly recommend you get these two books in Free PDF sownloads from PPFA:

    The Residential PEX design Guide

    http://www.toolbase.org/PDF/DesignGuides/pex_designguide.pdf

    The PEX Installation Handbook;

    http://www.toolbase.org/Design-Construction-Guides/Plumbing/PPFA-Installation-Handbook-PEX

  • 17 years ago

    Thanks for the links.

    I looked at the two documents (the PEX Installation Guide I had already read) but none of the documents seems to describe how to stub out to fixtures.
    The specific ZURN PEX installation guide I downloaded (can be found at http://www.zurn.com/images/pdf/zpm07199.pdf) does have some suggestions on pages 19 and 20 and, if IÂm interpreting it correctly, their "faucet connection" diagram (pg 20) seems to imply that you can run the PEX line all the way out of the wall to the stop valve.

    Actually, I have also read on forum searches i.e. that it is possible to run the PEX all the way to the stop valve and that there are either compression stops that can be used directly with PEX (a Brasscraft using SS ferrule insert was mentioned). Or perhaps valves that connect PEX directly to the fixture like this one:

    I like this option because it eliminates all in wall connections. However, I cannot envision how the PEX coming out of the wall is secured and/or how the stop valves are secured.

  • 17 years ago

    I know before i say it that this is going to open a can of worms, but the truth of the matter is, the valve you have illustrated my be installed inside a cabinet but it may not be installed as a stop for the watercloset because code prohibits installing PEX where it will be exposed tp UV. The watercloset stop must be connected by means of a fixture stubout where the PEX connection is concealed inside the wall.

    Now you guys can argue till the cows come home, but i don't make the rules, I only tell you what they are, and if you elect to ignore them, that is on you, not me.

  • 17 years ago

    If you want to make very easy to patch holes in drywall, use a RotoZip with a bit designed to follow boxes or wood.
    The very tip does not cut.

    You push it through the drywall, then move sideways till you hit a stud, move along the stud, then back across the stud bay to the other side.

    It leaves a very clean cut edge.
    You can then attach blocking to the studs as needed.

    If you do not need access to the studs, cut the hole only as large as needed, and attrach 1x to the drywall with screws spanning the opening. A single strip of 1x2 for a smaller opening, a pair of strips for a larger opening.

    Put the removed piece of drywall back in the opening with a couple screws in each wood strip.

    If you use setting compound like Easysand you do not even need tape.

    Mix the compound as thick as peanut better and be sure to force it into the gap around the replaced piece of drywall.

  • 17 years ago

    I see these chrome sleeves that I assume can protect the PEX from UV
    http://www.pexsupply.com/Wirsbo-Uponor-F5600500-Chrome-Finishing-Sleeve-for-1-2-PEX-11-16-OD-4273000-p
    {{!gwi}}

    This one even seems to thread to the stop valve.
    http://www.watts.com/prod_images/hi-res/StrtPEXStop.jpg
    {{!gwi}}

    While this guides the PEX out the wall.
    http://www.pexsupply.com/Wirsbo-Uponor-F5120500-1-2-Metal-Drop-Ear-Bend-Support-4270000-p
    {{!gwi}}

    WeÂre almost there HOWEVER, how can the chrome sleeve be supported? Seems to me that the chrome will still be a little floppy since it is only supported by the rigidity of the PEX. Plus it does not seem like the PEX would come out of the wall exactly perpendicular every time, even if I used the guide above. What am I missing?

  • 17 years ago

    It never ceases to amaze me at the length homeowners and DIY'ers will go to by trying to re-invent the wheel, when in truth they could have done the job correctly in half the time and a fraction of the cost.