Software
Houzz Logo Print
muscat_gw

how to trim a window

18 years ago

I have a few more mini-projects for this remodel, and one of them is deciding how to trim the window above the sink. I have a "look" for it in my head, which I think I like very much, but I cant envision other options, so I'm worried that I have blinders on and will wish I had thought of better detailing later. Hope that makes sense.

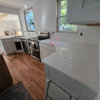
Anyway, here's the overall scope of the room, so you can see the lines/colors/etc. Everything is pretty simple/squared off/clean.

{{!gwi}}

Here's the window in question:

{{!gwi}}

Here's a sketch of what I plan. The ledge would be about 1 1/2" thick and extend about 1" farther than the wall (depth), the side and top pieces about 3/4 inch thick, and the top piece would extend out about 1" on each side. It will be of the same mahogany as the cabinets. Hope this makes sense.

I cant get it to load up un-rotated! sorry!

{{!gwi}}

So does that seem like it'll fit the room and the rest of the cabinetry? I dont want it to look to heavy, but I want it to have a solid presence, too. I think I want corners like this rather than mitered, to complement the shaker cabinets, but do you agree?

Comments (17)

  • 18 years ago

    muscat, forgive me - I'm dense - but the drawing still looks like it doesn't have any trim on it. Do you mean that you're thinking of putting the mahogany only on the side and top window jambs? Or are you wanting casing on the wall itself, the wall that faces you as you stand in front of the window? On your backsplash tile, at the lower right corner of the window, did you not tile all the way to the edge because you were leaving space for any trim you might decide on later? How much wall space do you have there?

  • 18 years ago

    I get what you're saying, and as soon as I saw the question I thought "trim it out in the cabinetry wood :) So perhaps that makes it easier for me to "get" what you're drawing. I think that's a perfect solution!

  • 18 years ago

    muscat - I think that will look great. I will really balance everything out. You're kitchen is absolutely gorgeous!!!

    (I am doing something similar, but my bottom sill will be the countertop material (Silestone) as I don't have a nice backsplash like yours that I would want to keep as the center of attention!!

  • 18 years ago

    So,

    Basically, you are just going to do returns, no casings?

    You already have drywall returns. So, you are going to put mahogany returns on top of the drywall?

    Not sure I'm in love with that idea. So, that little ledge on the bottom will return behind the 3/4" thick piece to the wall? Maybe I'm missing something?

  • 18 years ago

    Hmmmmm. I like the idea of some trim above the back splash and the mahogony is great. I think I would add a little more visual weight to the top piece - or even just do the sill and a top - so it's not so different than the door to the left, but IMHO a heavier/wider/taller top would give the window more substance - like the tile and cabinets.

  • 18 years ago

    Sorry, I can see that that diagram was not so clear. It is clear in my head, but even when I look at what I drew, I get your confusion.

    The vertical pieces that I drew were supposed to represent mahogany inside the drywall (returns?) AND on the surface of the wall itself (casings?), but I made them so skinny that that was not clear. I see the top and bottom as heavier than the sides, but the window would have wood all the way around it, "in" the casement as well as on the wall. My terminology is just no good- sorry. Does that help? I'll try a new drawing tomorrow if it does not.

  • 18 years ago

    OK,

    That's better, your picture just shows 'returns' and I just couldn't see having this piece of wood sticking out...

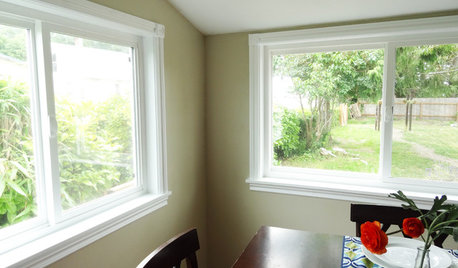
    Here's a picture of my LR window (before I puttied and touched-up the nail holes). I think what you want to do, is what we did on the 'inside' of the windows- we added a molded trim on the outside of the two outside windows, but just plain returns on the inside. We wanted to create the illusion of one big window, rather than three separate ones.

    You just need to figure out how much of the edge of the return you want visible before you put the casing on. You know how on a door jamb, there is some portion of the frame showing when you put on the casing?

  • 18 years ago

    Thanks, muscat, for the clarification. Butt-jointed flat casing will be perfect with your cabinets! The reveal that raehelen mentioned, the slight setback of the side casing from the edge of the jamb, is usually about 1/8". (Sorry if I'm explaining something that's already obvious to you.) Will you have to remove a few pieces of tile from that lower right-hand corner?

    Your kitchen is just sooooo pretty; it's one of my favorites.

  • 18 years ago

    If you click on the bottom right hand picture, and then scroll through that album to get to the next- album #28, images 3 &4 show the kind of window trim you want. In white, but it'll give you a visual.

    Sorry, it's so complicated, but couldn't copy the pics, and when I went to page source, the html was embedded in too much code- couldn't retrieve it.

    Here is a link that might be useful: Crown point cupboards

  • 18 years ago

    I think it will look great (we did the same thing in white moulding to ours) but I noticed you have a door right next to it. I think it might stand out if you don't do it to both. I think you will have to add some to the door also.

  • 18 years ago

    OK, I follow you. My initial sketch was misleading, since I made the vertical casing so narrow- but that makes me think that maybe I do want to to make it look at bit chunkier. My main hope was to see if you guys thought that these proportions and lines would work, specifically, the way the horizontals protrude beyond the verticals, and the width of the casing......lets see if this works......

    {{!gwi}}

    How's that for funky and low budget!?

    Should the casing be any wider?

    thanks for your patience!

  • 18 years ago

    I missed a few posts here as I was doing my silly little sketch-

    lily- thanks for the right terminology. Yes, that sounds like what I am talking about.....just dont know what to call it. I dont think I'm going to have to remove tile, as the window ledge is going to "lip" over the top edge of the tile anyway. I left the edge pieces off initially since I was not sure how far to the sides the ledge would extend, so was not sure how to cut that tile, but I have since cut and mortared them in place.

    raehelen- thanks for the pics. I think I found the ones you meant.

    mlraff- the whole door is going to be replaced, I have just not quite figured out what to do with it. But yes, it'll end up trimmed out similar to the window.

    thanks!!!!!

  • 18 years ago

    I really like the look of square trim rather than mitred in some cases. We did all square window trim in our new house much to the dismay of some of the regulars on the building a house forum but we like it. Our house just has a very plain square feel to it. If that suits you I think you should do it.

    You should always offset the trim from the returns b/c the tiniest shifting or shrinkage over the years can make flush work look bad. Slightly offset work will still look perfect with a little shifting.

  • 18 years ago

    Now that I've seen your 2nd pic, I guess the initial drawing wasn't so misleading after all - they look pretty much the same. You said you wanted something simple but were worried that you'd wish later on that you had thought of better detailing and, if the 2nd pic is an accurate represention of what you have in mind, imo, it doesn't do justice to those super-nice cabs.

    ajpl's casing is what I meant when I said "butt-jointed flat casing" except without the top-most piece and without the thin piece between the head and side casings. That would be a simple, clean, squarish style of trim that would complement your beautiful cabs. But I don't know if you would have enough room between the side of the window and your wall cabinet - that's why I was asking how much wall space is really there, it's hard to tell but it doesn't look like very much.

    You could go ahead with doing the trim like your drawing though, and then if you decide later you don't like it, it would be easy to change.

  • 18 years ago

    I have about 3" between the window and the cabinet, but I dont mind using all that room for window trim. I guess I thought that bold on the top and bottom, and more narrow on the sides was going to look best, but now I'm not sure. What ajpl posted is pretty much dead on, except that the verticals might be narrower, and as lily said, there prolly wont be a narrow piece on top.

    hehehehe- I need to talk to the carpenter (aka, Dad) and he'll help straighten me out, too. He usually gets what I am describing, and can translate it into a cut list.

    Would it look OK if the window casing went all the way to the cabs? It would end up looking like sort of continuous cabinetry, I think......

  • 18 years ago

    We actually have a few tight squeezes in our house where the choice is either a very narrow strip of wall between two pieces of trim (or trim and cabinet) and taking the trim over to the cabinet. I think either can work but when the wall strip gets really narrow it looks better to join them IMO. You can play around with some pieces of wood help against the wall to see what you like and then decide.

  • 18 years ago

    Personally,

    I prefer the continuous look, which is why we 'connected' all our LR windows together with molding. Original windows had little strips of drywall between- didn't look 'bad', just looks so much better (IMHO)without the drywall.

    Try having your top piece a little longer (just tack in place). Cuz my DH did that with our sliders, and I disliked it so much, I made him take it all down, had to redo corner molding, and had the top line up with the side casings. I would live with it a few days before making it permanent. With simple square molding, not a big deal to trim off one end if you decide you'd prefer them lined up. (Mind you, my DH had the top sticking out quite a bit past the ends- just didn't like it!)