Software
Houzz Logo Print
greenhaven_gw

Doing my tiling homework, questions and tutorials

12 years ago

My tiles for my backsplash are finally here, so it is time to get serious about learning how to do this work.

I have a couple concerns but first wanted to ask if any other pros or DIY-ers have good videos or websites they have come across that have been particularly helpful.

I have two main questions/concerns:

1. I have read both that small marble tiles (2x4 in running bond on mesh backing) can be scored and snapped, and that they should be cut with a wet saw. The only places I will have to cut are around the outlets and on the edges, and I am hoping to not have to rent a wet saw.

2. The tiles are a warm, honed marble and I love the soft, matte finish. My understanding is that I need a grout release prior to grouting and that the tiles should be sealed. However, I o NOT want a shiny finished product! :o(

If anybody can advise on these matters or point me in the right direction for good reading I sure would appreciate it.

Thank you!

Comments (15)

  • 12 years ago

    I'll be doing my first tiling job in a few weeks. Can't help with your questions, because I haven't done my research yet. But I have collected a few links I can share.

    Here is a link that might be useful: Tile Tutorial

  • 12 years ago

    Here's another

    Here is a link that might be useful: Tile

  • 12 years ago

    You need a wet saw with a diamond blade to install this and get the professional look you want. Ceramic tile can be scored and snapped. Stone isn't going to snap in a straight line for you period. People will tell you you don't need a diamond blade. Get one anyway.

    It might be less expensive to buy a small wet saw than to rent one if you are going to set a lot of tile, and if you are going to lay a floor, make sure you have a level.

    Good luck!

  • 12 years ago

    You need a wet saw. You can buy an inexpensive one for $60 or so at HD that will work for mosaics to 12x12s and not have to worry about getting it back on time. It's just as cheap as renting but with the bonus of keeping it.

    Sealing doesn't make it shiny. You need Miracle 411. It's a penetrating sealer, not a topical coating. Seal the face before install, then seal again when the grout is done and the haze removed.

    The absolute most critical part of tiling isn't tiling. It's the prep that goes into making the wll flat and plumb before you get near it with the thinset. Take a long straight edge like a 4' level, and fine out how much work you need to do there first. If you need to skim out the wall to make it flat, use a setting type joint compound that you mix with water rather than a drying type compound that comes in a bucket already hydrated.

    The setting compounds dry by chemical reaction like thinset does rather than by dehydration. That makes them stay hard and not re-emulsify when moisture contacts them. And that's why you want to use thinset behind your tiles ( WHITE thinset, not grey) rather than mastic. Mastic will also cause marble to yellow.

  • 12 years ago

    greenhaven- not to hijack but i too am doing my own bs. i am thinking simple subway tiles. i will also be following to see what advice you get:)

  • 12 years ago

    The wet saw is the LAST place to cut corners on a tile job. Great tile jobs are about three things: the tile, the precision lay, and the correctly centered layout.

    I did stained glass for years and am an expert at score and snap skills, but when I did my tiling I bit the bullet and bought a $100 wet tile saw with DIAMOND blade, even for my ceramic tile. The control you get in precision cuts will make all the difference in how your tile job looks, and you are going to look at that tile job several times a day for many years!!!

    Just a warning, the $100 saw worked fine, but was noisy and messy. I had to do it in a walk in shower since it was too cold to do it outdoors. The cheaper wet saws (under several hundred dollars price range) throw water when they cut, so just be prepared to have a loud, wet place to do your cutting. Take your time and let the blade work at the speed it can. Keep a water hose nearby to flush the dust off the table surface between cuts and this will help a lot with sliding on the table and keeping tiles from getting scratched from previous fragments.

    Wet saw - worth every penny in a tile job.

  • 12 years ago

    You people rock my world! I already feel so much more confident about this job!

    Thanks a ton for the links, and no need to worry about hijacking. This is not about me but about sharing the knowledge. :o)

    Since we also have an upcoming bathroom to tile (and my tile "rug," forgot about that!) the point about a wet saw is more than valid. I did not know they came that cheaply! I will definitely buy one, and I guess it is handy that I just got my Verizon rebate in the mail yesterday to ease the pain.

  • 12 years ago

    No way you could do this without a wet saw, and you will be surprised you run into such cuts.

  • 12 years ago

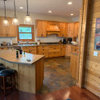
    Also if you want to picture frame any tile, such as your "rug" near the island (I snugged the corners as I wanted minimal grout in the bevel in this case.):

  • 12 years ago

    And here you can see the importance of correct centering and precision layout in a tile job. This won't affect your kitchen mosaic so much as it might affect your future bathroom tile job. Study the John Bridge tile forum pictures that the pros post their jobs, to see the importance of layout.

    In this instance, I chose to float the picture frame low, as standing in the kitchen the top edge would have been obscured by the range hood if I had centered the frame in the space horizontally. This picture was taken with me sorta squatting, but at normal standing height the obscuring takes effect.

  • 12 years ago

    Below is a video for tiling dummies, which I am.

    I did my backsplash last summer and learned a lot. Go slowly. If your thinset gets too old, then just mix a new batch. It's a pain, but better than rushing the tiling. Work out your layout ahead of time (mentioned above). Be careful with mesh backing. Mine disintegrated when it got wet, giving no structure at all. So the tiles just "melted" into each other. The spaces between tiles were so small that spacers wouldn't work. After the fact, DH (who was out of town for the tiling) suggested that I could have hammered skinny nails into the drywall to tack the tiles in place, and that might have worked, not sure if it's a no-no. Note that not all mesh backings are so temperamental.

    You're so handy that I'm sure you'll do a bang-up job, and I can't wait to see your finished kitchen!!

    Here is a link that might be useful: DIY mesh tile splash

  • 12 years ago

    If you have any specific questions, post them on the John Bridge forum. The experts there are so generous with their time and knowledge.

  • 12 years ago

    Another thought is that Lowe's will cut tile for you. This may not work for you with the stone on mesh, it is good to remember. When using ceramic, the score and snap method will work for most cuts.

    Taking those few oddball cuts like Beauty showed into Lowe's helps in not having to buy a wet saw. I have done many tiling jobs and used to have a professional wet saw so I knew how to cut the U shaped cut. The Lowes workers did not, they did let me make the cuts even though they weren't supposed to.

  • 12 years ago

    Yes, buy the HD cheap wet saw. It's about the price of a rental and at least the time I got mine, you needed to buy a blade for the rental anyway. Stone cuts easier than porcelain tile but I don't think it'll snap for you properly!

  • PRO
    12 years ago

    If Michael Byrne of Taunton Press told me to stand on my head while eating a peanut butter sandwich before beginning a tile job, I would do it. Get his book and do as he says.