Software
Houzz Logo Print
wifisker

Help for a DIY headboard

14 years ago

We have a king sized bed but it's just on the metal frame without a headboard and I'm feeling like I really need to do something about that. I love the look of wood-framed headboards with an upholstered front panel but I don't want to pay a ton for a new one.

Instead, I'm hoping I could find an inexpensive solid wood headboard that has simple lines and I could just add the upholstery part onto it. I can't seem to find any instructions for just adding upholstered padding to the front of an existing wood headboard and only see those hang from a wall with the fabric wrapped all the way around plywood.

Any suggestions for how I could do this? Do I just wrap fabric around a foam pad and somehow affix it to the wood with screws? Do I still need to use a plywood backing in the padded part and then attach that to the headboard? Help! :)

Here is a link that might be useful: I want the result to look something like this...

Comments (9)

  • 14 years ago

    If you have a way to cut the wood to the perfect shape, you can cut a piece of luan or other thin plywood to fit within the shape of the headboard frame. Lay the unupholstered wood on the head board, drill 4 to 6 holes completely through the wood and the headboard - maybe one a few inches in from each corner and couple in the middle. Separate the two pieces (insert and headboard) Buy bolts with washer and nuts before you drill the holes, so you will know what size hole to drill. BEFORE you upholster the insert, put the bolts through the holes, slip the washers on the back and put the nuts on just enough to hold the bolts in place.

    Upholster the insert. You will be upholstering over the heads of the bolts. Attach a thin sheet of foam to the insert just to the edges. Do not wrap to the back. I use spray glue to hold mine in place. Then cover the insert with a thin piece of batting, wrapping the batting to the back. Staple in place on the back side. You will have to ease corners and curves, but you can find plenty of information online on how to do that.

    Cover the insert with the desired fabric, also pulling it to the back and stapling.

    Now, remove the nuts from the bolts. Place the insert on the headboard with the bolts through the holes you previously drilled. From the back of the headboard, put the nuts on the bolts and tighten. You may have to put a little pressure on the bolt head from the front of the insert, just to keep it from moving.

    Tighten the nut on the bolt firmly enough to pull the insert into the frame and to hold it there.

    This is a sketchy overview. I'll be happy to answer any questions you may have.

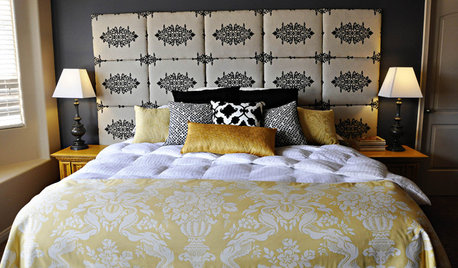
    I made this headboard using the above technique. The only difference is my head board had 2 inserts.
    {{!gwi}}

    (P.S. This was a picture I sent to the nieces and nephews seeing if they wanted the PB Everyday suede bedding before I gave it to Goodwill. It isn't the best picture of the headboard, but it is all I have.)

    This technique does not address the nailhead trim. I have never been able to get nailhead trim to look perfect enough to suit me.

  • 14 years ago

    I think you're going about it backwards!

    I'd start with a plywood board of the size and shape you want, and enough good picture frame molding to attach around the perimeter.

    I'd glue foam to the board, leaving a border the width of the molding. I'd lay a layer of batting over that, and staple a layer of muslin over it. Then I'd follow with the upholstery cloth, and frame it up with the molding.

    You can follow the usual instructions for making a headboard where the legs and/or attachments to the wall are concerned.

  • 14 years ago

    Do you have a local hotel liquidation place? Their headboards are often simple. Here is one I bought for DD's apartment. It will hang on the wall.
    {{!gwi}}
    I know it is a crummy picture. I lightened it so that you could see the frame and the flat center.

    Because I do not have the tools to cut an insert, I intend to upholster it by gluing a thin layer of foam to the center, then covering that in batting, then covering that in muslin and then fabric. Pretty much what bronwynsmom said, except in my case, the frame is already attached.

    The staples on the front side will be covered with gimp. Double cord welt would be better, if I can learn how to make it.

  • 14 years ago

    Thank you, thank you!!! I think my preference is really to get an inexpensive headboard in good shape off CL so I don't have to worry about cutting trim, staining, and attaching legs that can work with the frame. Bbstx - Your step by step instructions were perfect for that!

  • 14 years ago

    I found this on Craigslist (solid wood made in Mexico)for $50.

    Then I primed and painted it Creamy White to go in my guest room.

  • 13 years ago

    I have a similar question. While I don't have a headboard, I'd like to use a faux-velvet drapery panel I found (about 7' x 4') for the fabric. It's a king sized bed and I am wondering if I should attach the head board directly to the wall or add legs.

    The wall is just so boring and I'd like something a little taller than bbstx's design...so you could see more of it behind the pillows...but not so tall as EG3d's. (Both by the way are beautiful!)

    Thanks in advance for any suggestions :)

  • 13 years ago

    LL, I re-did the brown one for DD just this past week. She lives in an apartment and is skittish about hanging it on the wall. She is going to attach legs to the headboard and then attach the headboard to the frame.

    If you can measure with some exactitude, you can glue the legs to the back of the headboard with Gorilla Glue. My only concern about gluing the legs with GG is if it isn't level, you are then stuck trying to trim the bottoms of the legs to make it level.

    For my money, I'd attach it to the wall. Get some touch-up paint from the maintenance guy. When you move, fill the holes with spackle and touch up with the paint.

    Here is a third possibility: Make your headboard out of lightweight material and, after it is covered, apply it directly to the wall with Command Strips. I've seen some where the base was made out of styrofoam insulation sheets.

    Here is a link that might be useful: HD rigid foam insulation sheet.

  • 13 years ago

    Bbstx- That's a great idea! Thanks for the suggestion of the Command strips and styrofoam :)

  • 13 years ago

    I used bead board, I painted it black, attached 2x4's to the back and hung on the wall. Turned out beautiful and only cost about 45.00.