Software
Houzz Logo Print
lightenup_gw

Our small kitchen DIY remodel is almost completed (before and aft

18 years ago
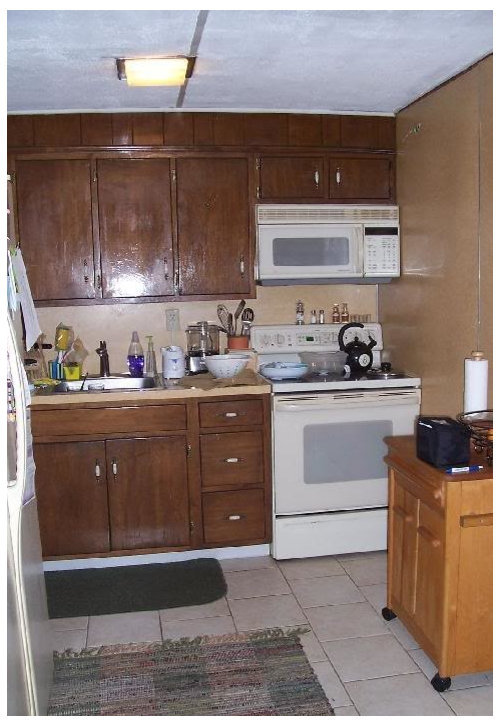
Hey everyone, we still have a fair amount of work to do on our diy kitchen remodel. But, the main work area is nearly complete. So, I thought I would share some pictures. This forum was very helpful in making some of our decisions, so thanks to everyone here!

Our kitchen is about 15' by 8.5'. The position of the doors and baseboard heating cut the usable area for cabinets and such almost in half. The only window in the kitchen is on a wall with baseboard heating, so all the workspace ends up on the opposite end of the room.

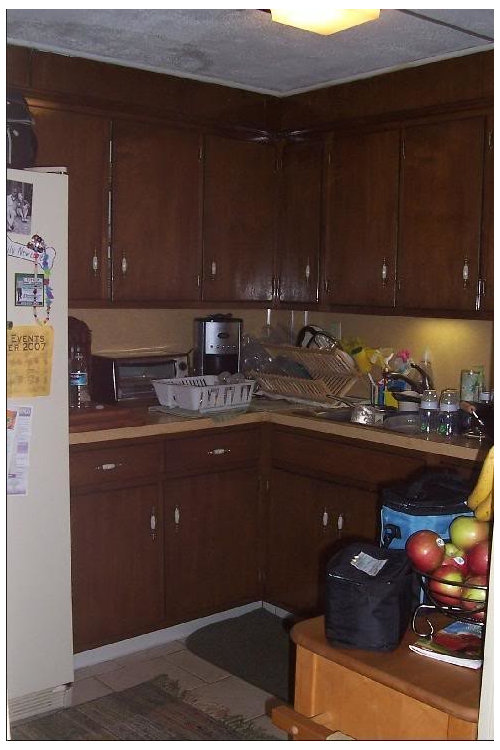
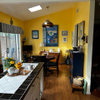
Here is what it looked like before.

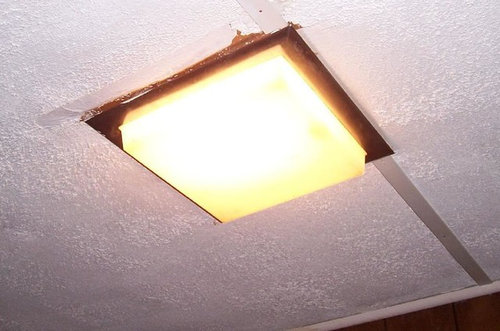
Having only one window on the opposite end of the workspace and dark paneled walls and cabinets made for a dark closed kitchen. The one awful dim ceiling light only added to the problem, here is a close up. Some tape can be seen the textured paint.

The entrance to the kitchen is just to the right of the first picture. And, the exit to the mudroom/back yard is just to the left of the picture.

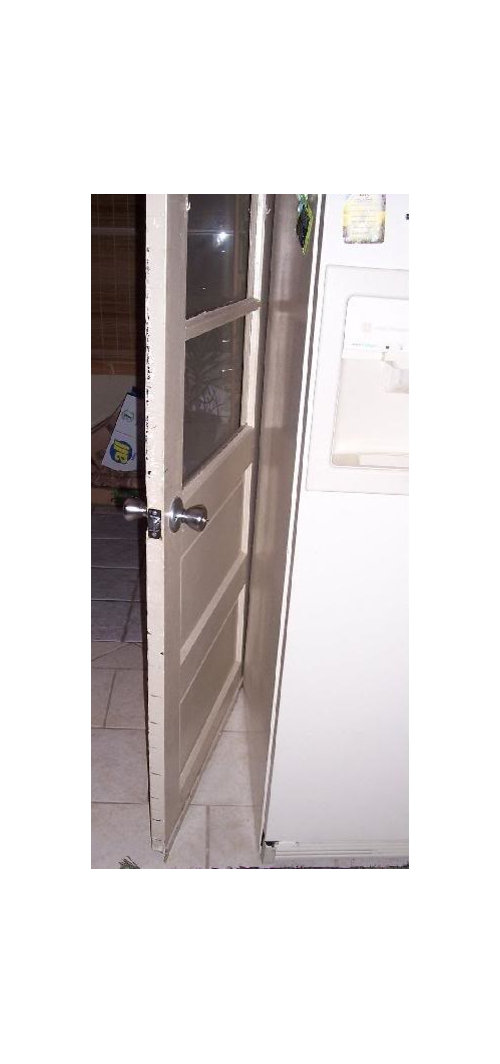
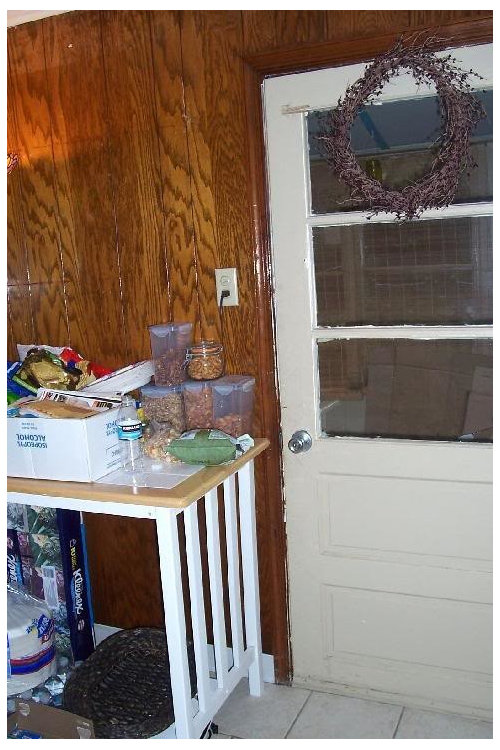
Here is the door going out back. This is as far as it would open, because of the fridge. The dark wood paneling extended around the room. Without much counter and cabinet space our things quickly got very cluttered.

Because of the limitations in our room we were forced to make some compromises to make things work. We moved the fridge to the left of the door going out back (where the clutter is in the previous picture). We still need to finish up some drywall, paint and trim on that side of the room, so there aren't pictures for that yet. We were nervous to move the fridge away from the rest of the workspace, but it really was the only option that allowed us to open things up and gain some cabinet and counter space. So, far I think it works well.

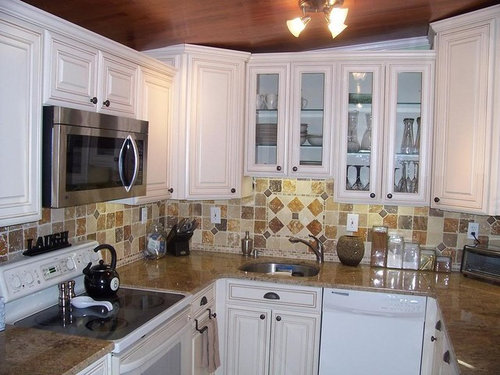
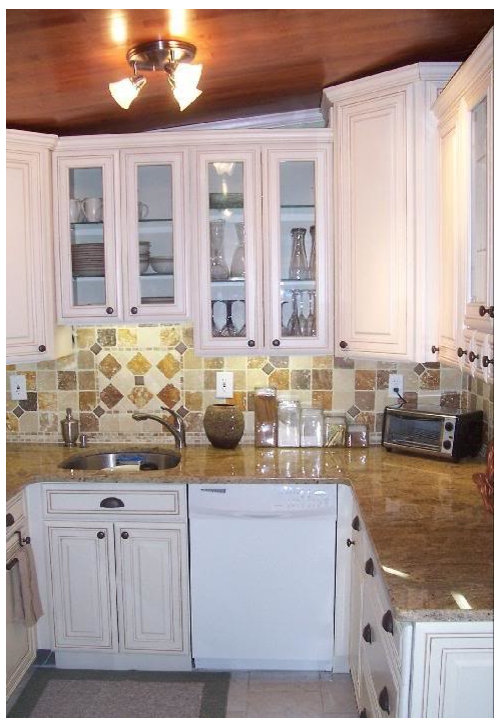
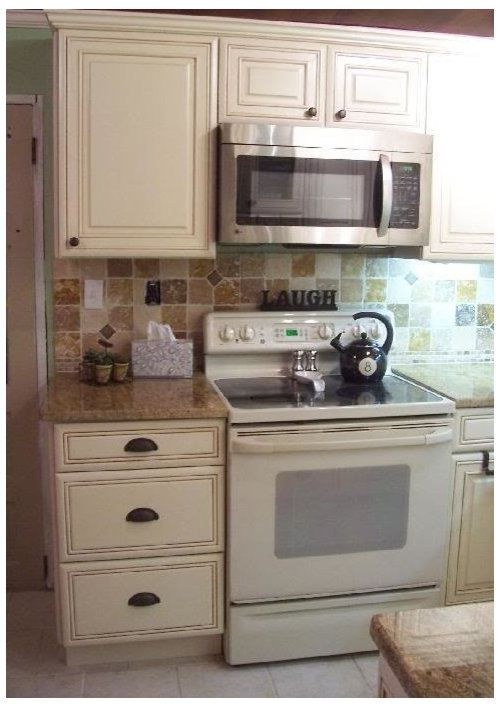
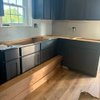
Since we are also on a pretty tight budget, we did not replace all of the appliances. I started some of the demolition at the beginning of the year, so this has been a long process, but it was worth it. Anyway, here are some pictures of what our kitchen looks like now.


Comments (42)

  • 18 years ago

    What a difference - so hope our remodel turns out as nice.

  • 18 years ago

    Wow! You've lightened up the space, made it more functional, and made it seem bigger! I bet you like having a DW! I like the staggered cab heights and glass cabinets as breaking up the monolithic cabinet wall. I also love the Magic 8 Ball teapot :)

  • 18 years ago

    You should laugh (like your sign says)...With absolute delight! What an improvement! It's just gorgeous. VERY nice job.

  • 18 years ago

    Thanks.

    We love having a dishwasher. One of the glass cabinets we got by mistake, but were very glad we did. We had originally planned on only 2 with the glass doors (the one over the sink and the one all the way to the right that is barely visible on the second pic.

  • 18 years ago

    Very Nice! And what a difference!! Great Job!

    Now tell us. What did you do on the ceiling? Is that hardwood flooring?

  • 18 years ago

    ci lantro -

    Thanks. The ceiling is hardwood flooring. It's 5/16" thick, so it was very light which made it pretty easy to install. Without a nail gun it would have been a lot more difficult.

  • 18 years ago

    What a great remodel for such a tight space! You came up with a beautiful new layout. Your cabinets and backsplash are wonderful. We need details! Thanks for sharing with us!

  • 18 years ago

    wow! night and day difference.. very nice work, great design.

    I always tip my hat to DIYers :) It is especially rewarding to work with your own hands, and on a budget...
    kudos!!

  • 18 years ago

    That ceiling is luscious! And I love the backsplash. I'm not always a big fan of backsplashes but yours is really pretty. What is your granite? I am now having a craving for Butter Rum Lifesavers looking at all your warm, golden choices. :-)

    Thanks for sharing!

  • 18 years ago

    Absolutely stunning! You should be really proud of yourselves! I really like your cabinets! Very yummy!

  • 18 years ago

    Really amazing...love the backsplash...the whole room seems so light and airy and put together. Congrats on a beautiful job!!!

  • 18 years ago

    Huge transformation!! Beautiful! The backsplash goes well with the granite & cabinets. Love the new ceiling & light fixture, too : )

  • 18 years ago

    ngng - Thanks, we are already enjoying it.

    Here is a list of some of the details.

    Cabinets:

    The cabinets we got from kitchenspro.com. They were Cream Maple, which they no longer seem to carry. They were rta (ready to assemble), so we assembled them once they arrived. We went through a few bumps in the road before we actually got all the cabinets.

    We ordered in mid/late January and finally had all the last cabinets mid early/mid May. They weren't great with communication and the delays were frustrating. But in the end we are happy with the cabinets and to us the frustrations were worth it for the money that we saved compared to the other places we looked.

    Backsplash:

    The backsplash is tumbled marble that we got from HD. We mised the three colors chiaro, noce, and antique gold. With more chiaro and noce and using the antique gold more for accents.

    Granite: Kashmir Gold. We were initially looking at darker granites, but we gradually shifted over to move of a brown tone. And, I'm glad we did. scootermom - It does kind of make me hungry for some Werther's original, no that you mention it. Kashmir Gold sounds much more sophisticated though...

    Sink: Ticor S405 from Galaxy Supply.

    Ceiling: 5/16" hardwood floor I think it was called cinnamon maple, or something similar.

    Hardware: Liberty ORB pulls and knobs from Cripe Distributing - big thanks to bamaspice for the link to these. Paid $14 for a 25 pack of the knobs and $14 for a 25 pack of the pulls.

    Under cabinet lighting: Pegasus Lighting fluorescent lights.

    Ceiling lights: From Lowes. I can't remember the full name, Portfolio something or other...

    I think that's just about everything.

  • 18 years ago

    What an amazing transformation! You did a fantastic job on a very intricate backsplash. Did you have it all laid out on the floor first, then transfer it to the wall or did you just sketch it out first? You should be very proud of the finished project.

  • 18 years ago

    Wow! You wouldn't know it was the same house. Very impressive!

    I'd like to know more about the ceiling, as I've been thinking about doing this in our living room.
    What brand flooring did you use?
    Did you attach furring strips to nail the boards to or something else?
    I assume you nailed the tongue part, then placed the next piece to nail that tongue?
    I'd love to see a picture that shows more of your ceiling treatment!

    Again, great job!

  • 18 years ago

    nersesian, laurie_2008, laxsupermom:

    Thanks. I think I'm most proud of the backsplash. It probably required the most amount of planning, and was something that I had never really done before.

    laxsupermom - I worked on the getting the design how I wanted on the computer. I copied pictures of the tile from their website and sized but them to scale. Then I just started messing around with them. It involved a lot of cut and pasting...

    Here was the computer design I finally used:

    The colors for the chiaro and noce obviously look quite a bit different then this mock up, and we decided to have a mix of the different colors throughout. I laid the tile out on the counter top for each wall before installing them, in order to get a good mix of the different colors. As we went along we really noticed that we liked the antique gold mixed in. So, we put that into the focal point above the sink.

    If I laid out the design on the floor first and really measured it all thoroughly, I may have be able to avoid some of the smaller tile slivers, but I was just happy to make it so the accent tiles didn't fall where an outlet was...

  • 18 years ago

    alex9179 -

    Thanks. We got the flooring from Lumber Liquidators, it was on sale for a decent price.

    We reused 1X3 strips of wood from the previous drop ceiling and nailed into them. You are right we nailed into the tongue at an angle, and then put the next one up so the nails were always hidden in the tongue.

    The toughest part with this was the last ones, because the wall didn't leave much room for the nail gun. We were installing crown molding as well, so we didn't have to get it right up to the edge. Also we installed the part over that is over the cabinets last, so an blemishes wouldn't be noticable. I know there was about 1 inch gap at the end that was covered by the crown molding.

    I think I had to nail on the face of the last board I put up as well. If the cabinets weren't going to be covering the last bit, I probably would have used a hammer to for the last run.

    I don't think I have any pictures that focus on the ceiling right now. I'll try to take some and post them later.

  • 18 years ago

    Wow! This is some kinda purdy!

  • 18 years ago

    What a wonderful transformation. Nothing like some truly dreadful before pictures to make one sure anything will look great against them, but your kitchen really is fantastic all by itself. Love the ceiling against the other surfaces and love the liveliness of your backsplash. It all comes together really really nicely. Happy cooking!

  • 18 years ago

    Congratulations on your remodel - What a lot of work you must have done to go from Before to After, but so worth it!

  • 18 years ago

    Unbelievable....Talk about "night and day" (ie, your before and after). You should be so proud to put this kitchen on display. Enjoy it!

  • 18 years ago

    What a beautiful kitchen! You must be so happy. I started demo today and I'm also getting Kasmir Gold! It really looks beautiful in your kitchen. You did an outstanding job with the backsplash. Enjoy!

    Barb

  • 18 years ago

    Wow! Amazing transformation! You should be very proud of all you've accomplished.

  • 18 years ago

    Out of all the kitchens I see and drool over in this forum, the ones that always impress me the most are the DIY renos that come out with results such as yours. What a great job! And, while I love it all, I think what I like most about your new kitchen are the backsplash and the ceiling -- and, of course, all the color choices which substantially lighten up the whole space. Oh gee, I guess I have just figured out the "deep" meaning behind your choice of a handle, Lightenup! LOL! Well, IMHO, you certainly can lighten up now 'cause on that score, and others, this is job very well done!

  • 18 years ago

    Thanks all, we are very pleased with how it has turned out.

    alex9179 - Here are a couple pictures that capture more of the ceiling.

  • 18 years ago

    Lightenup, how tall is the cabinet above your sink? I'm putting in a corner sink and want to shorten the cabinet above it so that my nose isn't touching the front of the cabinet when I'm washing dishes. Your heighth looks just about right. Thanks.

  • 18 years ago

    Barbaraz, the cabinet above the sink is 30" in height, the cabinets on either side of it are 36". So, from the countertop to the bottom of the cabinet above the sink is 24" compared to 18" for the other cabinets.

    We shortened it and used glass doors so that while you are at the sink you wouldn't feel boxed in.

  • 18 years ago

    Wow. My mouth is open. You did an amazing job. I've been working on mine for a few years...we'll see how it turns out. Thanks for the inspiration.

  • 18 years ago

    That is just fantastic and I too love your backsplash. And, thank you for sharing the sketch you did. I have been trying to play around and figure out my backsplash(using 4 inch tiles and some 2 inch glass accents , really getting old "drawing" my squares and diamonds:)
    Great job!!!

  • 18 years ago

    Thanks. sheilaaus, 1 bit of advice I'd offer for the design process in the backsplash is to keep good track of where your outlets and light switches are. They can really have an impact on design.

    We also did the 4 inch tiles with 2 inch accents.

  • 18 years ago

    I love what you did with the ceiling. That looks really beautiful, and is unusual. I was looking at pictures of real French kitchens today, and had noticed how they all had beautiful ceilings, something most American kitchens pretty much ignore. And then I see your creative ceiling.

    Really nice job all around. You must be so pleased every time you walk in.

  • 18 years ago

    Lightenup, thanks so much! Showed it to my DH and he's gung-ho to do it here :)

  • 18 years ago

    Thank you for sharing details & more photos. That ceiling really is amazing and works so well with all the other elements.

  • 18 years ago

    Thanks. sheilaaus, 1 bit of advice I'd offer for the design process in the backsplash is to keep good track of where your outlets and light switches are. They can really have an impact on design.

    We also did the 4 inch tiles with 2 inch accents.

  • 18 years ago

    Boy, I'm not sure how I got a double post there a half hour later, oh well.

    alex9179 - Good luck with your ceiling. I'm really happy with how our ceiling turned out. Compared to doing drywall, it was more expensive. But, it really ended up being a lot easier and quicker than what dry wall would have been. All those coats of mud standing on a ladder doesn't sound like fun at all.

    jeannie_kitchen - I do give a little smile every time I walk in there now. My DW was just commenting the other day that she really likes to just sort of hang out in the kitchen now.

  • 18 years ago

    awesome! love your cabinets, I'm hoping to tackle painting and glazing my maple cabinets soon! I love your back splash it's so cool! I want my cabinets to be just like yours and my granite is similar lapidus gold, right now it just blends with the maple so I'm hoping it will POP like that when I get the cabinets painted. I wanted to do a wood ceiling but alas ran outta $$$ LOL...I just love it!

  • 18 years ago

    Excellent job and transformation. Very creative use of hardwood for your ceiling. I did that in a room in our old house many years ago and it really is adifferent look. Congrats and enjoy your new space

  • 18 years ago

    Wow! It is stunning! Rejoicing with you on a job well done!!

  • 18 years ago

    lucky32 - Thanks. When looking for granite lapidus gold was one that we liked as well.

    berryberry - Thanks, the hardwood ceiling was my DW idea, I think we may have seen it once on one of the remodel shows on TV. I think the hardwood adds a touch of class to it that helps make it unique.

    mrs-mjt - Thanks, it was a long process, and we're really happy now that we are done with the majority of the work.

  • 18 years ago

    It's been only a week or so, but I was digging deep in my brain and searching the site to bring this one up. It really is a great one. Can you post it to the gallery side?
    So very impressive!!!

  • 18 years ago

    What an amazing transformation! And you did it yourself! The hardwood ceiling is my favorite part. Going back and forth between your before and after pics, well, it looks like a completely different kitchen. Very nice job with a kitchen you will enjoy for a long time.

  • 18 years ago

    Thanks. We still have a little bit left to do. I'm not sure how to post to the gallery side, but I'd be happy to do it when we have everything finished.

Sponsored
Custom Home Works
Average rating: 4.6 out of 5 stars10 Reviews
Franklin County's Award-Winning Design, Build and Remodeling Expert