Software
Houzz Logo Print
tiki_girl

Please help me with my kitchen!

11 years ago
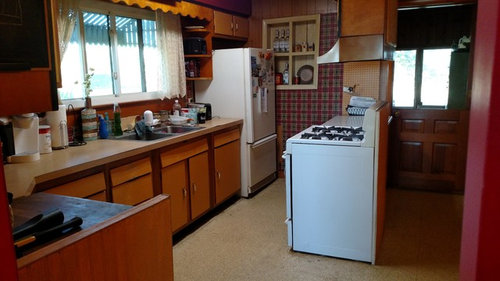
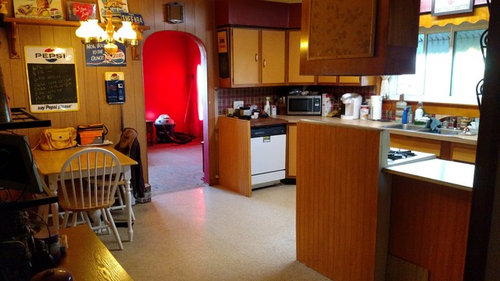
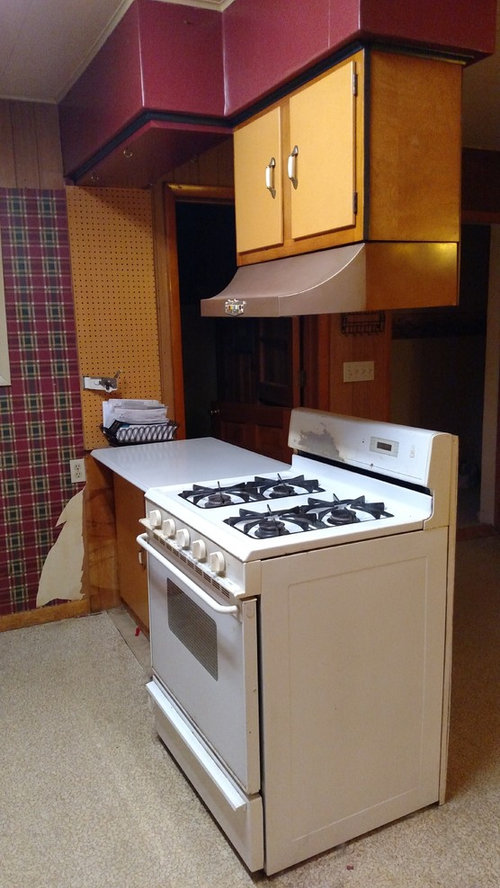
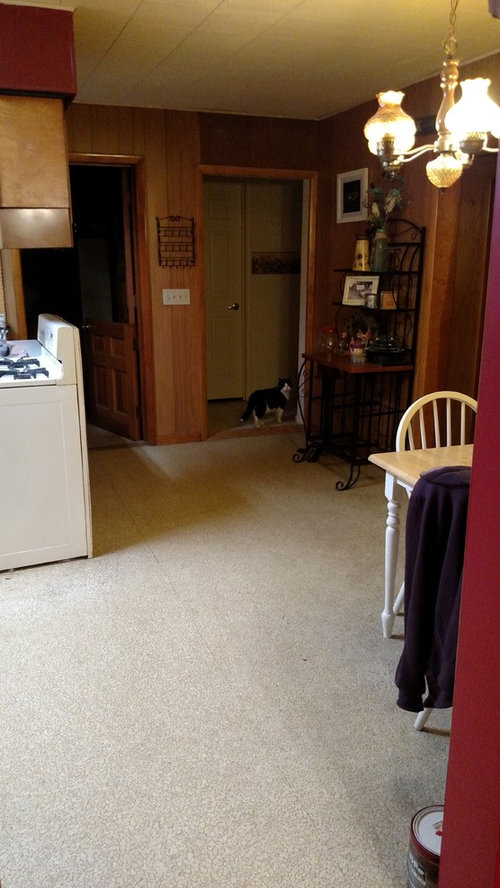
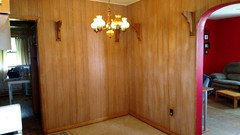
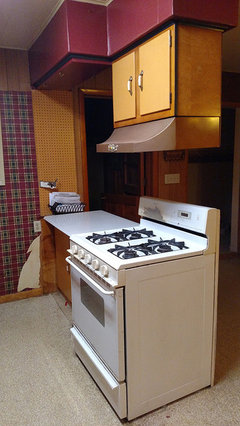
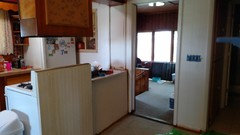
I moved into this country home a little over a year ago. The whole house is in desperate need of updates, but the kitchen is definitely the worst. Not only is it ugly, but the previous owner smoked IN the house, so everything has a nice nicotine stain and stickiness to it. I immediately scrubbed all the cabinets down, but on a humid day, they get super sticky again. My dilemma is that I have a very small budget, but I desperately want to update this kitchen and brighten it up. I'm envisioning a vintage country cottage look. I like the idea of white cabinets and walls, maybe with accents of 50s turquoise blue and light green. Right now, I am just overwhelmed and don't know where to start. Pretty sure the cabinets need to be one of the first updates. I am open to any suggestions. And how do I get rid of the nicotine stickiness? Do I need to use a special paint when painting the cabinets and wood-paneled walls? Thanks in advance!

Comments (71)

  • 11 years ago

    Thank you! I will definitely post progress pics. :)

  • 11 years ago
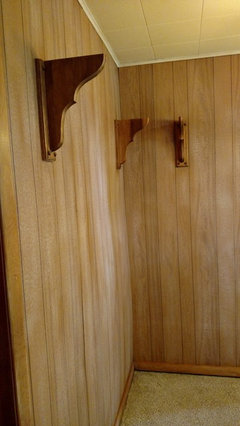
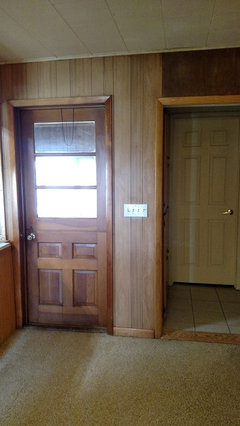
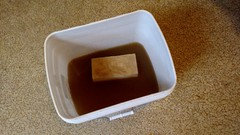
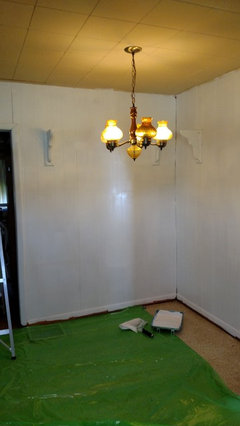
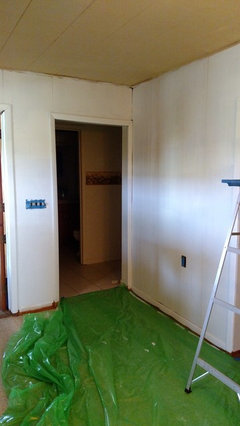
    Paneling has been scrubbed down with TSP and sanded. Those walls were nasty. The nicotine turned my water brown instantly. So gross. REALLY wish the previous owners hadn't smoked in the house!! Hard to tell in the pictures, but the paneling is lighter now, after getting that crap off. Time to prime!
  • 11 years ago

    I wonder if the range was originally over in the space occupied by the DW now. Then things got moved around and cobbled a bit when the range was tacked onto an existing peninsula and the DW was put in its place.

  • PRO
    11 years ago

    Looks great! We have also used diluted Mr. Clean in a plant sprayer (with wand) to remove heavy smoke residue. It works very well. I start a t the top of the wall, spray across, and let it run down. Then just wipe it off. Follow up with a spray of clean water. Especially if you will be painting. We also spray aerosol Fabreeze into the ac air intakes to get rid of the odor. The ceiling tiles can be painted with an encapsulating paint as long as it meets fire codes.

  • 11 years ago
    What a nasty job, can you imagine what their lungs look like! Thanks for the update!
  • 11 years ago
    last modified: 11 years ago

    Ewww eww eww I'll bet you sleep better tonight. Good job the fugly part is over!! Oh and soak the lamp globes in the tsp too. (Bet they used to be white)

    Jennie Fisher thanked lucidos
  • 11 years ago

    I was thinking the same thing. If that's what I was getting off the walls, I can't even imagine what their lungs look like! It was so gross. I'm so glad to be done with that part!
    So my boyfriend thinks we should just use an all-in-one primer/paint on the walls. I'm thinking it'd be better to use pure primer, then paint it. Thoughts? I'm thinking pure primer will seal in any remaining nicotine stains.

  • 11 years ago
    I would think going the extra mile with a separate primer would be the way to go. You can tint primer, to make painting easier!
    Jennie Fisher thanked miacometlady
  • 11 years ago
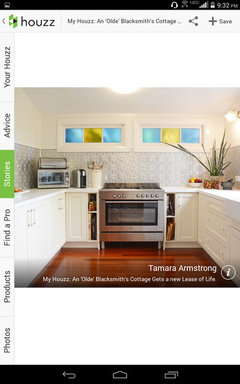
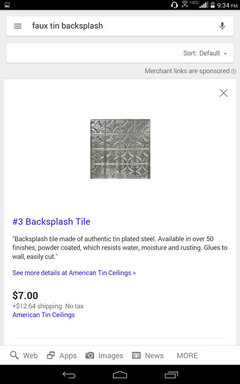
    Glad to hear your painting the wood. I would say white and perhaps a couple of colored upper cabinets. Here is a inspiration photo with white laminate counters and blue green accents. Maybe something similar would work for you! How about a affordable faux tin back splash?
  • 11 years ago

    Yep, that's my thinking, too. I think he's just wanting to hurry up and get it done, lol. I told him that if I'm going to do it, I'm going to do it right!


  • 11 years ago

    Congratulations. After all that, do it right and use an actual primer.

  • 11 years ago

    Oooh, I like that backsplash, Miranda.


  • 11 years ago

    Using a real wood primer is very important here. The walls will leach goo no matter how well you cleaned them. If you use anything less you will see the primer actually turn brown. Don't skimp here. Even using the wood primer you may have an issue.


    Jennie Fisher thanked lucidos
  • 11 years ago

    You've done a great job with the paneling.

    The condition of your cabinets is very poor, as you know, so don't put a ton of effort or money into them. Getting everything painted one color will go a long way toward unifying all of the different "themes", including all the weird add-ons. Tape off the vent and spray paint it white as well.

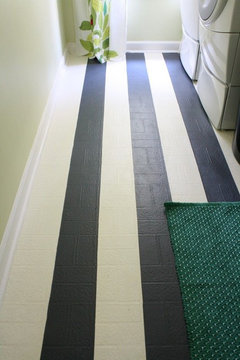
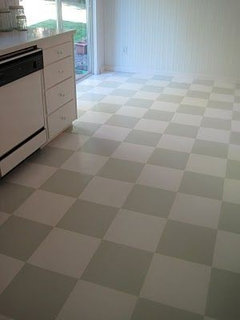
    Get a patio/floor paint and paint your floors because I don't think you'll be happy with them once you paint the cabinets. I wonder about getting a med beige tone and using that same paint on the ceiling tiles - make it look like a country kitchen with wood floors/ceilings. Here's how someone did theirs to help with supplies, etc. If you don't mind a little extra work and a lot of taping, you can even do your floors thusly

    http://www.designertrapped.com/2013/11/how-to-paint-your-linoleum-floors-yes.html

    Home Depot has a kit for $40 from Rustoleum that you can use to paint your linoleum counters to look like soapstone. You'd have to get some adhesive and glue down the loose bits but it would at least get you buy until you can afford to replace them. I'd also think about finding a piece of butcher block that will fit the space above the dishwasher to bring that up in height plus make it usable. Don't worry about moving the dishwasher or anything just now...that can wait until you actually are ready to install new cabinets.

    Paint that strip of wall near the stove (yellow wallpaper) with chalk paint, get a stool, and make that a little "command center". Your son can do homework there, you can go through coupons, drop off the mail....

    One of the biggest expenses will be the knobs/pulls for the cabinets...that stuff ain't cheap! Home Depot sells "pro packs" meant for builders that are the less expensive pieces in bulk - generally 10 knobs and 4 pulls. If they only come in silver and you want black, bronze or periwinkle, it is really easy and inexpensive to take a can of paint to them. You don't want to spend a lot at this time because they might not be what you want or need later when you're ready to change out the cabinets.

    Home Depot has a bazillion colors in spray paint so pick your accent color, whether it be blue, green, yellow or red and feel free to paint whatever accessories you want.

    Check on Pinterest for "how-to" on making mason jars chandeliers. You can actually buy those jars clear, blue or green and pinterest also has tips for coloring those jars any color you want. If you bunch them into 5, replace that light over the eating area. Cute, cheap, country...

    For the future, if you happen to have an IKEA anywhere near where you live, I know a lot of people are using their kitchen cabinets, Price is right and user-friendly for installing if you learn a little bit and take your time, as well as do your homework up front. If there is room in the budget, I'd consider walling up the dutch door and moving the entry to the hallway, giving you another 3' in your kitchen.

    You have a unique opportunity in that there is pretty much nothing you can do to make this worse. That means you can take some chances and try out some fun new things and not feel bad if they don't work exactly like you want. That, my friend, is a big bonus!

    Jennie Fisher thanked columbia93
  • 11 years ago

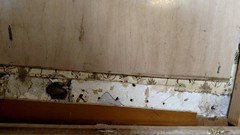
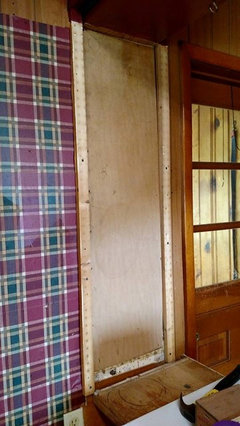
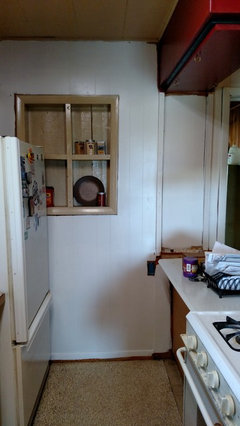
    Wow, Columbia, thank you for all the suggestions! I have heard of those Rustoleum kits for countertops and cabinets. Will definitely need to do something with these ugly countertops. I like the idea of a chalkboard there on the wall by the stove. That is actually pegboard that they nailed onto the wall. I pulled it off and there's a lovely piece of linoleum. Guess they had an extra strip left after doing the counters and thought, Hey let's put that on the wall! I shudder to think what's under that! Might be the original kitchen wallpaper under there, as there's some protruding down at the bottom. (See attached photos.)

    My Current Kitchen · More Info


  • 11 years ago

    I looked up the mason jar chandeliers. They are so CUTE! I really like that idea and it would fit with the country cottage theme I want to go with! Thanks for the suggestion!


  • 11 years ago

    Jennie get me sizes!! Include the mudroom please. Door and window locations and widths...Also how goes the primer?


  • 11 years ago

    Haven't started priming yet. Waiting for my son to help me with that! I completely forgot about the measurements, sorry, lol! I will get them for you. :)


  • 11 years ago
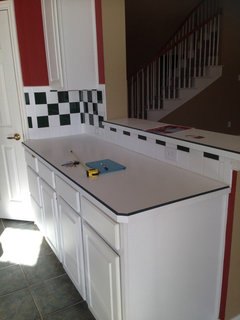
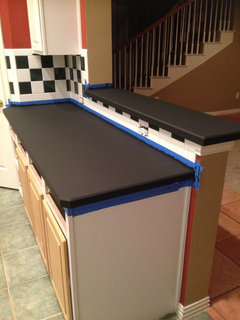
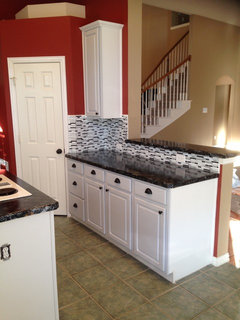
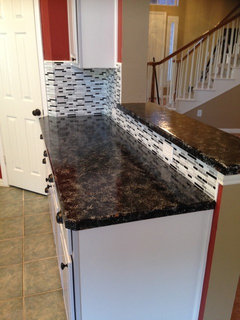
    Just like everyone is saying... Take your time and do it right. Clean, prep, prime. A former boss used to say, "When you wanna go fast, go slow." I used a countertop paint kit and was VERY happy. For the amount you have, one kit would be plenty. I read reviews for weeks and the brand I chose was higher rated than Rustoleum and cheaper. The kit is $80. I ordered from Amazon as I have free shipping. It's called Gianni. They have light and dark and a few in between. I used a black one. Pics show before, after primer, and finished. But, as one poster said, glue down the pieces coming up.
  • 11 years ago
    Here's a better view of the top...
  • 11 years ago
    Oh wow! That looks amazing! I'll definitely try it!
  • 11 years ago
    My only advice. Watch the instructional DVDS many times before and during. It really is helpful.
  • 11 years ago
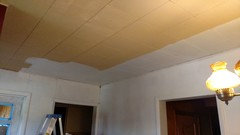
    Two coats of primer applied. Already makes the room brighter!
  • 11 years ago

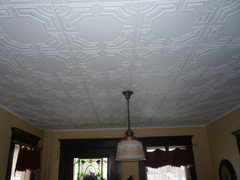
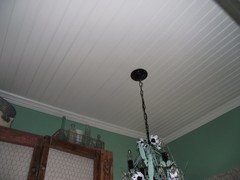
    YAY!!! Let the primer sit about a week you want to make sure nothing is bleeding through. Looks like you are going to have to paint the ceiling tiles too.

    hmmm... OR consider covering the ceiling in a textured paintable wallpaper.

  • 11 years ago
    I like the look of the second wallpaper. Would match the paneling. How much does that stuff usually run?
  • 11 years ago
    last modified: 11 years ago

    It runs about $ 34.00 per roll you would likely need 3 rolls. But! it would save you miles of work and time.

  • 11 years ago
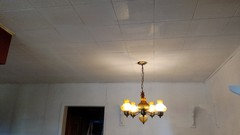
    Hmm. Well, I think I'll prime it for now, and save the money for a new light fixture. That ugly thing's GOT to go!
  • 11 years ago

    It's already looking so much better. I love the quirky style. It might turn out looking even better than a new kitchen.

    If you are renovating any other rooms in your home that are paneled I would suggest you carefully remove at least one sheet of paneling (it can always be reinstalled). I bought a home built in the 30's that also had paneling everywhere. When we removed it we found beautiful beadboard in perfect condition. I think at some point the owners just wanted to make it look more in keeping with the style at the time.

  • 11 years ago

    It looks like the ceiling tile is that cellulose acoustical tile, and wallpaper will definitely NOT stick to that. The tile can be painted using a roller.

  • 11 years ago

    Remember to caulk tile gaps before hand, if you paint.

  • 11 years ago

    OK you are a great person to take this on. You are going to make a spendid remodeler!

    Remove the base cabinet opposite the fridge. Put it on the right side of the stove. Put the dishwasher to the left of the sink as you face the sink. Now you have an easy opening to the kitchen, a prep island and stove in the center of the room where you can see and talk to everyone. Remove the upper cabinets that were over the DW.

    I say this because I see your stove is gas and it would be expensive to move. This might give you a more open work feeling in the kitchen. Difficult as it may be, I would do nothing other than paint cabinets and the kitchen and save money until you know what you want to do in the kitchen.

    And I hope when you do the room please consider ripping out the wall between kitchen and living area. Good luck, you are doing great!

  • 11 years ago
    last modified: 11 years ago

    What's above the ceiling tile? Might be worth taking a look.

  • 11 years ago

    No, you do not have to caulk the ceiling tile gaps before painting. That would make a huge mess. Just paint with a roller. The gaps between the tiles will just show up as a black line.

  • 11 years ago

    If you use a long enough pile nap on the roller, the paint should just fill in those cracks with paint.

  • 11 years ago

    It is what it is, and you cannot make it look like smooth drywall ceiling by simply caulking.

  • 11 years ago
    How about using chalk paint on the cabinets? Also think of replacing ceiling tiles within expensive tin tiles from Home Depot.
    Have fun! Looks great already!
  • 11 years ago

    Ahh I thought they were the plastic ceiling tiles. I know wallpaper sticks to them.

    Don't be afraid to look for a used light fixture you have a lot of expenses ahead.


  • 11 years ago

    That is certainly true, Nancy, but not exactly to the point. Caulking is just to help keep the paint from cracking in narrow gaps, and will give a more finished look to the paint job.

  • 11 years ago

    Caulking it will be more noticeable than the cracks, IMO.

  • 11 years ago

    I have seen these kind of ceilings painted the way I have described and they look fine.

  • 11 years ago
    Yeah, at this point, I'm just going to paint them. I think they'll look MUCH better even after one coat! Those nicotine stains are awful! Might try to tackle them tomorrow. Just priming that ugly wood paneling has already transformed the room! It's so much brighter and cheery! Can't wait til the cabinets are painted, too.
  • 11 years ago

    I think I would tackle the ceiling before the cabinets. Then figure out if you can move that dishwasher.


  • 11 years ago

    google removing nicotine stains from appliances and cabinets....I did it with my daughters used stainless.

  • 11 years ago
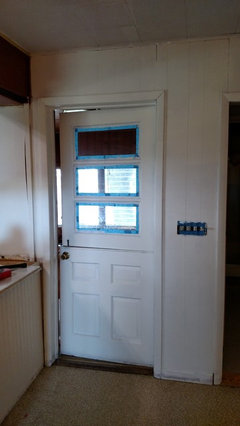
    Got the ceiling primed this morning and the dutch door. Ceiling's going to need another coat for sure. Those tiles aren't the prettiest, but they'll have to do for a while, since I'm on a budget.
    So as far as the cabinets go, what do I need to do to prep them? I'll definitely wash them down first with TSP to get some of the nicotine off. Do they need to be sanded? Looks like they've already got a couple layers of paint on them.
  • 11 years ago
    last modified: 11 years ago

    The cabinets will need to be washed and a heavier sanding then the paneling. Once paint builds up and there are multiple layers of it, mistakes get re-coated again and again. Work a bit harder on the fronts of the cabinets. If you can see if you can borrow a mouse sander or orbital it may keep you from wanting to curl up in a small ball and shedding tears. If you can't borrow one of those use a sanding block. The cabinets will take more time and be a pain.

    So remove hardware. clean, sand and sand again lightly after the primer dries then wipe with a damp cloth.

    Remember primer does not look like paint it's blotchy and ugly you only need a second coat if the nicotine bleeds through. Since these were painted already you can use a normal cheaper primer.

    Take some time to go back over the paneling and any seams that are not flush or flat or gapped, nail in and apply putty - such as the one over the doorway.

    When painting the cabinets and with the primer too use a small foam roller and don't crisscross the paint - apply it back and forth in one direction.

    It looks 100% better already!!

    **Note: The caulk if you use that has to say paintable. If not wood putty or drywall compound is fine.

  • 11 years ago
    Thanks lucidos! You've been a tremendous help, as has everyone else! Think I'm taking a break and might start on the cabinets next weekend. I think I have some caulk, so I'll fix up those paneling seams.
  • 11 years ago

    The cabinets are sticky also from grease build-up, not just the nicotine. A good degreaser such as Dawn dish detergent will get most of it. That is what they use to clean sea birds after an oil spill.

  • 11 years ago

    I am thinking that you can put the hardward hinges, knobs etc in acrylic paint remover to get all the dried paint off. Remove doors and prime doors front and back then two coats on inside let dry thoroughly and then paint the fronts. Take you time so they can cure properly and become resistant to soap and water clean up.

  • 11 years ago
    Any updates? Would like to see new pics.
  • PRO
    11 years ago

    I think you should have a look at Online 3D Kitchen Constructor. It will be very helpful to solve your dilemmas. It is a great tool for kitchen planning, design and decoration. It is human-friendly and is powered by latest 3D technologies providing you with an image via browser.

    Its demo version is free, so you can try to design your kitchen and choose colours or materials for your cabinets and countertops.

    Kitchen Constructor demo: http://prodboard.eu/kitchen/

    E-mail: support@prodboard.eu