Software
Houzz Logo Print
davidr_2002

Bathroom wall & ceiling warp -- Fix? Hide? Ideas?

11 years ago
By way of introduction, this old house was built in the 1920s, and proves every day that an old house is not always a good house. I suspect that the first owners did a lot of DIY, and not too well.

Now all these years later, the other half says "update the bathroom." So I started by taking down the drop ceiling panels from the 1970s. I soon found out why they were there.

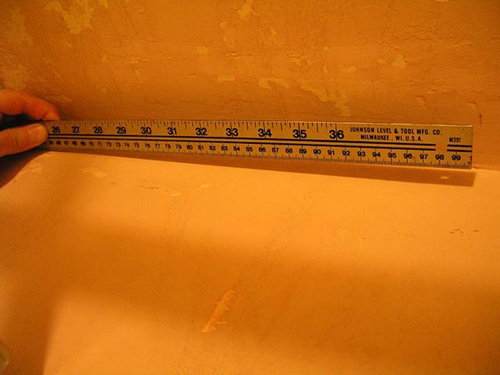
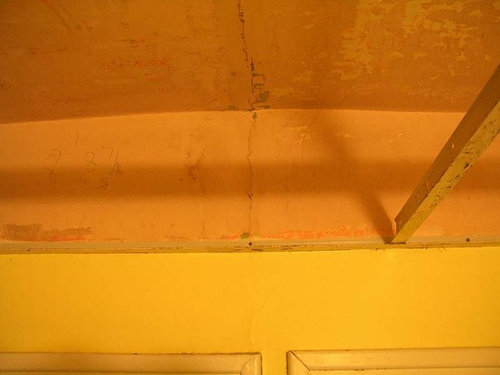
Half the bath is in the original house, and half is in an addition built (guessing here) some time in perhaps the late 1940s. Just above the drop ceiling line, the plaster wall begins to bulge outward where old meets older. By the time it gets to the ceiling, the bulge is pretty big. (See photos.)

I haven't dug into it, so I don't yet know for sure, but I guess it could be many layers of patches attempting to deal with shifting and plaster cracking between old and new sections. It could also just be sloppy plastering. As I said, there's a lot of iffy work in this house.

The plaster ceiling has the same problem deciding whether it wants to be part of the old house or part of the older house.


It doesn't look too bad on the other side of the bath, toward the outside wall, pretty smooth there really, with just a hairline crack going across. But on the inside wall right above where the wall I described above bulges in, the ceiling also bulges up. There's an area a good 3-4 feet wide which is sort of a reverse trough. The plaster slopes upward from the left, to a high point right where the old and new join, and then slopes down from there. It seems to be there at the wall, right where it's most obvious. It's pretty amateurish looking, which in this house is no surprise.

Check out the pictures. The overall view just below really does look that bad -- it's not just pincushion distortion in the camera. (We won't discuss the Pepto-Bismol pink and canary yellow paint.)


(Overall view)


(Ceiling)

(Wall)

All this was nicely hidden by the drop ceiling, which I'm sure was no coincidence.

The house seems pretty stable now. Yes, marbles roll and spilled water runs, but hey, that's an old house for you. I haven't had to reset any doors in the 15+ years we've lived here, so I think (or at least hope) that any differential settling between the original house and addition is probably over and done with.

Plan A is to fill in the ceiling crest with drywall mud and level it off. I don't know how well that would work with the wall, though. I'm kind of afraid of what I may find if I start sanding or grinding down into that plaster.

Plan B is shims and 2x2 furring, topped with 1/2" drywall, which would at least get the ceiling straight. The wall problem remains.

Plan C comes from a handyman who helps me on big jobs. He thinks the easiest and most practical answer is to cover it all up again. He suggests framing in a new false ceiling at about the same height where the drop ceiling was, using 2x4 lumber, and drywalling. If nothing else, that would sure make the needed new wiring easier.

With plans B and C, I'm worried about condensed moisture getting trapped between the old plaster and the new drywall. Even with an exhaust fan, we're still talking about a bathroom here. I guess we could demolish all the old plaster, but I was kind of hoping to avoid that mess.

What say you, experts? Plan A, Plan B, Plan C, or something else?

Comments (3)

  • 11 years ago

    I'm definitely not an expert, but we did just remodel a 1928 bathroom. Our ceiling and walls were pretty wonky. I am guessing if your ceiling is off, places in the walls are off - it's probably not even consistent on one wall!


    I don't feel like it was from settling (our house is brick) but more like the nuances of plaster. Because we had to live in this bathroom and were DIY, gutting it was not an option, however we both agree that would have been the best choice. It would have helped with electric, plumbing, setting the tiles easier, etc...

    We elected to do Durabond to smooth out the surfaces where we could. The walls weren't sanded down very far - just to get the paint to scuff. Any plaster that wasn't sound did break off from the vibration, and that meant that the area truly needed to be repaired a little more deeply.


    DavidR thanked kats737
  • PRO
    11 years ago

    That plaster looks sound. Patch the crack, sand it lightly, prime and paint. Embrace the funk; it's an old house. Have boring flat plumb drywall when you move.

    DavidR thanked Joseph Corlett, LLC
  • 11 years ago

    Kats, thanks for the report. We have the same situation -- this is our only bathroom, so it has to remain functional.

    Joseph, thanks for that view too. I've lived in old houses for a good part of my life, so I agree in principle. That might not go over so well with my mate, though. We'll talk about it.

    Has anybody ever tried a false ceiling a few inches below an old plaster ceiling? My concern about it mostly comes from reading years ago about a commercial building where a lowered false ceiling collapsed when the old ceiling above it deteriorated and broke up. Eventually the weight of the ancient plaster broke through the newer ceiling.

    Especially in a bathroom, where there's lots of moisture, I'm concerned about having a hidden, unvented, enclosed area above the finish ceiling.