

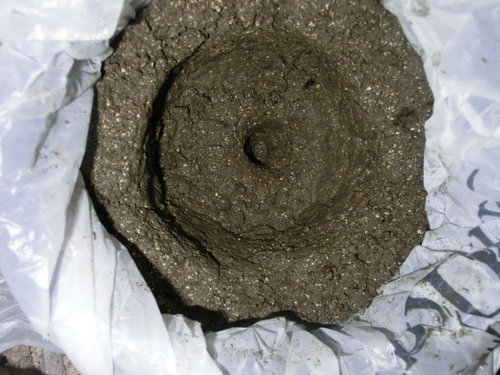
Hypertufa - First Attempt
10 years ago
Sort by:Oldest
Comments (4)

Related Stories
DECORATING GUIDESCreate a Chic First Apartment on a Dorm Room Budget
Show your first solo place off with pride by incorporating these tips for budget-friendly artwork, furniture and accessories
Full Story
MOST POPULAROrganizing? Don’t Forget the Essential First Step
Simplify the process of getting your home in order by taking it one step at a time. Here’s how to get on the right path
Full Story
KITCHEN DESIGNHouzz Call: Tell Us About Your First Kitchen
Great or godforsaken? Ragtag or refined? We want to hear about your younger self’s cooking space
Full Story
HOME INNOVATIONSConsidering Renting to Vacationers? Read This First
More people are redesigning their homes for the short-term-rental boom. Here are 3 examples — and what to consider before joining in
Full Story
GARDENING GUIDES10 Easy Edibles for First-Time Gardeners
Focus on these beginner-friendly vegetables, herbs, beans and salad greens to start a home farm with little fuss
Full Story
REMODELING GUIDESConsidering a Fixer-Upper? 15 Questions to Ask First
Learn about the hidden costs and treasures of older homes to avoid budget surprises and accidentally tossing valuable features
Full Story
LIVING ROOMSRoom of the Day: Redone Living Room Makes a Bright First Impression
A space everyone used to avoid now charms with welcoming comfort and a crisp new look
Full Story
COFFEE WITH AN ARCHITECTA Primer on the Language of Design
An architect nobly attempts to educate clients about what certain architectural terms "really" mean
Full Story
INDUSTRIAL STYLEMy Houzz: From Raw Space to Hip Home in a Converted Utah Garage
Creative repurposing with an industrial edge defines the first home of an engaged couple in Salt Lake City
Full Story
ARCHITECTUREStates of Style: Alabama’s Icons Leave Their Mark
In the first of a new series, discover the natural beauty, the architectural icons and some of our favorite homes deep in the heart of Dixie
Full Story
Sponsored
Nicholas C.Original Author
billie_ann
Related Professionals
Saint Joseph Landscape Architects & Landscape Designers · Saint Cloud Landscape Architects & Landscape Designers · Oneonta Landscape Architects & Landscape Designers · Birmingham Landscape Contractors · Richmond Landscape Contractors · Danbury Landscape Contractors · Detroit Landscape Contractors · Fergus Falls Landscape Contractors · Lima Landscape Contractors · Green Bay Landscape Contractors · Chula Vista Landscape Contractors · Sarnia Landscape Contractors · Oxford Tile and Stone Contractors · Ottumwa Tile and Stone Contractors · Bend Tile and Stone ContractorsNicholas C.Original Author
billie_ann