Software
Houzz Logo Print
beachem

Semi DIY Kitchen - Stage 3 Progress

10 years ago
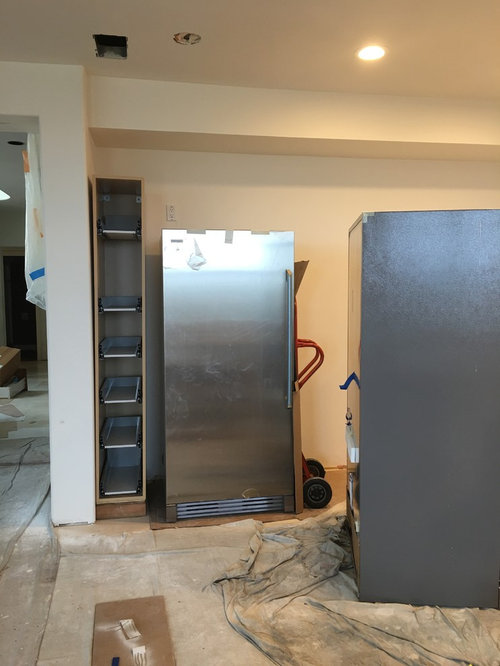
As a caution, DIY is always slower and more painful. I'm currently in Stage 3 (my own nomenclature) - building the cabinets.

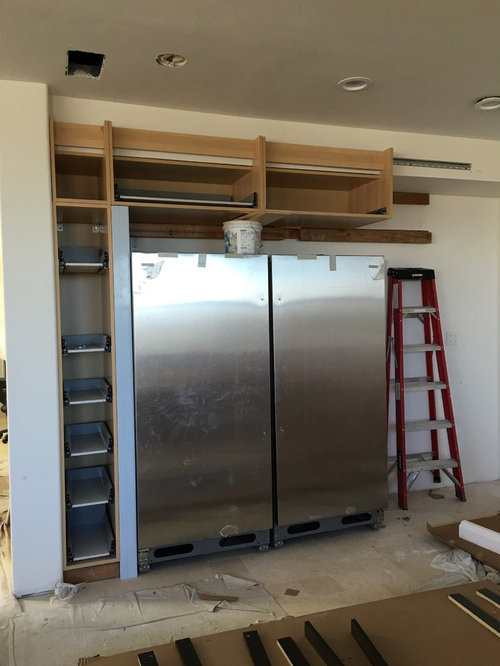
Our old fridge blew up apparently due to construction dust over the past year destroying the compressor. We had to quickly install the new fridge/freezer temporarily to use. I took the new fridge pair apart and vacuum them out to make sure that construction dust will not destroy them as well. We'll have the appliance repair guy do final maintenance on them before they are formally attached at final.

So far I've custom/hacked the cabinets for the short wall and tested the look with dry fit. Let me share that you cannot do this by yourself. The wall cabinets are HEAVY. No one in my family is helping so it's just me doing everything and hiring muscles.

I had to have two handyman help me with lifting and leveling the cabinets along with me borrowing their table saw. They come once a week and just left it in the front courtyard for me for the last two weeks.

You can see some of the 100+ drawers that I bought. I'll be adding more drawers to the pull out tall pantry but I need to build them.

This week, they're going to have to help me with cutting the gigantic birch slab for the drawer front as I can't hold it and use the table saw by myself.

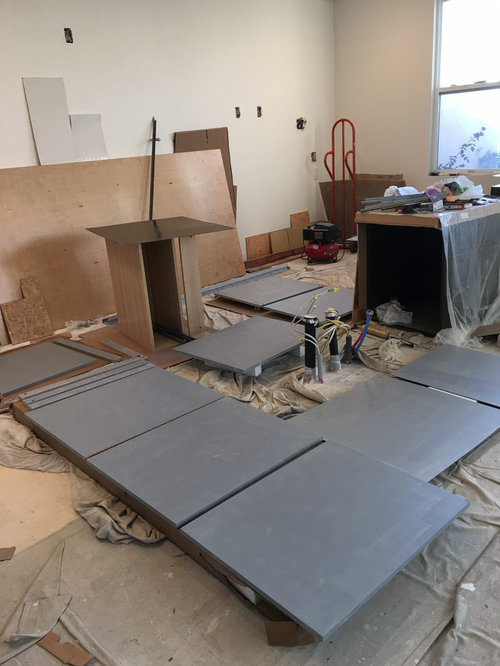
Here's what the rest of the kitchen looks like as I finish priming and painting the island and bar cabinets.

The next step is back to Stage 1 - designing the kitchen as I've made changes in the hood design and took out the pocket door wall oven cabinet.

I'm contemplating not putting any of the rest of the cabinets together until the veneer comes. I think it's easier to put veneer on the edges of the cabinets if they are not assembled. Any feedback about that would be great.

Comments (17)

  • 10 years ago

    yes, post pics of putting the veneer on too. posting pics of making cabs would be good also...

    in your spare time, do you ever make drawers for others? I need a few drawers for one of my kitchen cabinets...

    I like the grey. Is that the final color or does it need more coats?

  • 10 years ago

    Wow. What an undertaking. I wish we could have been as handy as you are.

  • 10 years ago

    wow! I love the IKEA (right?) hacking so far! Where are you ordering the veneer from? I just placed a sample order from amishcabinetdoors.com so I can decide whether I want IKEA boxes with different drawer fronts.

  • 10 years ago
    last modified: 10 years ago

    @desertsteph. The gray is actually the primer. I had it tinted gray so I can see that I've covered the cabinets which was white. The final color for the island cab is a dark chocolate brown to match the espresso custom doors.

    @nightowl and Steph. I'm no DIY person. I've never built anything except tongue and groove wall panel for my closet years ago when I first bought the house. I had to buy a drill from a garage sale to put these cabs together. They are IKEA cabs.

    I'm known as a klutz and prissy princess so if I can do it, anyone can.

    Frankly, as I was forced by budget constraints to do a lot of stuff DIY such as my own baseboards, I found that it was not that intimidating. The critical thing is to understand which portion has tricks of the trades and hire that out while doing the rest yourself. Plumbing, electrical, gas, drywall was all hired out. I helped lay tile and did grout, calk, and seal myself on flooring. I did some of the electrical such as connecting the recessed light, covers, etc...

    The final cabinet installation would be hired out to an experienced installer.

    @guco the custom doors will be from Conestoga and I'm ordering the veneer to match from there. I'm waiting for the 2nd rounds of sample doors to decide on the final colors. I bought the IKEA in pieces as they came on sale so I had a combo of white and birch. I had to figure out how to make it look cohesive.

    The birch is used for the perimeter and will be with gray doors. The white cabinets were painted dark and used for the espresso doors.

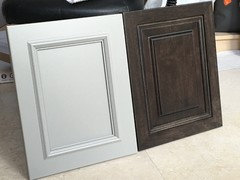
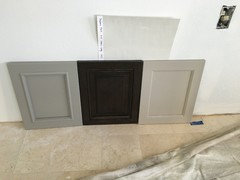
    These are my sample doors so far.

  • 10 years ago

    Really love the left door! Beauuutiful!!

  • 10 years ago

    Wow! You are amazing, beachem. It looks great. Funny but I never thought of painting the boxes to make them cohesive. D'oh! I also really love the left door.

  • 10 years ago

    Wow, totally impressive! Pat yourself on the back. Are the deets available for parts 1 and 2; I'd love to read it

  • 10 years ago

    "...and seal myself on flooring"

    yep, that's exactly what I'd do if I was the one doing that actual work - seal myself to the floor! If I got down close enough to 'seal' it, I'd never get up again without a crane (or at least someone to help me).

    awesome that you can do it. Actually, when I was younger and agile I could do things like that (well, some of what you're doing). I always loved even working on cars (ok, mostly helping the mechanic - but I did replace a valve gasket, a thermometer and spark plugs many, many yrs ago). These days, I'm lucky to get the power steering cap off to add some in. My hands and fingers don't always do what I think my brain is telling them to do...

  • PRO
    10 years ago

  • 10 years ago

    Hi Beachem, which door profiles did you get from Conestoga and which white color did you get?

  • 10 years ago

    I admire you for digging in and getting down to business.

    I was raised in a household where girls did not get instruction in carpentry and other 'manly' pursuits. My father has long since seen the error of his ways. Women with power tools, unite!

  • 10 years ago

    @Mgmum & desertsteph lol I've caused nerve damage in my hands and my left hand was paralyzed and frozen into a claw for several months from the flooring work. I didn't know not to put weight on the edge of my palm while leaning over to grout and seal.

    I will have to say that the DIY taught me that the butt has a lot of muscles. I had no idea until my butt got super sore and stiff from all the squatting.

    @Mags I've been documenting my "adventure" in flood remodeling for blog posts for my blog in order to help other people from making the same mistakes. Parts 1 & 2 are not on GW. I was planning to finish up the posts and start publishing over Christmas break when I get a chance. I've been so busy that I'm working til 1-2AM in the morning every day.

    @tiggsy the left door is gray. It's darker in person than what shows on the computer. I'll have to look up that particular door. I ordered 4 different door styles with custom detailing. That style is the final pick for my inset doors. The right hand side is the new dark roasted and most likely will be the style for the island. I'm waiting for the espresso doors to come.

    Here's a comparison with the other gray door and style

  • 10 years ago

    Beachem, girl you ROCK!

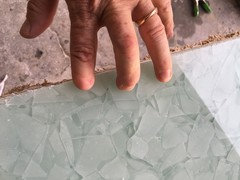
    Is that picture of Trebs fingertip cut off?!?!

  • PRO
    10 years ago

    "Is that picture of Trebs fingertip cut off?!?!"


    Yes. Thought you might like to see what a "klutz" looked like. lol. I'm pointing to a repaired crack in a glass countertop.

  • 10 years ago

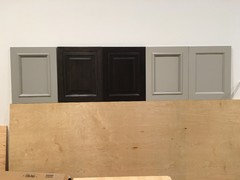
    Ok the last of the sample doors came in so now a final decision before finalizing the design and order the rest of cabs and door.

    Interesting that both grays looks almost identical at night with our recessed light.

    The details on the espresso cab got wiped out. It's the darker on right.

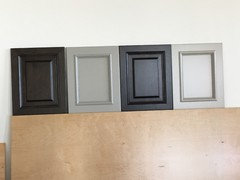
    Here are the doors in daylight around 1pm.

    You can see the undertones better on the grays. The left, honey roasted, actually look lighter in person. It's more brown vs the dark chocolate melt in your mouth I wanted.

  • 10 years ago
    last modified: 10 years ago

    Beachem, the middle gray in the last picture is my preference. I love that dark dark brown!

Sponsored
Mary Shipley Interiors
Average rating: 4.8 out of 5 stars34 Reviews
Columbus OH Premier Interior Designer 10x Best of Houzz