Software
Houzz Logo Print
brittany_harrison93

Help! Shiplap wall question

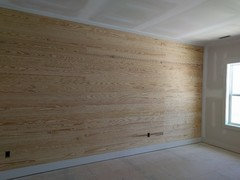
Our home builder put in a shiplap wall in the bedroom, but it currently does not look like one at all. They installed it with the planks tightly together - so no gap. He said that the wood will shrink to make the gap once the house is heated. Is this true? It just doesn't make any sense to me. All of the tutorials I've seen on creating this look require you to have space in there initially. They just painted it and it looks like a regular solid wall with a few pieces sticking up on some of the ends of boards. As it is currently I hate it...will it look different after hear? Any thoughts?

Comments (37)

  • 9 years ago
    Photo?
  • 9 years ago

    The boards are right up against each other with zero space between. I'll get a pic of it painted and close up and post tonight, but there is no space at all between boards.

  • 9 years ago
    Honestly, I think it is correct. We had a ship lap wall before Jo and Chip made it a thing. When it is in a old house it is the actual wall, so there is no way you would want it built with gaps. If you painted in white, maybe you can use a little gray in between the boards to emphasize them if that is what you are going for.
    Brittany Harrison thanked Pool Habit
  • 9 years ago

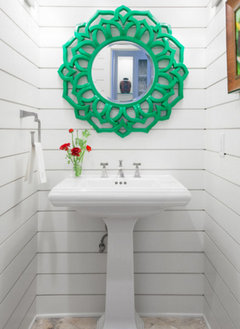
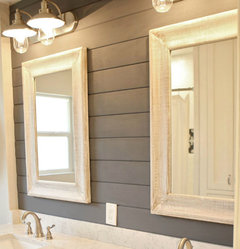
    All the examples when you google shiplap have a space between boards. I'll add a picture of it painted tonight - it literally looks like a normal wall minus a few bulges where the ends of the boards stick up some.

  • 9 years ago
    last modified: 9 years ago

    it looks like they didn't want to take the time to put spacers. but I think it will look beautiful with out the gaps.. (less dusting in between)..... just a thought ! also,, a stain would be way pretty !

    Brittany Harrison thanked Sapphire0905
  • 9 years ago

    It might look a little different over time but it will never look like the inspiration photos you posted. It needs to be redone to achieve that look. I'm sorry!

    Brittany Harrison thanked Artiesmama
  • 9 years ago

    That's what I thought @artiesmama - just wanted to make sure I'm not just clueless about wood haha


  • 9 years ago

    It's also not truly shiplap, what was put on your wall. Shiplap self spaces and you literally can't have shiplap installed without a space between. I have it in my home from long before Chip and Joanna reignited the trend. I do love what Joanna does but it's not exactly shiplap - https://thecraftsmanblog.com/no-joanna-thats-not-shiplap/

  • 9 years ago

    He is saying the wood will shrink - but it was installed in winter when it was cold (pre-AC install)...won't it just get even tighter in the summer? I'm just confused as to how he thinks the wood is going to shrink and create lines...?

  • 9 years ago

    i would be concerned with if they let the wood acclimate to the house. If they didn't then there will be shrinking, possible buckling, and warping if the wood was not fully dry and acclimated. unfortunately time will tell. Till then i would hold off with doing anything. It would take two weeks with heat and regular room temps to know.

    Brittany Harrison thanked Emily Marvin
  • 9 years ago

    Does acclimating count if it was in there before the A/C was installed? How long should it have been given to acclimate? I have a feeling they didn't :(

  • 9 years ago

    it depends on the moisture in the wood for it to be fully acclimated it should be at 2% which a moisture reader can do. I think you can get one at your local home depot or lowes.

  • 9 years ago

    Even if the wood were to shrink with the drier air of home heating, it's not going to shrink and stay put that way, just so, with the consistent channels you want. The boards will fluctuate with temperature, humidity and season.

    Because you've started out with each plank butted up tightly against each other, with no room for expansion, you could be in for trouble. I don't know what part of the country you're in, but if you have humid summers, you could be in for serious buckling problems.

    When you requested the shiplap wall, did you show the contractor pics of what you wanted? Or was this an option they offered? If so, did they show you any pics, samples, or installed examples? It may be that both of you bear some responsibility in not clearly defining "shiplap". If that's the case, and you want it changed now, you'll have to bear commensurate share of the costs. Or, maybe you could just wait til August when the boards start buckling and they have to take it all out and redo on their dime.

    Brittany Harrison thanked kchreg
  • 9 years ago

    That's just a wood wall. Shiplap is an actual product. Sorry, pal.

  • 9 years ago
    last modified: 9 years ago

    I live in Raleigh, NC. I think it's fairly humid in summer. There is zero space between boards - they are as tight as possible. It was a standard feature - not even an option to not have it. I attached a pic of what the contract shows - clear spacing between boards. I'm going by to get a pic of what it looks like in the model home too. (He told me they installed the same way in the model and later it somehow shrunk up into the "shiplap" look.) I have a feeling someone messed up and forgot the spacers and are trying to get by with it as is now. The explanation just seems crazy to me.

  • 9 years ago
    last modified: 9 years ago

    Looks like they owe you a new wall. Great that you've got the pics in the contract along with the model having the spaced planks, They probably just made those silly explanations hoping you'd just accept it. But, t hey don't get to unilaterally change a contract or re-write material science that dictates what will happen to those boards in N.C. in summer.

    Good luck!

  • 9 years ago
    last modified: 9 years ago

    Could you not route a small gap at the seams between the boards? Seems like that would be an easy fix.

    Edit: Also, I'm not a woodworker, so it's possible that suggestion wouldn't work at all!

  • 9 years ago

    Yeah it's definitely not tongue and groove that they used just flat wood sheets. Thanks for the input. I'm going to fight them on it. Clearly not shiplap look nor like the picture in the contract.

  • 9 years ago

    Yeah, the pic looks like the wood has beveled edges which yours definitely does not.

  • 9 years ago
    if that wood shrinks then you will see the unfinished wall behind the gaps.
  • 9 years ago

    'Your first picture looks like they put it up inside-out."


    I believe that is the issue.

  • 9 years ago

    Brittany Harrison - do you have a piece of scrap wood you could post a picture of? It would be helpful to see the back of the wood to see if it was installed backwards. If that is the case, your contractor would need to redo it.

  • 9 years ago
    last modified: 9 years ago

    Unfortunately not @smitrovich. They installed it one day - I never saw the wood before they put it up and there wasn't any laying around to see. I'll ask the contractor about the backwards thing though - that makes a lot of sense!

  • PRO
    9 years ago
    last modified: 9 years ago

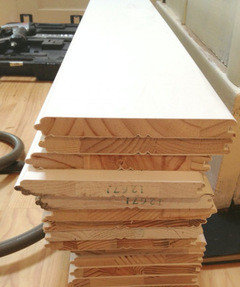
    This is ship lap…

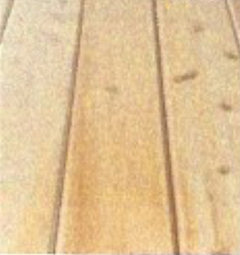
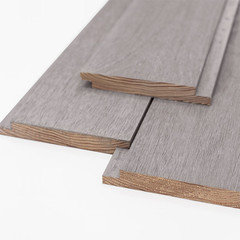
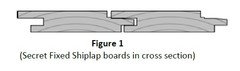
    "Shiplap, like tongue and groove, has a special rabbet or notch cut on the edges of the board. These rabbets allow the boards, when installed horizontally, to self-space themselves and keep water from getting behind them because they fit so perfectly."


    What Joanna is showing on “fixer upper” is not ship lap.

    Brittany Harrison thanked JudyG Designs
  • 9 years ago
    last modified: 9 years ago

    Great, thanks Judy! I'll point this out to the builder as well. The contract says shiplap wall, so what you've shown is what I should have gotten.

  • 9 years ago
    last modified: 9 years ago

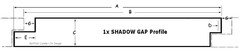
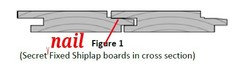
    No, THESE are shiplap. Judy is showing T&G beaded on one side and V-groove on the other.

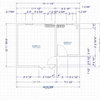
    The gap (G) is determined by the measurement of (E) compared to (D) as specified in the contract.

    Shiplap does not necessarily have a gap, such as "square edge, flush joint"

    http://www.buffalo-lumber.com/shiplap-siding.htm

    Brittany Harrison thanked User
  • 9 years ago

    I'll run by and get a pic of it up close and painted. I can't see any space between the boards what so ever - no groove, no line, no nothing. It looks like a giant regular painted wall except a few ends of boards sticking out a bit. I'll post the pic in the am - then it would be great to get your opinion again.

  • 9 years ago
    last modified: 9 years ago

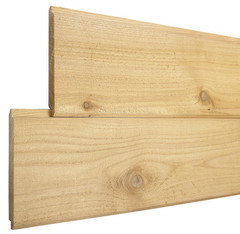
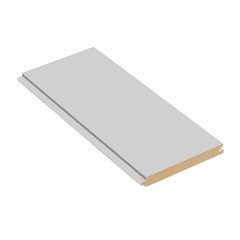
    The reason I said it was probably the square edge side of T&G is that shiplap has to be face nailed, and tends to cup or warp more between pieces. You may have wanted something more like this.


    .

  • PRO
    9 years ago

    Brittany, my understanding is there are many profiles in ship lap…discuss it with your builder…


  • 9 years ago
    last modified: 9 years ago

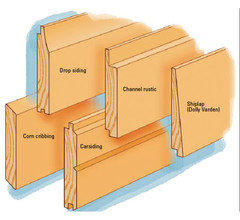
    Actually JudyG Designs, "Car Siding" or T&G (actually what you show in the 3 pict's are technically all different) is definitely not considered nor called shiplap. The first being T&G V2E & Center Match reverse. Pic #2 being Center Match V4E. And lastly #3 being T&G Edge & Centerbead & V2E Reverse. Your pictured "Dolly Vardon", "Channel Rustic" & "Drop Siding" are the only ones considered a "ship lap" pattern. All of these also have Lumber Association Pattern numbers associated with them as well.

    But getting back to the OP, from the pictures you posted it is impossible to tell what the pattern of the wood you currently have installed.

    Brittany Harrison thanked millworkman
  • 9 years ago

    The builder responded with: We use a yellow pine 1x planking that gives a knotty,rustic,uneven appearance. I'm going by at lunch to see what it looks like after it's had time to "settle" in another house. I'll add pics soon.

  • 9 years ago

    Doesn't sound anything like shiplap to me. Sounds like just sq edge boards.

  • 8 years ago

    wouldnt you just use the router on the boards' edge to give it a softness to create that look?


  • 8 years ago
    last modified: 8 years ago

    Any update? I am currently in a similar situation. Thank you.

  • 8 years ago

    To save wasting the wood you have got already and costing you a lot more money I would also agree with jehnlehr. This will mean taking the wood off the wall. Heartbreaking to do but it's the only sensible option. I assume it is screwed on so hopefully this won't be difficult to do and wont damage the wood either. You should number the boards with a sticker or lightly with pencil so that is easy to put them back up in the same positions later on. Then, using a router (a type of power tool) with a chamfer bit, run along the length of the two front facing edges of each board to give the bevelled edge that you want. Then when you put the boards back on the wall you'll have the effect that you're after. I should add that this is definitely not an indoor job as it creates a lot of dust. Good luck!

  • 5 years ago

    Did you ever solve this? Did the boards ever separate on their own?