Software
Houzz Logo Print
laura_larosa

I finally rooted a cutting!!!! Now what?

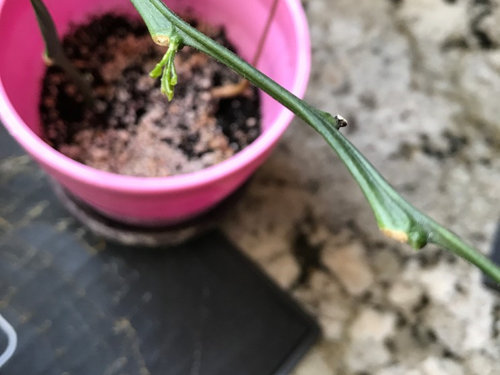
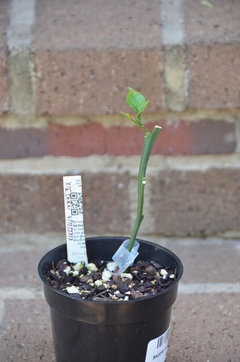
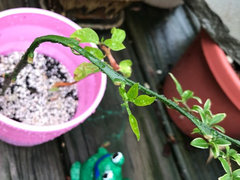
I am so excited! After so many failed attempts, I finally have a growing cutting of my cocktail grapefruit. It had a terribly long limb and I cut it and now it's growing. It is not in a great mix for long term and just started to grow today. How long should I wait to move it to a better mix and pot? Is it ok to put in 5-1-1 right away? I'm afraid to damage the roots during the transfer.

Comments (52)

  • 9 years ago

    Thanks guys! George, I will do just that. Sammers, I have tried MANY times and failed miserably, so don't give up!

  • 9 years ago

    Congrats Laura very cool seeing a twig come to life . I have cuttings of most of my tree's as a just in case the main tree dies. I would wait a bit before repotting the roots or a root will be very fragile at this stage.

    Brian

  • 9 years ago

    Well done, Laura! The very important thing that I want to tell you is, when you repot the little tree, leave the root crown little exposed, so your tree doesn't get crown rot. It happened to my cutting and the plant stopped growing, just hanging in there.

  • 9 years ago

    Congrats Laura! It can be a real form if accomplishment and by right it should be. It's not easy to be that successful without the right environment 100% of the time. Good for you. I too would leave it alone for another month r two until you see good growth in the season. If I were to re pot, I would put in in a small pot with a good mix, one that allows air but stay moist longer since the pot would be so small anyways.

    Good work. Fertilize it quite often to gain maximum growth while you can.


  • 9 years ago

    Thank you for all the great advice guys. I will definitely follow it. Mike, do you think 5-1-1 would be ok, or maybe 5-1-1 with a little extra peat? I still have some pro-mix...perhaps that while young?

  • 9 years ago

    Lots of drainage holes with ProMix, Laura :)

  • 9 years ago

    Congratulations, Laura! I hope the little guy does well. My dekopon, which put out two tiny leaves, all of a sudden died.

  • 9 years ago

    Thanks sunshine!! I'll do that! I'm sorry Vladimir!! That would be tough!!

  • 9 years ago

    I would not hesitate to use ProMix. I've got a bunch of seed grown kumquats in PM for a year now. I think I may have done 2:1 PM:perlite. If you have vermiculite it might be good to put on top of soil to reduce damping off? I've just started experimenting with this so I don't know if it works for citrus.

    I feel like using the potting mix rather than 5-1-1 might be better for root formation at first (i.e. the small ones), but I haven't been able to test this yet.


    Brian, I think we need to know your method, sounds like you have success getting them to root.


  • 9 years ago

    Yes, hibiscus, I wondered about that also and Brian has great success with pro-mix...yeah Brian, fess up...what do you do to get those cuttings to root?

  • 9 years ago

    Laura, good luck with rooting that little critter! The stem is so green at that stage it must be contributing significant photosynthesis. I'll second the recommendation to give it some time in that container. I was amazed at how fragile the roots were on some air-layered branches I tried a while back. The roots were so fragile they would just pop off with any weight from the root media.

  • 9 years ago

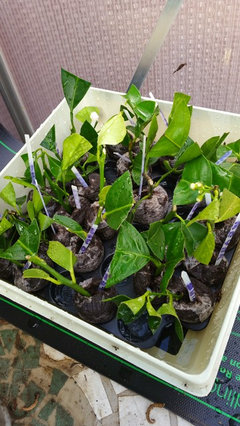
    Lol Laura and Hibiscus I dont use pro mix for cuttings I use those Jiffy disks I believe that's what they are called they expand when watered place them in a small GH with a heating mat. Very funny guy's.

    Brian


  • 9 years ago

    Hi Laura, Hibiscus I was able to find a pic taken a couple of winter's ago . The cover was off so I could water .

    Brian

  • 9 years ago

    Brian, what are the cuttings in? They look great!

  • 9 years ago

    Laura they are in peat pellets the expand as soon as they are watered . Laura when I place the top on I don't place it on tight I leave a very small opening .

    Brian

  • 9 years ago
    last modified: 9 years ago

    Thanks Brian! That is great to know! I may need to get some of those! I think I see a heat mat below, right?

  • 9 years ago

    Your very welcome Laura . Yes that is my heat mat below . I found it packed away in a box the other day I was so glad I thought I lost it .

    Brian

  • 9 years ago

    I have a few other cuttings that I'm optimistic about - still green. One is a ST cutting. I hope it takes! I'll report progress as it occurs. Night!

  • 9 years ago

    Congrats Laura ! That is so exciting!

  • 9 years ago

    Good job Laura! I think I am ready to pot up the bigger one of these cuttings. I am just worried about potting up too big. I do see roots at the bottom of this little pot. I was thinking of a 1 gallon but is that too big? Pictured here.

  • 9 years ago

    That pot looks way too big I think. Will try and find something half size.

  • 9 years ago

    Nice job Hobby!!! What varieties have you rooted?

  • 9 years ago

    What technique did you guys use? Just dip the cutting in rooting powder and put it in the dirt? I'm just curious as to how you got them to root.

  • 9 years ago

    Amanda, I've tried so many times and failed that I am not sure I am the right person, but I can tell you what I did this time.... Cut right below the next node (that is where roots will grow from), dipped in rooting hormone (I used a liquid one), put in peat, watered, covered partly with a ziplock bag, and put on heating mat....watered daily and crossed my fingers ;-). Hobby, can you tell us your method? And Brian uses those peat chips that expand with water. I ordered some of those.

  • 9 years ago

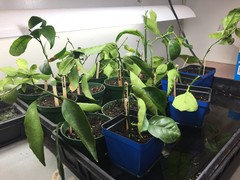
    I'm no expert either, I would say my success rate is about 20% but these 2 that have made it are doing pretty well. They are a meyer and a bearss lime of course! I followed the process of someone else on the forum, I take the cutting and shave away the green stem with an exacto knife so the lignin inside is exposed all around just as far up the stem as the depth of the mix. Then I make a hole in the potting soil with a pencil and dip the cutting into rooting hormone and then into the hole and then tamp down around the cutting. Then they go into a watery tray on top of a heat mat under lights.

    These 2 cuttings took an entire year to start growing. Here is my newest batch from yesterday:


  • 9 years ago

    It's interesting that even in super boggy wet soil last year's cuttings grew nicely, I can see the roots just a little bit at the bottom of the pots, nice white roots. I think the bottom heat is key.

  • 9 years ago

    A good and simple enough article on cutting propagation is this one. There are many others too.

    Hobby: shaving the green part of the stem is used for air-layering - not for cuttings. Roots grow from the living tissue just under the bark if there is any bark. If you take that away it is unlikely to root.

    To increase chances of success bury at least one node if not two. The nodes are active sites of cell division and are more likely to mutate to form root cells.

    In summer, heat mats are not usually necessary and can in fact be a negative. Ideal soil temperature is around 75F but it varies by species. Once roots have formed it is better to make sure that that heat mat is turned off during the night. Or use a temp controller to bring it down to 65-68F. This needs some experimentation since different species have different ideal environment.

    Maintaining high humidity is important too. But not soggy wet - otherwise fungus will take over quickly. Good idea to "burp" the humidity chamber once in a while. Usually misting/watering is needed for several days if you have a humidity chamber. If you do mist keep the chamber open to make sure accumulated water on leaves have mostly dried out.

    A good product is DynaGro's KLN rooting solution - the same company that makes Foliage Pro. You can use that as dip and also as a mist. Works wonders.

    If you want to increase your chances more then treat the soil with a fungicide of your choice before planting your cutting or sterilize your soil. My preferred medium is 511 where the bark is all below 1/4. Add some bits and pieces of sphagnum moss which has natural anti-fungal and anti-bacterial properties. I use the same mix for air layers.

  • 9 years ago

    Couple of pics.

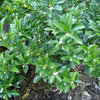
    The first one is Xie Shan. This was sent to me for grafting but my roostock was not ready. It had produced two tiny leaves just like the original pic by Laura in this post. In the last few days one of the leaf started getting bigger. So it is doing something down below - hopefully. Started in mid april. If it produces another leaf then I will start introducing it to the environment outside of the humidity chamber.

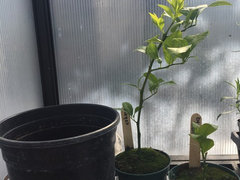
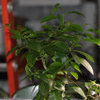
    The next one is Chinotto orange ready for its new pot. I think I started this one in January. It is already hardened to be out in half a day of Sun.


  • 9 years ago

    Tropic, that is fantastic information. Thank you for sharing! I am going to try and take some cutting this year when it comes time to prune.

  • 9 years ago

    Thank you for the information guys. Tropic thanks for the article! Hobby, I am glad you have those two and hope your new ones grow well. Tropic, yours look great!! I want to prune Alexander a bit and considered taking the cuttings and trying to root them, but I have soooo many trees...and seedlings...I don't know...plus, I certainly do not need any more Meyer lemons ;-)

  • 9 years ago

    Laura, I don't want any duplicates as of now due to space, If I mange to get any to root I plan to trade/gift them away. I think they would make fantastic gifts paired with a little "Instruction manual" or hopefully I will be able to trade for other plants that i'd like in my garden, i'd love to trade for different citrus cuttings but I imagine that most people already have the varieties that I would have available. I was taking a look at my trees on lunch and the Oro Blanco has at least one crossing branch that I want to take off so i think that will be my first attempt.

  • 9 years ago

    Sammers, I agree with you. I will probably give them away, but after growing them up, it is hard...I become attached ;-)

  • 9 years ago

    I can't see myself ever saying I have too many meyers! John are you listening???? Or any citrus for that matter lol. Maybe calamondins, you can probably end up with too many calamondins lol.

    Good info Tropic... however mine were super wet and on a heat mat for an entire year and seem fine. Looking forward to repotting and seeing the root development. If it's exciting I will post a pic. :).

  • 9 years ago

    I had another cutting that formed the bumpy root nodes all over the stem where I had shaved the bark but never ended up forming roots so I chucked that one.

  • 9 years ago

    Thanks Sammers and Laura.

    When taking cuttings I tend to favour partially hardened branches as opposed to purely green ones. Also I favour ones where the nodes are fairly close to each other but always possible. Leave only 2-3 leaves of about 1 inch length. If they are longer then cut them in half or more as needed.

    If the branch is woody you are better off air layering. It is nearly a sure shot way of propagating in a much shorter time (during peak growing season). You can also leave flowers and fruits in the air layered branch and you will end up with a new plant with a few fruits on it. Here is something I wrote on air layering a japanese maple but it will work with citrus too. If you start now you will have a new plant in about 2 months.

  • 9 years ago

    I want to learn about air layering Tropic and will certainly read what you wrote....after my 6 year old goes to bed ;-)

  • 9 years ago

    LOL. Hobby...I thought John would object after I wrote about the meyers ;-)

  • 9 years ago

    A bunch of posts appeared while I was lazily editing mine. Anyways.

    Hobby: Without looking at a picture I cannot be entirely sure but I would bet that the bumpy root nodes are the cambium layer trying to form callous around the wound. It is like when you cut a branch it forms a callous and tries to protect itself. If the cut is smooth then the callous is usually smooth too. But if the cut/wound is rough then the callous is bumpy and malformed. This is the reason for making the cut smooth, clean and the smallest possible. After it has calloused roots can form. Some plants like basil or coleus will not miss a beat and start forming roots right away and d o not need to form callous. Succulents want to callous in dry conditions for a few days otherwise it will rot.

  • 9 years ago
    last modified: 9 years ago

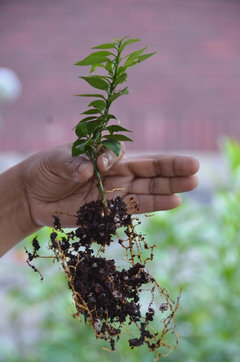
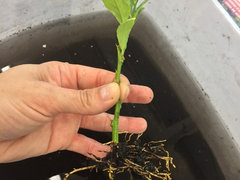
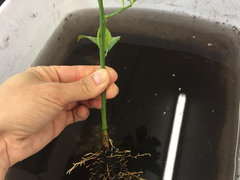
    Here's the smallest one, the bearss.

    And here's the Meyer.

    Pumped! I'm pleased with these. It seems Tropic yours rooted faster as mine have taken a full year to get here so maybe that's an advantage.

    From looking at your pic as compared to mine I think my roots formed over about an almost 2 inch span of the branch, where I shaved the bark, whereas your roots seem to sprout from the cut end. So that's a good thing no?

  • 9 years ago

    Good tips about choosing cuttings with lots of nodes though... I think these cuttings actually came from branches that were broken during a nasty hail storm we had last summer, so I just made the best of what I had.

  • 9 years ago

    Laura if you want to practice air layering try it on one of your figs. It is super easy you pretty much can't fail with figs. I think there are tons of good videos on the fig forum.

  • 9 years ago

    Wow Hobby and Brian, totally impressed!! What good systems..I just stick mine in a pile of bark mulch or in my pond and hope for the best, They usually root but now I want total control ..Thanks

  • 9 years ago

    A couple days worth of growth...

    I put it outside. I move it to the shade during the bright sunny hours, but left it out today bc it was cloudy, plus we got a nice rainstorm.

  • 9 years ago

    Laura: Looking pretty good. Expect to stagnate for a bit and another growth spurt.

    Hobby: You have pretty nice roots there in your cuttings. I suspect that the roots grew out of the calloused regions. They are supposed to do that. Yours have a longer region of callous and thus roots. The only thing I can think of is that you did not scrape the outer layer all the way to the core and so there was some living cambium left (it happens quite often). So your callous formed along the length of the stem. Nevertheless, it looks pretty good.

    Mike: I often do just that. In summer, I would stick cuttings under a bush or some shaded region in the yard and hope they would root. Some make it and it is always fun to find the few that survived the ordeal. I have rooted many evergreens (junipers, cypress, false cypress, boxwood, and recently a dwarf yew, etc) like this. And tropicals like ficus of various kinds, serissa, etc.

  • 9 years ago

    Wow I can't believe how easy you guys make propagating trees look! I have a weird downward growing branch on my calamondin that I have been thinking about trimming but I will study up more on all this information and try to root it! Thanks for the information everyone! It would be cool in a couple of years if I could root some cuttings, grow them up a bit and give them as gifts. Talk about a labor of love!

  • 9 years ago

    So what are you saying Tropic, that some scraping is fine as long as you don't scrape too far down into the cambium?

    So far with my observations on my newest cuttings, it is true that the older the branch the better chance you have. That being said, I have never used brown wood, only green, and the thicker water spout type branches seem to look the best. It's early days yet though with this newest batch.

  • 9 years ago

    hobby: Best is to not scrape the bark at all since you risk damaging the cambium layer. For most tropical woody plants best is semi-hardwood cuttings. For citrus when the branches start to harden with a some bark with bits of green stem still visible. Hardwood cuttings are harder to root. Softwood cuttings tend to be very slow and can fail prematurely.

    Cut the stem at slight slant just below a node. Make as clean cut as you can with a sharp knife - just like you would do for grafting. Poke a hole in the soil mix and place your cutting in the hole and firm the soil against the stem with your fingers. If you jab the cutting in the mix you again risk damaging the exposed cambium at the cut end.

    If you use rooting hormone use the .1% or .2% IBA ones. Not the .8% one. Sometimes rooting hormones can actually prevent root formation.