Software
Houzz Logo Print
cassandra_wright68

What isn't working

Inspired but Anna-Lyssa's comment about discouragement I thought we could post spots that just aren't working and maybe offer advice.

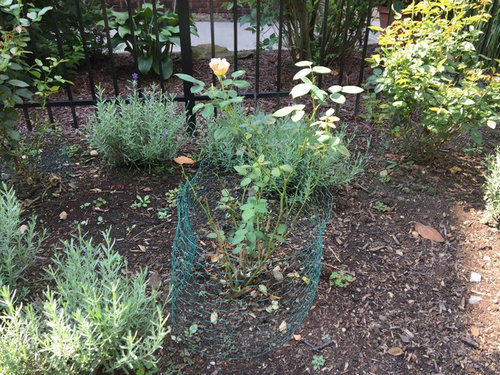
Below is a combination I threw together with various pot cast offs and a Twilight Zone (not an OGR, sorry!) that looks kind precious to me. Light purple, large flowered clematis, TZ, a few struggling Siberian iris and variegated sage.

Fussy, too many little accents that are all the same size. I like the heliotrope (bottom left) but there should be more of it. Need something bigger than lamb's ear and hostas but smaller than the roses to fill in. Starting to think it's best to have only three types of plant in each bed. Combining more than that is an art too easily thrown off balance.

Below is Carding Mill. It's six years old, own root and heavily infected with Rose Mosaic. Should probably shovel but I love the flowers. Anyone think I should give it more time? It's only been in this spot for two summers so maybe it needs more time to settle in? I'm pleased with that lavender though. We live in an area where lavender usually struggles so I've never planted it but I'd call this a win.

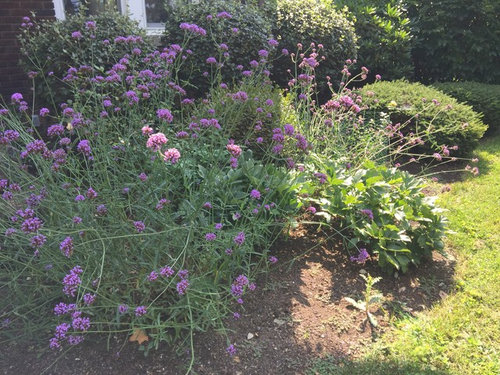
Ha. Verbena Bonariensis was way too big for this spot. It's swallowing up the Itoh peonies and two good sized Lady of Shallott.

Comments (16)

  • 9 years ago

    Cassandra, I can't even see a problem; all I can see is that everything is green i.e. not drought-stricken, and that blinds me to everything else. I can't fault the verbena because I happen to love purple. I can't post my failures because the whole garden looks like a failure right now. I must admit that I personally prefer not to have too many different kinds of plants together, but that's mostly because I'm not good at it and my climate is not friendly to all the pretty little blooming things; six to eight months without rain does not please them.

  • 9 years ago

    Cassandra, I like the verbena too. I think you just need more time for things to fill out. If they won't cooperate in your location you could remove stragglers and double down on winners. I don't really think you can always tell ahead of time what will love it's spot. Here, some of it is watering effectively, that determines success or failure, but there are so many other factors. Some of my clematis are doing so much better than others. I wonder if it is the variety or the fact I put triple phosphate under some and not others. I read how the phosphate impaired mycorrhizal fungus functioning if applied, but I'm not seeing it. I think the phosphate treated are doing better.

  • 9 years ago

    Cassandra, your grouping looks like it was planted correctly. It takes a full season, sometimes two, for a perennial planting to fill in and give you the full effect.

    Remember perennials can easily be rearranged, so if at first you don't like the result plan to switch things around until you do!

    I usually plant perennials in groups of 3 or 5, more in the case of spiky ones like phlox. I like each group to be somewhere between the size of a large dinner plate and a-- hula hoop!

    I love Sheila's advice about doubling down on the winners. The thing is to try lots of different things and see what does well for you.

  • 9 years ago

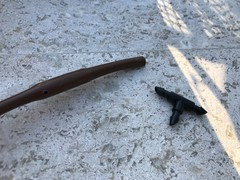
    I found drip irrigation hoses with the emitters built into them. So now, compared to these awesome new hoses, my old drip irrigation just isn't working. At some point, probably spring, I will be redoing the old front yard drip system with these awesome new hose systems. Luckily it's super easy since there's not drip emitters to install, just hoses.

    Photo from: http://www.rainbird.com/homeowner/products/drip/EmitterTubing.htm


  • 9 years ago
    last modified: 9 years ago

    The issue with these hoses is that the emitters are installed in fixed distances (there exist hoses with different emitter spacing). These are suitable for plants arranged in roughly equal distances having similar irrigation needs or for a densely planted bed but are not suited for irrigating shrubs planted in varying distances and/or having varying irrigation requirements. They are mostly targeted to the professional field growers growing plants (e.g. vegetables) in nicely arranged rows. They are also not very good in case the water is very hard because if an emitter blocks from salt buildup there's no way to individually replace or clean it. You will have to cut out that part and patch a new length of hose in its place. Too much patching causes flow problems.

  • 9 years ago
    last modified: 9 years ago

    I already installed them in the back yard Nik and they are working great for me. I do a circle around each plant with the smaller tubing, connected to the larger tubing by a T-connector. The larger tubing could either be the brown tubing with the emitters pre-installed, or it could be typical black tubing with no emitters.

    I do a perimeter with the larger tubing and also rows (since that is how my plants are set up). If there are expanses I want to connect where there aren't plants, I just connect it with the typical black hoses that don't have emitters.

    In this way, shrubs have a circle of emitters around them. It's more even for the roots. And if one emitter gets clogged, there are still others all around it. If they really need to be replaced, you can just replace the whole circle without cutting the main line. No flow issues.

    That's the way I have always done installations in the past with the typical black hoses, but then I also had to install emitters every few inches. It was such a pain. Literally. My hands pained every time I had to do it. I could only do so much in a day. These hoses are wonderful that they already have the emitters installed... that's the whole point! It's not a problem at all for me! :-)

    All the problems you listed happen with regular drip irrigation too. But with these, my installation time was cut down by at least 3/4. And no pain! :-) I love them.

    The drip irrigation I have in the front yard is all the older style of black hoses with individual drip emitters installed. It's a few years old. Compared to the new ones, they're just not working at all. Because install with the new ones is so easy, I'm actually looking forward to it instead of dreading it. :-)

  • 9 years ago

    Looks like this...

    Works great for fruit/citrus trees too.

    Please excuse the dust. We have a construction project going on in the backyard.

  • 9 years ago

    We used to have green soaker hoses that are made of relatively thin material and they always leaked very quickly. We then discovered the brown ones Cori Ann has which we use along a line of rosemary bushes with a section of lantana for which hand watering was completely ineffective. Now this area looks so much better, and the lantana is blooming rather than being a shriveled mass in the summer. We haven't had this system long enough to see whether salt build-up might be a problem. So far so good. I've never seen the circular ones that are connected, and don't know how that would work for large tea roses, for example. If you install them when the rose is still young it should work very well. It's definitely something I'd like to try. Thanks Cori Ann for introducing this new idea.

  • 9 years ago

    You're welcome Ingrid. It's a trick that is used for many who grow citrus or other fruit trees trees, so I think it would work well for large tea roses too. It's important to remember that as the tree (or rose) grows, it has more roots spreading out. With this way you can address that by simply making a new, larger ring around the root zone as it grows. Super simple! :-)

  • 9 years ago

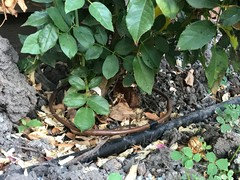
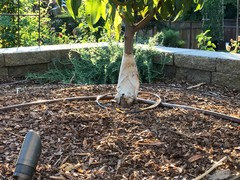
    I'm actually making a few "circles" this morning so here's a closer look...

    1/4 inch hose and T connector

    Pop one end in (this part is still hard on the hands, but much easier than doing it over and over again with emitters)

    Connect it around the plant, then pop the other part of the T connector in the main line. :-)

  • 9 years ago

    Cori Ann,

    take a thermos of hot water out with you, stick the tubing ends in for a few seconds before you put the connectors together...even easier!

    i don't even make circles around individual plants with that kind of tubing (which I have been using here for about 6 years) just snake it around the bed, easy to see where the emitter bulges are, make sure at least 2 are pretty close to each rose, or plant the size of a Rose, more snaking for trees, plants will run their roots to the water, they know what is good for them. And of course, heavy mulch over once you are satisfied that all plants are getting enough, then all you have to do is observe as you do other tasks. Catching problems early is key to good gardening IMO. <g>

    best

    claire

  • 9 years ago
    last modified: 9 years ago

    Oh so smart! Thank you Claire! If I wait until it's hot the sun does that for me... but you know.... then it's too hot to be out there working. The thermos of hot water is genius!

  • 9 years ago
    last modified: 9 years ago

    Cori Ann,

    Yes used in this way those tubes will work. I was thinking about the usual application of using large runs of them as Clair seems to be doing. This, as I said, will work in a densely planted bed but not for individual shrubs or trees. I use a different watering concept. I water in watering holes or rings around my plants and I use high flow emitters running them for a shorter time to fill those holes. Helps with my sandy soil.

    Ι also use the external sort of connectors rather than the internal ones. I find them easier to install, less prone to become loose and less flow restrictive, although they look bulkier if you care about such things.


    Btw, I would make those circles around those mature looking citrus much larger. They look to me to be too close to the trunk for comfort and not really in the feeder root area.

  • 9 years ago

    Thanks Nik. I will in time. They're not really mature... just planted in fall. It's the right size for now. :-)

  • 9 years ago

    Oh, the pictures misled me then.