Software
Houzz Logo Print
kenstl

Staircase Carpet to Hardwood project

9 years ago
last modified: 9 years ago

I thought I would start a post on a project we are undertaking of changing over our staircase from carpet to hardwood. This is DIY project and hopefully it it can be of benefit to someone else out there thinking of doing a similar project. I have to mention that the success of this project would not be possible without the help from my father in law and my wife.

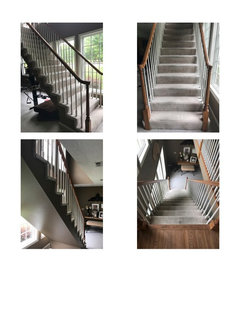
We have a staircase that is open on both side, heading in to our lower level / basement (atrium ranch home). I called a couple of stair contractors and neither of them was too interested in the project when they saw photos of how it was made and their verbal quote was out of our budget.

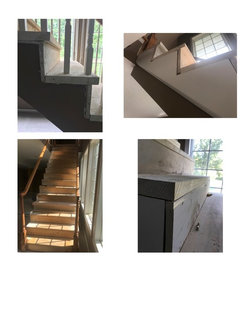
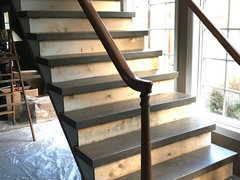
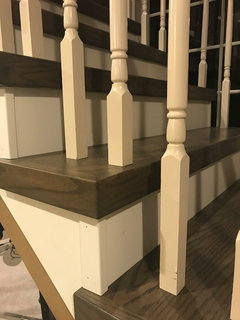
The staircase has treads and risers made out of lumber, and then finished off in drywall on the sides and undersides. After going through a number of options, we landed on using an overlay custom built tread in oak. One of the big issues was trying to put a plan together that would cover all of the gaps on the side of the staircase, so that it would look like a clean install vs a retrofit. The stair case has 14 steps and 56 spindles. So far we have completed the following steps:

1. We ripped off all of the carpet. It was really old and dry rotted on the window side of the staircase.

2. We cut out all of the spindles. We plan on reusing them, so we cut them off at the bottom with a reciprocating saw. We were able to pull them out (a lot of twisting and turning) without any damage to the top of them. We are hoping to be able to trim them to the needed length on the new install.

3. Cut of all of the "nose" off of the front of the treads. After cutting them off with circular saw, I then went back and used a electric planer to get the leading end of the nose flush with the risers.

4. The spindles had a threaded metal shaft in the bottom of them, that was screwed in to the stop. After cutting them out, there were some that were able to unscrew out of the step, others we used a grinder on the remnants to make them flush with the top of the step.

5. After a lot of brainstorming, we decided the best way to trim out the side of the staircase would be to install a trim piece which would give us something flush with outside of the riser and the stair tread. We made a cardboard cut out for a pattern, and they cut that pattern out on wood that was planed down to 1" thickness (the measurement from the outside of the staircase to the outside edge of the tread and riser.

I'll post some pictures of where we are up to this point. We are keeping our fingers crossed that this project will turn out looking like we hope!

Comments (12)

  • 9 years ago

  • 9 years ago
    last modified: 9 years ago

    More to come as the project progresses


  • 9 years ago

    Are you installing hardwood treads? If so, the normal tread thickness is 1&1/8" to 1&3/8" thick.

    Code requires a step height to be no more than 7&3/4" high. If the height now is 7" to 7&1/2" high, adding 1"+ treads means the height of the bottom step is over 8" and will cause trip hazards and falls. Plus, there cannot be more than a 3/8" difference between any tread heights---meaning the top step height will be less than 6&1/2" high---again causing a trip hazard.

    The correct way to get hardwood treads is to remove the current treads and replace with the hardwood treads.

  • 9 years ago
    last modified: 9 years ago

    You have to actually rebuild those stairs. Creating a safety hazard in your home by making them deliberately out of code removes any insurance protection that you might have. You have a huge liability there.

    And that is why contractors are hesitant to touch stairs. They can never really charge enough for the actual labor involved. And the huge liability.

    Time to pay an actual Pro the going rate for a stair rebuild.

  • PRO
    9 years ago

    "They can never really charge enough for the actual labor involved."


    I don't even propose them any more. I'm probably 0 and 15.

  • PRO
    9 years ago

    kenstl:


    You may save this project if you use the laminate stair treads with nosing; they're about 1/4" thick and very tough. You'll need some sort of skirt board detail or set up a router in a jig to make return ends. Ugh. Hope you've got lots of time on your hands, you're going to be spending it now.

  • 9 years ago
    last modified: 9 years ago

    I've had contractors build stairs for carpet and exterior stairs. It took 2 people 1 day to build carpet-ready stairs with to-code winders to a bonus room converted from an attic. (Winders were only way.). Balustrade took another full day. Had to do a section on the first floor and around the stairwells. Then I had to paint every. fiddly. primed baluster. They were on a kind of sidewall because you don't usually put the balusters on the stairs directly for carpet. still took a full day.

    Multiply all that by 1.5 to three for stained stairs

    Carpeted and uncarpeted stairs are built very differently. Neither is toonhard if it runs between two walls, (if they aren't too off square) but the balustrade on stained ones are beasts.

    You can keep the stringers...maybe. The rest is a rebuild.

  • 8 years ago

    Lots of negative waves here! :) We did a lot of thinking and measuring before we jumped in on the project. The above you issues you have all mentioned were big concerns of mine as well, but a lot of details fell in to place.

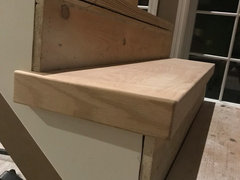
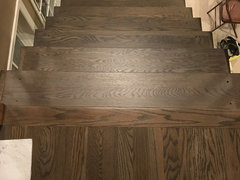
    I ended up ordering oak stair treads that were made to order. 1/2 thick on the main tread, return on front and both sides at 1.5" tall (to wrap existing tread), with a 1.5" return extending past the tread. They look very nice and appear to be constructed well. Prior to install, they will get stained and sealed when we get our hardwood floors refinished in a couple of weeks.

    Regarding liability and code, all of that has been taken in to account and they will actually be better than the original build. On the staircase, the first step from the top, just happened to have a higher rise by 1/2" than all of the other stairs, and the bottom step happened to have 1/2" less than all of the other treads, so after the retrofit they be more in code and consistent throughout the staircase than they were before the retrofit.

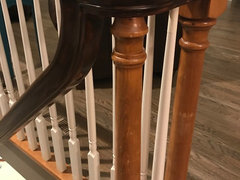
    After removing and numbering all of the spindles, we were able to take out the threaded shaft in the bottoms, cut 1/2" shorter and reinstall a wooden dowel back in its place which will fit in to the drilled holes on the tread. We made up a plumb bob with a dowel rod that fits in to the hole on the underside of the railing. When plugged in, it will give us area to drill the hole for the spindle. There is enough play on the top end of the spindle in to the railing that we will be able to raise them enough to install the tread, lower the spindle base dowel in to the hole, and then secure with a brad nailer.

    So far so good. Our floor refinishing got put off for a couple of weeks as prior to doing the floors, we had a contractor remove all of our popcorn ceilings in our vaulted living room, kitchen, dining room, mud room, and hallway. That should be removed and painted by within the next two weeks, and the floors are scheduled for Oct 18th.

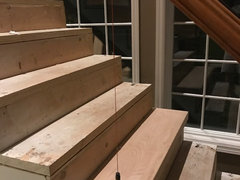
    In the interim, I have dry fit all of the treads and numbered them for the steps. Many of them needed some light sanding on the inside of the side returns to properly fit over the exterior trim piece we installed on the sides of the staircase. We will be now be dry fitting, plumb bob, and drill the holes for the spindles so that once the steps are stained, we can do the final install.


  • 8 years ago

    We dry fit all of the treads, plumb bobbed the holes for the spindles and drilled all of the holes. At this point, we are on hold until the treads get finished on the 18th of this month. Can't wait to install the, they looked great on the dry fit!

  • 8 years ago

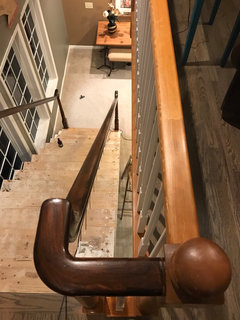
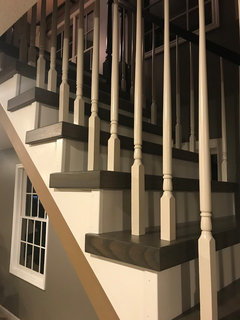
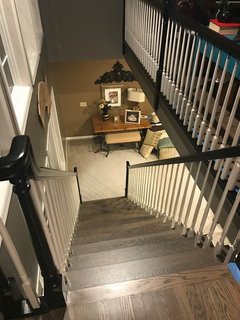
    Update! We finally have finished our floor refinishing which at that time, they stained the treads as well. Attached are a couple of photos. They are not installed yet, but they wanted them set in place to make it easier to stain. I also include a photo of the handrail that we are now staining. We are using a gel stain. Hopefully we will permanently install the treads next weekend!

  • 8 years ago

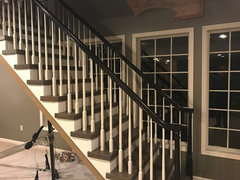
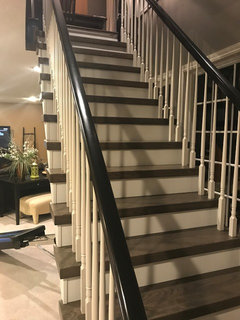
    It has been awhile, but short of some final touch up paint on the trim, we are done with our staircase! I have attached some photos. It's not perfect, but it turned out in great in our eyes. The treads are level, rises are consistent throughout, the refinishing matches our floors, the spindles went back in how planned, and my wife did a great job on the hand rail! It took a lot of time to get it done as we only worked on it for a few hours each on the weekends when we had time, but we could of never afforded to hire someone for the job. Anyway, hopefully posting the process can help someone in the future if they decided to tackle a similar project.