Software
Houzz Logo Print
bossyvossy

Amaryllis Quartering: an experiment

8 years ago
last modified: 8 years ago
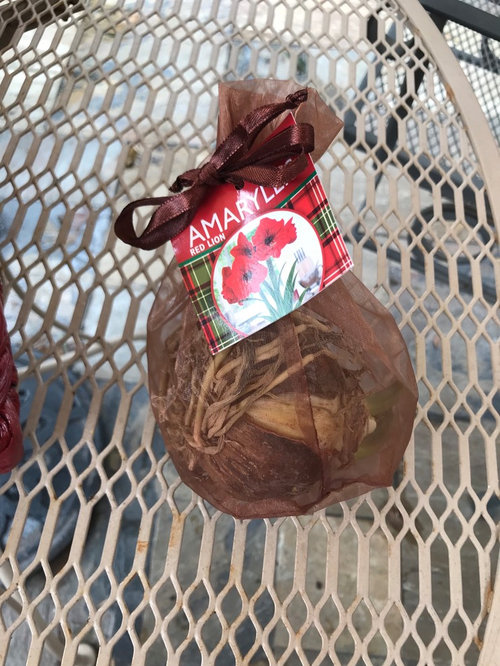
I finally got around to buying a Red Lion bulb for propagation by cutting the bulb in sections, aka quartering.

Not the best bulb, but for 4.99, meh

Comments (48)

  • 8 years ago

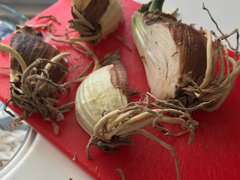
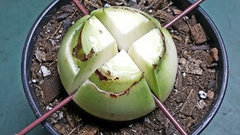
    I cut in quarters, making sure there was some basal plate in each piece. There was a video that showed the roots cut off, but I chose not to remove them, for


    no particular reason. Use a sharp knife.

  • 8 years ago
    last modified: 8 years ago
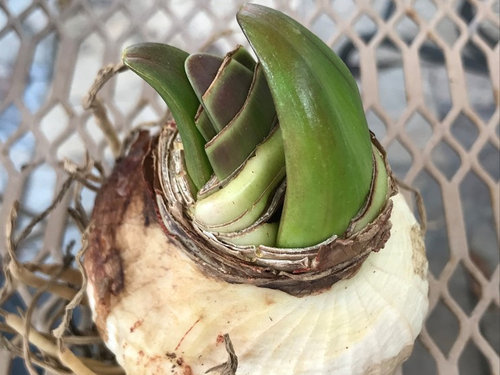
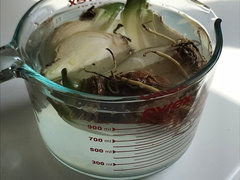
    I made a fungicide using 1


    oz Clorox in 4 cups of water. I dipped the quarters for a few minutes. Meanwhile, I mixed 1/2 vermiculite and 1/2 perlite as my potting medium for this experiment.

  • 8 years ago

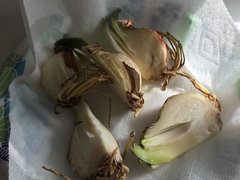
    The quarters were thoroughly dry before potting in the vermiculite/perlite mix

  • 8 years ago
    last modified: 8 years ago

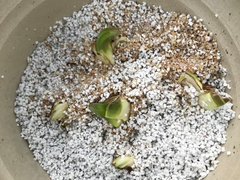
    Here are potted quarters (I actually ended up with 5 pieces). I have no idea what to expect but I will post here as it progresses. I read somewhere that it may take years for quarters to bloom. Since they’re not expensive, propagation by quartering may not be the most time/cost effective alternative. I did it out of curiosity and b/c as an amaryllidaceae lover, one can never have too many bulbs,

  • 8 years ago

    Hello bossyvossy !

    It will be interesting to watch the process! Good luck to you!

    Best wishes,

    Elena.

    bossyvossy thanked Elena75
  • 8 years ago

    I can't wait to see what happens. About 3 years ago I did the same thing with Little Devil and I got 4 plants from 1 bulb. I hope you're successful, even if it's just for an experiment.

  • 8 years ago

    Fred, have yours bloomed?

  • 8 years ago

    Yes they have :-)))))

  • 8 years ago

    This should be interesting! I’ve wanted to try this myself, but never have. Best of luck!

  • 8 years ago

    This sounds very interesting. I have two large white ones that were take from my mom's garden when she passed away two years ago. I have two sisters and each would like to have one but we are one short. I'll watch this experiment. So I'll know if I can do the same with one of these I have.

  • 8 years ago

    Fred, how long did your take to bloom?

  • 8 years ago

    Hi Cathy,

    Mine took a couple of seasons with no dormancy before they were large enough to bloom. Little Devil really lives up to it's name and the bulbs stay very small (2 1/2 to 3 inches across) before they're large enough to flower.

    Fred

  • 8 years ago

    So. When you propagate a bulb this way, it means you have to wait just like planting from seed. Only with seed, you don't know what you're getting. In propagating, the bulbs are true to the mother plant?

  • 8 years ago

    They will be true to the mother plant. Any type of propagation that preserves part of the basal plate (the rough disc on the bottom of the bulb where the roots come out) will result in a new genetically identical plant. The basal plate contains the stem cells where new growth can begin. Offsets break off of there and get pushed away as they grow, so they are also identical clones. Hopefully bossyvossy can send us more pictures since I have yet to see how the new growth comes out of quarters.

  • 8 years ago

    That’s the plan

  • 8 years ago

    That's a good plan. I posted on another string about another form of encouraging offsets. There's a YouTube video from AzFlora titled "Hippeastrum propagation by bulb cutting". It describes how to partially cut a bulb while still in it's pot, roots and basal plate intact and "forcing" it to produce offsets. I wish I could forward the link, but I'm at work and don't have access to YouTube any longer. Check it out, it's very interesting.

  • 8 years ago

    Fred, I saw the video and yes, very interesting. It saves on space and materials to do it like the video. If it succeeds, then you can invest on individuals pots for each offset. I can’t stress the importance of a super sharp knife. Man in video bulb cut from the top. I cut from the bottom to make sure I had a little bit of basal plate on each piece. But being my first time, I have no idea if one way is better than the other. Just gardening fun, at this point.

  • 8 years ago

    As for the fun part, I totally agree and I will be trying the technique of quartering the bulb from the top this weekend. I'll post pictures and keep you guys informed.

  • 8 years ago

    Yes. Fred please post pictures also. I saw the video and it was great. I may be trying it a bit later as I don't have the guts to cut mines yet. Lol. I'll have to wait until the many seedlings I have get bigger. Then I can practice.

  • 8 years ago

    Hi Cathy,

    I have a bunch (well over over 50) of the "common hippies" that are readily available from the local garden centers, so I'll choose one of them as my victim and I'll post some pictures.

    Fred


  • 8 years ago

    I wonder if the scapes can still bloom or not. If it can bloom, I'll try on my bulb.

  • 8 years ago

    zaflora video is in russian, but it's clear what he does. is it this one?


    he cuts in spring after flowering, 4 mo after cutting the first small leaves appear, 1 more month and he shows 5 small bulbs started. he lets it grow without dormancy till next spring and then separates the babies, without damaging the mother-bulb. he keeps it going for sev years. after 3 years it produced 30 new bulbs. not bad!

    after 3 years from the cutting the new bulbs bloom.

    his bulb is obviously planted very shallow. he does not say and it is not visible - the basal plate is kept whole uncut? he cuts very very carefully. that is the hard part.

  • 8 years ago

    Aha! I have a Green Valley that had crown rot but is still firm. I will experiment with it and cut like the Russian video did. 30 bulbs from one bulb! Not bad at all!

  • 8 years ago

    Good luck with your Green Valley, Maria! I would just hope that your NBF damaged Santos would produce 30 offsets...

  • 8 years ago

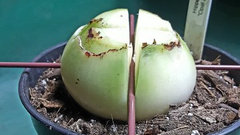
    So, here's my attempt to propagate my Opal Star bulb. I had this bulb outside all summer long so it has grown nice and plump. Hopefully I'll be successful and have some nice offsets.


  • 8 years ago

    OMG Fred, You're braver than I am, that first slice is the hardest with that shinny sharp knife!! I do it the coward's way, either buy another one or wait for offsets. Something really rare and special I wouldn't have the courage to do it anyway!! Good luck!!


  • 8 years ago

    so, fred! you cut from the top like in the video? how did you know when to stop?

    were you peeking inside to see if you reached the basal plate? or you stopped surely above it?

  • 8 years ago

    Is fall/winter the right time to do this? Video said after flowering so it was spring?

  • 8 years ago

    Hello All,

    I did cut the bulb from the top down and it was surprisingly easy but I did use a sharp knife as instructed. As far as knowing when to stop, I just cut about 3/4 of the way down and well above the basal plate. When I was looking at the video, I got the impression that this technique was being done at the end of the growing season, but in either case, it's an experiment and hopefully it will work out. I checked it this morning and the cuts are drying out nicely and I placed it in the sunny part of the porch. Time will tell and i will post pictures of how it's doing.

    Fred

  • 8 years ago
    last modified: 8 years ago

    quote:

    When I was looking at the video, I got the impression that this technique was being done at the end of the growing season

    - nope, he says clearly that he does it in spring right after flowering is finished.

    that is to say - when the bulb wants to grow...in prime time

    but then some people do not put them into dormancy. and if you have good conditions in winter - may be it's all the same? or may be it'll take a little longer?

    it's an interesting experiment!

  • 8 years ago

    Hi Petrushka,

    I have a heated porch that I grow all my tropicals and many hippeastrum that prefer evergreen growing conditions. Hopefully the warmer (60 to 65 degrees F) will be enough to convince it to start growing.

    Fred

  • 8 years ago

    Nicely done, Fred! Fingers crossed for you project. Please keep us informed! By the way, I think it would work on that heated porch. Usually they grow when it is warm and they have enough water.

    Anja

  • 8 years ago

    Good luck Fred! Maybe I’ll slice my Green Valley also one of these days when I get bored. Not much blooming here. Lol

  • 8 years ago

    If I were trying to propagate new bulbs, I'd cut the flowers off. Otherwise, the bulb quarters (quinters, because there are five? LOL) may use their limited energy for flowering, rather than creating new bulblets.

  • 8 years ago

    so, i guess this bulb was dry ,after dormancy?

    and now it produced new flowers! and leaves? and how lucky that you did not cut thru the flower bud when you quartered. yah, it's better to remove them, but still, flowering quarter! that something else :).

  • 8 years ago

    I’ll cut ‘em off

  • 8 years ago

    Bossyvossy, I think your experiment is great. No one said you would get blooms a few weeks afterwards. Now imagine that. You got three blooms from one plant. Congrats!! I thought you had to wait a few years before they bloomed.

  • 8 years ago
    last modified: 8 years ago

    Cathy the bulb I bought for my experiment was one that had been in a box for much too long so that flower was in the making b4 I cut it up. I would be truly surprised if the fifths bloomed again in 2018. With good care maybe 2019. We shall see.

  • 8 years ago

    Hi Jody,

    That's pretty awesome :-))) I hope they root beautifully and in time you'll have a pot full of them in bloom at the same time...that would be a stunning sight.

    Good Luck and Warm Regards,

    Fred

  • 8 years ago

    hi there - just following up on this thread to see progress! It would be cool to see where the bulb(lets?) were every month! I am so tempted to do this too - I love experiments!

  • 8 years ago

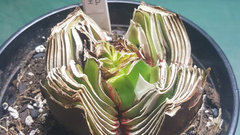
    Well, this is what mine looks like two months later.

  • 8 years ago

    Thanks for sharing Fred! I forgot you did this too!

  • 8 years ago

    bossyvossy, how is your experiment coming along? Fred, do you have any updates on your Opal Star?

  • 8 years ago

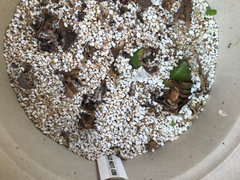
    I was looking for this thread. I recently took a pic but


    you can’t tell much from it. I have 3 survivors from 5 piece experiment.

  • 8 years ago

    I had a very bad mealy bug infestation and had to trim the scales. I had to resort to treating it with Bayer Tree & Shrub insecticide and now it's a waiting game to see if it survives. Very big bummer :-(((

  • 8 years ago

    Ugh... mealy bugs are awful! I just did a hot water treatment on several bulbs a little over a week ago because they appeared to have mites and mealy bugs. I treated with a systemic treatment twice, but it looked to me like the plants were still infested. I hope your plants pull through, Fred! Opal Star and her sister, Ruby Star, are so pretty!

  • 8 years ago

    Hi Jody,

    I wish you all the luck with yours. Mine formed a large central bulb that seems to be growing well and hopefully some offsets will form now that I have it growing outside.

Sponsored