Software
Houzz Logo Print
kpr121

Biergarten Greenhouse / Sunroom Build

8 years ago
last modified: 8 years ago
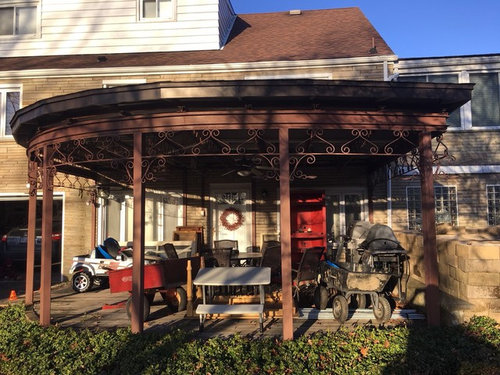
Well I had a much longer writeup but it somehow got lost in the Houzz stratisphere. This is the condensed summary:


Wanted greenhouse for overwintering, leafy greens, and most importantly a veggie plant sale that I have yearly benefiting the Walk MS Pittsburgh charity (my mother was diagnosed in 2016).


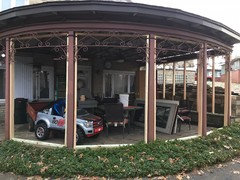
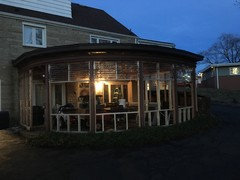
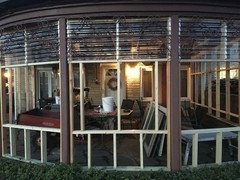
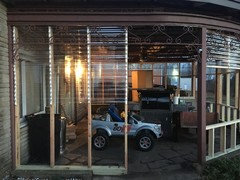
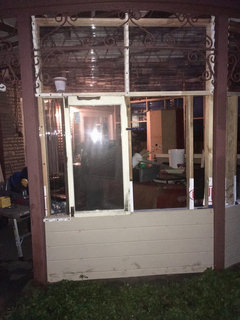
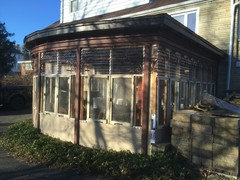
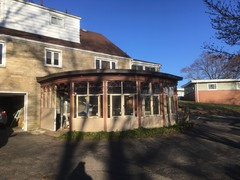
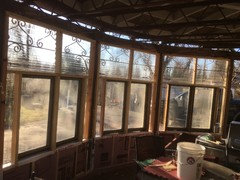
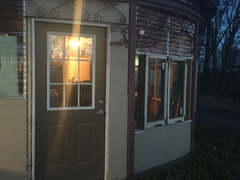
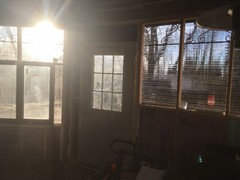
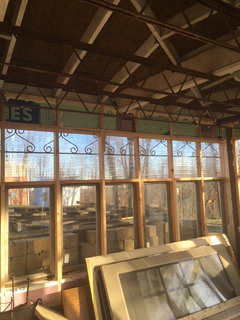
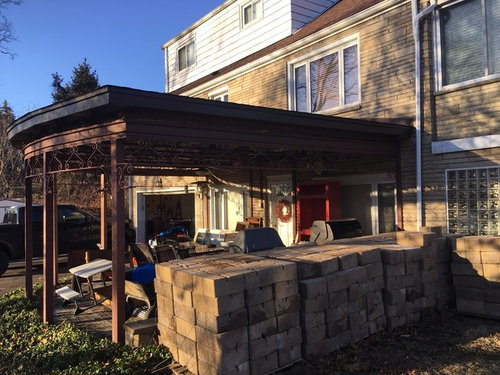
Was going to build something freestanding but decided to enclose my back southwestern facing porch instead. Photos for sunlight (taken at approximately 4:30 pm January 26). There is a decent sized magnolia tree directly behind me (you can see the shadow) that I've been ordered not to cut down.


We call it the "Biergarten" as the room directly to the right of the photos is my dedicated beer brewing/ wine making space.


Left:


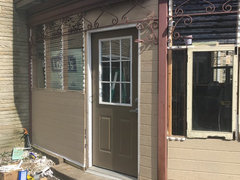
Right:


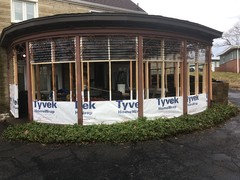
The right and southern (rounded) walls will be (from top down):

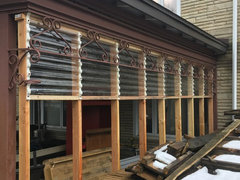
2 ft of polycarb clear (panels layed horizontally).

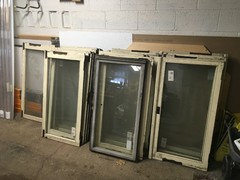
42 inches of single pane old window

~22 inches of insulated wall.


Raised bed planter on outside and possibly inside for planting space and also some extra insulation.

There will be a total of 16 windows. 8 on the right side and two in each 'bay' on the southern side.

The left side will hold a mandoor and likely be enclosed/insulated.


Final solution for roof is up in the air (ha!). I think we will want additional light so there will either be skylights added (where rest of roof had copious amounts of insulation) or the entire thing will be replaced with a polycarb roof).


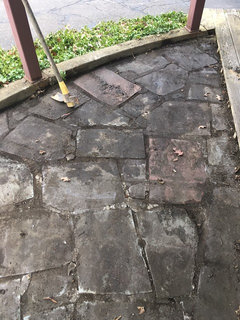
Floor - I pulled up an older wooden PT deck to find a nice (but busted up) hand laid flagstone patio. That will probably end up with a herringbone pattern of brick tile that I have a surplus of from a previous project.


The decking will be reused as potting benches, plant shelves, ect.


I am concerned about heating. The last thing I want is to spend $1000 a year heating a structure so I can grow a couple hundred dollars of plants.


I am open to any and all suggestions, conventional and otherwise. I've researched the various 'free' heating options including passive solar, active underground heat sink/battery, solar water heater, rocketstoves, and even exterior compost water/air heaters.

Comments (26)

  • 8 years ago
    last modified: 8 years ago
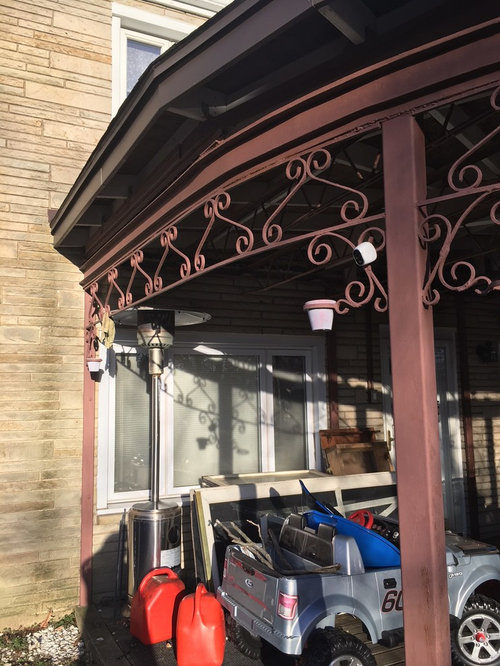
    Here is some of the framing started.

    Here is the flagstone patio (haven't clean it up yet):

    One of the trickier parts of this build is going to be sealing up the roof and top of the walls. The curved metal framework and the 'pie' shaped roof does not make for conventional soffet and fascia construction. I may end up using a PVC or other 'bendable' product. Maybe aluminum flashing but not sure how that will look or stay attached.

  • 8 years ago

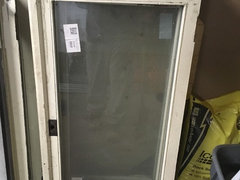
    Cold weather kept me inside but I was able to work on the windows. There are old, lots of scrap flashing, nails, and other junk attached. Also need to notch the backside of one edge since they were set up to swing open in a different way than I want. Still need to clean them up and hit them with some spar urethane or some other weather proof protectant.

  • 8 years ago

    How is the project going? I've always dreamt of building a greenhouse from old windows.

  • 8 years ago

    Hi PK. The project is coming along slowly with the weather we’ve had. I have all the wall framing attached to the structure. Next steps are to frame in for the windows, figure out some sort of soffit and facia to seal up the roof, and then start installing the polycarb panels and windows. Just need a break in the weather.

  • 8 years ago

    Got some good progress done today. All the polycarb paneling up, most of the rough framing up for the knee wall and windows, and walls attached to the ground and roof of the existing structure.

  • 8 years ago

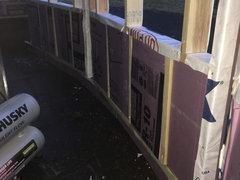
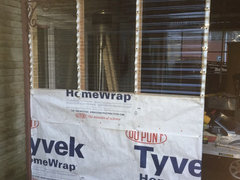
    Rest of window framing done. Tyvek and insulation paneling installed in knee walls.

    still to do:

    siding (t-111)

    window detail framing and sash install.

    door framing and install.

    soffit and facia.

    trim around the windows/siding

    seal up gaps (this one will be fun).

    once it’s all sealed up then I can do some of the more fun stuff:

    built in raised beds along the knee walls.

    island seedling / propagation table (which will have somewhere around 8 to 10 black 55 gallon drums as a base).

    potting bench(es).

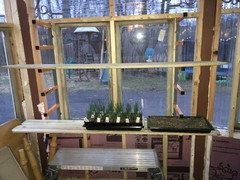
    Built in shelves along the windows. I’m planning on installing these so that I can move or remove the shelves easily depending on where I want the sun to hit.


  • 8 years ago

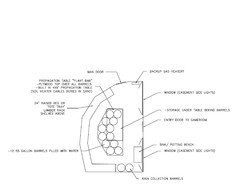
    Heres my rough sketch of how I'd like the greenhouse to be layed out. All subject to change, I am open and welcoming to any input.

  • 8 years ago
    last modified: 8 years ago
    Tranquil garden - that looks wonderful!! Are those auto-vent openers? One thing I need to work out... since I don't plan to do anything with the roof yet I need to figure out the best way to ventilate. I plan to make the windows be able to open out (hinged on top with a DIY bracket/stop to hold the window open on the bottom).

    I could put a couple auto-openers on those but not sure if it would let enough of the heat out. Other idea is to install a relatively cheap or even reused bath exhaust set on a thermostat through either the roof or up high on a wall.

    Also - what type of insulation did you do? Any below grade stuff? Any other tips or tricks you have from your build would be appreciated!!

  • 8 years ago
    Yes, they are auto vent-openers. I have a few posts on my blog tranquilgarden.ca on greenhouse design, features and the vent-openers. Just do a search (top-right magnifying glass) for greenhouse and you’ll find those articles. :)

    Insulation is basically either foam or fibreglass insulation in the knee walls. Nothing below grade but I think having the greenhouse close to the house helps to regular below ground temps.

    There are solar operated fans you can get - these would only run when you have sun and I believe also may only run if inside temps get to a certain level. But I like your idea of a bathroom fan with a thermostat. You can also hook it up to a humidity sensor or even get fans that have it built in. I have some old PC fans that I want to use to ventilate my greenhouse and also to circulate the hot air that accumulates at the top through the rest of the greenhouse during the cooler parts of the year when the sun shines.

    I’m also collecting rainwater from my greenhouse roof and using it to water the plants inside with a watering can.

    Good luck with the rest of your project!

    Kevin Zone 6b - PIT, PA thanked Tranquil Garden
  • 8 years ago
    That's gonna be nice! Our kitchen it set up in a similar way. Only problem I see with it is there being a lack of over head light. Plants stretching. How many direct hours of sun in the winter does it get? from say Nov-Feb?

  • 8 years ago
    Tranquil garden - thanks for the info, nice blog and very nice greenhouse! I like the idea of circulating the air during warm times... I’ve been looking into those underground air exchangers. I might even go with something that recirculates the water in the barrels through a radiator (with fans blowing warm air through them, up high in ceiling). All kinds of cool ideas out there and in my head.

    Matt - thanks - yea the overhead light is probably going to be an issue at some point. I already have thoughts of putting in skylights but that will be a later venture.

    Right now I have plans to just grow up against the southern and western Windows which will give me like 200 or 300 square feet of space depending on how many levels I can plant at. I may have to do some rotating of the seed trays to keep the plants from growing sideway.

    In wintertime i get lots of light with the sun so low on the horizon (I am at around latitude 40 degrees, at elevation of 1000 ft MSL). Probably something like 10-11 hrs depending on where at in the structure.

    In summer time the sun is overhead but I won’t be growing much of anything in there as I can plant outside. I imagine the window planters will still get some sun. Having the shaded area and all the windows open will be an enjoyable hang out spot hopefully.

    The shoulder seasons I’ll just have to see how it goes and adjust accordingly.

    I can always throw some flourescents in there to supplement if needed but that kinda defeats the feel.


  • 8 years ago
    Siding is up. Got 6 of 8 of the side lights (polycarb panels) installed. Figured out what I need for the windows and flashing, that’s gonna be a bit of a task. Also got the door so I can frame that up. Just need more time and daylight and less rain! Excuse the messy picture, it was a muddy mess!

  • 8 years ago

    Getting there! I didn’t put any hinges on any of them yet, they’re just screwed in.

  • 8 years ago

    Progress! Big step forward in getting the door installed.

    The sun today felt real good inside even though it was a high of 37. I still have to get the tops of the walls sealed up which is not goIng to be fun. I’m sealing it up from the inside and then will put in soffit and fascia later.

    The key is to get the thing sealed up and functional for now as I have plants that need to be brought out into this space .... after it’s functional then I can start making it look good with trim and paint.


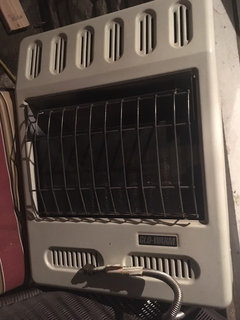
    Also got a natural gas wall heater today!!! Still gotta figure out where I’m gonna set it up.

  • 8 years ago

    A very nice transformation. I am sure you will enjoy it for years to come.

  • 8 years ago

    Lots to do in terms of making it look nice but I accomplished the main objective this weekend - the Greenhouse/Biergarden is about 98% (unscientifically) airtight after a full day of cutting and fitting 2 inch insulation paneling and sloppily applying around 4 cans of spray foam insulation. All I have to do is seal up the cracks that were too small to blast in the spray foam with caulking. I do have to figure out the ventilation at some point, right now all the windows are just screwed in. For now I want to capture as much heat as possible and get the thermal mass of the floor warmed up a bit.


    The immediate goals are to:

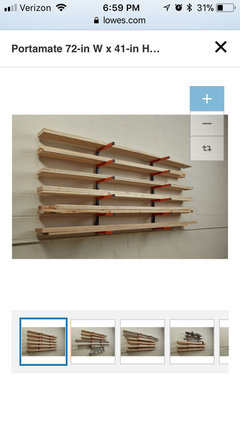
    1. Get some shelves added for the window walls that will be able to hold around 3 trays per shelf. I'll be using these so that I can add or remove wood planking as needed:

    https://www.amazon.com/Storage-Portamate-PBR-001-Six-Level-Organizer/dp/B004DGIZMW

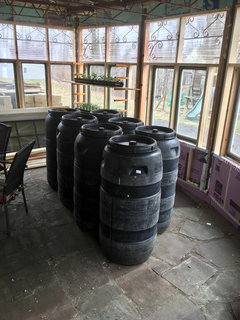
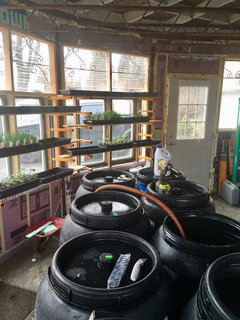
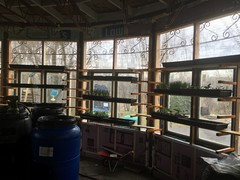
    2. Get about 8 55 gallon plastic drums painted black, filled with water for thermal mass. This will also serve as a base for a propagation table which will have soil heating cable buried in sand to help with seed starting and seedlings.

    3. Figure out the ventilation. Will likely be just simple hinges and blocking for propping open a couple of the windows for now.

    4. Get water inside the structure. There's a line somewhere in the wall or ceiling adjacent so this shouldn't be too hard (hopefully).

    5. Get this NG wall heater hooked up. I'm going to monitor the temperatures over the next week or so without any added heat to see if this is necessary right now or if it can wait until this fall/winter.

  • 8 years ago

    Nice job. I'm curious what temps will be. Please post a few highs and lows once you starting reading. That spray foam saved me this year It really works well. I think it boosted the temps 2 or 3 degrees. You said you wanted to do seeds in here? do you have a heat mat?

  • 8 years ago

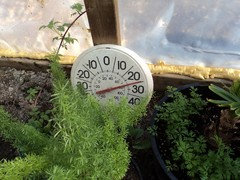
    Matt - thanks. I still have quite a bit of sealing to do which became apparent tonight when I could feel the wind inside the structure. It got up to around 66 f today in the sun (high outside was 42). I have to caulk everything still.

    Yes i am planning on doing seeds outside. I will be building something like this:

    https://youtu.be/wwkGXEatKSk

    I put in one of the shelves today and I couldn’t be happier. They are very strong and I love how easy it will be to move the shelves around if needed.


  • 8 years ago
    what a wonderful greenhouse, just as awesome as your charity work. congrats!
    Kevin Zone 6b - PIT, PA thanked stars26
  • 8 years ago

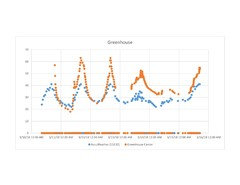
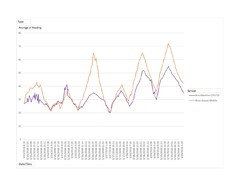
    Heres a cool graph showing the temperature in the greenhouse vs Accuweather for my area since I 'closed up' the greenhouse.

    3/10 is when I closed up the greenhouse but still had massive gaps allowing airflow.

    3/14 is when I added additional caulking and spray foam to eliminate nearly all of the big gaps/draft entrance points.

    You can see the difference from before I sealed up gaps (first three nights - 3/11, 3/12, 3/13) compared to after (last two nights - 3/14 and 3/15). You can see that the greenhouse temp at night dropped down below the outside temp on the first night. I credit that to all the cold thermal mass that I effectively 'trapped' inside the structure. Despite having a cold day and night between 3/13 and 3/14 - the greenhouse held back from dropping with the outside temperature. I'll be curious to see what it does tonight - the clouds are breaking as of this evening and we are now getting some sunlight.


    the data from the graph is from Smartthings sensors which I only have indoor safe sensors. I have plans to use one of these and a paired outlet controller to turn on an electric heat source if it gets too cold. Similarly it can turn on an exhaust fan if the temp gets too high. I might even get a few sets of them and heat up individual microclimates inside mini coldframes inside the greenhouse.

    I am hoping to get the water barrels this weekend so I can get some thermal mass going. I might just run my entire house's hot water tank empty into them to help speed up the process - to do that I'll need to run a garden hose from my downstairs faucet.

  • 8 years ago

    This may be anti climactic to some but it was exciting for me- here’s nearly 500 gallons (2 tons!) of what will hopefully be heat storing water! I have plans to link them together and run water collected from a solar water heating panel through the system. The idea being that the water going to the heating panel comes from the last, coldest barrel in the system, which allows for the best heat transfer at the collector. I’ll have a potting “island” / propagation table on top of the barrels too, likely with fluorescent supplemental lighting above.


    Also got the rest of the shelves up. I now have room for 50+ flats along just the windows! Happy happy!

  • 8 years ago

    I finished insulating the knee walls and redid my greenhouse roof last summer and I’ve seen an improvement in the temps at nighttime after a day of sun. Just wish we had more sunny days in winter to collect that solar energy!


    I’m interested in seeing how that works with heating up the water in the barrels using a solar water heater. I’ve had that in mind for several years now since I rebuilt my greenhouse. Problem is I don’t have that much space in the greenhouse for barrels, so I’m limited to at most two. Mind you it might still help.

  • 8 years ago
    last modified: 8 years ago

    I think it would definitely at least help some! Here is a little better looking graph showing the inside vs outside temperature over the past week or so. You can see the difference between the night of the 16th vs the 17th - the gap between the lines at the bottom of the valleys indicate that the greenhouse is holding temperature better after the barrels were installed and filled (completed on 3/17). You can also easily tell which days were the sunniest.

  • 8 years ago

    Have some experimentation to do as far as heat transfer and water storage. I bought all the fittings and uniseals to get all the barrels connected. I'll probably do 2 or 3 at first just to test it out.

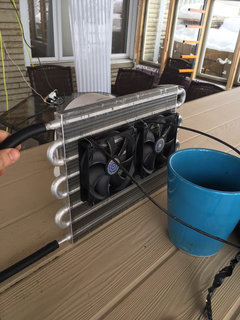
    Here's my heat exchanger. The idea is to pump cool water through it while blowing hot air on it thereby 'moving' the daytime heat into the water barrels so it can be displaced at night. I have an exhaust hood installed in the uppermost portion of the roof that I can use to pull the hottest air.

    Still pondering whether I should install the exchange up high in the roofline or at ground level with the hot air from roof ducted into it. It can operate as both a heat collector during day and heat displacer at night if I kept it at ground level. At night I would probably turn the exhaust fan off and set the PC fans on a thermostat to circulate warm at when needed. It would also be more efficient for the water pump if it were left at ground level. I think I may have just made up my mind in this paragraph.

    I don't know if this transmission cooler will be able to transfer the heat in the most efficient manner but I had it sitting around from another project that never got off the ground so I figured it would be worth a cheap shot.


  • 8 years ago

    It peaked at 80 in the shade today, about time

    That clock going forward helps a lot too having longer days

Sponsored
Wannemacher Interiors
Average rating: 5 out of 5 stars26 Reviews
Customized Award-Winning Interior Design Solutions in Franklin Cnty OH