Software
Houzz Logo Print
bird_of_paradise

A New Experience ... My 1st Seed Pod!!

8 years ago
last modified: 8 years ago
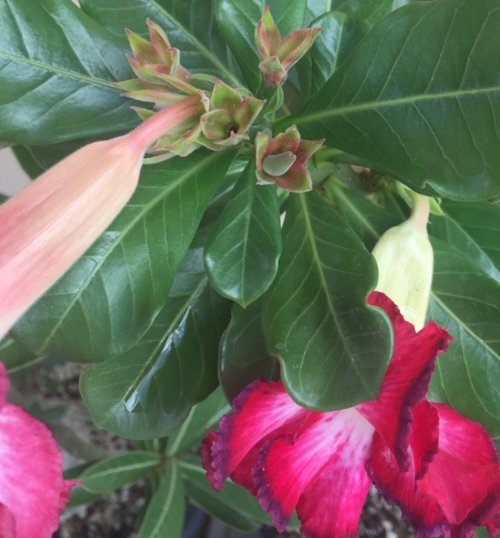
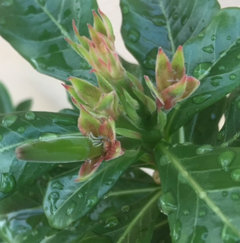
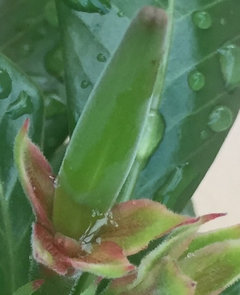
How exciting! After an entire year of attempting the petal removal method (and ruining my blooms) with zero results, I finally have my first seed pod. I took Roger and Tyler's advise and switched to the artist brush method. The pod is tiny, but definitely there, right?

I pollinated on a whim using the blooms I had. Both plants are very special to me because the seeds came from forum members when I first started cultivating adeniums two years ago. Both plants are very strong and healthy. Here is the cross:

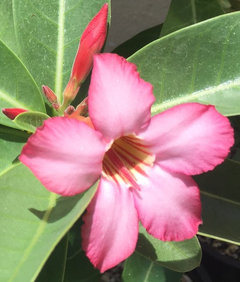
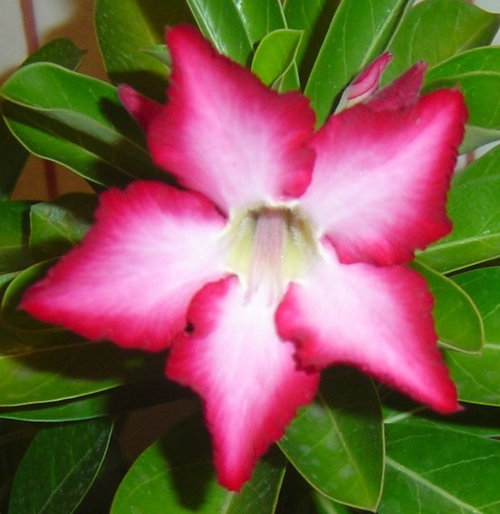
RG4 - Pollen came from this Roger obesum ...

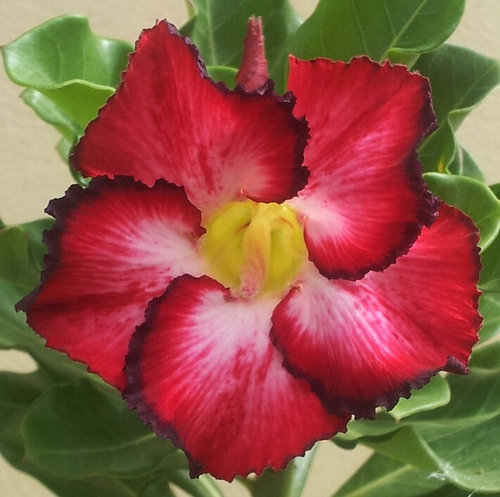
EV6 - The mama ... To think I was about to decapitate her!

I can't tell you how excited I became when I saw that tiny pod two days ago. Yesterday, I took that brush and crossed all the blooms on both plants. Let's see if I get more pods.

In the meantime, I have questions:

1. How long will the pod take to ripen? I want to be sure to bag it in time so I don't lose my seeds.

2. Is there anything I should do to ensure the pod doesn't abort? I'll try not to look at it too much .. LOL.

3. Why is not mother nature pollinating my adeniums? My plants are outdoors 24/7 and God knows there is a plethora of flying insects out there.

I promise to post an update every two weeks or so ... whenever I observe something significant.

Maria Elena

Comments (40)

  • 8 years ago

    Hi Maria it should take somewhere around 90 days just watch it it will change colors and start to split open when it's ready just take good care of it feed it often and watch for any bug that can get it. Real proud you did good just keep us posted

    roger

    Maria Elena (Caribbean - USDA Zone 13a) thanked katiedolittle
  • 8 years ago

    Fantastic! Thank you for taking the time and effort to share all this, Rachel.

  • 8 years ago

    Woo hoo! Congratulations Maria Elena on your first pod! Would you mind to share your technique on polinating? I probably miss that thread... I tore up few mini Queen flowers but didn’t see any pollen. :(

    Maria Elena (Caribbean - USDA Zone 13a) thanked Elena
  • 8 years ago
    last modified: 8 years ago
    I could never find any pollen either, Elena. I think it's because I expected to see the yellow grainy pollen we are all familiar with. That's not what I found in the adenium.

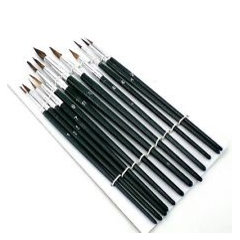
    What I did was purchase a pack of thin artist natural bristle brushes like these:

    Using the thinnest brush with longish hairs, introduce the brush end into the flower you want to get pollen from (male) and gently swirl around the stamen. Make sure you are not pushing too hard and flattening the brush. The idea is to gently pick up pollen onto the brush. You won't be able to see anything.

    Very carefully, lift out the brush and immediately introduce it into the female flower and swirl it in the area of the stigma, touching the brush against all the areas inside that female flower. You have to go further in on the female flower to get to the stigma. Wash off the brush.

    Good luck!!

    Maria Elena

  • 8 years ago

    Congratulations Maria Elena! My Adenium Multiflorum got between 8-10 flowers total. I had initially tried the tearing the flower apart method on 3 of them but I was just way too inexperienced to know what I was doing, looking for and looking at. I then got the paint brushes which seemed like a super easy, foolproof method. I had zero success with both methods. Maybe next year.

    Can't wait to see the progress of your pod.

    Tyler

    Maria Elena (Caribbean - USDA Zone 13a) thanked SoCal Stewart (San Diego, Ca Zone 10A/10B)
  • 8 years ago

    What do you mean, "Maybe next year?" The season just started! LOL ... Get those brushes out and start swirling!

  • 8 years ago

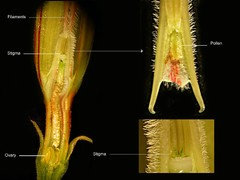
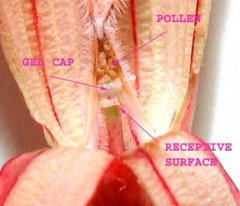
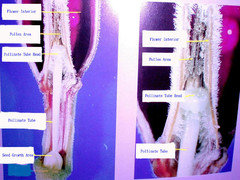
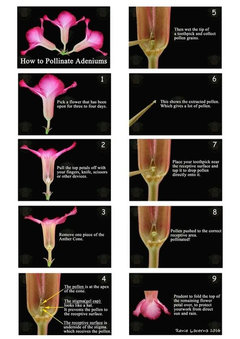
    Hi all, When collecting pollen - use a flower that is 2-4 days old, that way the pollen is more mature. A newly opened flower may not have pollen yet. Some flowers will have lots of pollen, others hardly any....and some plants are sterile and will never produce pollen. We use a damp toothpick to pick up our pollen after cutting part of the flower apart to find the pollen. Do this indoors, as a light breeze will quickly blow your pollen away. Pollen has a light white/yellow appearance. A magnifying glass is very useful.


    Here’s another photo of a cut flower showing where to find the pollen and where to place the pollen on the mother plant. The receptive surface is where you have to place the pollen to be successful. ( If you pull some old flowers apart and study their structure with a magnifier, you’ll find it easier to understand where everything is.)

    Maria Elena (Caribbean - USDA Zone 13a) thanked User
  • 8 years ago

    I have this image and a few others, Rachel. Followed all the instructions and suggestions and it just didn't work for me. I won't be pulling any more flowers apart.

  • 8 years ago

    Sharing for reference:

  • 8 years ago
    last modified: 8 years ago
    Maria Elena, I will try to put a link to the webpage I used to learn from. I think my page may be different to yours. I’m not sure if I can get this to work from my iPad as I’m having trouble with Houzz embedding links properly.

    Try clicking this.

    Someone let me know if the link works, please.

    Maria Elena, I used the first method in this link as I found it easier at the beginning. It does take some practise, that’s why I recommend cutting up old flowers that are about to fall off as practise. (A small pair of scissors, such as bonsai scissors are best for cutting the flower open.) Single flowers are easier to practise with to be able to see all the parts of the flower. Double and triple flowers are harder to pull apart especially when they are the ones you are trying to place the pollen onto. :)

    Maria Elena (Caribbean - USDA Zone 13a) thanked User
  • 8 years ago
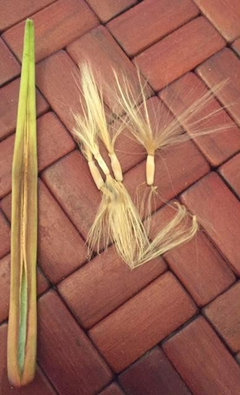
    Worked good for me same one that I used

    roger

  • 8 years ago
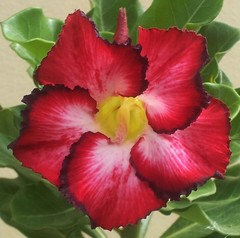
    last modified: 8 years ago

    I did all that for a year, Rachel ... It didn't work for me. Maybe my plants were too young ... under age 3. I've since developed a very real distaste for tearing blooms apart. I'm sticking with the brush.

    The link you shared came through perfectly ... great info. Similar to David Clulow's guide. Does anyone know if he's still around? Here's his link:

    https://groups.google.com/forum/#!msg/adenium/A7aQxsCGuiw/o5r0QgsOwBkJ


  • 8 years ago

    Rachel - your Adenium plants are breathtaking. Real master pieces.

    Maria Elena (Caribbean - USDA Zone 13a) thanked Agartta
  • 8 years ago

    They really are!

  • 8 years ago

    Thank you all! So far I’ve only ruined three flowers, hopefully this summer I’ll get enough of blooms to practice. I pruned my plants this spring, now waiting for new branches. Oh, Maria Elena, I tried to air layer about 8 branches and they all healed without roots, lol. Now making attempts to root them in perlite/coir mix. Adeniums are hard to propagate apparently, or it just me, hahaha!

    Maria Elena (Caribbean - USDA Zone 13a) thanked Elena
  • 8 years ago
    last modified: 8 years ago

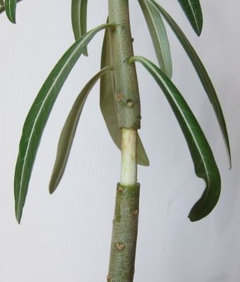
    Oh, no, Elena ... Sorry to hear your attempt to air layer didn't work. That sucks ... So, are you saying the plants now have scarred branches? Or have you cut them off? Sounds like there is a real possibility that the entire outer layer of the bark was not removed. It will peel off whole after you make your horizontal scores one inch apart. This is a must in order for rooting to take place. It should look like this:

    Here's the related thread:

    https://www.gardenweb.com/discussions/3759660/has-anyone-tried-this-yet?n=59

    Air layering is a more secure way to duplicate a cherished bloom. Cuttings do not always root successfully ... Some take and some don't. I've had a lot of success rooting cuttings and just sent this to a buddy. I hope it's helpful. Remember, everything about everything adeniums is dependent on growing culture.

    Propagating from stem cutting

    Cut the bottom straight and dry out the cutting a week or two, depending on how thick the branch is. Cut off most of the leaves, then plant in dry substrate. You can dip in water once before planting to dip in rooting hormone if you have. Keep out of direct sunlight. Mist once a week if your climate is excessively hot and dry, but do not wet the soil. For dry climates, I recommend bagging your cuttings ... Do not mist if you do this. Placing the pots in plastic bags with open or loosely tied top will add needed moisture. Do not water until the cutting sprouts new leaves about 6 weeks later. This tells you the plant has rooted. If you have all your cuttings in a communal pot, gently remove the rooted cutting to its own pot. Then only water lightly at first, increasing as more leaves grow. Begin acclimating to full sun.

    If your cutting goes mushy, then it's rotted ... throw away. As long as it's firm, it has a chance to root. Some take longer than others. Cuttings can also dry out completely from the tip down ... but most will not. If this happens, it will change color to brown and resemble a dry twig. Once they do this, they're usually no good. You can try cutting off the dry part if the cutting is large enough and the base is viable.

    Cuttings are a wonderful way to replicate a bloom without grafting. Remember, a cutting is the same age as the plant it came from and will bloom accordingly. Don't ever throw out your cuttings ... They make great give-aways if you don't want them. Most people don't know anything about a caudex and just want flowers anyway!!

    Maria Elena

  • 8 years ago

    Congratulations! I remember the excitement of my first seed pod. Watching the pods grow longer and longer was amazing.

    Maria Elena (Caribbean - USDA Zone 13a) thanked dragonstone
  • 8 years ago

    Maria Elena, lots of good photos in your link showing hand pollinating technique. Hopefully the 2 different links can help others that wish to try hand pollinating :)

    The toothpick method took us awhile to learn, but we found it to be the cleanest method to use. Once we’ve collected the pollen and transferred to the mother plant, we then throw that toothpick away and use a new one for every different plant. That way we not accidentally cross pollinating or spreading any other problem to any of our other Adeniums.

    Maria Elena (Caribbean - USDA Zone 13a) thanked User
  • 8 years ago

    There has to be some connection through cambium layer for Air Layering to work. The cut needs to be only on one portion of the branch, leaving Active tissue from Mother Plant to Rooted portion for roots to form and then to be severed once good root formation.

    Rick

    Maria Elena (Caribbean - USDA Zone 13a) thanked rcharles_gw (Canada)
  • 8 years ago

    Maria Elena, I just read the “has anyone tried this yet?” post from your link above. It was very interesting reading about air layering Adeniums, and reading about your progress and being able to see the photos of the new roots that formed.

    This would be a good alternative for those that struggle to grow from cuttings and might be an easier way for those who’s weather is not always accomodating. Thanks for the link to the old post and thanks to Stuart also for posting the initial thread :)

    Maria Elena (Caribbean - USDA Zone 13a) thanked User
  • 8 years ago

    Rachel, I think we made a great tag team on this very informational thread. Thank you for your collaboration. I'm saving this thread!!

  • 8 years ago

    Lol, I saved the thread on air layering, after you put the link in. Just in case I wanted to try it down the track :)

    Maria Elena (Caribbean - USDA Zone 13a) thanked User
  • 8 years ago

    Maria Elena, thank you for the instructions on cuttings, I’ve been struggling with them as well, lol. When I dried them for a few days, they got too dry and shriveled up, both top and bottoms, than bottoms got rotted because there was no alive tissue for new roots to start. Then, when I didn’t dry them up too much, they are also rotted. I tried both, with humility domes and without. On Utube videos it looks so simple, people just stuck them in to almost anything, and they do root! I have few more victims coming up, will try again tomorrow. :)

  • 8 years ago

    I think it's your dry climate. You have to find a way to tweak the technique for your climate. Maybe misting? And the cuttings are avg 6" tall? Smaller thin cuttings usually die.

  • 8 years ago

    Is it like they show twirling on the Plumeria blooms?

    I could maybe do this on my Adeniums, as for cutting the blooms and finding the pollen, my hands don't stay steady enough.

    Thanks for all that info :)

    Also, I am waiting for my white Plumeria to grow...seems after Harvey, it is just stunted :( I'm planning on sending you the one Bromeliad that you had lost, and I'm hoping to have a cutting of the white Plumeria to send. Any other type of plants/succulents you may like/want?

    My granddaughters last day of school in tomorrow and my daughter started a new nanny job where she is able to take her daughter. I will have lots more time and will try to get you a box of goodies out soon!

    Happy Gardening, Jeannie :)

    Maria Elena (Caribbean - USDA Zone 13a) thanked Jeannies_Garden (Tx 9a)
  • 8 years ago

    Hi, Jeannie!

    Do you mean pollinating with the brush? Yes, just insert in the center of a 2-day old bloom, twirl the stick of the brush between your fingertips, gently remove and insert (a tad deeper) into the bloom you want to pollinate. You can go back and forth between the blooms of the two plants. I'm going to keep trying this all summer to see what I get. Experiment is the mother of invention.

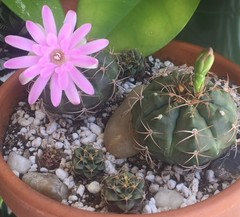
    Thank you for thinking of me ... Bless your heart! Please take a look at my swap list to see if I have anything you'd like. It's usually up to date. I am really interested in acquiring tropical blooming cactus pups like gymnocalycium, discocactus, melocactus, uebelmanna, copiapoa. My cactus aren't blooming because they need cool climate to set bud. This is a gymnocalycium ... it blooms every 2 months for me here. Gotta have more colors!!!

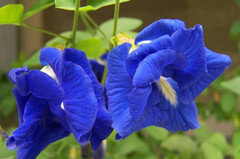
    I have seeds for this very hard to find blooming vine, Double Blue Clitoria Ternatea:

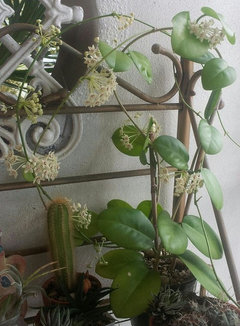
    and this Hoya australis ssp. tenuipes - This is a fragrant succulent vine and the leaves are very thick and lasting.

    Please let me know if I can send you seeds for these.

    Maria Elena

  • 8 years ago
    last modified: 8 years ago

    Jeannie,

    While I have your attention, here's an update on the succulents you sent me just before Hurricane Maria:

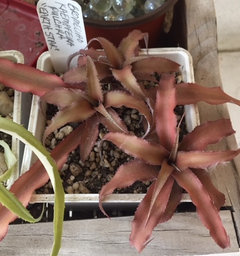
    Bromeliad Cryptanthus - Earth Star ... It has pupped out generously. The name is wrong on the tag ... I have to change that.

    <><><>

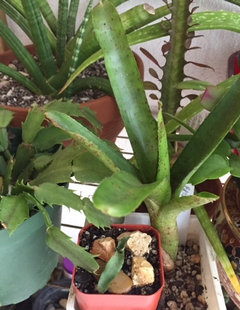
    Bromeliad neoregelia mini ... and now there's only one. The striped one, my favorite, had a pup and died. Unfortunately, the geckos keep digging up the pup and it's drying out. I'm trying to save it in a mini pot.

    <><><>

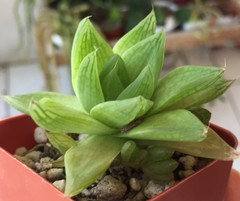
    Haworthia cymbiformis - Cathedral Window Haworthia ... it's pupping out.

    <><><>

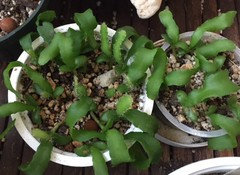
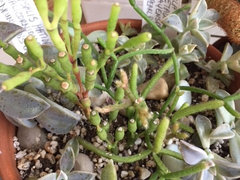
    Epiphyllum phyllanthus v. guatemalense f. monstruosa - Curly Locks ... The cutting rooted but isn't doing anything. I planted the seed pod and have a bunch of curly locks babies!

    <><><>

    Kaempferia Pulchra - Peacock Ginger ... all the leaves died but I noticed all the corms in the soil and let it be. They have resurrected!!

    <><><>

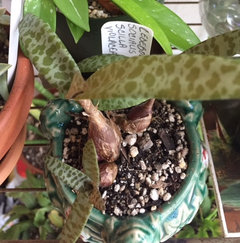
    Ledebouria socialis / Scilla violacea - Silver Squill ... it is pupping out!

    <><><>

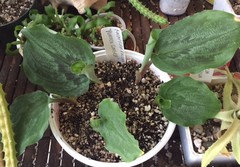
    Rhipsalis hatiora salicornioides - Drunkard's Dream and Rhipsalis pilocarpa ... they weren't doing much, so I put them in a communal pot with Crassula graptopetalum paraguayense aka Ghost or Pearl Plant. My Mom sprayed ant spray on my crassula, so it looks spotted.

    <><><>

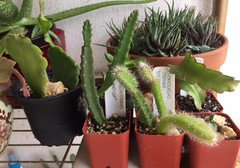
    L-R: Everything has rooted. The Haworthia faciata and cooperii in back are not part of this lot.

    Rhipsalis micranta (one pad grew a leaf, the other is stagnant) , Stapelia asterias, Selenicereus testudo - Dogtail Cactus, Epiphyllum phyllanthus v. guatemalense f. monstruosa - Curly Locks (this is the cutting I took the seed pod from)

    <><><>

    Ceropegia woodii - Rosary Vine / String of Hearts ... I didn't photograph it because it's 2 vines are barely visible. There are corms in the soil and I'm hoping new vines will soon pop out.

    <><><>

    Thank you for surprising me with these lovely C&S right before Hurricane Maria, Jeannie. They are a real treat.

    Maria Elena

  • 8 years ago

    All of the plants look great! I can/will send lots more.....just need some time :)

    The peacock ginger does go dormant for the winter months here, but always comes back out in the spring....Mine are in bloom right now (gives like a bloom a day) and I was hoping for several blooms at one time to get a great picture.

    As for the curly locks epi cutting, it will soon take off. It needs time to establish roots and once it does, it will grow well :)

    Those seedlings look so cute curled together. I let a seed pod on the plant too long and when the pod opened on it's own, there were many sprouts already.

    I just potted up 53 Adenium arabicum seedlings (that was my second batch) that were a bit over 2 months old (I have my granddaughter help at times) it seems like it takes longer to do, but so much fun letting her experience how to grow plants from seeds. Do you need any A. arabicum seeds? I've sowed so many and still have so many it seems. They were from Best Plumeria on Ebay....I have purchased Plumeria and Adenium seeds from her and they germinate well :)

    Happy Gardening, Jeannie :)

    Maria Elena (Caribbean - USDA Zone 13a) thanked Jeannies_Garden (Tx 9a)
  • 8 years ago

    Sure, Jeannie ... I'll take some arabicum seeds. They are great for root work. I love how fat they grow. I've given mine away and only have four left, 2 Desert Night Fork and 2 Brazilian from KO. One of the Brazilian just bloomed 1/2 size blooms.

  • 8 years ago
    last modified: 8 years ago

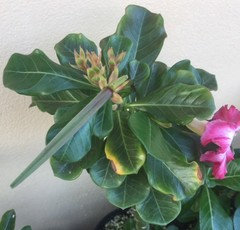
    Seed pod is growing quickly! Here it is today 5/25:

  • 8 years ago

    What seed pod? *grin*

    grats!

    Maria Elena (Caribbean - USDA Zone 13a) thanked bragu_DSM 5
  • 8 years ago

  • 8 years ago

    Update: Hoping the upcoming tropical storms don't wreck havoc.

    Looks like there was another pod perpendicular to this one that didn't quite develop. Looks flat and empty. This plant is only 1 year, 10 months old ... I think little precocious for seeding. This is like a teen pregnancy, LOL!!

    The leaves have some yellowing but I am leaving them alone. The pod is stable, well attached, and developing fast. Lets hope the upcoming rains don't do a number on it.

    Maria Elena

  • 8 years ago

    Well, my 1st seed pod (RG.4 x EV.6) opened this morning. At 2 months, it was just 4" long and only bore 4 seeds, 1 very small. I planted them to see if they are even viable. We'll see.


  • 8 years ago

    Wow. I guess that mama wasn't interested in a big brood. Hopefully they're viable. Even though it's just a few, it's exciting that there's offspring, at least! Hope they all take for you.

    Maria Elena (Caribbean - USDA Zone 13a) thanked dragonstone
  • 8 years ago
    last modified: 8 years ago

    Thanks, Dragon! I have years of practice and seeds in my future, so no worries. The mother plant (below) is under 2 years old and not completely mature yet. She gave it the old college try. At 2 months, I think it's safe to say this is an abort. 3 of the 4 seeds produced are rather large, though, so I'm hopeful. A learning experience no less.

    Maria Elena


  • 8 years ago

    Been a long time since we talkes. Thought a lot about you an the weather and your mom from time to time. My eleven yr old has seeds of course it does . I will let a couple grow just to see the process. But I have enough pinks. Been out of it awhile. Gotten some strength back. Roger helped me graft today. So glad to here the pleasure you still get from these beauties.

    Maria Elena (Caribbean - USDA Zone 13a) thanked Marica 7 high Sierra's Ca 4,000ft
  • 8 years ago

    I was thinking about your seed pod yesterday yes 2year old not mature enough seeds still should germinate

    roger

    Maria Elena (Caribbean - USDA Zone 13a) thanked katiedolittle
  • 8 years ago

    Marica ... So nice to hear from you.