Software
Houzz Logo Print
webuser_990392085928366148

interior window trim buckling

8 years ago
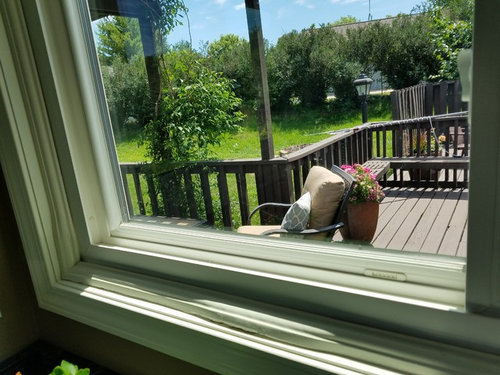
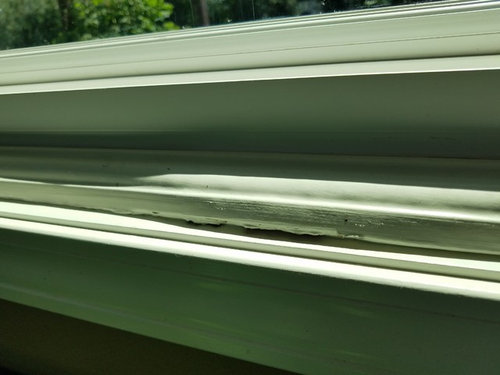
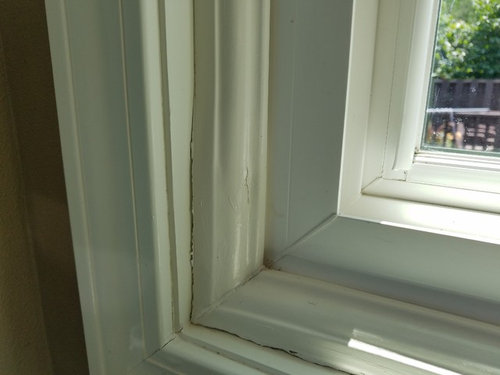
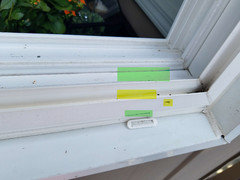
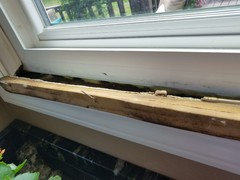
The trim appears to be warping, but I'm unsure why, and need some guidance on addressing it. There are two locations, on the bottom and the corner of the bottom and one side. No sign outside of deterioration or place where water is getting in. We just moved here a year ago, but windows are relatively new. I did notice the corner part during the winter, and a bit on the bottom, but just now noticed a great deal of increased separation/buckling.


Thoughts? Do I not know until I pry them up? Any tips on doing that?


Comments (21)

  • 8 years ago
    Is this happening on all of your windows or just this one?
  • 8 years ago

    Just the one. I just double-checked every window in the house. And the top and other side of the same window have no issues. Even the other half of each of these pieces look great. I presume I'd pull out the whole bottom and side?

    Do I simply pry them up, after maybe slicing the paint with a utility knife? Not sure if I should pry up, away or both?

  • PRO
    8 years ago

    Cut paint line with knife and more than likely pull up, start in the middle and work to the ends.

  • 8 years ago
    Something is definitely up with that particular window then. I would pull up the trim and take a look.
  • 8 years ago

    Thanks, guys.

  • PRO
    8 years ago

    That much swelling it must be sopping wet, which means you have a problem; I expect the insulation under the window is also waterlogged.

  • 8 years ago

    Thanks. My nephew wondered if they'd used particle board, which would mean that not as much moisture would have been needed to cause that much. We'll see. I'm still stumped by the cause, though.

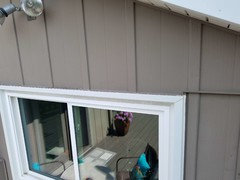
    Here's a photo of the top of the exterior. To me, it doesn't seem problematic, but I'll run some caulk up there just in case. The seep holes looked to be clear; wondering if it's possible that the window is sloped inwards, so that all water isn't draining out of them?

  • 8 years ago

    Why is that metal exposed? That does not look at all correct to me. Where is the drip cap? Perhaps a picture from back a foot or two further may help.

  • 8 years ago

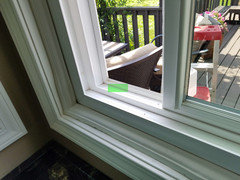
    Here you go. Also, could you confirm that I understand the weep holes correctly? That the water in the green area should flow out of the green weep hole, with the flap?

    My thought is that water must be going in there and not flowing out - or is, but is also flowing towards the house. I'm guessing that the window is supposed to be sealed, so that it can NOT flow past the inside window frame? If I pull up (when I do) that I'll likely find that there's a leak in the frame causing that. Thoughts?

  • PRO
    8 years ago

    That head flashing, or lack thereof, is questionable to be certain.

  • 8 years ago

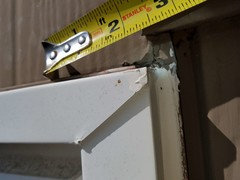
    Thanks. The last photo I'll post (promise). I got up there to caulk it and realized that I think the photos were making the crack look worse than it was. Now, after having sealed the area (and elsewhere, just in case), it occurred to me that I probably should have cleaned off the paint, as I wonder if it's merely the paint on the siding that's cracked and there's not even a potential leak? Anyway, fwiw, here's a last one (with a tape measure and a flashlight to minimize shadows.) Thanks again for all the comments!

  • 8 years ago

    Caulk is not a fix. It is a help but if you have water infiltration due to a lack of flashing, the leak will be back in short order.

  • 8 years ago

    Thanks; we're supposed to get a lot of rain in the next couple of days, and I've removed the interior trim, so perhaps I'll see :) Though maybe you're saying after the caulk wears away. I poured some water with food coloring against the window/in its sill, to see if it would come through at the bottom, but it didn't (that I could tell).

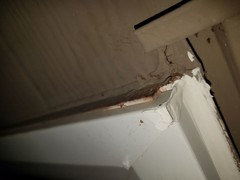
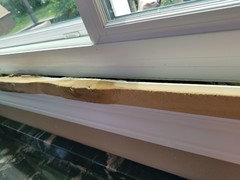
    As I said, I've now removed the damaged wood, and here are the pics. It's indeed particle-board type, and clearly quite prone to absorption. Any suggestions on doing anything to the gap, where there's a bit of insulation under the window? Put more in there, or caulk, just in case? Let me know if you need better photos, with better lighting.


    Hopefully I can find replacement borders. These look like they may have even come painted? Or perhaps I'll have to replace all.

  • PRO
    8 years ago

    Remove the insulation and use a spray foam insulation for Windows. Replace all trim stops if unable to match.

  • 8 years ago

    Thanks. No match at HD, and obviously would like to match the other windows. Time to buy a router - and learn to use one!
    It's MDF - I don't suppose I can sand down the MDF parts that are swollen and to look like it was and repaint?

  • PRO
    8 years ago

    No,tmaybe try a lumber yard, finding the right router but can be even trickier than finding the more millwork. Sometimes you can find somethings that is close and rip with a table saw.

  • PRO
    8 years ago

    I meant finding the right router bit can be trickier than finding the right millwork.

  • PRO
    8 years ago

    The window has to be removed, properly flashed, and reinstalled. Caulk is not mechanical flashing. This is serious installer error.

  • PRO
    8 years ago

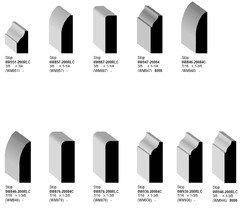
    Looks like WM951.


  • 8 years ago

    Thanks, all!
    @Todd - Thanks for the cautionary note. If needed, I'm going to check with my nephew who works with 3d printing and rapid prototyping :) Sounds easier than router!
    @Joseph - I'll check on that (may even have paperwork from original owner).
    @Sombreuil - Thanks! May be one of the others, actually (947 or 936's). It's 1 3/8" high, though I fear still not one of those. I should have taken a profile pic when I had it off (I had to push it back into place for the wife :). I just googled those #'s and see that HD carries them?! Just terrible service from the guy I talked to (shocking, I know).