Software
Houzz Logo Print
steve_wright56

Sanding down old paint

6 years ago
Hello everyone,


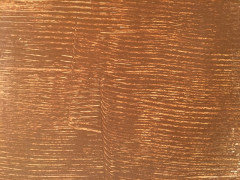
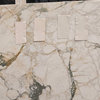
we have a wall in our new house which has an unusual type of paint. i will try and describe it and attach a photo.


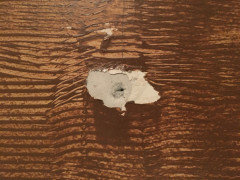
it is painted in a way that the paint lines from the brush are slightly embossed, so when you run your fingers over it, you can feel the bumps quite profoundly from the wall.


ive been advised to paint over it, but I think the bumps will show through because of how raised the lines are, so I’ve begun sanding it. And it’s taking forever!


as I’m sanding it, some of the more raised parts turn to a kind of rubbery consistency, and I can pull and peel it off the wall. It’s kind of stretchy and rubbery. And it’s taking forever to come off.


does anyone have a good suggestion Of a better way to remove? I’ve tried steaming/scraping it, but it’s just as slow/slower. Or do I just have to suck it up


thank you!


Comments (22)

  • 6 years ago

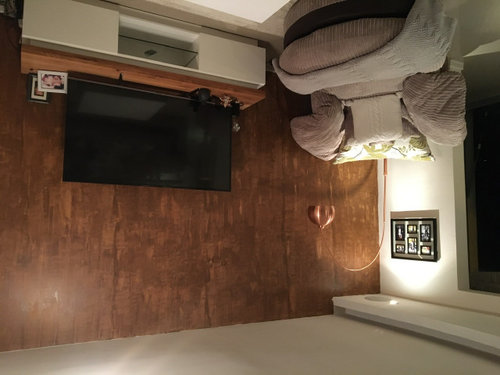
    Here is your picture right side up. First of all, are all the walls like that in that room? That wall doesnt appear to be sheetrock. It appears to be paneling, where someone has filled in all the grooves with caulk. That would account for the rubbery strips you are pulling off the wall. You may have a real mess there that will be impossible to get to look nice enough for paint, now. You may have to have that wall sheetrocked.

  • 6 years ago

    Thanks for your reply. I perhaps haven’t explained myself very well, so Im uploading more photos. The wall is actually a concrete wall. I suppose there is a layer of plaster before the concrete, with this unusual paint in top. No caulk, it’s the paint itself that turns kind of rubbery after some time of the sander on top of it. Photos attached to help you see what I mean.


  • 6 years ago


  • 6 years ago

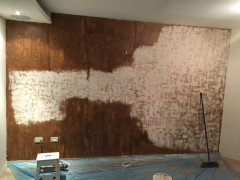
    And this is my progress up until now.


  • 6 years ago

    Wow! Good progress.

    I've never seen a wall like that before. It looks like someone got creative with some kind of paint-like substance and a trowel (hence, the grooves). You've made the right decision to remove that stuff. The only suggestion I have is whether it would make the work go faster if you used a paint scraper first, and then the coarsest sanding grit available. A belt sander might also speed things up a lot.

  • 6 years ago

    It’s slow, laborious and tiring but progress is progress.


    im using 50 coarse sandpaper (the thickest they had in the store) with a handheld electric sander. I have tried scraping, but it doesn’t come off easy. If I push hard, it takes the paint, undercoat, and plaster off revealing the cement. I might have to do that round the edges where the sander doesn’t reach, as sanding by hand is equally useless. I also tried steaming, which did make the scraping a bit easier, but I had to steam for so long before it would remove, it was quicker to sand.


    looks patchy as I’m only sanding until it is smooth to touch. my Plan is to paint it once over with a base coat of white, this will show up any uneven parts that are hard to see given its state (ie bits that need a bit more sanding, or bumps that need a bit of filling.) then once those bits are dealt with, patch them up with the white undercoat, then go over with first coat of color. Sound like a sensible approach?

  • 6 years ago

    I think you've got a good approach and a good understanding. My last suggestion is that, once you get it as good as you can get it, use joint compound and a 12" taping knife to go over the wall first. This will fill in the unevenness much better than a painted on coating (which will follow the deviations and allow more to show through). After the joint compound has dried, do a light hand sand to knock down any marks left by the knife. Then prime the wall, and paint. I think you'll be good.

  • 6 years ago

    I agree with kudzu, get a skim coat put on the wall, before you do any painting. It will smooth it out nicely, so it will look very nice. Those ridges look a bit like the ridges, you get when you spread tile mortar etc. I cant imagine how anyone would have thought that looked good, unless, there was stone or tile etc on that wall at one time, and someone removed it, and then just painted over all that mess that was left after removal. Its a lot of work. Good luck to you.

  • 6 years ago

    I also agree with skim coating

  • 6 years ago

    When its time to paint, please use a very good primer on those walls before painting. If you skim coat, then just regular drywall primer. If you dont skimcoat, then use an oil based, bonding sealing type primer.

  • 6 years ago
    last modified: 6 years ago

    Thank you for your comments everyone. If I’m totally honest, the wall is coming off very smooth. There are only a few small patches that need filling (that old nail hole for example). I’ve done a few other walls that needed filling, and with some patience and sanding they came out really good with an ordinary filler type thing. I feel that a skim coat is too much for my abilities. I’ve never done it before, and whilst I feel I’m pretty good with this kind of stuff, I can imagine doing a bad job and making things worse!

    thanks for the tip in the primer. The paint store just sold me plain white paint to use as a first coat, but they also advised me to paint right on top, not really appreciating what it is I’m dealing with. I think I’ll go back and ask for the oil based bonding sealing type (just have to work out how to say that in Spanish...!)

  • 6 years ago
    last modified: 6 years ago

    Good luck with whatever you do. But I still encourage a skim coat as it would be nearly impossible to mess up on a hard surface wall like that. You wouldn’t be trying to put on a new, uniform coat like a plasterer. You would simply be spreading a glob of joint compound on the wall and clearing most of it off with the knife immediately, just leaving behind what sticks in the little depressions. It would take less than an hour, even if you’re slow and unskilled.

  • 6 years ago
    last modified: 6 years ago

    since you dont know exactly what was on that wall, you are dealing with, the primer is very important. A plain white paint as first coat, is very likely to peel right off. Maybe learn how to say oil based bondng sealing primer in spanish. LOL May I ask what country, you are located in?

  • 6 years ago
    last modified: 6 years ago

    I hope you are wearing a really good facemask with that stuff. No telling what it is. I ended up in the urgent care once a few days after working with some extremely dusty sanding once with bad asthma like symptoms. I learned my lesson, really not good to inhale stuff.

  • 6 years ago

    Yes after your comment I am wearing a face mask!!


    we are in Ecuador. Beautiful country!


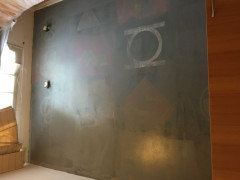
    i do have what they call ‘sellador’ (Sealer). The woman in the shop mixed the white sealer with a bit of grey. Supposedly it is good when painting walls matte to have it a bit darker (?!). Would this be a good one to start with, then an overcoat of white to calm down the grey a bit, and then our final color? Here is a picture of another wall that has the grey sealer on it (superhero painting behind(.


  • 6 years ago

    I looked up sellador sealer, and all that came up in search was a caulk. Pretty sure thats not what you are talking about. No idea what it is at all.

  • 6 years ago

    Best I can find is that 'selladore' means sealer & isn't a brand name.


    Gray tinted primer is useful when you are going to topcoat with a dark color paint.


    From Sherwin Williams site: Common practice is to use a white primer or one tinted with the topcoat color. However, about 20 percent of the colors in the Sherwin-Williams COLOR® system are maximized when applied over a gray-tinted basecoat. This idea or technology is the Sherwin-Williams Color Prime System. Using a gray basecoat or primer for these colors has several benefits, including better touch-up, superior hide and more uniform color. Painters also save time and money because they can achieve an accurate color match in fewer coats. Best of all, the system is easy to use because Sherwin-Williams has eliminated the guesswork.

  • 6 years ago

    Hi everyone,


    Thanks for all of your comments/input, I have finally finished! (Photos attached below).


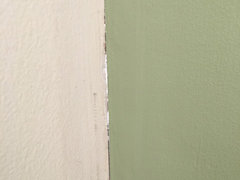
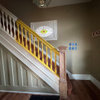
    Another question - unfortunately the edges where I used the masking tape to achieve a straight line have allowed a little bit of the grey sealer/primer to sneak through, where the green (nor white undercoat) didn't quite reach when painting. As you can see, the condition of the old off-white wall to the side isn't great, so may need a new lick of paint itself. But is there a less work-intensive way of solving this?


    Thanks again!


  • 6 years ago

    Use a small brush and paint that out. What should have been done, is when you painted the lighter wall, you paint the entire corner out on to where you now have green. Once that paint is dry, you buy the yellow paint tape for delicate walls, and mask it off and do the green. Your corner would have turned out perfectly.

  • 6 years ago

    Ah, well we haven't repainted the lighter wall - thats left as it was from before. The grey/white underneath is the primer that I used.


    Presumably I could apply some masking tape which just exposes these little parts, and do one final pass with the brush on the green color?

  • 6 years ago

    Two things:

    1) Apply latex caulk into that corner as it appears it has some problems.

    2) Use the special masking tape for painting and, after you apply the tape, go back over it with thumb pressure to insure you minimize paint creep under it.

Sponsored
J.Holderby - Renovations
Average rating: 5 out of 5 stars4 Reviews
Franklin County's Leading General Contractors - 2X Best of Houzz!