Software
Houzz Logo Print
westes

Problem With Screw Inside Toilet Leaking

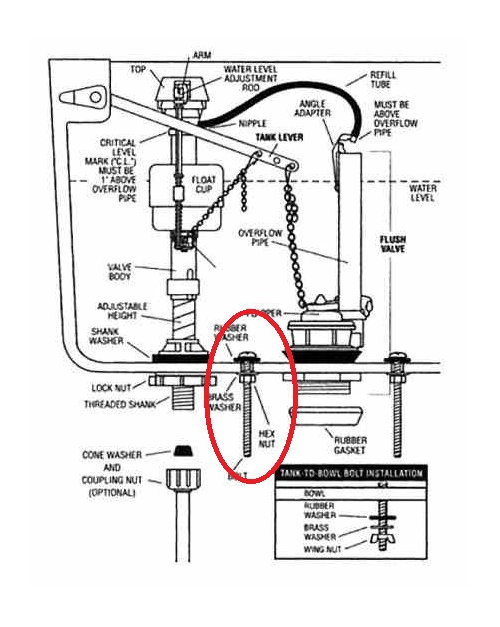
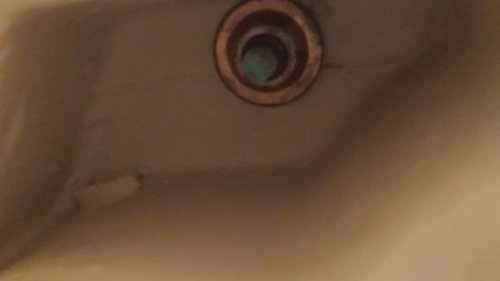
I have a problem with one of my guest toilets with the screw that is circled in the photo. Periodically, water starts to drip from this screw assembly. How should I address this?

Should I first attempt to just tighten the bolt from the bottom, without emptying the toilet? This bolt is surrounded on all sides by porcelain walls. I would need a special wrench that is both small and has its head turned 90 degrees. This wrench on Amazon looks like the right idea, but I think it would be too large for the small space I have. Is there a wrench kit that is pre-angled that would let me get access from below the toilet?

Assuming tightening the bolt does nothing, then would this indicate that the rubber washer needs to be replaced? To do that I should empty the toilet tank, then siphon out any water remaining in the tank? Will almost any rubber washer work, or do I need to get a precise match to the one I already have?


Comments (24)

  • 6 years ago
    last modified: 6 years ago

    It sounds like you have the old brass screw and nuts. I would at a minimum replace them with teflon or equivalent.


    If I was doing the job; I would first turn the water off to the toilet. Then flush it and let it drain, then brush as much water as possible into the outlet, and finally sponge it dry ringing out the sponge into the bowl.

    If one fitting is leaking they probably all need replacing.

    You can by a kit to replace all of the components in the tank, at most hardware and big box stores.

    Don't over tighten the fittings. Just tighten until they do not leak.

    Personally experience talking. We had recently moved into the house and the fill valve leaked. No problem! I went down to Lowes and bought the complete kit. Replaced every thing except the flush lever. When I tried to complete the job, I figured I had the lever, so might as well replace it also. Mistake, in removing it I broke the corner out of the tank. Back to Lowes again. After about the six visit that day, kit, tank, two wax seals, fill line. I was thinking of asking Lowes for a special parking spot ;-)

    westes Zone 9b California SF Bay thanked krnuttle
  • 6 years ago

    @krnuttle By "fittings" do you mean more than just the two screws that hold the tank down? What else is in one of those kits?

  • 6 years ago
    last modified: 6 years ago

    westes- I wouldn't get the wrench you show in the link...it looks awkward to use, particularly for this application. I have a massive tool collection, and don't have one of those. A standard socket wrench, possibly with a socket extension, will be much easier and give you better control over the tightening process. If you don't have a socket set, it's time to by one. Or borrow from a friend. If the bolts are really long, get a socket set with a "pass-through" that lets a long bolt extend through the open center of the socket and wrench. Here is an example: Pass-through socket set Just make sure you know whether you are dealing with a metric bolt size or SAE.

    westes Zone 9b California SF Bay thanked kudzu9
  • PRO
    6 years ago
    last modified: 6 years ago

    You may have to pull the toilet to get access to the bolt. Replace both washers while you're there please. I just sawed off some toilet seat bolts to avoid having to do that.

    westes Zone 9b California SF Bay thanked Joseph Corlett, LLC
  • 6 years ago

    Yes. Depending on the kit there is the flapper valve, fill valve, washer, nuts, etc. There usually are several combinations available, ie fill valve kit, flapper valve kit, etc. Just make sure the kit you buy, has the screws, nuts and washer that hold the tank to the bowl.

    westes Zone 9b California SF Bay thanked krnuttle
  • 6 years ago

    Here's what you need at a minimum. Trying to tighten at this point isn't likely to produce more than a cracked tank.


    https://www.lowes.com/pd/Fluidmaster-Tank-To-Bowl-Bolts-Solid-Brass/1002463956


    As for tools I always use a deep socket with an extension. However I already own these so don't need to buy anything.


    westes Zone 9b California SF Bay thanked lyfia
  • 6 years ago

    @kudzu9 The problem with that pass-through set is that the wrench is at an angle and would not fit into the narrow opening I have. Is there some kind of pass-through that would attack the bolt vertically and be used like a screwdriver?

  • 6 years ago

    @Joseph Corlett, LLC I was going to ask if it is okay to just cut off the excess bolt length to make it easier to get in there. If I do that I may distort the screw thread and make it harder to get the bolt off.

  • 6 years ago

    @krnuttle And all of those accessories are standardized and would work with any tank?

  • 6 years ago

    @lyfia I am a little confused by that bolt's arrangement. Shouldn't the rubber be touching the ceramic on both sides of the tank? Is there a schematic somewhere showing how that installs?

  • 6 years ago

    westes-

    Yes, they make pass-through extensions: Extension

    And I also see that the socket set I linked to above has both metric and SAE sockets, so that would be a very versatile buy.

    westes Zone 9b California SF Bay thanked kudzu9
  • 6 years ago

    @westes Zone 9b California SF Bay there are lots of you tube videos and other resources. I also think the kit may come with instructions. I don’t remember the exact order but one seal on the inside and one on the outside. Flat head screw driver inside to hold it in place and just snug the bolt on the outside. I’ve never replaced the bolts, but have installed several new toilets which includes setting the tank

    westes Zone 9b California SF Bay thanked lyfia
  • 6 years ago

    @kudzu9 Thank you for those references and I bought the parts. Let's hope I do not make a mess of it. :)

  • 6 years ago

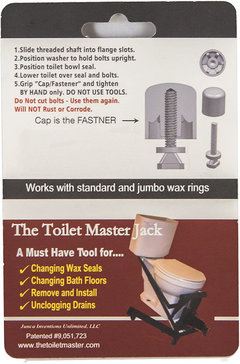
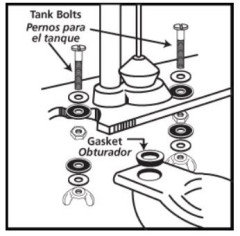
    Has anyone tried this design for the tank bolts?

    Ignore the bottom part of the photo, which is advertising a separate product.


  • 6 years ago

    westes In my experience all the parts are interchangeable. However, there is one area I have found where there may be a problem. On the flush lever some tanks have a square hole. The bracket for the flush valve has a stop so the arm does not swing down in the tank. the square hole keeps the fitting from sliding around.


    Just tighten every thing to the point that it does not leak. there is no need to muscle the nut so they are tight. As for the washers, I always put them against the porcelain, as it is illogical to do it the other way.

    westes Zone 9b California SF Bay thanked krnuttle
  • 6 years ago

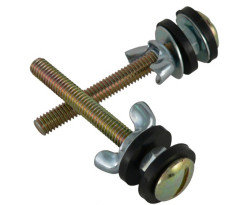
    @krnuttle This is the unusual bolt the other user had posted. As configured it appears to put a washer against the tank on one side, and rubber against the tank on the other side. It's not clear to me how it attaches.


  • 6 years ago

    westes- It doesn’t make sense to me either unless the head of the bolt is outside the tank and the threaded shaft is inside...the reverse of what you have. In addition, if that zinc-plated wing nut was inside the tank, it would quickly corrode.

    westes Zone 9b California SF Bay thanked kudzu9
  • 6 years ago

    While I have always placed the rubber washers against the porcelain, I checked several online do it yourself and diagrams for attaching the bowl to the tank. All showed the rubber washers against the porcelain.


    One thing I notice as some show one washer on the inside and then pulling the tank down to the bowl with the nut and metal washer under the lip of the bowl.


    Personally I like the type that uses a washer on the inside, a washer on he outside, a metal washer, an nut; the a metal washer and nut on the underside of the bowl to hold the tank to the stool.


    With this arrangement I can tighten he one nut so the tank does not leak and the other to hold it to the bowl as in this video

    https://www.youtube.com/watch?v=HGy69NxKMU4

    westes Zone 9b California SF Bay thanked krnuttle
  • westes Zone 9b California SF Bay thanked lyfia
  • 6 years ago

    @krnuttle Now that video made sense to me. But it looks like using that particular bolt and nut system requires me to remove the entire tank. Some of the other bolts I could buy would in theory let me keep everything intact and just replace the bolts without lifting the tank off.

  • 6 years ago

    @krnuttle Thanks for pointing out that I had asked about the wrong kind of bolt. :) That saved me some grief.

Sponsored
Top Choice for Reliable Tile & Stone | Franklin County, Ohio