Software
Houzz Logo Print
courtney_stone27

Zellige tile installation

4 years ago
last modified: 4 years ago
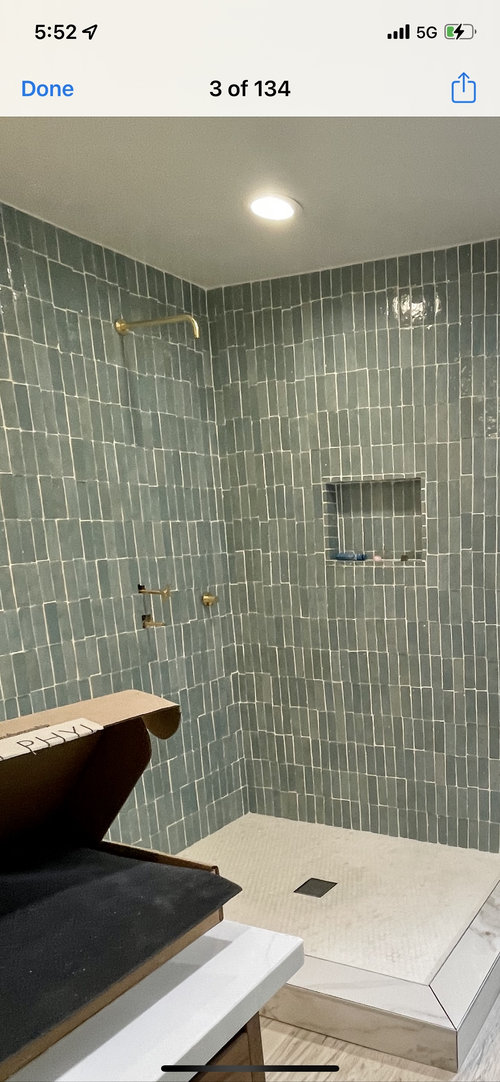
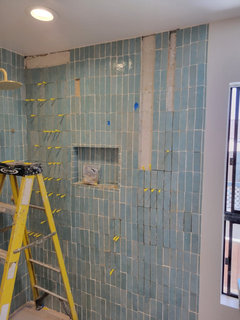
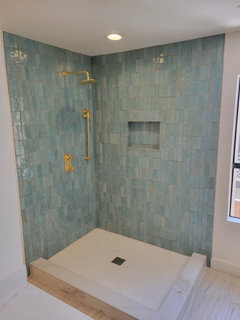
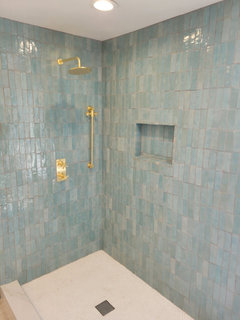
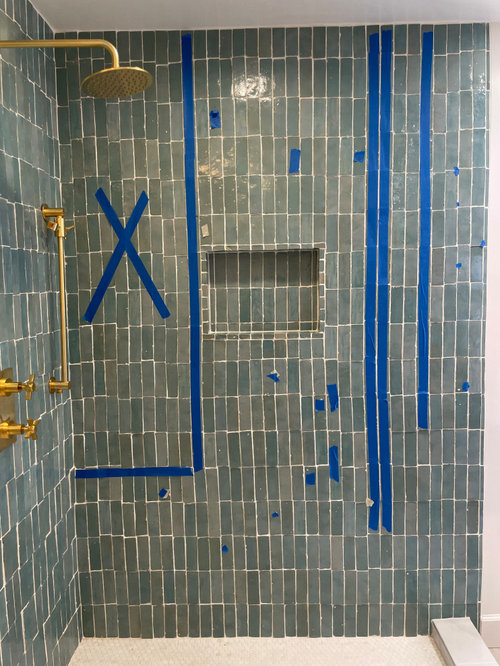
Just had my Zellige tile installed and disappointed in how chaotic sone of the lines are. thoughts/tips? Am I being too critical or wondering if contractor can fix.

update:

hi, we met with our contractor and have appreciated all the comments just overwhelmed by the issue. We were out of town while construction was going on so definitely learning for future. plan was to have the look be vertical and knew to expect not 100% clean lines/ we expected irreguirregularity and organic look but the jaggededness was just too concerning especially with grout as many pointed out. our contractor is going to rip out a few worst offending areas to improve and goal

is to change/ darken grout to likely a gray tone.


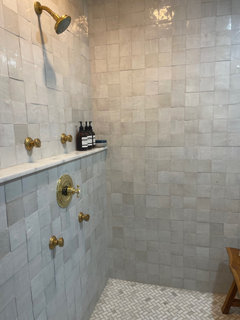
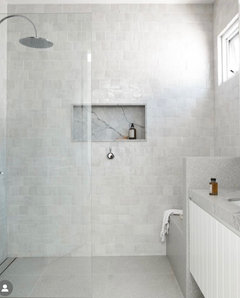
7/28 latest photos after some repair and grout stain


Comments (48)

  • 4 years ago

    Did you specify tiles to be aligned both horizontally and vertically? It’s certainly different that I’ve not seen before.

  • 4 years ago

    Did you request something OTHER than alignment horizontally and vertically? THAT would be the 'go to' installation!! The only fix is a total tear out and start over with a tile installer who knows what they are doing. The upside is if your installer finds it challenging to get all the lines perfectly straight--then this is better than a slow slant. Those tiles look small enough to have come on sheets with a grid backing holding them together...if so this was done with a lot of effort. Sorry.

  • 4 years ago

    That’s just vertigo inducing!

  • 4 years ago

    Some of the lines? Again how was the layout agreed to be done?

  • 4 years ago

    Zellige tile is extremely irregular so nuch so that some people order 40-50% extra.

    I would consider trying to match the grout exactly to the tile so it all became just textured. The rectangular shape is going to be even more like this than the square.

    To me, the irregularity is so uniform that it looks okay to me, just very rustic. If you don't want rustic and irregular, you should consider another tile.


  • 4 years ago

    This would be far better without the niche. The "rustic" alignment might actually work without the square niche...in general I think niches should be avoided. Did you clearly communicate the layout you wanted?

  • 4 years ago
    last modified: 4 years ago
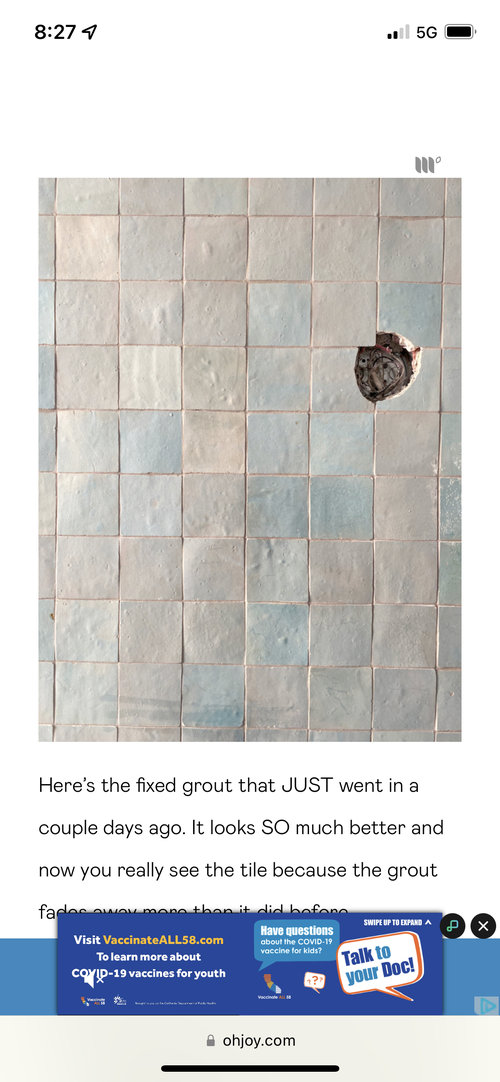
    You would need REALLY wide grout lines in order to create an illusion of straight grout lines. That is not what zellige is about. It is way too irregular to do that. Your grout is sldo way wrong for zellige. You need color matching grout.

  • 4 years ago

    Zellige is irregular. To tone down the busy-ness, have it regrouted with a grout that matches the tile as closely as possible.

  • 4 years ago

    Hmmm I googled Zellige before responding to see if this irregularity was the case and all the pics I saw were glass tiles straight and standing even. Now I have to assume the OP wanted irregularity.....so what's the beef?

  • PRO
    4 years ago
    last modified: 4 years ago
    "Zellige Tile Installation

    Not for the faint of heart, or tile talent. WHERE were you as the tile was going in?

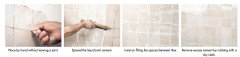
    - Before installation, mix the tiles with their different shades to compose a random and harmonious panel.
    - Prepare and level the wall before installing the Zellige tiles.
    - Evenly apply flexible adhesive for ceramics on the surface to be tiled as well as on the back of the tile. Silicone can also be used to fix Zellige tiles.
    - Position the tiles by hand, leaving no joint (edge to edge) without using tile spacers.
    Adjust tile placement with the adhesive depth and grout space, looking for the harmony of the installation. With complex designs, more adjusting may be needed.
    Floor installations: leaving a small grout space will help compensate for movements.
    - Once the adhesive is dry and the Zellige tiles are well fixed, spread flexible grout over the surface, with a rubber spatula, making sure that the spaces between the tiles are completely filled.
    - Wipe off the excess grout cement with a damp sponge or cloth. Manually rectify any possible defects on areas that have been left without grout.


    Bottom line? Leave it rustic, change grout, or rip it. : )

    Courtney Stone thanked JAN MOYER
  • 4 years ago

    It’s kind of interesting as is. The more I look at your photo, the more I enjoy the unevenness. A different grout color would certainly reduce the effect currently produced. Will be interesting to see how you resolve the issue. Love the colors you’ve chosen for the shower. Can you show more photos of the bathroom?

    Courtney Stone thanked Timi M
  • 4 years ago

    @Courtney Stone, any answers? Can't tag her, she probably ghosted us.

    Courtney Stone thanked millworkman
  • 4 years ago
    last modified: 4 years ago
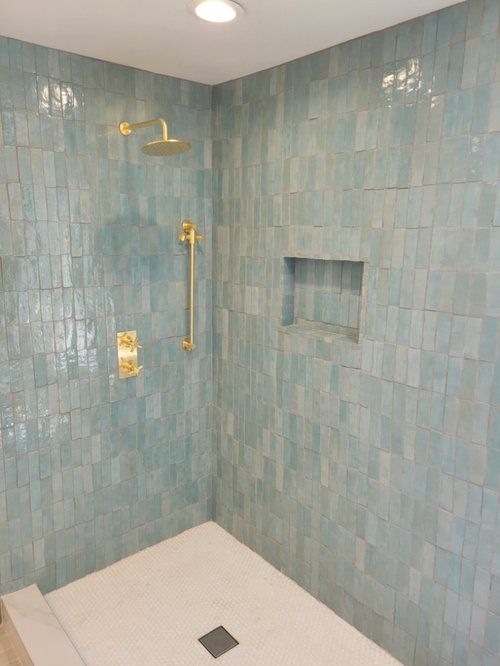
    hi, we met with our contractor and have appreciated all the comments just overwhelmed by the issue. We were out of town while construction was going on so definitely learning for future. plan was to have the look be vertical and knew to expect not 100% clean lines/ we expected irreguirregularity and organic look but the jaggededness was just too concerning especially with grout as many pointed out. our contractor is going to rip out a few worst offending areas to improve and goal

    is to change/ darken grout to likely a gray tone.

  • 4 years ago

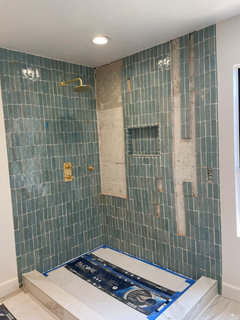
    Latest photo with rip out


  • 4 years ago

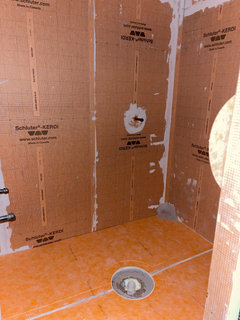
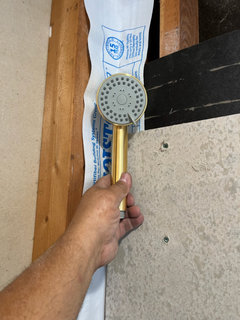
    May want to keep ripping, I see what looks to be raw cement board, no waterproofing.

  • 4 years ago

    Thats a 100% redo now, and it has nothing to do with how the tile was set and everything with how the shower wasnt built properly underneath the tile.

  • 4 years ago

    Will be beautiful. Love the color!

  • 4 years ago

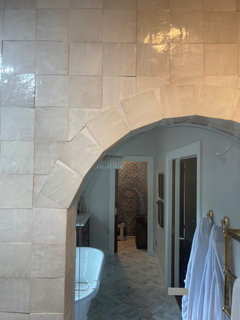
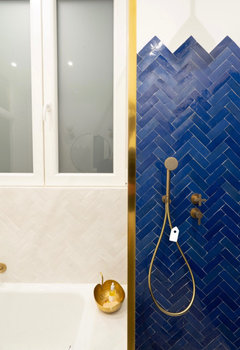
    Zellige is very hard to install. Our contractor went with a top dollar tiler who had experience with Zellige. There are also a lot of problems right now with tiling generally. In our area for example, pretty much everyone I have talked to who is remodeling has had to have tile redone because contractors are just having a heck of a time finding good subs. And these are relatively simple subway or hex tiles that had to be ripped out and redone. I would ask my contractor to go with the best tiler with Zellige and pay the extra and make sure they have experience. Our tilers were so so good, and I will ask my contractor to use them every time even if they are a premium. Their attention to detail was immaculate. I will post pictures and you can see even the tiny pieces around the arch are perfect. And a good tiler with experience with Zellige will be able to miter edges. We left ours raw because I like that sort of European feel (and it’s outside the shower where our tile ends) but how it’s going to be edged is also a very important consideration. We asked our tiler a ton of questions because I was super nervous about the Zellige, and they knew their stuff. Dark grout can be difficult with Zellige because it can show through; I would ask the manufacturer with your tile what they recommend. The grout is very important; we used the recommended mapei color (I don’t remember what it is now but basically it is white). I was there the whole time because I was so nervous; I live in a Midwest city where not many people have done Zellige. The other questions I would be asking the tilers: did they soak the tiles before applying? This is also very important. Did they seal the tile? For the look you want with Zellige, you also want to make sure they are using the smallest possible spacing between tiles — I can’t remember now what my tilers used but they did everything that the tile manufacturer recommends. Personally, I would make them redo because there is no reason it should look that bad and I would wonder if other steps were missed. And I read everything the manufacturers recommended and told it all to our PM just to make sure everyone was on the same page. Our tiler could show us examples of previous Zellige installs he had done — I would ask for those as well.

  • 4 years ago

    Wow, Erika, just gorgeous!

  • 4 years ago

    It also looks to me in your pics like the bottom of the niche is grouted and that the shower curb is multiple pieces. We did not use a niche and used a ledge instead, but from everything I have been told, the bottom of the niche and the shower curb should be a solid surface because you do not want water to collect there. For example you can see we used a single piece of marble for our curb and another single piece for the ledge. You also want to make sure that the curb is very slightly slanted to keep water from pooling outside the shower. Our tiler happened to notice that our curb when it dried wasn’t slanted how it should be (this can just happen or someone stepped on it) and pulled it off and re did it. To me that is another example of a great tiler; they are going to notice those little details and mistakes themselves and fix them.

  • 4 years ago

    Thanks Timi!!

  • 4 years ago

    One last thought: from looking at other pics, it seems like the vertical stack Zellige is kind of hard to do without having the problems you are noticing with unevenness esp in a darker color. Perhaps consider having them run horizontal and not stacked or herringbone. It is still a beautiful look!!! And I feel your pain with mistakes during a remodel; we had every mistake you can think of (our framers put in 7 feet ceilings at first and it all had to be ripped down) and that’s when I got savvy about trying to prevent mistakes from the get go ;)

  • 4 years ago

    Those tiles are best in smaller areas, like a backsplash.

    what grout are you using?

  • 4 years ago

    What the other posters are mentioning with the waterproofing is that there should be something underneath the tile — we used schluter. I admit to not knowing all the different kinds, but it is another question I would be asking the tilers. I posted a picture of what they mean — you can see the orange schluter Kerdi board.

  • 4 years ago
    last modified: 4 years ago
    Appreciate the comments - but really not an option for us to fully redo - just cant afford replacing all the tile. the black paper waterproofing and hot mop etc was done and I was reassured on it based on concern. That this was done on top of that. I don’t know what else we can do. He was referred to me by my realtor who has used him on many jobs and has done a great job for him.


  • 4 years ago

    Interesting how upthread it was recommended to "Position the tiles by hand, leaving no joint (edge to edge) without using tile spacers." I wonder why your guy is using spacers?

  • 4 years ago

    Looking good!

  • 4 years ago

    Hot mop ... you are probably in CA!

    I had that type of water proofing in my CA house and didn't have any problems with any of the showers in the house, old or new.

    Courtney Stone thanked chispa
  • 4 years ago

    A designer I follow on IG had a bathroom hot mopped, and apparently it is just the preferred method in S.CA!! So no worries on that end :) it is looking much better!

    Courtney Stone thanked User
  • 4 years ago

    I agree with Beth H about the niche. They are hard to do with Zellige anyways. I am not an expert, but it doesn’t look right to me. I would perhaps use whatever you are using on the curb for the niche. My tilers would not allow me to use anything but a solid surface— marble, quartz, etc in a niche (but I ended up not doing one).

  • 4 years ago

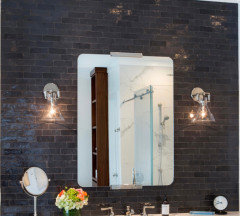
    Here are some where the niche is lined with the curb material

  • 4 years ago

    Schluter edging

  • 4 years ago

    And then a pro might be able to say whether these work well for people but you can also just skip the niche and have your bottles attached to the wall (I think Aesop for example even sells a holder for their bottles that can be attached to the wall) or get some kind of metal ledge/basket like this pic.

    Courtney Stone thanked User
  • 4 years ago

    I agree, think the niche is biggest eye sore now. will see what we can do, thanks all for your insight and feedback!

  • 4 years ago

    Tar paper as a vapor barrier on the walls and hot mop on the shower pan has worked for many years. If CBU is used then the joints need to be covered with tape and thinset and the screw holes covered too. I like that your installer has overlapped a vapor barrier in the corner. However, the niche not only looks untidy done with such rustic tile, it will also give water a chance to penetrate behind the walls. Niches are hard to waterproof and if you just have tar paper then I fear it will be very difficult indeed. So the niche fails for me for both esthetic and practical reasons.

  • 4 years ago

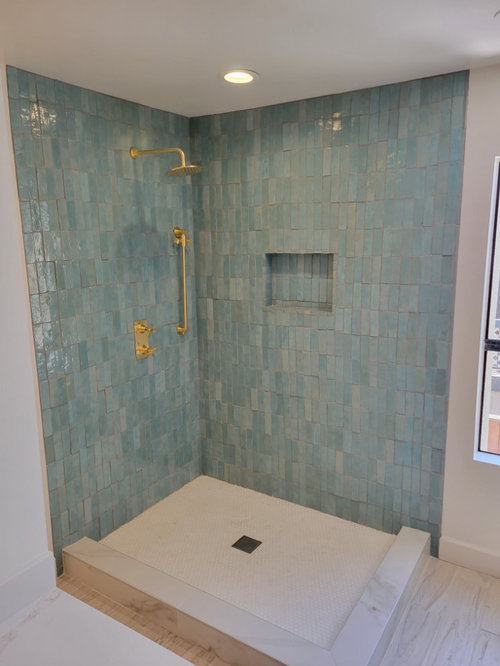
    update: grout stain and tile repaired - feeling so much better about the wnd result!


  • 4 years ago

    It looks beautiful! Hard to believe it is the same shower.

  • 4 years ago

    much better Courtney. (I still don't think that niche was done properly, but it's your shower!) Get some nice containers for the shampoo and soap and it will hide most of it!


    The blue tile is very pretty.

  • 4 years ago

    Hardly looks like the same space. I think it turned out lovely.

  • 4 years ago

    It’s gorgeous!!

  • 4 years ago

    And, the niche is fine. Just enjoy your beautiful new shower.

  • 4 years ago

    It’s wild how much the grout color made a difference!! I def like that grout color better. It looks great! You can find generic apothecary bottles on Amazon for shampoo, soap etc. if you want and of course some already come in prettier containers.

  • 3 years ago

    Hi, Going through the exact same problem. What grout stain and color did you use?

  • 3 years ago

    This looks so much better with the new grout color. It accentuates the tiles and not the grout! Turned out beautiful.

  • 3 years ago

    Hi, Is the tile cle tea ceremony? I am putting this in my island home and have to get the grout right the first time or it will be a major pain - curious the color you used for the correction - it looks perfect. thank you

  • 3 years ago

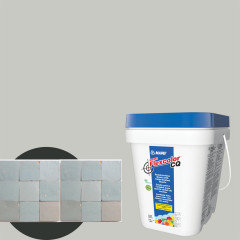
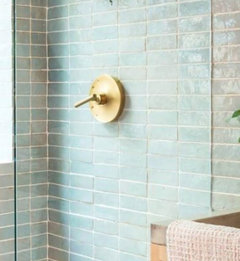
    bevysaintpe,,,,tea ceremony is a beautiful color. I would use a light gray grout color, allowing the zellige tile to shine through. The eye really won't pick up on the gray. Look at Mapei Warm Gray. it's the perfect shade. I used it w/my shower tiles


    the warm gray will give you a similar look to this one. (also your color tile)


    here's the warm gray in the Flexcolor CQ


    I would not use this bright white grout color or this very large grout spacing


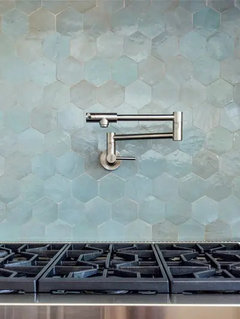
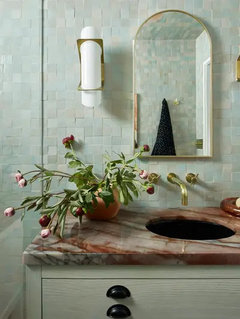
    try to get as close as you can


  • 3 years ago
    last modified: 3 years ago
    thank you so much Beth. Very helpful and that is exactly what I'm looking for - grout that doesn't overwhelm the tile and the smallest grout lines possible. really appreciate this help!!