Software
Houzz Logo Print
reid_coopersmith

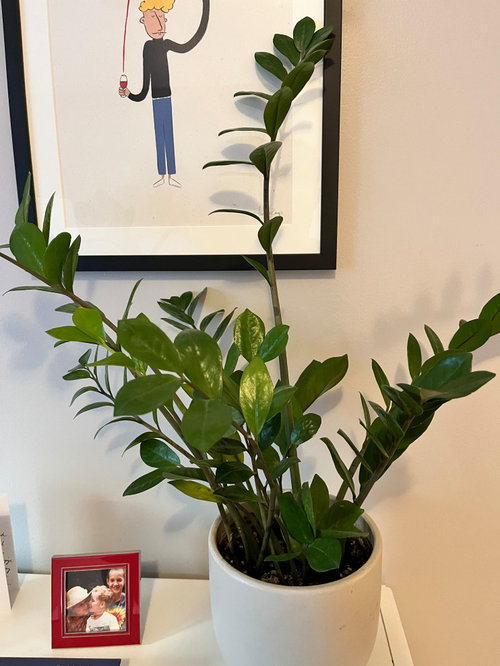
ZZ Plant Issue - house plant

3 years ago
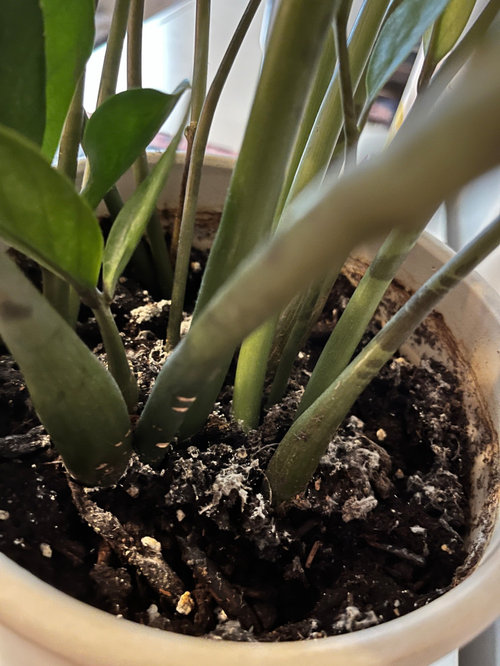


Hi all,


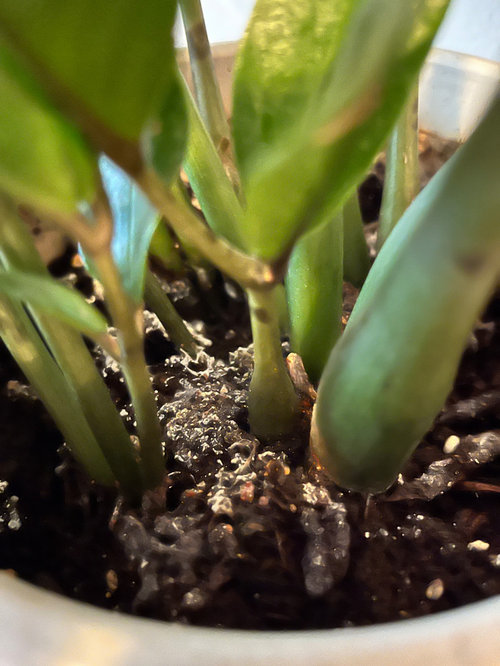
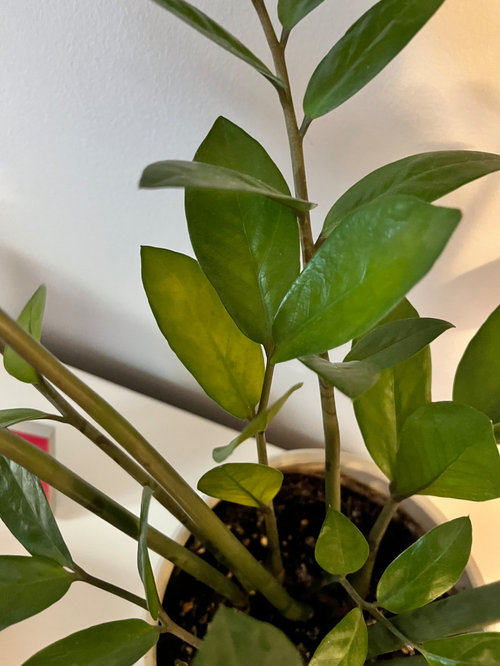
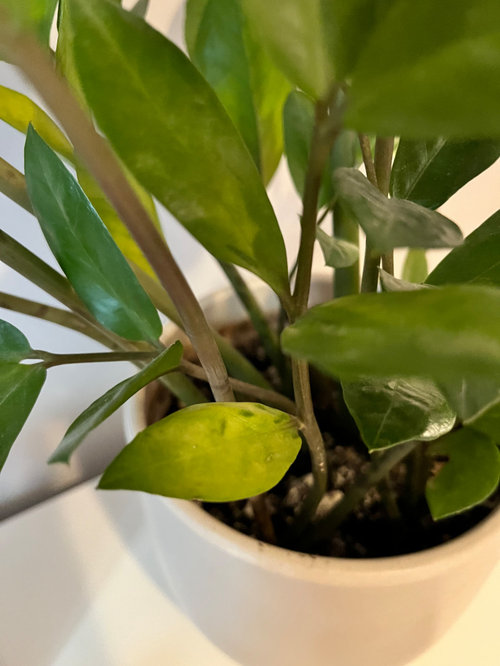
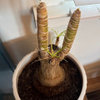
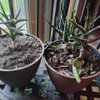
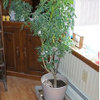
Noticing that some of zz plant leaves are turning a lighter green or almost yellow. I know new growth tends to come in brighter but this appears to be older growth changing colors. im also seeing some white mold perhaps on the soil. inights and recommendations would be appreciated. thx

Comments (8)

  • 3 years ago

    the white stuff is just your media breaking down due to the constant moisture.. it has no effect on any plant ...


    the salt stains around the rim of the pot and the shrinking of the media indicates to me.. you need to repot with some fresh new media ... the stains also indicate an excess of fertilizer... which is what the salts are ... all can bring you up to speed with all that ...


    how far from the window is the pot.. is it getting sufficient light.. yellowing might suggest it isnt ...


    ken

  • 3 years ago

    @ken_adrian Adrian MI cold Z5 Hi Ken- thanks for your feedback and thoughts. I recently repotted this (within the last two months) and have not used any fertilizer at all. The visible rim may be from the prior potting. This is pretty far from any window. Maybe 15 feet in a relatively dim room. Maybe it needs to spend more time by the window (west facing)?

  • 3 years ago

    The white material on the soil surface is the solids, formerly dissolved in the soil solution, left behind as the soil solution evaporated from the top of the soil. Think of the mineral deposits that occur in tea kettles or anywhere where tapwater or fertilizer solutions are allowed to evaporate. Usually it doesn't occur when you make sure to apply irrigation water evenly to the top of the soil when you water, and you make sure you're applying at leads 20% more water than it requires to rewet the entire soil column. The purpose of applying more water than it takes to wet the entire soil column is it flushes any accumulating dissolved solids (think 'salts') from the soil, thereby ensuring they cannot accumulate to the point where they inhibit water uptake. Salts can accumulate to the degree they prevent water uptake or even reverse the osmotic flow of water into cells, instead, pulling water OUT of cells by the same mechanism curing salt pulls water out of meat cells (bacon/ ham/ sausage, ....).

    The tendency of grow media is to break down over time due to the activity of biotic soil life cleaving the hydrocarbon chains that make up the medium's organic ingredients. The white dissolved solids are not an indication the medium is 'breaking down' as they will become conspicuous whenever a planting is not watered with focus on preventing a build-up of dissolved solids.

    It's not clear if the pot has a drain hole. If it doesn't that can be the source of issues related to over-watering and an accumulation of dissolved solids in the soil. Your pot should have a drain hole unless A) you're an experienced grower familiar with monitoring soil moisture levels B) you're watering with some form of deionized water (rain water, water from a r/o filtration system, dehumidifier/ air conditioner condensate) and C) your nutritional supplementation program consists of using organic soil amendments as a nutrient source - not easy to get to a place where you can depend on delivery of nutrients via organic sources in containers.

    Since you haven't been fertilizing regularly, there is a very high probability the chlorotic appearance is due to a deficiency of nitrogen and likely other nutrients considered to be mobile in the plant (nitrogen, phosphorous, potassium, magnesium, sulfur). "Mobile", means the plant is able to 'borrow' nutrients from other plant parts (like older foliage) to provide the building blocks (nutrients) plants need for new growth.

    Care basics: the plant wants to be treated as you would a succulent. Wait until the soil is nearly but not entirely dry before watering and plenty of bright light bet not direct sun.

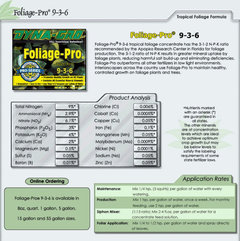
    A very good fertilizer source would be Foliage-Pro 9-3-6. It's a 1-stop (complete) nutritional program from a single source. Let me know if you want help putting an effective fertilizing regimen in place. No one can tell you how to fertilize w/o some knowledge of your grow medium's physical characteristics and your watering habits.

    Thoughts or questions?

    Al

  • 3 years ago

    @tapla (mid-Michigan, USDA z5b-6a) Thank you for the extremely thoughtful and detailed response. I'm a novice when it comes to houseplants, so this explanation was extremely helpful. The planter does not have a drain hole but I did put down a base layer of lava rocks hoping that that would create enough space. I do have on hand some indoor plant fertilizer linked here. But I've never really used it. Any recommendation on how to fertilize and stabilize my ZZ plant would be appreciated. Thank you.

  • 3 years ago
    last modified: 3 years ago

    There are 2 issues associated with 'no drain hole'. One is over-watering. As noted, you can get by for a while w/o a drain hole if you monitor moisture levels carefully and water judiciously with some form of deionized water, but you can't avoid a build-up of dissolved solids and fluoride from tapwater.

    If the pot is plastic, you can melt a hole through the bottom with a heated nail of screw held with a pr of pliers. If it's a glass/ pottery pot, drill a hole in the bottom or cave and buy a new pot.

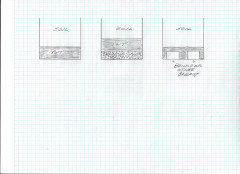
    Even if the pot has a drain hole, a "drainage layer" of lava rocks does not create drainage any more than filling a bucket half full of marbles does. If there is nowhere for the water to go, "drainage" is not possible. All it does is raise the level of any perched water table in the pot. The pots below are all full of the same medium. The shaded area in the left pot shows a perched water table, which is water that 'perches' in the pot like a bird on a wire, and will not respond to the force of gravity because the counter force of capillarity (water's tendency to stick to itself [cohesion) + its tendency to stick to other particles/ objects [adhesion]) is greater than the force of gravity. The middle sketch shows how a perched water table reacts to a "drainage layer". As you can see, it's not a good thing.


    Unfortunately, the fertilizer you purchased is a total rip off. You can read in this thread, where I took a seller to task for taking horrible advantage of unsuspecting buyers by marketing a very similar product, I wouldn't be surprised to learn it is the same marketers selling the same watered down stuff. The "fertilizer" you purchased is the same RATIO (3:1:2) as Foliage-pro 9-3-6, but the water content of what you purchased is about 99.57%. So the fertilizer content is <.05% (less than 1/2 of 1%), and you paid about 192X more than you would pay for the same concentration of Foliage-Pro 9-3-6. Shameful.

    Your thoughts?

    Al

  • 3 years ago

    Thanks @tapla (mid-Michigan, USDA z5b-6a) - I'll look into a pot with a drain and/or drill into this one (it is clay), as well as the foliage-pro fertilizer. Makes sense to me.

  • 3 years ago
    last modified: 3 years ago

    I just happened to have saved a tutorial re drilling holes in pots. Before I retired, I owned a corporation that specialized in contract glazing (a large glass company). On a daily basis, we were drilling materials including glass, ceramic, ceramic tile, granite, cement, stainless steel, cast iron, ..... So I have a great deal of experience when it comes to drilling all manner of hard materials.

    Drilling holes in pots

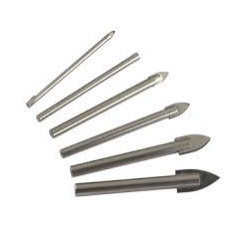
    The 2 types of drill bits most appropriate for drilling holes in pots are diamond core bits for the highly vitrified (hard material - baked at very high temps - glass, ceramic, ......) pots, and a drill with several names for drilling clay pots fired at low temps, such as terra cotta. That (carbide) drill is called a 3-point drill, spear point drill, or a spade drill, seen here:


    spade/ three-point/ spear drills ^^^^

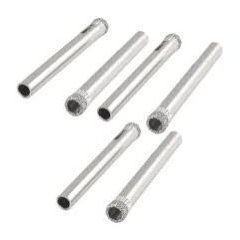
    For the hard stuff, diamond core drills are best, though the 3 point drill will drill the hard stuff, too. Both are available in many sizes, with bits sized 3/8 or 1/2” best for pots.

    You can buy either type at big box stores, and they're not that expensive, but you won't find a 'set' of diamond core bits worth buying for $9. The bits last a long time, depending on quality and how you use/care for them. They are best used with a steady stream of coolant from a squeeze bottle (contact lens solution bottles work great for this) or with the work surface barely submerged. IE, put the pot upside down in a tub and fill the tub with water until it just covers the work surface. If you use a spritzer or squirt bottle, a 50/50 mix of antifreeze and water is an excellent coolant, and soapy water is better than plain water but not as good as the antifreeze mix. The coolant keeps the tool from over-heating, and in doing so, increases the life of the tool substantially - like triple or quadruple the number of holes you can drill. While drilling, apply very little pressure, just the weight of the drill motor with you providing only guidance is sufficient. Drill at medium speed – somewhere around 1,600 rpm. NEVER use either type of drill mentioned above without a lubricated coolant. The heat will cause thermal shock and fracture in glass and ceramics and heat build-up will destroy the tool.


    diamond core drills ^^^

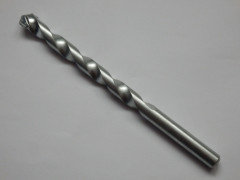
    Regular masonry bits are "ok" for drilling terra cotta or cement (you can make them work), but inappropriate for anything harder. The right tool makes everything easier.


    masonry bit ^^^ (not recommended)

    Al

Sponsored
Kuhns Contracting, Inc.
Average rating: 5 out of 5 stars26 Reviews
Central Ohio's Trusted Home Remodeler Specializing in Kitchens & Baths