Software
Houzz Logo Print
clairegs

Show me your showers with large format tile

2 days ago

I'm considering using 24x48 tile in the shower. I'm not having much luck finding photos of this. I see some with maybe 12x24 tiles, but not much with 24x48. The contractor recommended this so he's comfortable installing them. I was considering shower panels (have another post on that) because I hate grout, but it might be ok with minimal grout lines.


I'd like to see photos of them running both horizontally and vertically. Our shower will be about 44x60 and we have 8ft ceilings. So on the short walls we'd have 4 stacked horizonally or 2 stacked vertically. On the long wall, horizonally I'm not sure--I think one 48" and one 12" would be weird so maybe 48" in the middle and 6" on each side? Then 4 stacked. Or vertically it would be 3 across and 2 high.

Comments (10)

  • 2 days ago
    last modified: 2 days ago

    You mean little 6" pieces if they're laid horizontally on the back? Yeah, that could be weird. I guess vertically is the way to go. But I just realized my math isn't mathing. I've had 6ft in my head for the back wall but it's 5ft.


    I found this pic on Reddit. I"m not sure why the back wall here has smaller pieces--the back looks smaller than the sides, but maybe it's just an illusion of the photo. Seems like one large one would fit across. In my case, we could put two 2.5ft pieces side by side horizontally, instead of what I was thinking with the big 48" one in the middle and little pieces on the side. Not sure how that would look. Hmmm.

    https://www.reddit.com/r/Tile/comments/1atymip/first_24_x_48_shower/


    I don't want 12x24 tile. I want to minimize grout and was planning on shower panels but contractor suggested I consider 24x48 tiles.

  • PRO
    2 days ago

    A hand wring over grout is absurd, A well ventilated bath, weekly cleaning, renders grout cleaning a myth of misery in your head.


  • 2 days ago

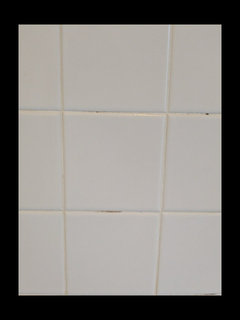
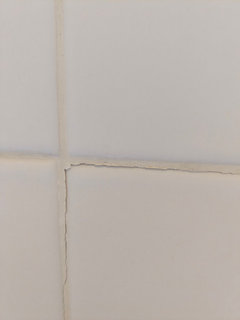
    We shower with the fan on and I clean the bathroom weekly and get crud. Plus some cracking in the grout. I think it's pretty normal to hate cleaning grout.


  • 2 days ago

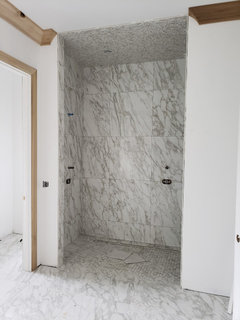
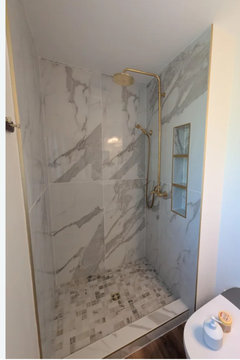
    In my master shower I have 30"x30" porcelain tiles. In my guest bathrooms, one has 12x24 and the other 24"x24". I wasn't going to show a photo because with matching grout and shower glass in place, it makes it hard to see the individual tiles, but I found a good photo during construction, before it was grouted. I also like to tile the ceilings in all my showers.

    This is 30"x30" wall tile. Shower is 48"x96" with 10ft ceilings.

    Floor tile is 24"x24"

    I would have gone with bigger tile, but this was the largest size offered in this tile collection.


    cgs thanked chispa
  • 2 days ago

    @chispa thanks, that's helpful. 30x30 would fit perfectly on the back wall, wall to wall. and having it not be exactly even floor to ceiling isn't a big deal--I see you have smaller pieces on the bottom and top.


    Now I'm thinking maybe I could do the back wall as an accent wall with 30x30 and the side walls with 24x48 and everything would fit pretty nicely.

  • yesterday

    @cgs - my assumption is that the back wall was too long for one tile = more than 48" across. Instead of centering a 48" tile on the wall + having little strips of tile on each side, it appears that they decided to cut two 48" tiles down for each row of horizontal tiles. It looks better to have two large partial pieces of tile stacked horizontally on the back wall vs. one 48" tile + two tiny strips.


    Also, the tile installer did a nice job of trying to match up the veining from one tile to the next in order to make the two tiles look more like one large tile that runs across each horizontal row. He/she/they tried to make the veining look as continuous as possible from the tile on the left to the tile on the right.


    If you are not using tiles that mimic natural stone, you may want to skip through the rest of this post! However, all tile installers should open all boxes of tile prior to installing in order to mix the boxes together - there can be some variation between tiles even if all boxes are from the same dye lot. Also, your installer should cull out any tiles that have issues (random marks/variation from other tiles/chips/etc.) prior to installing.


    If you are using large faux marble tiles, you need to have a very good tile pro installing the tiles.

    An experienced "high level" professional installer will try to make the veins seamlessly flow from the bottom tile to the top tile + horizontally across a wall. If the grout is color matched well to the background color of the tile + the thinnest possible grout lines used, the grout lines almost "disappear" visually = tricking the eye into seeing one massive sheet of marble instead of separate pieces.


    This type of layout requires a highly skilled installer who executes a "dry lay." The installer will unpack multiple boxes of tile in order to see all of the different vein patterns (some manufacturers have no repeat face patterns - I am pretty sure that is the type of tile that chispa purchased for her shower/floors). The installer will then "map out" the veins like a puzzle on the floor before any thin-set mortar touches the wall.


    When a random installation is used, tiles are pulled straight out of the box and installed without mapping the pattern. This is the standard, faster installation method. The installer focuses entirely on proper coverage, leveling, and minimizing lippage rather than the artistry of the print pattern. A vein might abruptly stop at a grout line, or run vertically on one tile and horizontally on the next. The individual grid lines of each tile become highly pronounced = the faux marble looks even more "fake" + becomes visually "busy."


    Also, because faux marble features repeated digital prints, installing them in a completely random manner can sometimes cause "pooling" = where two identical tiles end up right next to each other. This creates an unnatural and distracting look.


    The shower below has identical tiles right next to each other on the top and second row of the back wall = not good.


    I've seen many posts here on Houzz where two (or more) of the same exact tile print will be located next to each other (above/below/on the side/diagonally) - or very close to each other. The risk of "pooling" becomes even greater if you purchase a faux tile that has very limited face patterns (the number of face patterns should be listed in the specs for the tile - if not, I'd call the manufacturer to find out how many there are).

    cgs thanked dani_m08
  • yesterday

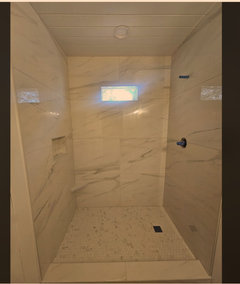
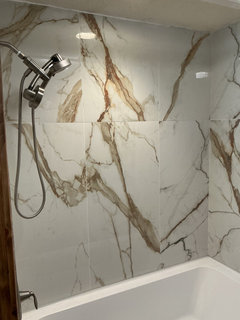
    This is ours , though, it is in a tub/shower combo. 24x48 but the top row, had to be cut..


    cgs thanked Love stone homes
  • yesterday

    Thanks @dani_m08 that is super helpful information. I remember when I was considering LVP, trying to find out how many different patterns a given type, but it was hard to find out.


    @Love stone homes thanks for the photo--very helpful as well.

  • 14 hours ago
    last modified: 14 hours ago

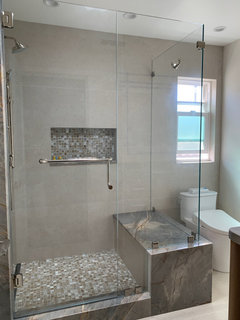
    Here is a "sneak peak" of my almost finished tub-to-shower conversion with 24x48 inch limestone-looking porcelain tiles across the back wall (horizontally stacked) and across the bathroom floor. The bathroom is about 8x7.5 feet. The ceilings are 8 ft high. The interior of the shower is about 36 x 59 inches.

    I hired a professional, expert, tile-setter for the project and acted as the GC. The tiles on the back wall were installed top to bottom. The bottom row of tiles needed to be cut to match the slope toward the linear drain under the plumbing wall.

    The size of each tile is just a bit smaller than 24X48 inches. I knew that I would have an extra cut going across the 8-foot wide back wall. I choose to have the extra line of grout fall alongside the vertical edge of the window. My tile guy helped with lining up the tiles on the bathroom floor -- placing the first tile along the bathroom entry threshold.

    Large-format uses more tile. I had just enough!