
Search results for "Plastiktüten" in Home Design Ideas
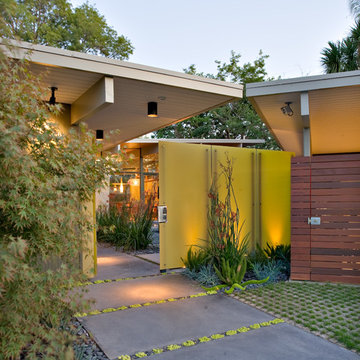
 Guy Ayers, Architect
Reverse Shed Eichler
This project is part tear-down, part remodel. The original L-shaped plan allowed the living/ dining/ kitchen wing to be completely re-built while retaining the shell of the bedroom wing virtually intact. The rebuilt entertainment wing was enlarged 50% and covered with a low-slope reverse-shed roof sloping from eleven to thirteen feet. The shed roof floats on a continuous glass clerestory with eight foot transom. Cantilevered steel frames support wood roof beams with eaves of up to ten feet. An interior glass clerestory separates the kitchen and livingroom for sound control. A wall-to-wall skylight illuminates the north wall of the kitchen/family room. New additions at the back of the house add several “sliding” wall planes, where interior walls continue past full-height windows to the exterior, complimenting the typical Eichler indoor-outdoor ceiling and floor planes. The existing bedroom wing has been re-configured on the interior, changing three small bedrooms into two larger ones, and adding a guest suite in part of the original garage. A previous den addition provided the perfect spot for a large master ensuite bath and walk-in closet. Natural materials predominate, with fir ceilings, limestone veneer fireplace walls, anigre veneer cabinets, fir sliding windows and interior doors, bamboo floors, and concrete patios and walks. Landscape design by Bernard Trainor: www.bernardtrainor.com (see “Concrete Jungle” in April 2014 edition of Dwell magazine). Microsoft Media Center installation of the Year, 2008: www.cybermanor.com/ultimate_install.html (automated shades, radiant heating system, and lights, as well as security & sound).
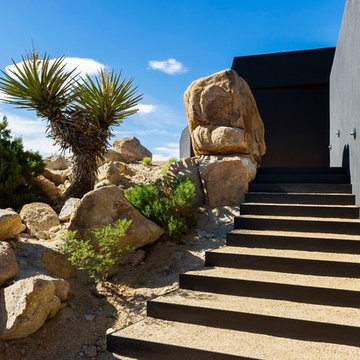
 Moderne Builders
The axis of the house was designed precisely to the point of the large boulder at the entry. It was also a way accentuate the emphasis of being dug into the landscape. The steps themselves were custom framed with steel to make the risers. Then, for the steps, I made a mix of decomposed granite and cement so that it was hold up better over time.
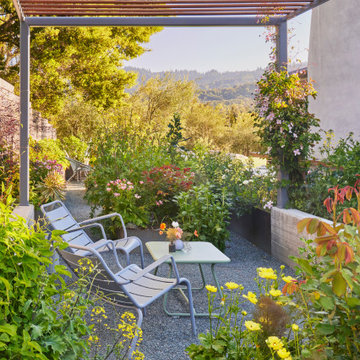
 Bay Tree Design, Inc.
This is an example of a mid-sized contemporary side yard gravel and wood fence landscaping in San Francisco with a pergola.
Find the right local pro for your project

 Elizabeth Aldrich
10 Ideas for Turning Your Garage into a Modern Industrial Neighborhood Bar
By Elizabeth Aldrich
Host happy hours and cocktail parties worthy of a full page spread – in your own garage.
Leave the brick exposed, the concrete floors as is, and the wood unfinished and it costs more? The sophisticated older brother of the shabby-chic trend, urban industrial style, is taking over. Real estate agents are able to tack on a few extra grand to a flat if they can include “exposed brick” in their advertisements, and designer chefs and master mixologists are moving into warehouses and industrial districts in urban areas across the nation. A friend recently invited me to dinner at Portland, Oregon’s newest, hippest charcuterie spot, and when we pulled up to the building it was in a warehouse where I used to go to underground raves in high school.
These industrial style spaces that were once seen as unfinished or lacking in coziness are now seriously coveted. Their rawness is considered authentic, their grit a mark of character. But if you’re a homeowner, there’s a good chance you already have one of them built right into your house: your garage.
I like to preach about how much people underutilize their garage spaces, piling them full of storage bins they never touch. Whether you turn it into a workspace or a playroom, there’s a lot of value in a creatively-used garage space. For the overly ambitious, the design lover, or the hostess with the mostess, here’s one idea that blows the rest out of the water.
Turn your garage into a multi-purpose, urban industrial wonderland for work and play.
Originally outfitted for factories and warehouses, the industrial style facilitates productivity. Now that it’s also being appreciated as a great aesthetic for bars and restaurants, these rooms can serve both form and function, doubling as work and entertaining spaces. This is great for people who have always dreamed of having that extra basement space for hosting friends, complete with a wet bar and a billiards table, but lack the square footage. Just keep in mind that your friends might love it so much, they’ll start ditching their favorite happy hour spot and showing up at your doorstep instead.
Here are ten ideas forbuilding the perfect workshop by day and cocktail bar by night in your garage.
1. Clean out the space. Get rid of everything you don’t need. Part of the beauty of industrial style designs is their simplicity and abundance of open space. Excessive clutter can make people feel boxed in, and that’s not conducive to productivity or to social activity. Out of sight, out of mind. Build shelving up high for storing must-keep belongings, much like a warehouse.
For bonus points, store your belongings in wooden crates for aesthetic consistency. Or consider stacking them on a pallet, wrapping them in excessive amounts of plastic wrap, and loading them onto the next cross-country freighter. You won’t miss them.
2. Install storage for frequently used objects. The brilliant thing about the urban industrial look is that your tools, tool boxes, and tool storage cabinets already fit right in. Metal storage cabinets and file cabinets are perfect additions to the space. While grey is certainly the color pallet for this style, 50 shades might be a few too many. Mix it up by spray painting one of your cabinetsto add a pop of color. Make a small pegboard to hold up your tools and hang larger items such as bicycles and recreational equipment by pegs. If you have a lot of storage bins that you have to keep, look upward instead of storing them on the floor. Insert a tracking system onto your garage ceiling and slide the bins into place.
For extra credit, get an old locker to use as a coat closet when guests come over.
3. Heat the space.Since you’re not turning the garage into a full-time living space, such as a spare bedroom, you really don’t need to go through the work and additional cost of installing full-blown heating and insulation systems. If you don’t need to use the space when the temperature drops, or if you live in a consistently temperate climate, you might not need to do anything. But if you do want to be able to host people through the winter, a simple garage heater will suffice. Here are some good options for installing garage heating.
Take it one step further, and get a couple patio heaters to help with the next step.
4. Turn your driveway into a patio space. Even the best restaurants and cocktail bars are nothing in the summertime without a solid patio space. Leave the garage door open on warmer nights and invite your guests to go outdoors. Place some stylish folding chairs and a patio table out for comfort. Place a few potted plants here and there to make the space feel more inviting.
For a really lively patio scene, put a portable fire pit out on the driveway or front lawn and surround it with workbenches from your garage.
5. Build your bar. Pick a corner in your garage for the bar, and get started. You can build a bar pretty cheaply and easily with reclaimed pallets, and get some industrial-style barstools. Behind the bar, you’ll have both your tools and your liquor, and there’s no need to build expensive cabinetry. If you’re serving quality, why cover it up? Build shelving or open cubicles to house your liquor. Put out metal buckets filled with ice to chill beers.Be sure to serve up cocktails worthy of the space. The Hemingway Daiquiri served straight up is a unique way to dress down, or industrialize, a traditionally frou-frou cocktail.
To go the extra mile, build a bar with laid brick.Install an extra fridge in the garage so you can avoid having to trek into the kitchen to refill chilled drinks, and you can store dips, vegetables, and other hors d'oeuvres right at your fingertips.
6. Bring on the games. To really turn your hosting space into a fun time, be sure to offer ample play options. For the low on space, a dart board will suffice, whereas if you’ve got a five-car garage and can’t manage to fill the space, put in a couple billiard tables. Ping pong tables are ideal for most because they’re great fun and can easily be folded up and stored.
If you want to keep your guests playing until the wee hours of the morning, get an old pinball machine, a vintage arcade game, or a small Skee-Ball alley.
7. The heart of your space.Build along worktable that doubles as a table for your guests right in the center of your garage. It should be tall enough to be used while standing, although you can place a few barstools along with it. Having a table space for drinks but limited seating will encourage guests to walk around and mingle. Build it out of wood and make sure to maintain a natural finish.
Don’t be afraid to rough up the work table by day. The dings and marks created while you build will only lend authenticity to the piece.
8. Install lighting. Remember, the urban industrial style is all about function and showcasing materials in their raw form. There’s no need to buy expensive floor lamps or install a fancy lighting system. The most popular lighting in these types of spaces is exposed bulb lighting. Just open up the wiring on your current lighting system and drop down some bulbs.
For additional lighting, string up exposed bulb patio lights and place some vintage metal desk lamps on the tables and bar area.
9. Brand your space. Use the designs for the stuff you build by day as wall art. Blow up sketches, blueprints, schematics, and architectural drawings to hang up for decoration. Choose one wall that could use a splash of color, perhaps the wall behind your bar, and get a friend to paint a mural, or whip out the spray paint for a real urban feel.
Splurge a little and get a custom neon sign made of your last name or the word “bar” to hang behind the bar.
10. The garage door. For the finishing touch, and to really wow your guests, get a brand new modern, industrial style garage door installed. Look for the window-paneled types that restaurants use, like this contemporary aluminum and glass beauty. You can leave it half open when you want to utilize your driveway-patio space.
On nights when you have to close it all the way, the glass panels let your guests still look out onto the stars, making it feel like a patio space even when it’s too cold for one.
Once your garage bar is up and running, put on your denim suit and get ready to call yourself the Joneses. No one will be able to keep up with you.
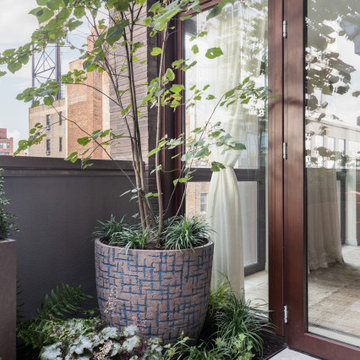


 BUTZ + KLUG Architecture
Eric Roth Photography
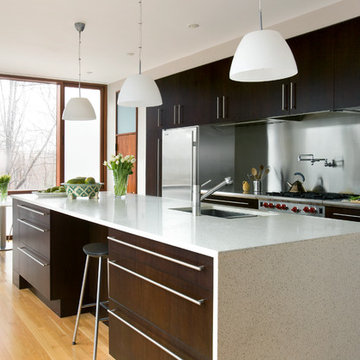
Example of a large trendy light wood floor eat-in kitchen design in Boston with an undermount sink, flat-panel cabinets, dark wood cabinets, marble countertops, metallic backsplash, stainless steel appliances and an island
Example of a large trendy light wood floor eat-in kitchen design in Boston with an undermount sink, flat-panel cabinets, dark wood cabinets, marble countertops, metallic backsplash, stainless steel appliances and an island

 Eco Star Painting
Step #1 Apply BM CLEAN
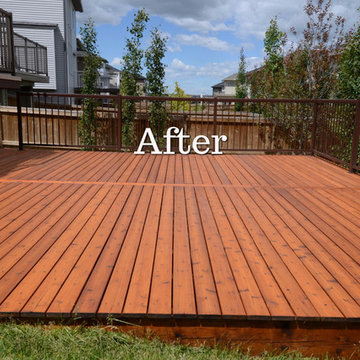
As you can see in the 'Before' picture above, this cedar deck was extremly dirty. This required an extra step in comparison to the typical deck stripping process. My paint rep at Benjamin Moore recommended a product called CLEAN. It comes in one gallon plastic containers and can be applied out of a plastic pail or with a garden sprayer. We used a Garden sprayer and chose a flat tip for application. The three gallon garden sprayer was filled with 2 gallons of water and one gallon of the CLEAN solution. This is a strong mixture and can be reduced to up to 6 parts water and one part of the Benjamin Moore CLEAN.
This approximately 22x20 deck had a board running perpindicular to the rest of the floor boards which divided it into 2 equal parts. Our method was to apply the solution to 3-4 of these 10' boards at a time. Allow it to set up for a few minutes and then scrub away with the deck brush. The agitation loosens up the dirt and grime and is then removed with a pressure washer a board a time. The flat tip on the pressure washer was almost the same width as the floor board. It is important to clean the sides of the board too because any remaining dirt or stain will be visible.
Benjamin Moore Deck Restoration products named Clean,Restore,brighten
Step #2 Apply BM RESTORE
The second step is exactly the same as the first step but with a different solution called Benjamin Moore RESTORE. The deck was dry before we started the 2nd step becuase it was baking hot outside. You use the same 2/1 mixture of water to chemical. This chemical will remove the stain still present in the deck floor. Make sure to rinse the garden sprayer clean before adding the restore solution. Unlike the BM CLEAN, the BM RESTORE has an orange-ish color in appearance. It did a fine job of removing most of the stain, but not 100% of it. There were a few areas that required a 3rd coat of restore but the process was quicker.
Step #3 Apply BM BRIGHTEN
The third step is exactly the same as the first two step but the chemical solution used was Benjamin Moore 'BRIGHTEN'. Again, the garden sprayer was cleaned and filled with 2 parts water and one part Brighten. The brightener not only lightens the wood but it also neutralizes the previous stripper solution. As stated before the Restore adds a bit of color and the Brighten will remove any traces of it. you still have to agitate the brightener with a scrub brush and either pressure wash it off or use a garden hose. We used the pressure washer for faster results. After it dries the wood look a lot brighter but we still found some spots of stain that had not come off.
Apply Sikkens Stain
As stated above the stain we used is called "Sikkens Proluxe" which is basically just a slight re-branding of the classic Sikkens Stain. The formula is exactly the same. In fact, the secondary name is still called 'Cetol' SRD RE. The color chosen was "CEDAR".
The weather was quite hot for a typical Calgary Spring day so we stained a 10' section of floor board at a time. The deck has a metal railing so the supporting feet had to be brushed in with a 2.5" natural bristle paint brush. for the rest of the job a 6" Wooster natural bristle deck brush was used. The handle was remove and a broom handle was inserted. The stain was stirred frequently and poured into a plastic Simms brand roller pan. Semi transparent Oil based stain has the consistency of water so you need to be careful not to spill any of it. When applying to a board you hit the sides first with the brush and then fillin the rest. Ten feet of floor board can be stain in a short period of time. it's important not to leave any streaks so it is adviseable to back-brush the entie length before moving on to the next board. The staining only took about 2.5 hours to complete. One coat is the manufacturers recommendation.
One last thing about Sikkens Stain. To maintain this beautiful look the deck should be re- coated once a year, preferably every spring. It's like applying sunscreen yearly to protect the wood against further damage. Two gallons was enough to cover this 450 sq foot deck.
 Moriq
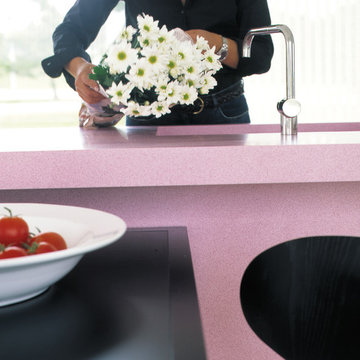
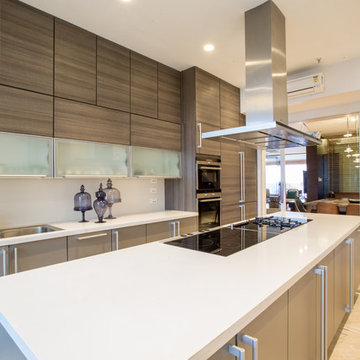
MoriqInspiration for a mid-sized contemporary galley kitchen remodel in Hyderabad with flat-panel cabinets, beige cabinets, solid surface countertops, stainless steel appliances and an island
 Studio Ten Interior Design Ltd.
Photography by ISHOT
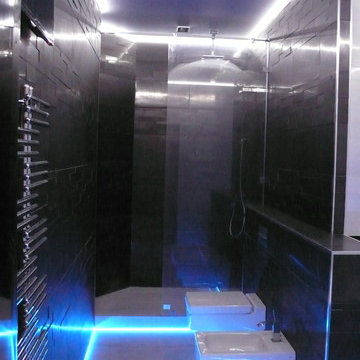
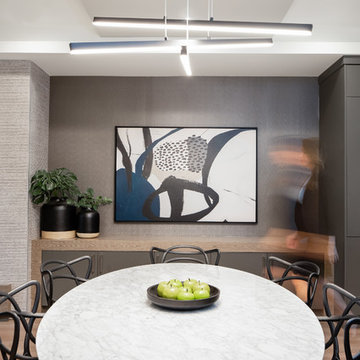
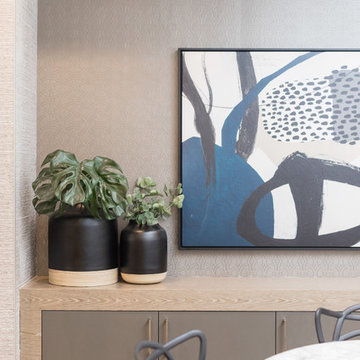
Inspiration for a mid-sized contemporary medium tone wood floor and brown floor kitchen/dining room combo remodel in Vancouver with gray walls and no fireplace
Inspiration for a mid-sized contemporary medium tone wood floor and brown floor kitchen/dining room combo remodel in Vancouver with gray walls and no fireplace
 Studio Ten Interior Design Ltd.
Photography by ISHOT
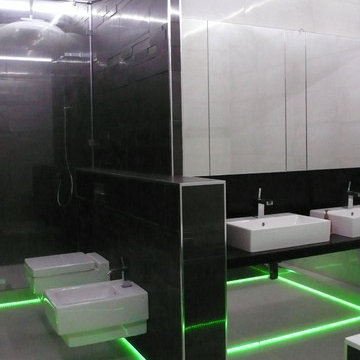
Example of a mid-sized trendy medium tone wood floor and brown floor kitchen/dining room combo design in Vancouver with gray walls and no fireplace
Example of a mid-sized trendy medium tone wood floor and brown floor kitchen/dining room combo design in Vancouver with gray walls and no fireplace
1