
Search results for "Plastic ten" in Home Design Ideas

 RN Interior Design
Kitchen - transitional u-shaped kitchen idea in Dallas with a single-bowl sink, shaker cabinets, white cabinets, white backsplash and stainless steel appliances

 Guy Ayers, Architect
Reverse Shed Eichler
This project is part tear-down, part remodel. The original L-shaped plan allowed the living/ dining/ kitchen wing to be completely re-built while retaining the shell of the bedroom wing virtually intact. The rebuilt entertainment wing was enlarged 50% and covered with a low-slope reverse-shed roof sloping from eleven to thirteen feet. The shed roof floats on a continuous glass clerestory with eight foot transom. Cantilevered steel frames support wood roof beams with eaves of up to ten feet. An interior glass clerestory separates the kitchen and livingroom for sound control. A wall-to-wall skylight illuminates the north wall of the kitchen/family room. New additions at the back of the house add several “sliding” wall planes, where interior walls continue past full-height windows to the exterior, complimenting the typical Eichler indoor-outdoor ceiling and floor planes. The existing bedroom wing has been re-configured on the interior, changing three small bedrooms into two larger ones, and adding a guest suite in part of the original garage. A previous den addition provided the perfect spot for a large master ensuite bath and walk-in closet. Natural materials predominate, with fir ceilings, limestone veneer fireplace walls, anigre veneer cabinets, fir sliding windows and interior doors, bamboo floors, and concrete patios and walks. Landscape design by Bernard Trainor: www.bernardtrainor.com (see “Concrete Jungle” in April 2014 edition of Dwell magazine). Microsoft Media Center installation of the Year, 2008: www.cybermanor.com/ultimate_install.html (automated shades, radiant heating system, and lights, as well as security & sound).

 Raina Henderson Interior Design, LLC
Example of a large transitional master white tile and porcelain tile porcelain tile, gray floor, double-sink and wainscoting freestanding bathtub design in Seattle with furniture-like cabinets, dark wood cabinets, a one-piece toilet, blue walls, an undermount sink, quartz countertops, a hinged shower door, white countertops, a niche and a freestanding vanity
Find the right local pro for your project

 Chris Corbett Design
Neil Michael - Axiom Photography
Photo of a small modern shade courtyard concrete landscaping in Sacramento with a fire pit.
Photo of a small modern shade courtyard concrete landscaping in Sacramento with a fire pit.


 Ky-Kan Coatings
Concrete can be made to look like any substance. Tile, stone, wood, brick, etc. With unlimited color options, Ky-Kan Coatings can transform any room in your home or business using lightweight, beautiful concrete.

 Zelaya Properties LLC
We used: Custom cherry cabinetry in Arts & Crafts Shaker style by Kabinart in Boulder and Espresso stains. Liberty Hardware Venetian bronze 1-1/2" cabinet knobs. KitchenAid Architect II Series 22 CF counter-depth French door refrigerator. KitchenAid Architect Series II 27" convection single wall oven. KitchenAid 36" 6-burner dual fuel freestanding commercial-style range. KitchenAid Architect II Series 24" dishwasher. Sharp Insight Pro Series 24" built-in microwave drawer (Model #KB6524PS). Crystorama Solaris 12" wide pendant lights in English bronze. Granite countertops in Brown Fantasy. 3"x6" polished marble backsplash.
Paint colors:
Walls: Glidden Silver Cloud 30YY 63/024
Ceilings/Trims/Doors: Glidden Swan White GLC23
Robert B. Narod Photography

 Moderne Builders
Gorgeous master bath with dramatic retro "wave" tile. Peak Photography
Example of a 1950s bathroom design in Los Angeles
Example of a 1950s bathroom design in Los Angeles

 Moss Yaw Design studio
Engineered cedar siding creates beautiful gray-blue tones at the exterior of the home, while adding a textural element to activate the simple exterior design.

 Warm Timber Saunas & Wine Cellars
This previously unused attic space is now a sauna/yoga room. The left sauna wall follows the attic rafters down diagonally to allow a wider space for leg room on the twin sauna benches.
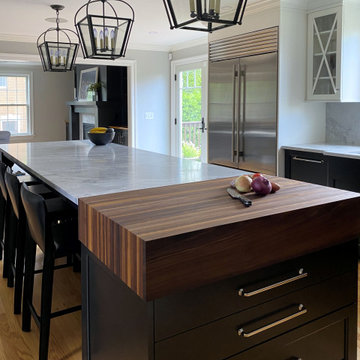
 McGuire + Co. Kitchen & Bath
Kitchen design and remodel with black and white cabinetry, gray and white leathered quartzite countertop and slab backsplash, a marble niche, polished nickel fixtures and a butcher block walnut, Sub-Zero Wolf gas range top, stainless steel double oven, and refrigerator. Nearby fireplace has a newly designed mantel, tile surround and hearth, and painted to match black kitchen cabinetry.

 Gayler Design Build
With a sizeable backyard and a love for entertaining, these clients wanted to build a covered outdoor kitchen/bar and seating area. They had one specific area by the side of their pool, with limited space, to build the outdoor kitchen.
There were immediate concerns about how to incorporate the two steps in the middle of the patio area; and they really wanted a bar that could seat at least eight people (to include an additional seating area with couches and chairs). This couple also wanted to use their outdoor living space year round. The kitchen needed ample storage and had to be easy to maintain. And last, but not least, they wanted it to look beautiful!
This 16 x 26 ft clear span pavilion was a great fit for the area we had to work with. By using wrapped steel columns in the corners in 6-foot piers, carpenter-built trusses, and no ridge beams, we created good space usage underneath the pavilion. The steps were incorporated into the space to make the transition between the kitchen area and seating area, which looked like they were meant to be there. With a little additional flagstone work, we brought the curve of the step to meet the back island, which also created more floor space in the seating area.
Two separate islands were created for the outdoor kitchen/bar area, built with galvanized metal studs to allow for more room inside the islands (for appliances and cabinets). We also used backer board and covered the islands with smooth finish stucco.
The back island housed the BBQ, a 2-burner cooktop and sink, along with four cabinets, one of which was a pantry style cabinet with pull out shelves (air tight, dust proof and spider proof—also very important to the client).
The front island housed the refrigerator, ice maker, and counter top cooler, with another set of pantry style, air tight cabinets. By curving the outside edge of the countertop we maximized the bar area and created seating for eight. In addition, we filled in the curve on the inside of the island with counter top and created two additional seats. In total, there was seating for ten people.
Infrared heaters, ceiling fans and shades were added for climate control, so the outdoor living space could be used year round. A TV for sporting events and SONOS for music, were added for entertaining enjoyment. Track lighting, as well as LED tape lights under the backsplash, provided ideal lighting for after dark usage.
The clients selected honed, Fantasy Brown Satin Quartzite, with a chipped edge detail for their countertop. This beautiful, linear design marble is very easy to maintain. The base of the islands were completed in stucco and painted satin gray to complement their house color. The posts were painted with Monterey Cliffs, which matched the color of the house shutter trim. The pavilion ceiling consisted of 2 x 6-T & G pine and was stained platinum gray.
In the few months since the outdoor living space was built, the clients said they have used it for more than eight parties and can’t wait to use it for the holidays! They also made sure to tell us that the look, feel and maintenance of the area all are perfect!
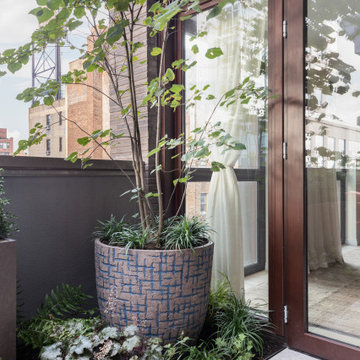


 Santa Barbara Home Design
Design Consultant Jeff Doubét is the author of Creating Spanish Style Homes: Before & After – Techniques – Designs – Insights. The 240 page “Design Consultation in a Book” is now available. Please visit SantaBarbaraHomeDesigner.com for more info.
Jeff Doubét specializes in Santa Barbara style home and landscape designs. To learn more info about the variety of custom design services I offer, please visit SantaBarbaraHomeDesigner.com
Jeff Doubét is the Founder of Santa Barbara Home Design - a design studio based in Santa Barbara, California USA.
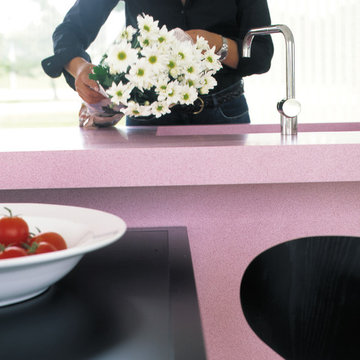


 Studio Ten Interior Design Ltd.
Photography by ISHOT
Inspiration for a mid-sized contemporary medium tone wood floor and brown floor kitchen/dining room combo remodel in Vancouver with gray walls and no fireplace
Inspiration for a mid-sized contemporary medium tone wood floor and brown floor kitchen/dining room combo remodel in Vancouver with gray walls and no fireplace
 Studio Ten Interior Design Ltd.
Photography by ISHOT
Example of a mid-sized trendy medium tone wood floor and brown floor kitchen/dining room combo design in Vancouver with gray walls and no fireplace
Example of a mid-sized trendy medium tone wood floor and brown floor kitchen/dining room combo design in Vancouver with gray walls and no fireplace

 Eco Star Painting
Step #1 Apply BM CLEAN
As you can see in the 'Before' picture above, this cedar deck was extremly dirty. This required an extra step in comparison to the typical deck stripping process. My paint rep at Benjamin Moore recommended a product called CLEAN. It comes in one gallon plastic containers and can be applied out of a plastic pail or with a garden sprayer. We used a Garden sprayer and chose a flat tip for application. The three gallon garden sprayer was filled with 2 gallons of water and one gallon of the CLEAN solution. This is a strong mixture and can be reduced to up to 6 parts water and one part of the Benjamin Moore CLEAN.
This approximately 22x20 deck had a board running perpindicular to the rest of the floor boards which divided it into 2 equal parts. Our method was to apply the solution to 3-4 of these 10' boards at a time. Allow it to set up for a few minutes and then scrub away with the deck brush. The agitation loosens up the dirt and grime and is then removed with a pressure washer a board a time. The flat tip on the pressure washer was almost the same width as the floor board. It is important to clean the sides of the board too because any remaining dirt or stain will be visible.
Benjamin Moore Deck Restoration products named Clean,Restore,brighten
Step #2 Apply BM RESTORE
The second step is exactly the same as the first step but with a different solution called Benjamin Moore RESTORE. The deck was dry before we started the 2nd step becuase it was baking hot outside. You use the same 2/1 mixture of water to chemical. This chemical will remove the stain still present in the deck floor. Make sure to rinse the garden sprayer clean before adding the restore solution. Unlike the BM CLEAN, the BM RESTORE has an orange-ish color in appearance. It did a fine job of removing most of the stain, but not 100% of it. There were a few areas that required a 3rd coat of restore but the process was quicker.
Step #3 Apply BM BRIGHTEN
The third step is exactly the same as the first two step but the chemical solution used was Benjamin Moore 'BRIGHTEN'. Again, the garden sprayer was cleaned and filled with 2 parts water and one part Brighten. The brightener not only lightens the wood but it also neutralizes the previous stripper solution. As stated before the Restore adds a bit of color and the Brighten will remove any traces of it. you still have to agitate the brightener with a scrub brush and either pressure wash it off or use a garden hose. We used the pressure washer for faster results. After it dries the wood look a lot brighter but we still found some spots of stain that had not come off.
Apply Sikkens Stain
As stated above the stain we used is called "Sikkens Proluxe" which is basically just a slight re-branding of the classic Sikkens Stain. The formula is exactly the same. In fact, the secondary name is still called 'Cetol' SRD RE. The color chosen was "CEDAR".
The weather was quite hot for a typical Calgary Spring day so we stained a 10' section of floor board at a time. The deck has a metal railing so the supporting feet had to be brushed in with a 2.5" natural bristle paint brush. for the rest of the job a 6" Wooster natural bristle deck brush was used. The handle was remove and a broom handle was inserted. The stain was stirred frequently and poured into a plastic Simms brand roller pan. Semi transparent Oil based stain has the consistency of water so you need to be careful not to spill any of it. When applying to a board you hit the sides first with the brush and then fillin the rest. Ten feet of floor board can be stain in a short period of time. it's important not to leave any streaks so it is adviseable to back-brush the entie length before moving on to the next board. The staining only took about 2.5 hours to complete. One coat is the manufacturers recommendation.
One last thing about Sikkens Stain. To maintain this beautiful look the deck should be re- coated once a year, preferably every spring. It's like applying sunscreen yearly to protect the wood against further damage. Two gallons was enough to cover this 450 sq foot deck.

 All Surface Restoration
Exposed aggregate driveway after cleaning & sealing with Paver Gloss Sealer.
Inspiration for a mid-sized front yard driveway in Detroit.
Inspiration for a mid-sized front yard driveway in Detroit.

 Elegant Hardwood Floors
maple hardwood floor, water-popped, and stained with 50% rosewood and 50% neutral stains.
Inspiration for a timeless medium tone wood floor living room remodel in Salt Lake City
Inspiration for a timeless medium tone wood floor living room remodel in Salt Lake City
1