
Search results for "Advised tips" in Home Design Ideas

 Knox Art Services
With exceptional technical experience, I am routinely called upon to manage a diverse range of installation projects. I work quickly and most houses usually only take a couple hours. Generally there are two job scenarios: if you know where everything is to be hung then I can start as soon as I arrive, and if you are unsure of where you would like your art hung, I will start by getting a sense of what art work you have and do a walk through of your home to get an understanding of the space. Once we have decided what layout makes the most of your collection, I start installation.
Comprehensive, museum-quality installation services
Aesthetic advice in art acquisition to build your collection
Aesthetic advice on the layout of your existing collection to shape your space
Security installation available for high value or public spaces
Exceptional technical experience
Able to work quickly & precisely
Installation of large quantities of artwork
Installation of artwork, sculptures and mirrors
20+ years experience handling a diverse range of installation projects
Comprehensive, museum-quality art handling services
Often work in collaboration with interior designers and art consultants
Often work in collaboration with architects and developers
Can integrate art with other design elements in the house: color scheme, mood boards, swatches, and fabric samples etc..
Family Wall Installation / Gallery Wall Installation
If you have a grouping of art, family photographs or kids' art to go on one wall, I can come up with a layout that will look great. Additionally, if you want a Family/Gallery wall but nothing is framed or printed yet, feel free to call me to discuss tips on how to get the most impact from your collection.
Family Walls - grouping of many family photos on one
Gallery Walls - grouping of many artworks on one wall.
 Knox Art Services
With exceptional technical experience, I am routinely called upon to manage a diverse range of installation projects. I work quickly and most houses usually only take a couple hours. Generally there are two job scenarios: if you know where everything is to be hung then I can start as soon as I arrive, and if you are unsure of where you would like your art hung, I will start by getting a sense of what art work you have and do a walk through of your home to get an understanding of the space. Once we have decided what layout makes the most of your collection, I start installation.
Comprehensive, museum-quality installation services
Aesthetic advice in art acquisition to build your collection
Aesthetic advice on the layout of your existing collection to shape your space
Security installation available for high value or public spaces
Exceptional technical experience
Able to work quickly & precisely
Installation of large quantities of artwork
Installation of artwork, sculptures and mirrors
20+ years experience handling a diverse range of installation projects
Comprehensive, museum-quality art handling services
Often work in collaboration with interior designers and art consultants
Often work in collaboration with architects and developers
Can integrate art with other design elements in the house: color scheme, mood boards, swatches, and fabric samples etc..
Family Wall Installation / Gallery Wall Installation
If you have a grouping of art, family photographs or kids' art to go on one wall, I can come up with a layout that will look great. Additionally, if you want a Family/Gallery wall but nothing is framed or printed yet, feel free to call me to discuss tips on how to get the most impact from your collection.
Family Walls - grouping of many family photos on one
Gallery Walls - grouping of many artworks on one wall.

 May Construction, Inc.
Budget analysis and project development by: May Construction, Inc. -------------------- Interior design by: Liz Williams
Large arts and crafts galley medium tone wood floor and brown floor eat-in kitchen photo with an undermount sink, white cabinets, granite countertops, green backsplash, glass tile backsplash, stainless steel appliances, an island, shaker cabinets and gray countertops
Large arts and crafts galley medium tone wood floor and brown floor eat-in kitchen photo with an undermount sink, white cabinets, granite countertops, green backsplash, glass tile backsplash, stainless steel appliances, an island, shaker cabinets and gray countertops
Find the right local pro for your project

 FMSProjects, Inc.
Latch hardware in upper cabinets.
Inspiration for a mid-sized craftsman u-shaped medium tone wood floor eat-in kitchen remodel in San Francisco with a single-bowl sink, shaker cabinets, white cabinets, quartz countertops, green backsplash, ceramic backsplash, stainless steel appliances and a peninsula
Inspiration for a mid-sized craftsman u-shaped medium tone wood floor eat-in kitchen remodel in San Francisco with a single-bowl sink, shaker cabinets, white cabinets, quartz countertops, green backsplash, ceramic backsplash, stainless steel appliances and a peninsula

 Dianne Davant and Associates
Master Bedroom with Red Bed Frame and custom drapery and bedding.
Bedroom - traditional master light wood floor bedroom idea in Charlotte
Bedroom - traditional master light wood floor bedroom idea in Charlotte

 aamodt / plumb architects
Shou sugi ban, weathered mesquite wood and white walls around found throughout this modern home, including in the stairway.
Staircase - modern wooden straight metal railing staircase idea in Austin
Staircase - modern wooden straight metal railing staircase idea in Austin

 Highland Builders LLC
Powder room with glam geometric wallpaper complimented with a vessel sink rustic vanity with riveted hardware. Counter top is quartz Viatera - Truffle. Mirror framed wall mirror.
Ryan Hainey

 Kuche+Cucina
High gloss white lacquer cabinets, are combined with 'gun metal' color metallic lacquer wall cabinets and a wood color laminate island, from DOCA, are featured in this manhattan apartment.
Sub Zero, Wolf, & Miele appliances were chosen and a Sapienstone porcelain counter and backsplash completed this NYC masterpiece.

 Eco Star Painting
Step #1 Apply BM CLEAN
As you can see in the 'Before' picture above, this cedar deck was extremly dirty. This required an extra step in comparison to the typical deck stripping process. My paint rep at Benjamin Moore recommended a product called CLEAN. It comes in one gallon plastic containers and can be applied out of a plastic pail or with a garden sprayer. We used a Garden sprayer and chose a flat tip for application. The three gallon garden sprayer was filled with 2 gallons of water and one gallon of the CLEAN solution. This is a strong mixture and can be reduced to up to 6 parts water and one part of the Benjamin Moore CLEAN.
This approximately 22x20 deck had a board running perpindicular to the rest of the floor boards which divided it into 2 equal parts. Our method was to apply the solution to 3-4 of these 10' boards at a time. Allow it to set up for a few minutes and then scrub away with the deck brush. The agitation loosens up the dirt and grime and is then removed with a pressure washer a board a time. The flat tip on the pressure washer was almost the same width as the floor board. It is important to clean the sides of the board too because any remaining dirt or stain will be visible.
Benjamin Moore Deck Restoration products named Clean,Restore,brighten
Step #2 Apply BM RESTORE
The second step is exactly the same as the first step but with a different solution called Benjamin Moore RESTORE. The deck was dry before we started the 2nd step becuase it was baking hot outside. You use the same 2/1 mixture of water to chemical. This chemical will remove the stain still present in the deck floor. Make sure to rinse the garden sprayer clean before adding the restore solution. Unlike the BM CLEAN, the BM RESTORE has an orange-ish color in appearance. It did a fine job of removing most of the stain, but not 100% of it. There were a few areas that required a 3rd coat of restore but the process was quicker.
Step #3 Apply BM BRIGHTEN
The third step is exactly the same as the first two step but the chemical solution used was Benjamin Moore 'BRIGHTEN'. Again, the garden sprayer was cleaned and filled with 2 parts water and one part Brighten. The brightener not only lightens the wood but it also neutralizes the previous stripper solution. As stated before the Restore adds a bit of color and the Brighten will remove any traces of it. you still have to agitate the brightener with a scrub brush and either pressure wash it off or use a garden hose. We used the pressure washer for faster results. After it dries the wood look a lot brighter but we still found some spots of stain that had not come off.
Apply Sikkens Stain
As stated above the stain we used is called "Sikkens Proluxe" which is basically just a slight re-branding of the classic Sikkens Stain. The formula is exactly the same. In fact, the secondary name is still called 'Cetol' SRD RE. The color chosen was "CEDAR".
The weather was quite hot for a typical Calgary Spring day so we stained a 10' section of floor board at a time. The deck has a metal railing so the supporting feet had to be brushed in with a 2.5" natural bristle paint brush. for the rest of the job a 6" Wooster natural bristle deck brush was used. The handle was remove and a broom handle was inserted. The stain was stirred frequently and poured into a plastic Simms brand roller pan. Semi transparent Oil based stain has the consistency of water so you need to be careful not to spill any of it. When applying to a board you hit the sides first with the brush and then fillin the rest. Ten feet of floor board can be stain in a short period of time. it's important not to leave any streaks so it is adviseable to back-brush the entie length before moving on to the next board. The staining only took about 2.5 hours to complete. One coat is the manufacturers recommendation.
One last thing about Sikkens Stain. To maintain this beautiful look the deck should be re- coated once a year, preferably every spring. It's like applying sunscreen yearly to protect the wood against further damage. Two gallons was enough to cover this 450 sq foot deck.


 Zelaya Properties LLC
We used: Custom cherry cabinetry in Arts & Crafts Shaker style by Kabinart in Boulder and Espresso stains. Liberty Hardware Venetian bronze 1-1/2" cabinet knobs. KitchenAid Architect II Series 22 CF counter-depth French door refrigerator. KitchenAid Architect Series II 27" convection single wall oven. KitchenAid 36" 6-burner dual fuel freestanding commercial-style range. KitchenAid Architect II Series 24" dishwasher. Sharp Insight Pro Series 24" built-in microwave drawer (Model #KB6524PS). Crystorama Solaris 12" wide pendant lights in English bronze. Granite countertops in Brown Fantasy. 3"x6" polished marble backsplash.
Paint colors:
Walls: Glidden Silver Cloud 30YY 63/024
Ceilings/Trims/Doors: Glidden Swan White GLC23
Robert B. Narod Photography

 Sabrina Alfin Interiors
Dean J. Birinyi Photography
Bedroom - mid-sized transitional master medium tone wood floor and brown floor bedroom idea in San Francisco with blue walls
Bedroom - mid-sized transitional master medium tone wood floor and brown floor bedroom idea in San Francisco with blue walls


 Lisa Tharp Design
Governor's House Entry by Lisa Tharp. 2019 Bulfinch Award - Interior Design. Photo by Michael J. Lee
Transitional painted wood floor foyer photo with white walls and a black front door
Transitional painted wood floor foyer photo with white walls and a black front door

 McCullough's Flooring
Gorgeous master bath finished with Dal-Tile's Fabrique porcelain tile in the color Noir Linen polished. Tile size is 12"x24" installed in a brick joint pattern. The floor boasts underfloor heating on a timed thermostat.

 GS Construction
Example of a small classic 3/4 white tile and stone tile mosaic tile floor alcove shower design in Chicago with an undermount sink, recessed-panel cabinets, black cabinets, quartzite countertops, a two-piece toilet and gray walls
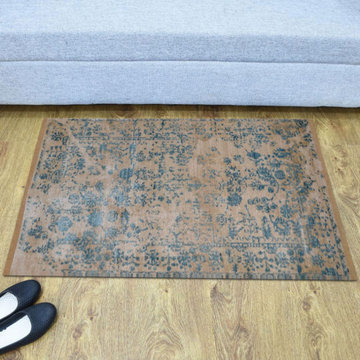
 Get My Rugs LLC
Bath mats are vital elements in bathroom decor, beautifully blending style and functionality. These bath rugs offer essential moisture protection, ensuring your floors remain dry while providing slip prevention for safety. When choosing a bath mat, prioritize quality; look for options that are absorbent, comfortable, and add warmth to your space.
Consider the size and proportion of the bath mat in relation to your tub and vanity. If you have a double vanity, you can select individual rugs for each sink or opt for a long runner rug for a cohesive appearance. Always measure your bathroom area to ensure a perfect fit, allowing enough space for doors to open freely.
Durability is another crucial factor. Since bath mats frequently encounter water and foot traffic, choose rugs with a nonslip surface and rubber backing to enhance safety on wet floors. Many options are crafted from high-quality cotton, providing a soft texture and easy maintenance, as most are machine washable. However, some may require professional cleaning, so checking care instructions is advisable.
The choice of bath mat size largely depends on the area you want to cover and the dimensions of your bathroom. Look for a shower mat that is appropriately sized for your tub and vanity, ensuring it provides adequate coverage. If your bathroom features a double vanity, you can opt for either individual rugs for each sink or a long runner rug for a cohesive appearance. Before shopping, take measurements of the spaces to ensure a perfect fit. In smaller bathrooms, remember to leave enough space for the door to swing open without obstructing the rug.
Durability should be a top consideration when selecting a bath mat. Since shower mats are frequently exposed to water and heavy foot traffic, it’s important to prioritize quality. Look for options with a nonslip surface and rubber backing to reduce the risk of slipping when the floor or mat is wet. Additionally, pay attention to the cleaning instructions. Most mats are crafted from cotton or chenille and can be machine washed, but some may require professional cleaning, so it’s best to verify before making a purchase.
moisture and helping prevent slips. When choosing a bath mat, quality is just as essential as aesthetics; you'll want one that not only looks appealing and is absorbent but also feels comfortable underfoot. As you search for the ideal bath rug, consider these helpful tips to guide your decision.
The choice of bath mat size largely depends on the area you want to cover and the dimensions of your bathroom. Look for a shower mat that is appropriately sized for your tub and vanity, ensuring it provides adequate coverage. If your bathroom features a double vanity, you can opt for either individual rugs for each sink or a long runner rug for a cohesive appearance. Before shopping, take measurements of the spaces to ensure a perfect fit. In smaller bathrooms, remember to leave enough space for the door to swing open without obstructing the rug.
Durability should be a top consideration when selecting a bath mat. Since shower mats are frequently exposed to water and heavy foot traffic, it’s important to prioritize quality. Look for options with a nonslip surface and rubber backing to reduce the risk of slipping when the floor or mat is wet. Additionally, pay attention to the cleaning instructions. Most mats are crafted from cotton or chenille and can be machine washed, but some may require professional cleaning, so it’s best to verify before making a purchase.
Having a bubbly pink color, this polyester footmat from Turkey ensures that it gets noticed by one and all. Its oriental patterns follow a definite sense of standard geometry. Buy it for your house and it will become an inseparable part of it for sure.

 Naturesque
Pool landscaping - small modern backyard tile and round aboveground pool landscaping idea in Perth


4