
Search results for "Agreement" in Home Design Ideas
 Sunrise Design and Construction LLC
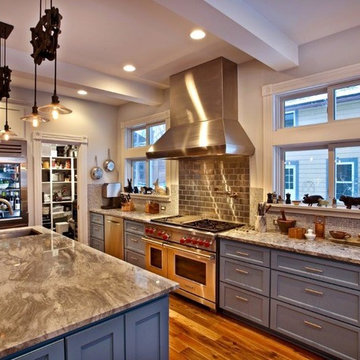
Open concept kitchen - large craftsman u-shaped medium tone wood floor and brown floor open concept kitchen idea in Minneapolis with an undermount sink, shaker cabinets, blue cabinets, copper countertops, metallic backsplash, metal backsplash, stainless steel appliances and an island
 Housing & Building Association of Colorado Springs
The Home
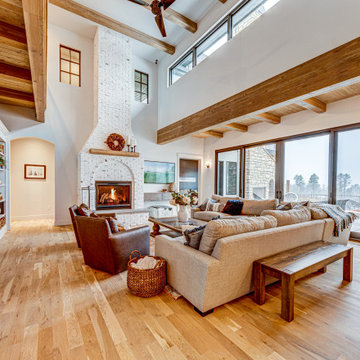
While looking for space where their active family could expand, these homeowners turned to Black Forest, with trees that remind them of their Indiana years. A stunning Pikes Peak view underscores how fortunate they are to live in Colorado. This home features classic nods to the owner’s French heritage while embracing a thoroughly of-the-moment Colorado lifestyle. Priorities for these homeowners included blending outdoor and indoor spaces wherever possible with generously proportioned windows and doors, porches, patios and balconies.
A gracious lime-washed brick entry punctuates a simplified white stucco and black-frame-windowed exterior with traditional
rooflines. Dramatic open spaces on the main floor comfortably accommodate the everyday activities of this busy family of four, while
providing for welcomed visits from family and friends. A functional, open kitchen is designed for serious cooking, a butler’s pantry for
staples, and serveware storage and dining spaces that effortlessly host after-school snacking to multi-course meals. A main-level,
Peak-view office comfortably supports working at home, complete with a beer cave and tasting nook for hosting fellow aficionados
after work is done. Guests will find comfort and privacy in a ma in-level guestroom suite or sleepover fun in the built-in bunks of the
expansive over-garage bonus room.
This home is a true collaboration that blends the homeowner’s long-held vision of their ideal home brought to life by the builder’s vision
and design/build process that achieves something truly…Warm and welcoming in the Forest.
The Builder
Stauffer & Sons Construction is a true Design-Build team creating some of the finest living spaces in the Pikes Peak region for over twenty years. We’ve developed an easy point-of-entry to the Design-Build process that begins with our very popular Conceptual Design and Budgeting Agreement. This affordable, low-commitment step provides answers to the early-stage questions of “what and how much?” With this critical information in place, a robust collaboration between client and builder ensues, resulting in a thoughtfully designed home that strikes a balance between size and scope and budget.
The Interior Design
Family, friends and soon-to-be friends are welcomed into this updated version of a French country farmhouse through a bricked archway and a solid arch-top entry door. Once inside, a sweeping gallery of windows adorned with flower-filled window boxes sets a nice foreground to the ponderosa pine forest. A great room with a two-story, lime-washed, brick fireplace sits juxtaposed to a cozy farm-styled kitchen with large island, plenty of storage and a Pikes Peak view. This family home features a simple, clean design with warm, wooden beams and solid, white-oak flooring. This home is designed to be lived in. Wherever you go, downstairs, upstairs or out on the porch, this home wraps around you and is a delightful place to enjoy.

Find the right local pro for your project
 HwRenewal
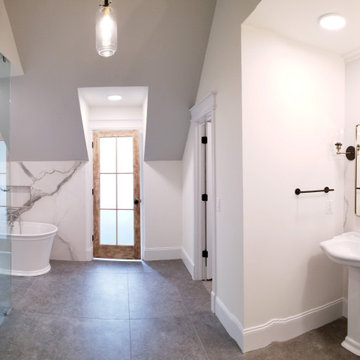
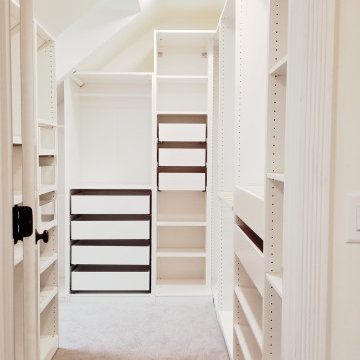
In this 90's cape cod home, we used the space from an overly large bedroom, an oddly deep but narrow closet and the existing garden-tub focused master bath with two dormers, to create a master suite trio that was perfectly proportioned to the client's needs. They wanted a much larger closet but also wanted a large dual shower, and a better-proportioned tub. We stuck with pedestal sinks but upgraded them to large recessed medicine cabinets, vintage styled. And they loved the idea of a concrete floor and large stone walls with low maintenance. For the walls, we brought in a European product that is new for the U.S. - Porcelain Panels that are an eye-popping 5.5 ft. x 10.5 ft. We used a 2ft x 4ft concrete-look porcelain tile for the floor. This bathroom has a mix of low and high ceilings, but a functional arrangement instead of the dreaded “vault-for-no-purpose-bathroom”. We used 8.5 ft ceiling areas for both the shower and the vanity’s producing a symmetry about the toilet room door. The right runner-rug in the center of this bath (not shown yet unfortunately), completes the functional layout, and will look pretty good too.
Of course, no design is close to finished without plenty of well thought out light. The bathroom uses all low-heat, high lumen, LED, 7” low profile surface mounting lighting (whoa that’s a mouthful- but, lighting is critical!). Two 7” LED fixtures light up the shower and the tub and we added two heat lamps for this open shower design. The shower also has a super-quiet moisture-exhaust fan. The customized (ikea) closet has the same lighting and the vanity space has both flanking and overhead LED lighting at 3500K temperature. Natural Light? Yes, and lot’s of it. On the second floor facing the woods, we added custom-sized operable casement windows in the shower, and custom antiqued expansive 4-lite doors on both the toilet room door and the main bath entry which is also a pocket door with a transom over it. We incorporated the trim style: fluted trims and door pediments, that was already throughout the home into these spaces, and we blended vintage and classic elements using modern proportions & patterns along with mix of metal finishes that were in tonal agreement with a simple color scheme. We added teak shower shelves and custom antiqued pine doors, adding these natural wood accents for that subtle warm contrast – and we presented!
Oh btw – we also matched the expansive doors we put in the master bath, on the front entry door, and added some gas lanterns on either side. We also replaced all the carpet in the home and upgraded their stairs with metal balusters and new handrails and coloring.
This client couple, they’re in love again!
 McCall Design & Planning
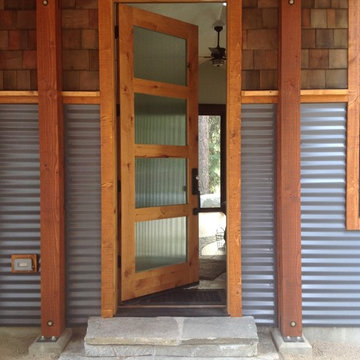
This project is truly one of those designed by setbacks. The owners fell in love with the setting, sitting on a bank above the river, but a sewer easement through the center of the property, parallel to the road, cut the building envelope in half. Our goal was a 1,400 sq ft home with outside space on the river side of the home.
We started with an attached garage concept, which is very desirable in our snowy climate, but it was forcing a compromise with no patio on the back of the house. We negotiated an agreement with the city staff to allow us to build a breezeway over the 25’ sewer easement. The breezeway was designed and constructed to be removable by forklift in 3 pieces, if it ever becomes necessary to work on the sewer line, buried about 20’ below grade.
The owners had varying taste in the style of home they wanted, one on the more traditional end and one on a more contemporary bent. They also wanted low maintenance materials. The result is a simple gable form with over-sized knee braces and gable end vents for function as well as character. The home is finished with cedar shingle siding with a horizontal corrugated metal wainscot below. We opened the back of the house up with windows and sliding doors, giving great views into the trees and down to the river below. The greatest feature is the back patio perched on the bank with the sound of the river rising up from below.
 HwRenewal
In this 90's cape cod home, we used the space from an overly large bedroom, an oddly deep but narrow closet and the existing garden-tub focused master bath with two dormers, to create a master suite trio that was perfectly proportioned to the client's needs. They wanted a much larger closet but also wanted a large dual shower, and a better-proportioned tub. We stuck with pedestal sinks but upgraded them to large recessed medicine cabinets, vintage styled. And they loved the idea of a concrete floor and large stone walls with low maintenance. For the walls, we brought in a European product that is new for the U.S. - Porcelain Panels that are an eye-popping 5.5 ft. x 10.5 ft. We used a 2ft x 4ft concrete-look porcelain tile for the floor. This bathroom has a mix of low and high ceilings, but a functional arrangement instead of the dreaded “vault-for-no-purpose-bathroom”. We used 8.5 ft ceiling areas for both the shower and the vanity’s producing a symmetry about the toilet room door. The right runner-rug in the center of this bath (not shown yet unfortunately), completes the functional layout, and will look pretty good too.
Of course, no design is close to finished without plenty of well thought out light. The bathroom uses all low-heat, high lumen, LED, 7” low profile surface mounting lighting (whoa that’s a mouthful- but, lighting is critical!). Two 7” LED fixtures light up the shower and the tub and we added two heat lamps for this open shower design. The shower also has a super-quiet moisture-exhaust fan. The customized (ikea) closet has the same lighting and the vanity space has both flanking and overhead LED lighting at 3500K temperature. Natural Light? Yes, and lot’s of it. On the second floor facing the woods, we added custom-sized operable casement windows in the shower, and custom antiqued expansive 4-lite doors on both the toilet room door and the main bath entry which is also a pocket door with a transom over it. We incorporated the trim style: fluted trims and door pediments, that was already throughout the home into these spaces, and we blended vintage and classic elements using modern proportions & patterns along with mix of metal finishes that were in tonal agreement with a simple color scheme. We added teak shower shelves and custom antiqued pine doors, adding these natural wood accents for that subtle warm contrast – and we presented!
Oh btw – we also matched the expansive doors we put in the master bath, on the front entry door, and added some gas lanterns on either side. We also replaced all the carpet in the home and upgraded their stairs with metal balusters and new handrails and coloring.
This client couple, they’re in love again!
 Liggero Architecture, LLC
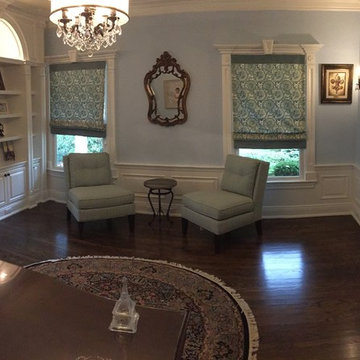
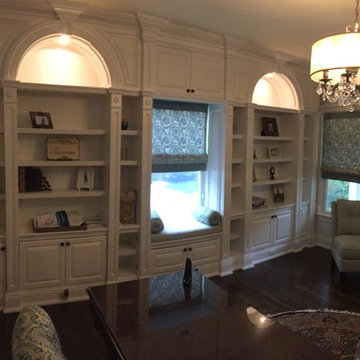
This is a photo of what was formerly the front living room space when the client first purchased the home. The existing window was what the new cabinet line was detailed around. In addition the bottom window sash was replaced with tempered glass, due to the addition of the window seat. Raised panel wainscotting sets off the balance of the room, which was transformed into a beautiful home office space. The existing oak floors were stained dark throughout the entire first floor, which creates a nice juxtaposition between the millwork & the floors. All of the cabinet detailing was repeated throughout the entire first floor. I would have liked to include applied ceiling mouldings but the client wasn't in agreement :-(. All of the existing windows surround trims & sills are all custom designed new. These surround details were used throughout the entire residence.
 Screenmobile of Charlotte
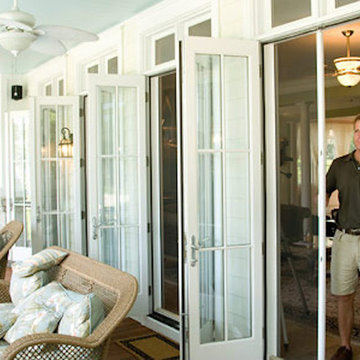
Phantom Screens, USA (stock photo, used with permission per Dealer Agreement)
 Liggero Architecture, LLC
This is a photo of what was formerly the front living room space when the client first purchased the home. The existing window was what the new cabinet line was detailed around. In addition the bottom window sash was replaced with tempered glass, due to the addition of the window seat. Raised panel wainscotting sets off the balance of the room, which was transformed into a beautiful home office space. The existing oak floors were stained dark throughout the entire first floor, which creates a nice juxtaposition between the millwork & the floors. All of the cabinet detailing was repeated throughout the entire first floor. I would have liked to include applied ceiling mouldings but the client wasn't in agreement :-(

 McCall Design & Planning
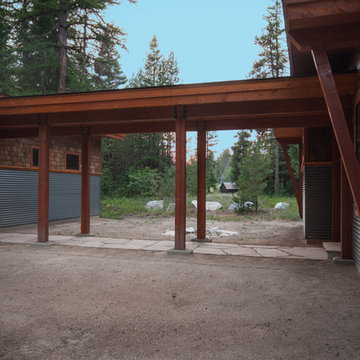
This project is truly one of those designed by setbacks. The owners fell in love with the setting, sitting on a bank above the river, but a sewer easement through the center of the property, parallel to the road, cut the building envelope in half. Our goal was a 1,400 sq ft home with outside space on the river side of the home.
We started with an attached garage concept, which is very desirable in our snowy climate, but it was forcing a compromise with no patio on the back of the house. We negotiated an agreement with the city staff to allow us to build a breezeway over the 25’ sewer easement. The breezeway was designed and constructed to be removable by forklift in 3 pieces, if it ever becomes necessary to work on the sewer line, buried about 20’ below grade.
The owners had varying taste in the style of home they wanted, one on the more traditional end and one on a more contemporary bent. They also wanted low maintenance materials. The result is a simple gable form with over-sized knee braces and gable end vents for function as well as character. The home is finished with cedar shingle siding with a horizontal corrugated metal wainscot below. We opened the back of the house up with windows and sliding doors, giving great views into the trees and down to the river below. The greatest feature is the back patio perched on the bank with the sound of the river rising up from below.
Photo By: Tom Stewart - http://tomstewartphoto.photoshelter.com/
 McCall Design & Planning
This project is truly one of those designed by setbacks. The owners fell in love with the setting, sitting on a bank above the river, but a sewer easement through the center of the property, parallel to the road, cut the building envelope in half. Our goal was a 1,400 sq ft home with outside space on the river side of the home.
We started with an attached garage concept, which is very desirable in our snowy climate, but it was forcing a compromise with no patio on the back of the house. We negotiated an agreement with the city staff to allow us to build a breezeway over the 25’ sewer easement. The breezeway was designed and constructed to be removable by forklift in 3 pieces, if it ever becomes necessary to work on the sewer line, buried about 20’ below grade.
The owners had varying taste in the style of home they wanted, one on the more traditional end and one on a more contemporary bent. They also wanted low maintenance materials. The result is a simple gable form with over-sized knee braces and gable end vents for function as well as character. The home is finished with cedar shingle siding with a horizontal corrugated metal wainscot below. We opened the back of the house up with windows and sliding doors, giving great views into the trees and down to the river below. The greatest feature is the back patio perched on the bank with the sound of the river rising up from below.
 Talon Construction Inc.
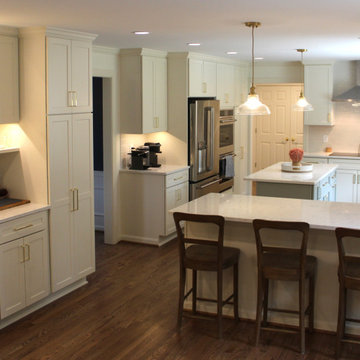
Finding a reputable contractor to design and build your kitchen remodel in Maryland with quality results involves several steps. Here are some general guidelines to help you find the right professional for your project:
1. Ask for Recommendations: Start by asking friends, family, neighbors, or colleagues who have recently completed kitchen remodels for recommendations. Personal referrals can be a valuable source of trustworthy contractors.
2. Check Online Reviews: Websites like Yelp, Angie's List, and Google Reviews can provide insights into the experiences of previous clients. Look for contractors with consistently positive feedback.
3. Check Credentials: Verify that the contractor has the necessary licenses and insurance to work in Maryland. You can typically check this information on your state's licensing board website.
4. Ask for References: Request references from the contractor and contact previous clients to inquire about their experiences. Visit some of their completed projects if possible.
5. Review Portfolios: Examine the contractor's portfolio of past kitchen remodels. Look for examples of work that match your style and preferences.
6. Check for Permits: Ensure that the contractor will handle any necessary permits and inspections for your remodel. Avoid contractors who suggest bypassing required permits, as this can lead to legal and safety issues.
7. Discuss Communication: Clear communication is crucial throughout the project. Discuss how the contractor will keep you updated on progress and address any concerns or changes during the remodel.
8. Get Everything in Writing: Never rely solely on verbal agreements. Ensure that all project details, warranties, and expectations are documented in a written contract.
9. Check for Red Flags: Be wary of contractors who pressure you into making quick decisions, lack a physical business address, or have a history of disputes or legal issues.
10. Trust Your Instincts: Choose a contractor you feel comfortable working with. Trust your instincts and select someone who listens to your ideas and concerns.
11. Visit Completed Projects: If possible, visit some of the contractors’ completed kitchen remodels to assess the quality of their work in person.
Once you've completed your due diligence and gathered all the necessary information, you'll be better equipped to make an informed decision about which contractor to hire for your kitchen remodel in Maryland. Remember that quality results often come from working with experienced, licensed professionals who prioritize clear communication and transparency throughout the project.
 Novus Exteriors
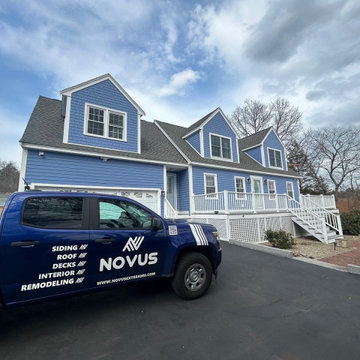
In this project, the client had some doubts in respect to the color and style of the siding he desired. After working extensively with him, we reached an agreement and got special order James Hardie Siding! Boston Blue was the color we signed off on, and it was the right choice. Located by the beach, this home renovation has grabbed the attention of the neighborhood along with all the visitors of the beach. We also constructed a new patio walkway in the rear of the house for the homeowner. A top quality job and a more than satisfied customer at the end was a mission accomplished!
 Novus Exteriors
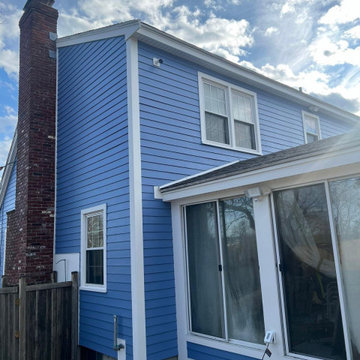
In this project, the client had some doubts in respect to the color and style of the siding he desired. After working extensively with him, we reached an agreement and got special order James Hardie Siding! Boston Blue was the color we signed off on, and it was the right choice. Located by the beach, this home renovation has grabbed the attention of the neighborhood along with all the visitors of the beach. We also constructed a new patio walkway in the rear of the house for the homeowner. A top quality job and a more than satisfied customer at the end was a mission accomplished!
 Novus Exteriors
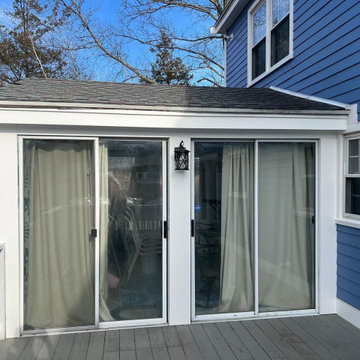
In this project, the client had some doubts in respect to the color and style of the siding he desired. After working extensively with him, we reached an agreement and got special order James Hardie Siding! Boston Blue was the color we signed off on, and it was the right choice. Located by the beach, this home renovation has grabbed the attention of the neighborhood along with all the visitors of the beach. We also constructed a new patio walkway in the rear of the house for the homeowner. A top quality job and a more than satisfied customer at the end was a mission accomplished!
 STUDIO GRANIA MURRAY
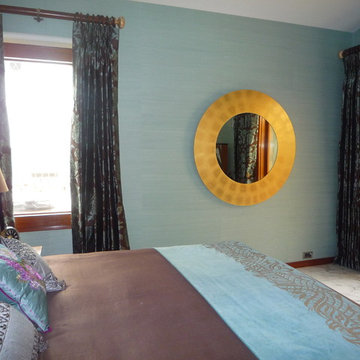
A second home for a large family. The brief was to completely furnish, accessorise and provide draperies. This was our second project for this client and his family of five daughters. From start to finish the project took ten months to complete. An initial site visit in June followed by a two week installation in March of the following year. Most items were custom made. Everything was chosen with constant family consultation and agreement.
 Above & Beyond Building
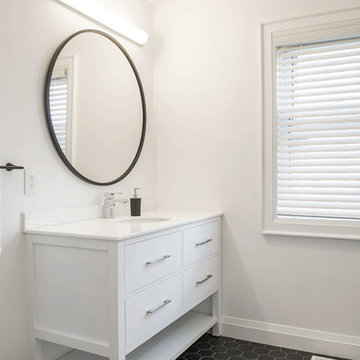
Bursting with craft to enhance true Muskoka living, the vision for this Lake Muskoka custom build was to bring family to the forefront of every day living. Classic, timeless, modern and clean, with a touch of rustic elements throughout.
Our client envisioned a streamlined, elegant home that maximized the impact of the glorious views and showcased their love of natural materials. ABOVE & BEYOND provided full planning and design services and executed a re-zoning and site plan agreement for the property in order to accomplish the client’s vision for their cottage.
This open-concept space framed with floor-to-celing windows, is defined by a custom stone fireplace, complete with reclaimed barn beam for the feature mantle.
A cool, fresh palette and simple lines bring focus to the fine details and rustic finishes that distinguish this exceptional home. Standout features include custom cabinetry and built-ins, a massive island draped with white granite, and brushed steel hardware.
Bursting with craft and fine woodwork, including a graceful, fine-lined staircase, maximize the light that makes this family home so magnificent.
 Dormus Design Collective
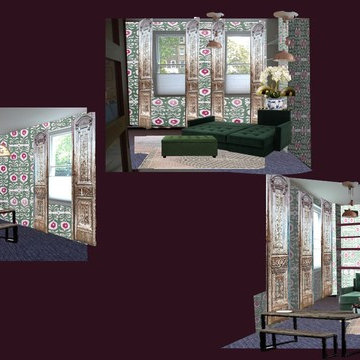
the property has a purple/aubergine kitchen that is too expensive to replace and the flat has to be carpeted due to share of freehold agreements -
design scheme
Iznik pattern - photo scaled 20;1 and will be printed on linen and paper to line walls
furniture from £150 - £400 via reclaimed or second-hand stores
flooring sisal - type agar steel
lights from made.com -
 STUDIO GRANIA MURRAY
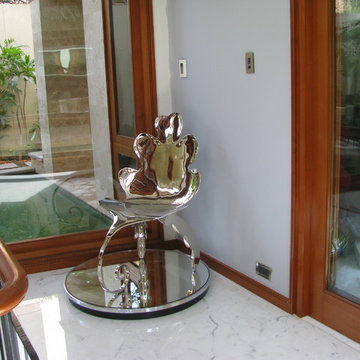
A second home for a large family. The brief was to completely furnish, accessorise and provide draperies. This was our second project for this client and his family of five daughters. From start to finish the project took ten months to complete. An initial site visit in June followed by a two week installation in March of the following year. Most items were custom made. Everything was chosen with constant family consultation and agreement.
14