
Search results for "Avoiding closing" in Home Design Ideas

 Five Star Tree Care
Taking care of plants, trees or shrubs may seem easy, but for many homeowners, the task is riddled with complications. For those who have no previous experience with plant or tree care, mistakes can cause damage or even death to the trees. A lack of proper training or a lack of proper information about tree care can do much more harm than good.
We care about your trees and shrubs as much as you care about your property. To help you avoid common mistakes, our team at Five Star Tree Services has created an easy to follow quick start guide for shrubs and tree maintenance. Following this guide will help you take care of your trees and shrubs in-between visits from our trained arborist.
Hire Help
Professional arborists are qualified and the best to trim, plant, maintain trees and to preform shrub trimming in just about any environment. Not only does a professional arborist have the experience, but they also are specially trained in the care and diagnosis of various plant species and diseases. In addition to taking care of your plant life, they will also offer you instructions on how to care for your plants when they are unavailable.
Make sure to take care in who you decide to hire. Instead of choosing the first company you find or the lowest priced plant care service, first you should research their qualifications by asking about how they usually care for trees, what their pruning style is, and how often they plan to visit for seasonal care. If they are not willing to answer your questions or educate you on the proper tree and plant care, keep searching.
Proper Tree Care Starts With You
Tree care starts with the property owner. The moment you chose a tree and how you care for it once it has been planted, will shape its health for the rest of its life. Proper care in the early years will ensure that it grows into a healthy shape and has a long life ahead of it. Working with a certified arborist will ensure that you choose the right trees for your area and that they are planted and care for properly during the early years.
There are many different species and types of plants, shrubs, and trees. Understanding how to care for each one will give you the knowledge needed to help them thrive. Speaking with a skilled professional will allow you to take care of your property effectively and efficiently.
Listen Carefully
As tedious or as boring as tree care instructions may be, it is important to pay close attention and take notes. Understanding the responsibilities you have as a property owner towards the shrubs and trees on your property is the best way to ensure they are well cared for. In the event that you are unsure about what to do or how to care for your plant life, you can always reach out to one of our certified arborists here at Five Star Tree Services.
How We Can Help
Whenever you have any Toronto tree care questions, Five Star Tree Services is here to help. We care about your plant life and are dedicated to offering each of our client’s comprehensive care so that your trees and shrubs will thrive. For more information or to get some tips on taking care of the trees on your property, give us a call at (416) 990-3355 to find out more.

 IQnewswire
The End of the Ultra-Slim Wedding Suit
For several years, men’s formalwear was dominated by narrow lapels, short jackets and trousers cut close to the leg. The style created a sharp outline, but it often left little room for sitting, dancing or eating comfortably. Current tailoring is moving towards a more balanced shape, with cleaner shoulders, a defined waist and trousers that follow the leg without gripping it.This change does not mean that wedding suits have become oversized. The newer approach sits between skinny and loose. It keeps the structure expected of formal clothing while allowing the cloth to hang properly. For grooms, that balance is useful during a day that may involve a ceremony, photographs, dinner and several hours on the dance floor.
Look For Shape Rather Than Tightness
A well-fitted suit should create a clear outline without relying on tension. Collections of Marc Darcy suits include tailored three-piece designs, checks and textured fabrics that suit the current preference for visible structure and considered proportions.
The jacket should sit close enough to define the waist, but the front button should fasten without pulling the cloth into an X-shaped crease. At the shoulders, the seam should finish close to the natural shoulder point. Extra width can make the jacket look borrowed, while a shoulder that is too narrow may cause the upper sleeve to collapse.
Fit should be assessed while moving as well as standing. Reach forward, sit down and raise both arms. A tailored jacket will never feel like casual sportswear, but it should allow the groom to carry out ordinary movements without sharp restriction across the back or chest.
Give The Jacket Enough Length
Very short suit jackets became common alongside skinny trousers, but they can disrupt the proportions of a three-piece outfit. If the jacket finishes too high, the waistcoat may appear longer than the outer layer and the trousers may look as though they begin too low.
A more traditional jacket length usually covers most of the seat and divides the body more evenly. This can make the legs appear longer without shortening the jacket excessively. The correct length depends on height and body proportions, so two men wearing the same chest size may still need different jacket lengths.
View the suit from the back and side rather than relying on a front-facing mirror. The vents should lie flat, and the hem should not lift away from the body. A side photograph can reveal an unbalanced jacket more clearly than the changing-room mirror.
Choose Trousers That Fall Cleanly
The move away from very tight tailoring is most noticeable in suit trousers. A modern tailored leg can still be neat at the ankle, but it should provide enough room through the seat and thigh for the fabric to fall without horizontal lines.
Trouser pockets offer a useful fit check. If they pull open while standing, the waist or hips may be too tight. The fly should lie flat, and the waistband should remain in place without depending on an overtightened belt. Higher-rise trousers can work particularly well with a waistcoat because they reduce the chance of shirt fabric appearing between the two pieces.
The hem should make gentle contact with the shoe rather than gathering heavily around it. A short hem can work with narrow trousers but taking it too far may make the suit look dated once the current cropped style moves on. A slight break is easier to wear with different formal shoes and tends to look balanced in full-length wedding photographs.
Let The Waistcoat Support the Silhouette
A waistcoat adds structure through the centre of the outfit, but only when it fits correctly. It should lie flat against the shirt and cover the trouser waistband. Tightening the back strap cannot correct a waistcoat that is the wrong size or too short.
Current three-piece styling often places greater emphasis on the waistcoat. Double-breasted designs, contrasting fabrics and wider openings can distinguish the groom without requiring a brightly coloured jacket. When the groom removes the jacket later, the waistcoat keeps the outfit looking complete.
Allow room for a full meal and several hours of wear. A waistcoat that feels acceptably close during a brief fitting may become uncomfortable at dinner. Sit down with every button fastened and check whether the lower edge presses into the waist or causes the front to bow.
Use Stronger Lapels Carefully
Wider notch and peak lapels are returning after years of extremely narrow designs. A broader lapel can frame the shirt and tie, balance the shoulders and give the jacket a more formal character. Peak lapels create a particularly strong line on double-breasted jackets and evening suits.
The lapel width should still suit the wearer. A very broad lapel can overwhelm a smaller frame, while an extremely narrow one may look out of proportion on a broad chest. The shirt collar, tie width and lapel should relate to one another without matching exactly.
A wider lapel also leaves less need for decorative extras. A simple buttonhole flower or plain pocket square may be enough. Large lapel pins can crowd the upper part of the jacket, especially when the cloth already contains a check.
Avoid Buying According to the Size Label Alone
The same labelled size can fit differently across designs because cut, fabric and construction affect the garment. Begin with accurate chest, waist, inside-leg and approximate jacket-length measurements. Compare those figures with the retailer’s size information rather than ordering the size worn in another brand without checking.
If the jacket fits at the shoulders but needs slight shaping through the waist, a tailor can often make the adjustment. Sleeves and trouser hems are also commonly altered. Major changes to the shoulder line or jacket length are more difficult and may not be economical.
Do not choose the smallest size that can be fastened. A suit that looks tight in the fitting room is unlikely to become more comfortable during a long wedding day. Cloth should skim the body and return to a clean position after movement.
Balance a checked suit with simple styling
Texture and checks remain popular in wedding tailoring, particularly for country houses, converted barns and traditional venues. These fabrics already add depth to the outfit, so the cut should remain controlled and the accessories relatively quiet.
A plain white, pale blue or cream shirt gives a checked suit a clear foundation. Choose a tie from one of the secondary colours in the cloth rather than introducing another strong pattern. A white pocket square works when the suit contains several shades and does not need further decoration.
Shoes should support the proportions of the trousers. A very slim shoe may appear too small beneath a fuller hem, while a heavy casual sole can pull attention away from the tailoring. Oxfords, Derbies and refined brogues usually provide enough visual weight without looking bulky.
Coordinate the wedding party without forcing one fit
Matching groomsmen suits can become difficult when every member of the party has a different build. Insisting on an identical close fit may leave some men comfortable and others visibly restricted. A better approach is to keep the cloth, colour and main design consistent while adjusting jacket and trouser sizes for each person.
The groom can stand apart through a waistcoat, lapel shape or accessory rather than wearing a suit cut much tighter than everyone else. This creates a connection across the group without treating one silhouette as suitable for every body.
Arrange fittings early enough to identify size and alteration issues. Group orders should be checked well before the wedding, particularly when trousers need hemming or jackets require sleeve adjustments. Each person should try the complete outfit with the intended shirt and shoes.
Judge the suit by the whole day
A wedding fitting often lasts less than half an hour, while the suit may be worn for twelve hours or more. Comfort should therefore be tested under realistic conditions. Sit for several minutes, walk upstairs and check the waistband after moving around.
Pay attention to the parts that cannot be seen clearly in a mirror. The collar should remain close to the shirt at the back of the neck. Jacket vents should not pull apart, and the trouser seat should follow the body without sagging or strain.
The current move towards balanced tailoring gives grooms more room to choose clothes that look formal without feeling restrictive. Clean shoulders, a shaped jacket and trousers with a natural fall will outlast extreme proportions. A suit that allows the groom to stand, sit and celebrate comfortably is also more likely to look composed in photographs taken throughout the day.

 Free Lancing
Effective residential construction project management is crucial in today’s fast-moving building industry. It means overseeing every step of building a home, from planning to finishing, to ensure projects are completed time, within budget, and with high quality. Unlike commercial projects, residential projects require special attention to meet homeowners' unique needs and wishes, requiring a customized approach from the beginning to the end.
In 2025, the construction sector will use advanced technologies like AI and integrated project delivery (IPD) to streamline processes and improve stakeholder collaboration. However, project managers face significant challenges, including managing risks, maintaining quality control, and ensuring effective communication among team members.
A WIP Report (Work-in-Progress Report) is a key tool that helps track a project's budget, progress, and resource use. It provides clear insights, making managing costs easier, avoiding delays, and making informed decisions.
By adopting best practices and using modern construction management tools, project managers can overcome these challenges and deliver successful residential construction projects that meet client expectations and contribute to a sustainable future.
This article provides a brief overview of residential construction project management, highlights its importance, and touches on the challenges faced by project managers while incorporating the latest trends and technologies in the field.
Types of Residential Construction Management
Here are the different types of Residential Construction Management:
Single-Family Homes: These are standalone houses built for individual families. Managing these projects involves overseeing construction from planning to completion, ensuring that the home meets the owner's preferences and budget.
Multi-Family Housing: This includes apartments, condominiums, and townhouses. Projects of this type require managing multiple units, often with shared facilities, and ensuring compliance with local building codes.
Custom Home Building: This involves constructing homes tailored to specific client needs. Close collaboration with architects and designers is required to ensure the house reflects the owner's personality and preferences.
Home Renovation and Remodeling: These projects focus on updating or expanding existing homes. They often involve working with subcontractors for specialized tasks like electrical or plumbing work.
Components of Residential Construction Project Management
Managing a residential construction project requires carefully coordinating people, materials, and timelines. A well-structured approach ensures efficiency, cost control, and high-quality results.
Roles and Responsibilities
A project manager plays a vital role in residential construction. They oversee every step from planning to completion and ensure the project stays on schedule, within budget, and meets quality standards.
Project Manager’s Role in Home Construction
The project manager is responsible for organizing tasks, managing resources, and solving problems that arise during construction. They coordinate between different teams, track progress, and ensure safety regulations are followed.
Collaboration with Contractors, Architects, and Stakeholders
Successful residential construction requires teamwork. Project managers work closely with architects to bring designs to new heights, coordinate with contractors to manage labor and materials, and keep stakeholders (such as homeowners and investors) informed about project updates.
Client Communication and Expectations Management
Clear communication with clients is essential. The project manager keeps homeowners updated on timelines, changes, and challenges. Setting realistic expectations and providing regular updates, they help avoid misunderstandings and keep the project running smoothly.
Project Scope & Planning
Practical project planning sets the foundation for a successful residential construction project. It ensures clear goals, minimizes risks, and keeps the project on track.
Defining Project Objectives and Deliverables:
Clearly outlining what needs to be done and what the final result should look like is essential. This involves setting specific, measurable goals that align with the homeowner's vision and budget.
Managing Homeowner Expectations and Scope Creep:
Homeowners often have changing needs or ideas. Effective project managers must manage these expectations to prevent "scope creep," which can delay projects and increase costs. This involves open communication and setting clear boundaries.
Ensuring Compliance with Zoning Laws and Permits:
Before construction begins, it's crucial to ensure that all necessary permits are obtained and that the project complies with local zoning laws. This step avoids costly fines and delays, ensuring the project moves forward smoothly.
Budgeting & Cost Control
Proper budgeting is essential for keeping residential construction projects financially viable. Effective cost management prevents overspending and ensures profitability.
Accurate Cost Estimation for Residential Projects
A precise cost estimate considers labor, materials, permits, and unexpected expenses. Using historical data and Sage 300 CRE for financial management improves accuracy and helps set realistic budgets.
Budget Allocation and Tracking
Allocating funds efficiently ensures that each phase of the project receives the necessary resources. Tracking expenses through Construction & Financial Dashboards allows for real-time monitoring and early detection of budget deviations.
Preventing Budget Overruns
Uncontrolled costs can derail a project. Regular financial reviews, automated alerts for overspending, and contingency planning help keep expenses in check and prevent financial strain.
Scheduling & Timeline Management
Timely project completion is crucial in residential construction. Effective scheduling minimizes delays and ensures a smooth workflow.
Creating Detailed Project Schedules
A structured schedule outlines all tasks, deadlines, and dependencies. Breaking down the project into phases, planning, execution, and finishing, helps maintain order and clarity.
Preventing Delays & Meeting Deadlines
Delays can result from labor shortages, weather conditions, or supply chain issues. To avoid problems, it’s good to check for risks ahead of time, add extra time to schedules, and keep everyone on the same page.
Using Gantt Charts and Critical Path Methods
CPM for Construction helps identify critical activities that directly impact project completion, while Gantt charts provide a visual timeline of tasks. Both tools optimize scheduling and improve efficiency.
Residential Construction Project Management Phases
Managing a residential construction project effectively requires a structured approach through various phases. Each phase plays a critical role in ensuring the project's success, from initial planning to completion.
Pre-Construction Phase
The pre-construction phase sets the foundation for a smooth and efficient building process. Proper planning at this stage helps prevent costly changes and delays later.
Site Analysis & Approvals: A thorough site analysis assesses soil conditions, topography, and environmental factors. Feasibility studies evaluate project viability, including costs and regulatory compliance. Obtaining zoning approvals, permits, and other legal clearances is crucial before breaking ground.
Selecting Materials and Procurement Strategies: Choosing the right materials impacts durability, sustainability, and cost efficiency. A well-planned procurement strategy, including bulk purchasing and reliable supplier partnerships, ensures timely delivery and cost savings. Using Sage 300 CRE for procurement management helps streamline material sourcing and financial planning.
Construction Phase
The construction phase transforms plans into reality. Effective coordination and strict quality control ensure a successful build.
Resource Allocation and Workflow Coordination: Efficiently managing labor, equipment, and materials is key to maintaining progress. Using CPM for Construction, project managers can allocate resources strategically, prevent bottlenecks, and optimize workflows for timely completion.
Quality Control and Ensuring Compliance with Safety Regulations: Strict adherence to building codes and safety standards is non-negotiable. Regular inspections, worker training, and real-time quality monitoring ensure a structurally sound and legally compliant project. Proactive safety measures prevent accidents and project disruptions.
Project Closeout & Handover
The final phase of residential construction project management is crucial for ensuring a smooth transition from construction to occupancy. Proper closeout procedures guarantee quality, client satisfaction, and long-term project success.
Final Inspections and Quality Assurance: Before finishing the project, a final inspection checks that everything meets safety rules and quality standards. Any problems need to be fixed quickly. Using Procore helps make inspections and tracking issues easier, ensuring a high-quality final product.
Client Walkthrough and Support: A final check helps homeowners see the finished work, ask questions, and make sure it meets their expectations. This is also a chance to explain important home features and maintenance tips. Good communication here builds trust and strengthens relationships.
Warranty Management and Feedback: Efficient warranty management ensures clients get quick help for any issues after construction. A clear process for tracking requests and keeping in touch with homeowners boosts satisfaction. Collecting feedback helps improve future projects. Using S-Curve Forecasting tracks performance trends and refines management strategies.
Software for Residential Construction Project Management
The integration of technology in residential construction project management has revolutionized the way projects are planned, executed, and monitored. Digital tools streamline operations, reduce costs, and improve communication, making them essential for modern construction firms.
Importance of Digital Tools
Investing in digital tools is crucial for construction firms as it transforms the industry by enhancing efficiency, accuracy, and collaboration across the entire project lifecycle. They also improve project management by streamlining processes, automating tasks, and facilitating real-time stakeholder communication.
Top Construction Management Software for Residential Projects
Several software solutions are available for managing residential construction projects:
Procore: Known for its comprehensive project management features, including document management and collaboration tools.
Sage 300 CRE: Offers robust accounting and financial management capabilities, ideal for large-scale construction projects.
Buildertrend: Specializes in residential construction, providing tools for project scheduling, budgeting, and client communication.
CoConstruct: Focuses on custom home building and remodeling, offering features for estimating, scheduling, and project management.
WIP Reports: Useful for tracking work-in-progress and managing project finances effectively.
Features Comparison and Best Use Cases:
Procore: Best for large projects requiring extensive collaboration and document management.
Sage 300 CRE: Ideal for firms needing robust financial management.
Buildertrend: Suitable for residential builders focusing on client communication and project scheduling.
CoConstruct: Perfect for custom home builders who need detailed estimating and scheduling tools.
WIP Reports: Useful for firms needing to track project finances closely.
How Software Improves Project Efficiency
Construction management software significantly enhances project efficiency in several ways:
Automating Accounting and Job Costing: Software like Sage 300 CRE automates financial tasks, reducing manual errors and improving budget tracking.
Streamlining Document Management and Communication: Tools like Procore centralize documents and facilitate real-time communication among team members, reducing misunderstandings and delays.
Mobile-Friendly Solutions for Real-Time Tracking: Mobile apps from platforms like Buildertrend allow for on-site access to project data, enabling real-time tracking and decision-making.
These digital tools and software solutions are essential for modern residential construction project management, offering benefits such as improved efficiency, enhanced collaboration, and better financial control.
Challenges in Residential Construction Project Management
Residential construction projects face a variety of challenges that can impact their success. Here are some of the key issues project managers encounter:
Managing Subcontractors and Labor Shortages
One of the biggest challenges in residential construction is managing subcontractors and dealing with labor shortages. Subcontractors often have their own schedules and priorities, which can lead to delays if not coordinated properly. Additionally, labor shortages can slow down projects and increase costs due to the need for overtime or hiring temporary workers.
Budget Overruns and Unexpected Costs
Budget overruns are common in residential construction due to factors like material price fluctuations, unexpected site conditions, or changes in project scope. Effective budget management involves regularly monitoring expenses and having contingency plans for unexpected costs.
Changing Construction and Eco Rules
Construction and Eco Rules are always changing, so project managers need to keep up with the latest regulations. This involves following guidelines for saving energy, protecting the environment, and ensuring safety. Ignoring these rules can lead to fines, delays, or even stopping the project.
Best Practices
To ensure your residential construction projects run smoothly and successfully, follow these essential best practices:
Setting Clear Project Goals and Milestones
Clearly defining what you want to achieve is the first step to success. Set specific, measurable, achievable, relevant, and time-bound (SMART) goals. This helps everyone involved understand what needs to be done and by when. For example, instead of saying "build a house," say "build a house with three bedrooms and two bathrooms within the next nine months."
Stakeholder Collaboration
Good communication is key to keeping everyone on the same page. Regular meetings with contractors, suppliers, and homeowners help prevent misunderstandings and ensure that everyone knows what's happening and what's next. This open dialogue also helps resolve issues quickly, preventing small problems from becoming big delays.
Using Data-Driven Insights for Decision-Making
Making decisions based on facts rather than guesses is crucial. Use data and analytics to understand project progress, identify potential issues early, and make informed decisions. For instance, if data shows that a particular material is consistently causing delays, you can plan ahead to avoid those delays in the future.
Proactive Risk Management Strategies
Things don't always go as planned, so being prepared is essential. Identify potential risks early and have a plan to manage them. This might include having backup suppliers, planning for weather conditions, or setting aside extra funds for unexpected expenses. Being proactive can prevent small issues from turning into major problems.
Conclusion
Effective residential construction project management requires careful planning, clear communication, and the right digital tools. From single-family homes to multi-family housing and custom projects, managing timelines, budgets, and quality is essential for success.
By following best practices, using project management software, and staying ahead of industry trends, project managers can ensure smooth execution and client satisfaction despite challenges like labor shortages, budget overruns, and regulatory compliance; modern technology and strategic planning help mitigate risks.
Construction firms can improve efficiency, enhance collaboration, and maintain financial control by adopting advanced tools like Procore, Sage 300 CRE, and Buildertrend. A well-managed project delivers a quality home and builds trust and long-term success in the industry.
FAQs
What is residential construction project management?
It involves overseeing all aspects of building residential properties, from initial planning and design to construction and completion, ensuring projects are completed on time, within budget, and to the desired quality standards.
How can I prevent budget overruns in my construction project?
Accurate cost estimation, continuous budget tracking, and having contingency plans for unexpected expenses are key strategies to prevent budget overruns.
What are the main stages of a residential construction project?
The primary stages include design, pre-construction, procurement, and construction.
How does construction management software improve project efficiency?
It streamlines processes like scheduling, budgeting, and communication, providing real-time data access and collaboration among stakeholders, which enhances overall project efficiency.
How can I ensure my project complies with local building codes and regulations?
Engage professionals familiar with local laws, obtain all necessary permits before starting, and conduct regular inspections to ensure adherence to building codes and regulations.
Find the right local pro for your project

 Lightology
Aurora square edge 3.3 specification grade recessed accent light fixture for plaster or drywall applications. The flush mounted rigid plaster plate, which is finished into the ceiling, maintains a flat finish and defines the Truly Trimless Pure edge aperture. Combined with the Aurora dome and the tilt gear hidden behind the lamp creates a clean internal look. Features hot-aiming and offers a 0-45 degree vertical adjustment and 362 degree horizontal rotation without beam clipping. The AH2 IC, and air-tight, housing is suitable for remodel and new construction installations. The snoot carries the lamp and a soft focus lens, included, with room for two additional accessories, sold separately. 120V magnetic transformer included. Also available in 230V and 277V, with a round aperature, and with a ceramic metal halide lamping option. One 50 watt, 12 volt, IR MR16 lamp, not included. UL, cUL and CE listed for damp locations.

 Morris Black Designs
Morris Black Designer: Lydia Bogle
ABOUT THIS REMODEL: This ranch house built in 1958 added an addition in the late 90s, but the existing white kitchen had standard 30” wall cabinets that pre-dated the addition and the cathedral ceiling, and were not in proportion to the new spacious ceiling.
Signature Custom Cabintery
Signature Custom frameless cabinets with European full overlay in “Larchmont” door style. Cherry wood with “Truffle” stain. Full extension dovetail drawers with soft close feature. Cabinet interiors finished in Maple.
Base cabinets include rollout tray shelves, a lazy susan, spice drawer, pullout waste baskets, and hidden cutting board and knife block. Island has extended countertop for casual dining.
Wall cabinets include 24” cabinets mounted over 42” wall cabinets and enclosed refrigerator with cabinet above.
Buffet area has 36” high wall cabinets with both glass and bronze wire inserts, a bar sink and an undercounter wine cooler.
Appliances
JennAire stainless steel hood, range, dishwasher, wine cooler and refrigerator.
Countertop & Backsplash
Custom granite “Giallita” with eased edge.
Tile backsplash uses Jeffrey Court Breakwater in “Sand”. linen field tile, Deco Coral embossed bullnose with Pyrolas brick pattern tile in “Iron Rust”.
Accessories
Staineless steel Blanco sinks and Moen “Ascent” faucets.
#LydiaForMorrisBlack #MorrisBlackDesigns
 Five Star Tree Care
Spring brings the first rays of steady sunlight that encourage your trees to start sprouting fruit and flowers. However, sometimes at the start of spring, the cold weather makes a sudden and abrupt turn as winter tries to reassert its dominance. This can cause a late freeze, which is difficult for many trees to combat. Fruit trees are the most vulnerable during a late freeze, but Five Star Tree Services has some suggestions to help you protect your fruit and flowering trees from a late freeze.
Protecting Your Trees
Some fruit trees are better able to protect themselves from the cold, but all trees need to be protected from the frost. Depending on the type of tree you have, several methods of protection are effective.
Peach Trees: To protect peach trees, cover them with a blanket or a sheet during the day. This will allow heat to build up that will protect them at night during the freeze. Make sure to leave the cover in place until the freeze passes.
Citrus Trees: These are the most fragile of all trees. Small trees should be draped with burlap, a sheet, a tree frost blanket, or any other type of fabric at least a day before the freeze occurs. The cover has to surround the whole tree to trap the heat and prevent frost.
Apple Trees: These trees are pretty sturdy compared to other fruit-bearing trees. They can handle the cold, but it is still a good idea to cover them during sudden frost.
It is important to avoid placing ground covers, mulch, and weeds from around the base of a tree during cold weather and frost periods. The moist bare soil emits more heat than soil that is mulched. Watering trees ahead of a frost can also help to protect them as water also emits heat. When you expect a freeze, it is also best to furrow-irrigate at night or use a sprinkler on its low setting while ensuring there is proper drainage for your trees. Any time the outside temperature is forecast to drop below 32 degrees; you should cover your trees.
Which Trees Can Survive in the Cold?
No fruit-bearing trees are made for cold climates, but some are better equipped to handle the cold than others. The Plant Hardiness Zone can help you choose the right trees to plant for the area where you live. For example, lemon trees and other citrus trees need to be planted in zones 9-11 where the risk of cold weather is minimal. Pear trees, on the other hand, need cold weather to thrive and should be planted in zones 4-8.
Freezing Dangers
Some fruit or flowering trees that are caught unguarded during the late frost may lose their blossoms. In many cases, these trees will no longer sprout during the current growing season but will come back next spring as healthy as ever.
Younger trees are more prone to damage than mature trees. Trees that have closed buds are also able to handle the cold better than those that have already started to bloom. Of course, the longer a freeze is present, the more dangerous it is for your trees.
How We Can Help
The skilled arborists here at Five Star Tree Services are always on hand to help protect your trees from frost and with regular maintenance. Some of the other services we provide include tree removal, tree planting, and tree pruning in Richmond Hill and the Greater Toronto Area. If you require our assistance, give us a call at (416) 990-3355 today.
 SabaRehman Abdulrehman
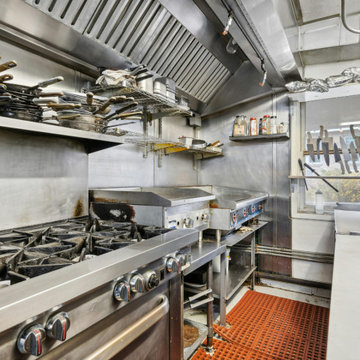
Phoenix's food scene is vibrant and thriving, but also one of the most closely watched in the country. Health inspectors in Maricopa County are strict, and customers expect spotless dining spaces.
To stay competitive, restaurant owners and food vendors must stay on top of evolving health codes, sanitation protocols, and food safety benchmarks. That starts with a firm grip on restaurant cleaning safety standards. Ignoring sanitation rules risks more than bad reviews. It invites citations, customer complaints, and operational shutdowns.
Whether you're operating a food truck or a restaurant, following these Phoenix cleaning standards helps you stay compliant, pass health inspections, and build customer trust.
Importance of a Clean Phoenix Restaurant that Follows Food Health and Safety Standards
The restaurant industry in Phoenix operates under strict oversight. The Maricopa County Environmental Services Department conducts regular inspections, and violations can result in fines or closures. In this climate, restaurant cleaning is not just a hygiene standard. It is a business-critical measure.
Proper food handling and establishment cleaning protocols reduce the risk of foodborne illnesses, control pests, protect equipment, and keep your staff safe. Inconsistent practices, on the other hand, can quickly become liabilities.
Start With the Food Code
Phoenix food vendors must comply with the 2017 FDA Food Code as adopted by Maricopa County. This includes rules on:
- Sanitizing food-contact surfaces after each use
- Maintaining proper water temperatures for dishwashing
- Cleaning restrooms frequently and keeping them stocked
- Storing cleaning chemicals away from prep areas
- Daily: Wipe prep tables, mop floors, clean grills, sanitize cutting boards
- Weekly: Deep clean kitchen hoods, polish cooking equipment, disinfect drains
- Monthly: Check pest control measures, clean freezer coils, and inspect HVAC filters
- Using the right sanitizers and PPE
- Logging cleaning times and who performed the task
- Identifying signs of mold, grease buildup, or rodent activity
- Conducting thorough surface cleaning to ensure all food-contact surfaces are sanitized regularly
- Food-safe and non-corrosive
- Effective against norovirus, salmonella, and E. coli
- Clearly labeled and stored in original containers
- Seal gaps around doors and pipes
- Store dry goods in sealed, elevated containers
- Keep outdoor waste bins locked and distanced from entry points
- Record cleaning completion in real time
- Alert managers when tasks are missed
- Keep a historical record for inspections
- Is certified and understands the Arizona food codes
- Provides documented service reports
- Offers customized cleaning plans
- Offers flexible scheduling around your operating hours
- Cross-contamination prevention: Regularly clean food prep surfaces and tools, and use separate equipment for raw meats, vegetables, and ready-to-eat foods. Proper cleaning prevents any contact with food that could lead to cross-contamination and affects food quality.
- Temperature monitoring: While not directly related to cleaning, maintaining proper food temperature is essential. Hot foods should be stored above 140°F, and cold foods below 40°F. Regularly monitor temperatures and clean temperature gauges to ensure accuracy.
- Proper storage: Use clean storage containers and shelving for food storage, keeping items off the floor. Ensure all food is sealed and labeled to avoid contamination risks and comply with food safety standards.
Sponsored
Delaware, OH

Buckeye Basements, Inc.
Central Ohio's Basement Finishing ExpertsBest Of Houzz '13-'21

 TKSL Construction
Patio - small traditional backyard stamped concrete patio idea in Denver with no cover

 GS Construction
Example of a small classic 3/4 white tile and stone tile mosaic tile floor alcove shower design in Chicago with an undermount sink, recessed-panel cabinets, black cabinets, quartzite countertops, a two-piece toilet and gray walls

 Jack Calderone
This bedroom and full bathroom are part of an adventuresome project my wife and I embarked upon to create a complete apartment in the basement of our townhouse. We designed a floor plan that creatively and efficiently used all of the 385-square-foot-space, without sacrificing beauty, comfort or function – and all without breaking the bank! To maximize our budget, we did the work ourselves and added everything from thrift store finds to DIY wall art to bring it all together.
No need to share a laundry in this apartment. In fact, no need to own a laundry basket since the washer/dryer is right in the clothes closet! We found this stacked unit on craigslist for $200.

 HwRenewal
In this 90's cape cod home, we used the space from an overly large bedroom, an oddly deep but narrow closet and the existing garden-tub focused master bath with two dormers, to create a master suite trio that was perfectly proportioned to the client's needs. They wanted a much larger closet but also wanted a large dual shower, and a better-proportioned tub. We stuck with pedestal sinks but upgraded them to large recessed medicine cabinets, vintage styled. And they loved the idea of a concrete floor and large stone walls with low maintenance. For the walls, we brought in a European product that is new for the U.S. - Porcelain Panels that are an eye-popping 5.5 ft. x 10.5 ft. We used a 2ft x 4ft concrete-look porcelain tile for the floor. This bathroom has a mix of low and high ceilings, but a functional arrangement instead of the dreaded “vault-for-no-purpose-bathroom”. We used 8.5 ft ceiling areas for both the shower and the vanity’s producing a symmetry about the toilet room door. The right runner-rug in the center of this bath (not shown yet unfortunately), completes the functional layout, and will look pretty good too.
Of course, no design is close to finished without plenty of well thought out light. The bathroom uses all low-heat, high lumen, LED, 7” low profile surface mounting lighting (whoa that’s a mouthful- but, lighting is critical!). Two 7” LED fixtures light up the shower and the tub and we added two heat lamps for this open shower design. The shower also has a super-quiet moisture-exhaust fan. The customized (ikea) closet has the same lighting and the vanity space has both flanking and overhead LED lighting at 3500K temperature. Natural Light? Yes, and lot’s of it. On the second floor facing the woods, we added custom-sized operable casement windows in the shower, and custom antiqued expansive 4-lite doors on both the toilet room door and the main bath entry which is also a pocket door with a transom over it. We incorporated the trim style: fluted trims and door pediments, that was already throughout the home into these spaces, and we blended vintage and classic elements using modern proportions & patterns along with mix of metal finishes that were in tonal agreement with a simple color scheme. We added teak shower shelves and custom antiqued pine doors, adding these natural wood accents for that subtle warm contrast – and we presented!
Oh btw – we also matched the expansive doors we put in the master bath, on the front entry door, and added some gas lanterns on either side. We also replaced all the carpet in the home and upgraded their stairs with metal balusters and new handrails and coloring.
This client couple, they’re in love again!



Sponsored
Columbus, OH

Snider & Metcalf Interior Design, LTD
Leading Interior Designers in Columbus, Ohio & Ponte Vedra, Florida

 Save home
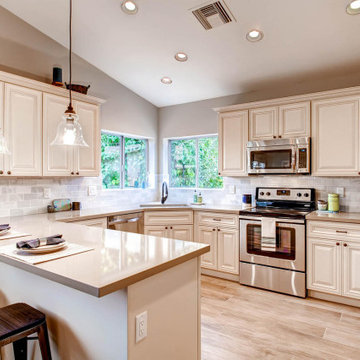
Kitchen trends may come and go, but some classic choices are forever. Take antique white kitchen cabinets for instance.
White kitchen cabinets have ruled the mainstream decor for several years, and continue to do so. They not only blend seamlessly with just about any kitchen space but dramatically uplifts the ambiance with the furniture and accessories.
Antique white kitchen cabinets represent a restricted yet unique color palette. In other words, it can be considered a neutral binding color point for all the other elements like countertops, floorings, and fixtures. Besides, it serves as a great backdrop for any shades that one might pick for a semi-classic or completely modern kitchen.
Contrary to what many would like to believe, antique white kitchen cabinets are never boring, especially, if you know your way of working around it. In fact, quite the reverse, as white shaker cabinets make for a perfect pair to inclusions like marble countertops and interlocked wooden tiles.
No matter what, white kitchen cabinets bring forth the very best of depth and dimension in equal measure. If you have been planning to design your culinary space with antique white kitchen cabinets, this guide can be your first cue.
Here’s a look at 10 master tips to design a kitchen using white cabinets.
Embracing the Rustic Charm
Do you fancy a rustic styled kitchen space?
White kitchen cabinets can be paired alongside open shelves that are a picturesque setting, reminiscent of the French flea market. To add essence to the scene, opt for brick flooring connecting the space to an adjoining terrace looking over a sea or any water body.
The Eternal Black Accent
Many homeowners envision a cozy kitchen space to unwind themselves, cooking their favorite meal.
Antique white kitchen cabinets when matched with black accents readily impart a warm and inviting aura to the whole space. To spice up things, you might introduce a steel countertop and nickel made cookware.
The Old-World Bliss
Antique white cabinets are easily differentiated from others in the row owing to its classical trims and muted scrolls. When looking to create an old-world kitchen, white cabinets work fine with brass detailing on doorknobs and cabinet handles. Upholstered stools for counters, deviated barrage drawers, heavy kitchen sinks, mosaic tiles, and grey backsplashes can be other inclusions.
The Scullery Styled Kitchen
Antique white kitchen cabinets are rather an accessory of convenience for a culinary space, that also doubles up as a scullery.
Typically, such a structure is often deprived of broad daylight. Thus, it becomes more important to get the lighting done right. Start with overhead lamps or use LED light strips right under the cabinet or across the shelves overhead. With antique white kitchen cabinets, the setting of a scullery is per-designed to excel by all means. You might as well choose to include brass details, paired alongside the soapstone counters, further complemented by suspended shelves.
For the Country Hearted
Birdcage chairs placed around a pine casted table, with pendant lamps hanging above does throw in some serious country vibes. Tell you what, antique white kitchen cabinets
are seemingly the first choice for any country-inspired kitchen space. Add a few open shelves and a pair of garlands for the kitchen windows, and you are good to go!
Character Building
When it comes to designing a living space, character-building contrasts are a good way to add uncanny charm and appeal.
White shaker cabinets are a perfect choice to create a lovely nautical atmosphere paired with the right set of elements; furniture and fixtures.
Start by pairing your white cabinets with a simple toned down hemlock kitchen island. To add a dash of an urban feel, introduce counter stools in lilac.
If your budget prevails, you might as well take your designing game up a notch with a banquette type seating arrangement, using a combination of leather and acrylic fabric.
Picking Your Granite
Picking on the granite style for your antique white kitchen cabinets
can be a tad tricky.
Always aim to work with granite and glaze that are of the same color. Look for variation across granite offerings to add a little bit of jazz to your otherwise worldly setting.
While buying from the store, always ask for a sample to take back home and view it under varying light conditions.
Of Balance and Symmetry
If you have a U-shaped kitchen, it is necessary to pay close attention to details.
To avoid a mismatch, you will need to keep it toned down to one theme which would have the antique white cabinets in between and trickle-down further to the stovetops, plate trails, and open shelves.
Tile Floorings in Muted Colors
When designing a kitchen space with white cabinets, glass displays are usually a preferred choice. For such a setting, it is recommended that you stick to using flooring tiles in light colors. Beige and light grey are quite a popular choice.
Dine-in Style
Antique white kitchen cabinets can be used to bring the very best out of a dine-in style kitchen. Start by pairing the cabinets with a refectory table, preferably one that mimics the 19th-century furniture style.
Throw in a couple of bamboo-casted chairs with plank floorings to render an easy-going, modern, and functional vibe.
Wrap up
Hands down, antique white kitchen cabinets are the perfect pick for just about any style kitchen. Now that you have great insight into designing your culinary space, it's time to put things into action!
White kitchen cabinets have ruled the mainstream decor for several years, and continue to do so. They not only blend seamlessly with just about any kitchen space but dramatically uplifts the ambiance with the furniture and accessories.
Antique white kitchen cabinets represent a restricted yet unique color palette. In other words, it can be considered a neutral binding color point for all the other elements like countertops, floorings, and fixtures. Besides, it serves as a great backdrop for any shades that one might pick for a semi-classic or completely modern kitchen.
Contrary to what many would like to believe, antique white kitchen cabinets are never boring, especially, if you know your way of working around it. In fact, quite the reverse, as white shaker cabinets make for a perfect pair to inclusions like marble countertops and interlocked wooden tiles.
No matter what, white kitchen cabinets bring forth the very best of depth and dimension in equal measure. If you have been planning to design your culinary space with antique white kitchen cabinets, this guide can be your first cue.
Here’s a look at 10 master tips to design a kitchen using white cabinets.
Embracing the Rustic Charm
Do you fancy a rustic styled kitchen space?
White kitchen cabinets can be paired alongside open shelves that are a picturesque setting, reminiscent of the French flea market. To add essence to the scene, opt for brick flooring connecting the space to an adjoining terrace looking over a sea or any water body.
The Eternal Black Accent
Many homeowners envision a cozy kitchen space to unwind themselves, cooking their favorite meal.
Antique white kitchen cabinets when matched with black accents readily impart a warm and inviting aura to the whole space. To spice up things, you might introduce a steel countertop and nickel made cookware.
The Old-World Bliss
Antique white cabinets are easily differentiated from others in the row owing to its classical trims and muted scrolls. When looking to create an old-world kitchen, white cabinets work fine with brass detailing on doorknobs and cabinet handles. Upholstered stools for counters, deviated barrage drawers, heavy kitchen sinks, mosaic tiles, and grey backsplashes can be other inclusions.
The Scullery Styled Kitchen
Antique white kitchen cabinets are rather an accessory of convenience for a culinary space, that also doubles up as a scullery.
Typically, such a structure is often deprived of broad daylight. Thus, it becomes more important to get the lighting done right. Start with overhead lamps or use LED light strips right under the cabinet or across the shelves overhead. With antique white kitchen cabinets, the setting of a scullery is per-designed to excel by all means. You might as well choose to include brass details, paired alongside the soapstone counters, further complemented by suspended shelves.
For the Country Hearted
Birdcage chairs placed around a pine casted table, with pendant lamps hanging above does throw in some serious country vibes. Tell you what, antique white kitchen cabinets
are seemingly the first choice for any country-inspired kitchen space. Add a few open shelves and a pair of garlands for the kitchen windows, and you are good to go!
Character Building
When it comes to designing a living space, character-building contrasts are a good way to add uncanny charm and appeal.
White shaker cabinets are a perfect choice to create a lovely nautical atmosphere paired with the right set of elements; furniture and fixtures.
Start by pairing your white cabinets with a simple toned down hemlock kitchen island. To add a dash of an urban feel, introduce counter stools in lilac.
If your budget prevails, you might as well take your designing game up a notch with a banquette type seating arrangement, using a combination of leather and acrylic fabric.
Picking Your Granite
Picking on the granite style for your antique white kitchen cabinets
can be a tad tricky.
Always aim to work with granite and glaze that are of the same color. Look for variation across granite offerings to add a little bit of jazz to your otherwise worldly setting.
While buying from the store, always ask for a sample to take back home and view it under varying light conditions.
Of Balance and Symmetry
If you have a U-shaped kitchen, it is necessary to pay close attention to details.
To avoid a mismatch, you will need to keep it toned down to one theme which would have the antique white cabinets in between and trickle-down further to the stovetops, plate trails, and open shelves.
Tile Floorings in Muted Colors
When designing a kitchen space with white cabinets, glass displays are usually a preferred choice. For such a setting, it is recommended that you stick to using flooring tiles in light colors. Beige and light grey are quite a popular choice.
Dine-in Style
Antique white kitchen cabinets can be used to bring the very best out of a dine-in style kitchen. Start by pairing the cabinets with a refectory table, preferably one that mimics the 19th-century furniture style.
Throw in a couple of bamboo-casted chairs with plank floorings to render an easy-going, modern, and functional vibe.
Wrap up
Hands down, antique white kitchen cabinets are the perfect pick for just about any style kitchen. Now that you have great insight into designing your culinary space, it's time to put things into action!

 Klopf Architecture
Joseph Eichler developed his moderately priced houses for the mass-market starting in 1949. His homes were designed using affordable materials and simple construction techniques. Nearly 70 years later these homes are in need of updating and remodeling an Eichler home today can become an imposing and costly project if you’re not careful. For this project the clients, who had undergone several previous house renovations, were determined to stick with an established budget from the beginning. Klopf Architecture helped them modernize their Eichler with a premium appearance on a reasonable budget.
The clients challenged the Klopf team to create a design that had a high-end feel and nicely done while adhering to their budget. That meant not all of the initial project scope could be built. Like many other Eichler homes, the original floor plan did not meet the family’s needs leaving them feeling disconnected from one room to another. While an early goal was to expand the house into a carport and create a larger garage, it did not survive the contractor pricing phase of the project.
The goals that did survive through to the end of the project included blurring some of the boundaries and opening up some of the spaces, making them more functional and creating a smoother flow in the house. The Klopf team joined the former separate kitchen and formal living room into one large space and shift the dining room where it is now connected to the kitchen. Klopf swapped the family room to the front alongside the living room, so the spaces feel more cohesive and are now better suited for family activities. The functional layout of the master bathroom was changed to include a large, curbless shower.
Installing a complete IKEA kitchen including cabinets, countertops, appliances, light fixtures, and furnishings was key to staying within budget. Bath fixtures in this house are also exclusively IKEA. Klopf Architecture has designed many homes using IKEA products, which are quite compatible offering an affordable, contemporary take on Eichler homes. The clients saved additional money from the simplicity and availability of IKEA products and by orchestrating the orders and purchases themselves. Following each construction meeting, the clients would make a run to IKEA and purchase items, pick up needed spare parts, and bring them back right away to stay ahead of the contractor’s schedule and minimize the chance of delays and bottlenecks.
Klopf balanced material selections by retaining some of the original woodwork and simply refinishing the mahogany paneling. They were able to retain the original windows and sliding doors which were still in good shape, avoiding some of the most costly replacement expenses. Additionally interior doors were simply refinished and the exterior siding cleaned up and repainted. Formerly dark interiors are now illuminated with new slimmer semi-recessed lighting eliminating the need for costly roof work.
Attention to design details allowed the Klopf team to ensure the house ended up with a high quality feel. Key visual elements were strictly aligned and Klopf worked with the clients to select a unified materials palette throughout the spaces so the house flows seamlessly together. Aligning the tile layout with the trusses and keeping it level with the concrete slab outside allowed them to achieve a level of quality that may otherwise be missed.
The clients were able to keep their budget on track by determining clear goals and making critical decisions upfront, choosing materials and furnishings wisely, working with the right design and construction teams in place and to a large part, their willingness to participate throughout the process. In the end the clients were much happier with their reconfigured Eichler home and Klopf Architecture managed to keep their remodeling costs to about $325/sf – a good amount below the average Bay Area Eichler remodel.
Project Team: John Klopf, Angela Todorova, Sherry Tan
Contractor: Keycon Construction
Structural Engineer: Sezen & Moon
Photography: Sabrina Huang
Year Completed: 2020

 Prestige Custom Building & Construction, Inc.
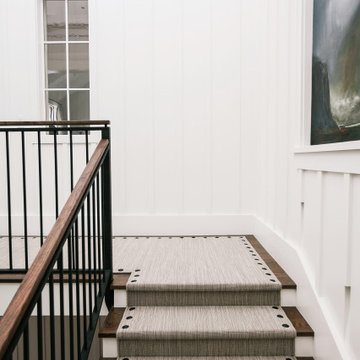
Staircase - mid-sized traditional wooden straight wood railing staircase idea in New York with painted risers
Sponsored
Plain City, OH

Kuhns Contracting, Inc.
Central Ohio's Trusted Home Remodeler Specializing in Kitchens & Baths

 Innovative Design Build
Five stars isn’t enough! Our project was to reconfigure and update the main floor of a house we recently purchased that was built in 1961. We wanted to maintain some of the unique feeling it originally had but bring it up-to-date and eliminate the closed-in rooms and downright weird layout that was the result of multiple, partial remodeling projects. We began with a long wishlist of changes which also required replacement of very antiquated plumbing, electrical wiring and HVAC. We even found a fireplace that had been walled in and needed major re-construction. Many other aspects and details on this incredible list we made included an all new kitchen layout, converting a bedroom into a master closet, adding new half-bath, completely rebuilding the master bath, and adding stone, tile and custom built cabinetry. Our design plans included many fixtures and details that we specified and required professional installation and careful handling. Innovative helped us make reasonable decisions. Their skilled staff took us through a design process that made sense. There were many questions and all were answered with sincere conversation and positive – innovation – on how we could achieve our goals. Innovative provided us with professional consultants, who listened and were courteous and creative, with solid knowledge and informative judgement. When they didn’t have an answer, they did the research. They developed a comprehensive project plan that exceeded our expectations. Every item on our long list was checked-off. All agreed on work was fulfilled and they completed all this in just under four months. Innovative took care of putting together a team of skilled professional specialists who were all dedicated to make everything right. Engineering, construction, supervision, and I cannot even begin to describe how much thanks we have for the demolition crew! Our multiple, detailed project designs from Raul and professional design advice from Mindy and the connections she recommended are all of the best quality. Diego Jr., Trevor and his team kept everything on track and neat and tidy every single day and Diego Sr., Mark, Ismael, Albert, Santiago and team are true craftsmen who follow-up and make the most minuscule woodworking details perfect. The cabinets by Tim and electrical work and installation of fixtures by Kemchan Harrilal-BB and Navindra Doolratram, and Augustine and his crew on tile and stone work – all perfection. Aisling and the office crew were always responsive to our calls and requests. And of course Clark and Eric who oversaw everything and gave us the best of the best! Apologies if we didn’t get everyone on this list – you’re all great! Thank you for your hard work and dedication. We can’t thank you enough Innovative Construction – we kind of want to do it again!
Dave Hallman & Matt DeGraffenreid
 safe ZOnea
Staging a home for sale or for a major transition is a strange in-between state. You are still living in the space, but you are also preparing it to impress strangers, support showings, and remain functional until the final move-out day. That tension between “home” and “product” is where storage quietly becomes one of your smartest tools. Used well, storage lets you reduce clutter, protect important items, and create the kind of rooms that photograph beautifully and feel calm when buyers walk through the door.
A staged move is rarely just about shifting boxes from one address to another. It is about managing timing, presentation, and stress at the same time. When storage is built into the plan from day one, the entire process feels less rushed and more strategic. Rooms open up gradually, essentials stay accessible, and you never feel like you are drowning in half-packed chaos. Understanding how to use storage as a staging partner, not just a place to dump excess stuff, is what turns a messy transition into a controlled, professional-looking move.
Why Storage Is the Backbone of Every Staged Move
Visual space is emotional space. When every surface is covered, and every corner is full, buyers feel crowded before they have even evaluated the layout. Storage gives you a way to pull back without making drastic decisions about what to keep or donate. Seasonal décor, bulky furniture, duplicate items, archives, and personal collections can be moved out early, so the home reads cleaner and more open while still feeling lived-in. That balance between warmth and simplicity is exactly what good staging tries to achieve.
In more complex situations, such as live-work properties or home offices, storage becomes even more important. You may need to keep a business running while also presenting a polished environment to viewers. Partnering with local movers in Boston makes it easier to shift equipment, files, and nonessential pieces into storage in phases, so work can continue while the visible areas of the property stay controlled and presentable.
How Staging and Storage Work Together to Control Visual Impact
Staging works best when every object in a room has a clear purpose. A sofa frames a conversation. A table suggests gathering. A lamp softens the mood. Everything else that is not essential to that story competes for attention. Storage supports staging by giving you a clean staging bench off-site, where nonessential items can wait without being constantly shuffled between rooms or piled into overstuffed closets.
The art lies in deciding what stays and what goes. Family photos, extensive collections, excess seating, and rarely used appliances often move into storage first. What remains should be enough to show scale, comfort, and function without revealing the full weight of daily life. Commercial properties go through a similar filtering process. Extra desks, surplus equipment, outdated signage, and inactive files often move out early so the active workspace feels lean, efficient, and future-ready before a relocation supported by commercial movers takes place.
Strategic Timing of Storage before the Actual Move
The worst time to think about storage is when boxes are already stacked in the hallway. In a staged move, storage decisions ideally begin as soon as you know the property will be listed or the space will be transitioned. That might be a month or more before the main moving date. Starting early gives you time to sort, label, and prioritize instead of throwing things together in a panic.
An early storage phase also helps you test how the home feels with less in it. You may discover that removing a few large pieces transforms a cramped room into an open, inviting space. For commercial spaces, early storage lets operations continue with fewer interruptions. Departments can send nonessential items out in waves. When the main relocation comes, much of the excess is already safely stored, and what remains is easier for a commercial movers Boston team to handle with speed and care.
The Emotional Psychology behind Letting Storage Hold Your Belongings
Letting belongings leave the house ahead of you can feel unsettling. There is always a quiet fear that once something is out of sight, it will be forgotten, damaged, or harder to reclaim. That is why some people resist using storage even when they know it would make the staging process easier. Acknowledging that emotion instead of dismissing it helps you plan more honestly and avoids last-minute regret.
The reality is that good storage is not a black hole; it is a temporary pause. When items are packed thoughtfully, labeled clearly, and placed in an environment you trust, they become easier to manage than when they are tucked into random cupboards or stacked in spare rooms. For many people, living with fewer visible possessions during staging actually reduces tension. The home feels lighter and easier to maintain. Businesses notice the same effect when storage removes outdated equipment and clutter from the floor. The workspace looks more focused, and staff can concentrate on current tasks instead of navigating around accumulated history.
Protecting Assets While They Live in Storage
Sending belongings into storage is only a good idea if they come back in the same or better condition. That is where quality control matters. Furniture, textiles, electronics, files, and artwork each have different vulnerabilities. Moisture, temperature swings, dust, and rough handling can all damage them in ways that only become obvious later. Choosing the right type of storage and packing accordingly is central to the genius of using storage as part of a staged move rather than as a desperate overflow container.
Climate-controlled units, padded wrapping, elevated pallets, careful stacking, and clearly marked boxes all reduce risk. The goal is to handle items fewer times, not more. When storage is integrated into the move plan, belongings can travel directly from the home to storage and later from storage to the new address with minimal extra movement. Many owners coordinate those transfers through a well trusted movers in Boston, so the same team that moves items out early also manages their final delivery, preserving continuity and accountability.
How Storage Reduces Risk during Multi-Phase Moves
Few staged moves happen in a single clean step. There are often gaps between listing and selling, between selling and closing, between closing and final move-out. If renovations, inspections, or office reconfigurations are involved, the timeline becomes even more layered. Storage absorbs those gaps, so you are not forced to live among towers of boxes or stack equipment in hallways waiting for the next phase.
By treating storage as a flexible middle ground, you can move things out gradually while still having access when needed. For example, archived files can go first, followed by seasonal décor, then surplus furniture. As each stage ends, fewer items remain to be shifted on the final date. This phased approach reduces the risk of rushed, late-night packing sessions, careless stacking, and damaged items. It also makes it easier for commercial moving crews to work efficiently because they are handling a manageable volume of goods at each phase rather than everything at once.
Using Storage to Maintain Clean Show-Ready Conditions
One of the hardest parts of staging is keeping the property consistently show-ready. Every viewing becomes its own small event. Floors need to be cleared, surfaces wiped, and personal items tucked away. When too many belongings remain in the home, each showing takes a heavy amount of effort. Storage cuts that workload dramatically by taking nonessentials completely off the stage.
With fewer items to move and hide, maintaining a neutral, inviting look becomes much more realistic. You are not scrambling to stuff things into closets or push items under the bed. Instead, the home sits closer to show condition all the time, and the final touches before a viewing are minimal. In commercial environments, using storage helps maintain a professional appearance for clients and staff, even while the space is being prepared for a larger transition. Active tools and furniture stay in play, while inactive pieces quietly support the future from storage.
Storage as a Strategic Tool in Business Relocation Planning
For businesses, storage is more than a convenience; it is part of risk management. Office relocations and staged commercial moves have to juggle lease deadlines, equipment deliveries, IT cutovers, and staffing realities. Trying to shift everything in one move often results in downtime, lost files, and strained teams. Storage turns the move into a series of controlled steps instead of a single disruptive jump.
Unused furniture, archived documents, and non-critical inventory can be moved into storage weeks ahead of the main relocation. As the new space becomes ready, items can move out of storage and directly into position. This reduces double-handling and keeps the old and new locations from filling with half-unpacked material. A business that coordinates these flows with professional commercial movers in Boston usually experiences smoother transitions, because storage is treated as a working part of the operational plan rather than a leftover problem.
The Hidden Cost Benefits of Proper Storage Planning
On paper, storage looks like an extra expense. In reality, poorly managed moves cost far more. When everything is rushed into boxes at the last minute, items are damaged, misplaced, or transported multiple times. Extra labor hours, emergency packing supplies, replacement furniture, and extended timelines quickly outweigh the cost of well-used storage. Staging without storage also tends to keep homes and offices crowded longer, which can hurt impressions and, in the case of a sale, influence offers.
When storage is integrated from the beginning, you minimize waste. You handle items fewer times, you know where things are, and you avoid paying people to shift the same objects repeatedly. Staged homes that look better often sell faster or draw stronger interest, which helps recover investment on the back end. Businesses benefit from less downtime, safer handling of equipment, and predictable work schedules. Those gains are why many clients prefer partnering with a commercial moving company in Boston that understands storage as a cost-control tool, not just a place to park overflow.
Conclusion
The true genius of using storage during a staged home move is that it quietly rewrites the rules of transition. Instead of treating space as something that must absorb every box and belonging until the last possible moment, you treat storage as a flexible extension of the home or office. This shift in thinking opens rooms, clears sightlines, and makes every phase of the move more intentional. Staging becomes easier, maintenance becomes lighter, and the stress of living in a half-moved environment drops noticeably. When storage is chosen carefully, used early, and coordinated with the overall moving plan, it protects both physical assets and emotional energy. Buyers and visitors see a calm, collected space. You experience a less chaotic path from “here” to “there.” Whether you are selling a home, repositioning a business, or managing a complex phased relocation, storage can turn a disruptive event into a managed, almost elegant process.
For people who want that level of control and care during a staged move, Stairhopper movers have built a strong reputation by treating storage, timing, and transport as parts of one connected strategy. Their team is known for listening closely, planning around real-life constraints, and moving both residential and commercial clients through transitions with calm, steady execution. They approach every project as a partnership, aligning storage use, staging needs, and final delivery so that what matters most arrives safely, on schedule, and with as little disruption as possible.
Frequently Asked Questions
Q1. When should I arrange storage for a staged home move?
Ideally, four to six weeks before listing or transition, so clearing, packing, and staging can happen gradually without rushed decisions or last-minute stress.
Q2. Is climate-controlled storage necessary for staged moves?
It is highly recommended for wood furniture, electronics, artwork, and documents, since temperature and humidity swings can quietly damage materials over time.
Q3. How does storage help keep a home show-ready?
By moving nonessential items off-site, daily tidying becomes simpler, and each room can stay closer to a staged condition between viewings or inspections.
Q4. Can storage reduce the length of the final moving day?
Yes. When many items are moved into storage in advance, the final moving day focuses on essentials, which shortens timelines and reduces physical and mental strain.
Q5. Is storage useful for short-term business relocations?
Even in short relocations, storage helps prevent overcrowded offices and allows departments to move in phases without interrupting everyday operations.
Q6. How do I decide what should go into storage first?
Start with rarely used items, seasonal décor, surplus furniture, and archived materials, then work toward pieces that are visually distracting or make rooms feel cramped.
Q7. Will using storage make it harder to find things later?
Not if packing and labeling are done carefully. Clear categories, room-based labels, and simple inventories make stored items easier to locate than when scattered at home.
Q8. Does storage still make sense if my move happens in one day?
Yes, because staging and preparation begin well before that day. Storage keeps the home functional and attractive during the weeks leading up to the final move.

 Patterson and Smith Construction, Inc.
Westphalen Photography
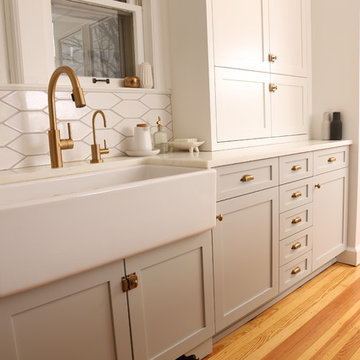
Eat-in kitchen - mid-sized cottage single-wall eat-in kitchen idea in Burlington with a farmhouse sink, shaker cabinets, white cabinets, black backsplash, stone slab backsplash, paneled appliances, beige walls, engineered wood floors and an island
Eat-in kitchen - mid-sized cottage single-wall eat-in kitchen idea in Burlington with a farmhouse sink, shaker cabinets, white cabinets, black backsplash, stone slab backsplash, paneled appliances, beige walls, engineered wood floors and an island
54