
Search results for "Backed coding" in Home Design Ideas
 Save home
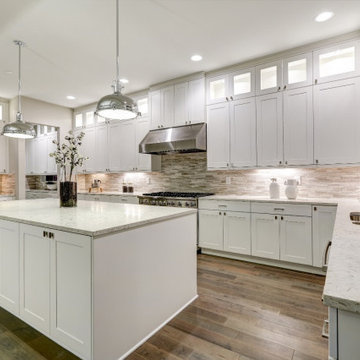
Why are White Shaker Cabinets Still Considered a Classic?
Every few years, if you remodel your kitchen because it feels old, then white shaker cabinets are what you need. Most homeowners feel the need to revamp their kitchen not because the cabinets have worn out but because the interior is a bit old-fashioned. One of the best solutions to this issue is to utilize white shaker cabinets. These are classic, timeless kitchen elements that last longer complements everything, and rarely make your kitchen look outdated.
For this reason, in this article, we have discussed why you need white shaker cabinets in your kitchen and how you can style them.
What is a White Shaker Cabinet?
White shaker cabinets are not new. In fact, these cabinets date back to 1700 when this style was found in every home. These cabinets have a classic look because of recessed door panels, a five-piece door, and a traditional look of pine, maple, or chestnut. Of course. white shaker cabinets are unique and attractive at the same time.
The material used to make these cabinets also makes them durable. You can easily purchase it in less pricing than other wood cabinets, and you can clean it easily. The simplistic structure of white shaker cabinets also makes them complement every type of kitchen; modern or traditional. You can find these cabinets in other light finishes as well, such as peach, off-white, brown, wood brown, etc. The reason we are focusing on white is that this color is timeless and the design of the shaker cabinet is too, which together makes the best combination. You can perfectly strike a chord between every kitchen element if you pair it with white shaker cabinets .
Why White?
The color which is always in style is white. It is highly unlikely to ruin your interior with this color if well-coordinated and properly lit. This is why white shaker cabinets are highly preferred by users.
Here are some reasons to choose white shaker cabinets over other options:
Timeless
Over years, our idea of perfect design changes, and our understanding of the interior also modify. This changes the way we want our kitchen interiors. Hence, if you select vibrant kitchen cabinets and off colors for your countertop, flooring, and paint, then you may end up changing it every few years.
To avoid that from happening, just use white shaker cabinets. In multiple decades, white shaker cabinets have never ceased being classic. White is timeless and it never goes out of trend. Even when you need to change the paint or fittings, you can reduce the cost of cabinets for multiple years.
Versatile
White shaker cabinets are versatile because you have an array of options. You can incorporate multiple elements in your kitchen and tweak color coding and design of countertop, flooring, and paint. For instance, with white shaker cabinets, you can pair white textured back tiles. You can even pair your white cabinets with a black marble countertop; two timeless interior elements together!
Clean
White is the color of clean. In hospitals, bathrooms, and hotel rooms, we find a lot of white because it is clean, fresh, and peaceful. This is why everyone is automatically attracted to this color; it looks clean.
However, you may actually have to make efforts to keep these white shaker cabinets clean from dust and dirt.
Complements Everything
Since cabinets form a big portion of your kitchen, it is necessary to make cabinets complement other interior elements. With white shaker cabinets, you don’t even need to worry about that. White compliments every choice of appliance, countertop, artwork, and flooring. If you decide to get marble grey flooring with white cabinets, you can make that work. If you want colorful kitchen furniture, white complements that too. If you wish to use artwork or warm lighting in your kitchen, white automatically goes well with it.
How to Style White Shaker Cabinets?
If you are styling your kitchen with new white shaker cabinets, here’s what you should keep in mind:
• If your kitchen is small, then white is definitely your color. It reflects more light, hence, makes your space look larger and shinier.
• When you have an open kitchen, you need to follow the same theme to the adjoining rooms and slowly phase it out. This consistency won’t make anything look odd.
• If the rest of the house is filled with artwork and colors, you need the same for your kitchen as well. All white may steal away the classic of shaker cabinets.
• Pair your wall textures and flooring choices with appliances, white cabinets, knobs, and other elements for the best look.
• If the theme for the rest of the house is subtle, then you can even design an all-white kitchen with white shaker cabinets.
Conclusion
Whether you are planning to revamp your kitchen/house or sell your property, white shaker cabinets are always classic. They make a statement in your kitchen and offer a new and clean look all the time. Just focus on coordinating other interior elements of your kitchen and stop worrying about cabinets. White shaker cabinets are durable, beautiful, and timeless! Purchase these classic units now.
For this reason, in this article, we have discussed why you need white shaker cabinets in your kitchen and how you can style them.
What is a White Shaker Cabinet?
White shaker cabinets are not new. In fact, these cabinets date back to 1700 when this style was found in every home. These cabinets have a classic look because of recessed door panels, a five-piece door, and a traditional look of pine, maple, or chestnut. Of course. white shaker cabinets are unique and attractive at the same time.
The material used to make these cabinets also makes them durable. You can easily purchase it in less pricing than other wood cabinets, and you can clean it easily. The simplistic structure of white shaker cabinets also makes them complement every type of kitchen; modern or traditional. You can find these cabinets in other light finishes as well, such as peach, off-white, brown, wood brown, etc. The reason we are focusing on white is that this color is timeless and the design of the shaker cabinet is too, which together makes the best combination. You can perfectly strike a chord between every kitchen element if you pair it with white shaker cabinets .
Why White?
The color which is always in style is white. It is highly unlikely to ruin your interior with this color if well-coordinated and properly lit. This is why white shaker cabinets are highly preferred by users.
Here are some reasons to choose white shaker cabinets over other options:
Timeless
Over years, our idea of perfect design changes, and our understanding of the interior also modify. This changes the way we want our kitchen interiors. Hence, if you select vibrant kitchen cabinets and off colors for your countertop, flooring, and paint, then you may end up changing it every few years.
To avoid that from happening, just use white shaker cabinets. In multiple decades, white shaker cabinets have never ceased being classic. White is timeless and it never goes out of trend. Even when you need to change the paint or fittings, you can reduce the cost of cabinets for multiple years.
Versatile
White shaker cabinets are versatile because you have an array of options. You can incorporate multiple elements in your kitchen and tweak color coding and design of countertop, flooring, and paint. For instance, with white shaker cabinets, you can pair white textured back tiles. You can even pair your white cabinets with a black marble countertop; two timeless interior elements together!
Clean
White is the color of clean. In hospitals, bathrooms, and hotel rooms, we find a lot of white because it is clean, fresh, and peaceful. This is why everyone is automatically attracted to this color; it looks clean.
However, you may actually have to make efforts to keep these white shaker cabinets clean from dust and dirt.
Complements Everything
Since cabinets form a big portion of your kitchen, it is necessary to make cabinets complement other interior elements. With white shaker cabinets, you don’t even need to worry about that. White compliments every choice of appliance, countertop, artwork, and flooring. If you decide to get marble grey flooring with white cabinets, you can make that work. If you want colorful kitchen furniture, white complements that too. If you wish to use artwork or warm lighting in your kitchen, white automatically goes well with it.
How to Style White Shaker Cabinets?
If you are styling your kitchen with new white shaker cabinets, here’s what you should keep in mind:
• If your kitchen is small, then white is definitely your color. It reflects more light, hence, makes your space look larger and shinier.
• When you have an open kitchen, you need to follow the same theme to the adjoining rooms and slowly phase it out. This consistency won’t make anything look odd.
• If the rest of the house is filled with artwork and colors, you need the same for your kitchen as well. All white may steal away the classic of shaker cabinets.
• Pair your wall textures and flooring choices with appliances, white cabinets, knobs, and other elements for the best look.
• If the theme for the rest of the house is subtle, then you can even design an all-white kitchen with white shaker cabinets.
Conclusion
Whether you are planning to revamp your kitchen/house or sell your property, white shaker cabinets are always classic. They make a statement in your kitchen and offer a new and clean look all the time. Just focus on coordinating other interior elements of your kitchen and stop worrying about cabinets. White shaker cabinets are durable, beautiful, and timeless! Purchase these classic units now.
 H&A My Design, Inc.
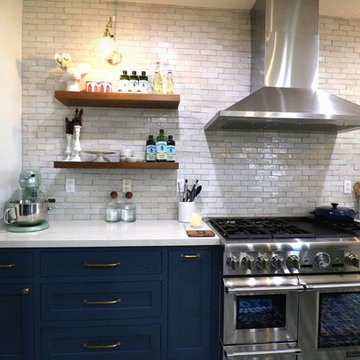
Full Kitchen Remodeling by H&A My Design at Simi Valley.
We provided electrical & plumbing work and we installed new clay tile.
Include complete painting of kitchen + bathroom entry.
Include all new custom cabinets: self-closing, soft touch.
Include fabrication and installation of new counter top.
Install new tile back splash.
Install new sink & faucet.
We always make sure that everything is done according to city code.
Call now for FREE estimate
1-800-285-3002
www.hnamydesign.com
 Vintage Cellars & Saunas
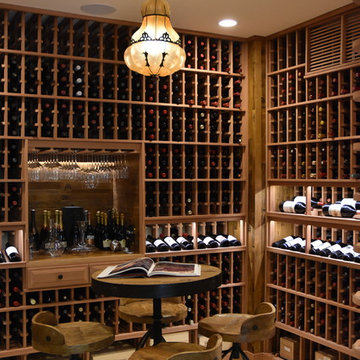
This gorgeous custom wine cellar acts as a dramatic entrypiece as you walk into this beautiful home in San Juan Capistrano, Orange County, California. San Juan Capistrano is a lovely community located slightly inland, tucked within Orange County near cities like Newport Beach, Lake Forest, Huntington Beach, Costa Mesa, Dana Point, Laguna Niguel, Laguna Hills, and Irvine.
This fantastically designed wine cellar, courtesy of the master wine cellar builders at Vintage Cellars, is a unique representation of fun and bespoke features that can be incorporated into a traditional redwood, yet modern and bright wine cellar like this. The wine room draws you in from across the house, with its warm redwood tones and interesting wrought iron and glass door. Wine Cellar doors are often overlooked, but proper knowledge of door materials, glass specifications, threshold placement and hanging procedures are key to creating that perfect airtight room. Additionally, based on the location of your room within your home, the amount of glass in your wine cellar, and your location in the world, levels of cooling capacity need to be seriously considered.
Glass is a naturally poor insulator. Because there has been a very heavy push for "wine cellar art," "wine cellars as art," and wine cellars as a main design component within high end homes, glass wine cellars are often incorporated in high trafficked areas or spaces where each homeowner can show off their prized wines to friends in an almost showcase like display.
When you first enter this large custom wine cellar in Orange County, Southern California, standing out first immediately on your left is a unique work station with a scanner, label-maker, and table top - perfect for inventorying the 3,500 bottles that this rustic wine cellar holds. The e-Sommelier system integrated allows this homeowner to catalog each and every wine within his collection, first letting the program know he owns it, how many bottles, which vintages, and with the click of a button - custom wine labels each with a bar code. Accompanied with the bar code scanner, the e-sommelier system has become a great companion for wine cellars and wine collectors alike, allowing a somewhat seamless and straightforward process in inventorying wines.
Directly past the wine inventory station is a vertical row of large format bottle coved trays, displaying some of the owner's favorite wines in the most coveted vintages.
This large walk in custom wine cellar in all heart redwood wine racking fills most of its capacity utilizing double deep, individual bottle storage. At waist height spanning the entire circumference of the wine room is a high reveal display row, highlighted with LED lighting and more single deep storage behind.
The back wall, in addition to the high reveal display row and double deep individual bottle storage, incorporates a rectangular wine work center with glass rack above - perfect for decanting, storing uniquely shaped bottles, and opening your favorite bottles with friends. Directly below this countertop are two drawers. A unique feature throughout this wooden traditional large walk in wine cellar in San Juan Capistrano, Orange County, California is the incorporation of wine barrel into the room's corner walls, work stations, countertops, and center custom table.
This custom wine cellar near Newport Beach, Dana Point, Laguna Beach, Laguna Hills, Coto De Caza, Laguna Niguel, Huntington Beach, and other gorgeous beach communities in Orange County, also incorporates wine case storage throughout the bottom, and a small area above the wine inventory system for split bottles.
Vintage Cellars, as well as the homeowner, are very happy with the way this beautiful project turned out, and we would love the opportunity to help you with you wine cellar projects!
Please contact us today to speak with one of our wine cellar specialists and begin building your wine cellar dreams today!
Find the right local pro for your project
 Copper Creek Homes
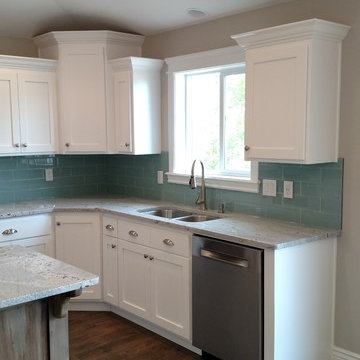
Beautiful homage to Cape Code style for this homeowner!
Example of a mid-sized transitional u-shaped porcelain tile open concept kitchen design in Other with an undermount sink, shaker cabinets, white cabinets, granite countertops, blue backsplash, glass tile backsplash, stainless steel appliances and an island
Example of a mid-sized transitional u-shaped porcelain tile open concept kitchen design in Other with an undermount sink, shaker cabinets, white cabinets, granite countertops, blue backsplash, glass tile backsplash, stainless steel appliances and an island
 INSPIRED KITCHEN DESIGN
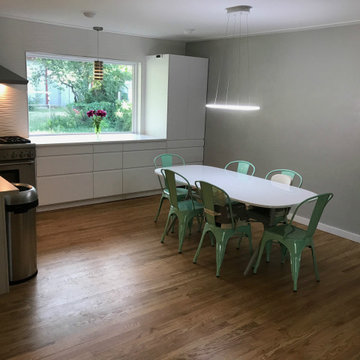
Another feature of this modern IKEA kitchen is the tall pantry cabinet that has electrical outlets inside. IKD doesn’t design lighting or electrical because of how electrical codes vary across the United States, Canada, and Europe. But Georgia included them and we think that’s a great design tip for you: because of the outlets, she can keep her coffee maker in there which makes the kitchen look much neater. Very European style of her.
 Sosna Inc
After serving as a rental for some time, this home was ready to be reclaimed by its owner and her son.
Gutting “back to the studs” was an understatement for this one. This transformation involved replanning everything; including the roof, the HVAC system, the entire plumbing system, and relocating the side entrance and staircase to the back of the house. Only the subfloors, the exterior framing structure, and the brick remains from this original 1940’s-built bungalow.
When we’re renovating an old structure, we’re bound to find some surprises. This renovation did not disappoint! From basement to roof, we found more than a few, shall we say, potentially catastrophic surprises along the way.
Let’s start with the basement. The homeowner wanted to update the basement and make it a usable living space for her adult son as well as a spa with a sauna for her. This required bringing the 6 foot ceiling height up to code at 7 feet. To do this, we had to re-think the HVAC system that was in the basement ceiling. When we opened up the basement ceiling to remove the HVAC supply and return trunks, we discovered asbestos! The asbestos had to be removed before we could dismantle and remove the HVAC system.
For the main floor, when we were replanning the existing 2-bedroom layout to create two master bedrooms each with their own ensuites, we looked at the possibility of removing the main load-bearing wall. But our investigations led to the discovery that the load bearing wall was not lined up with the roof or the basement load points, so the load of the house was not continuous throughout. This was a disaster waiting to happen. And as we found out, this lack of alignment was causing major issues with the roof when we went to replace the shingles. We discovered portions of the roof truss in very poor condition, literally moments away from giving out. These were replaced and other truss components were fortified before we went on to re-shingle the roof and replace all the soffits and eavestroughs.
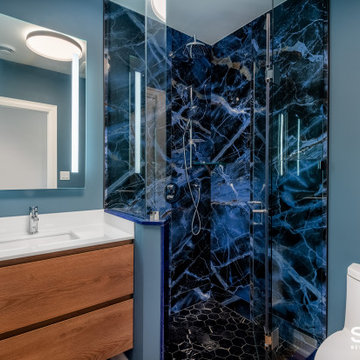
Once the structural and space planning elements were sorted out, we could turn our focus to helping this homeowner select the finishes she and her son wanted for their new spaces. She wanted white all the way, and he wanted bold colours. You will see these color choices reflected in their private bathrooms as well as in the upper kitchen and living area that she will mostly use, and the basement entertainment area that he will mostly use.
To round out the personalization of this made-new-again home, we converted the basement into an entertainment center with a bar for her son, and a sauna and third full bathroom with a jacuzzi tub for a spa-like feel for her.
Without having to build from scratch, this homeowner got the custom home of her dreams.
While you “can’t teach an old dog new tricks”, the sky’s the limit on how you can transform an old home into the home of your dreams. When your “old dog” needs some new tricks, we are the Renovator You Can Count On.
 Cari Schmoock
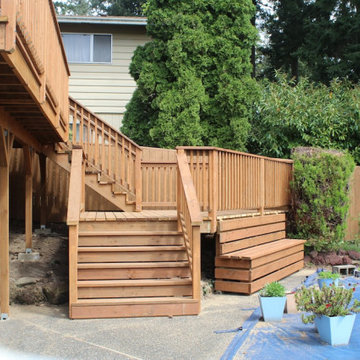
This project involved a complete removal and rebuild of an existing deck and railing system. We demolished the old materials down to the support points, cleared the site, and prepared a solid foundation for the new structure.
From there, we constructed a new code-compliant deck frame using pressure-treated lumber and galvanized hardware, then installed new exterior-grade decking, stairs, and a matching railing system where required by height. The scope did not include permits, inspections/engineering, or staining and finishing unless added separately, and the completed work is backed by a 15-year warranty.

 Brooklyn City Furniture
Use code "GUSSALE20" for 20% off
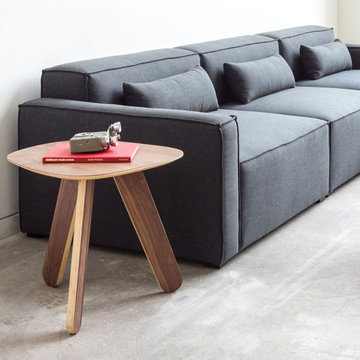
The Mix Modular Collection lets you mix and match components and fabrics to build a custom sectional, sofa or seating group to perfectly suit your space. The design uses 8 basic components (Left Arm, Right Arm, Armless, Corner, Arc, Wedge, Ottoman and Block Table) which can be combined to create an unlimited number of seating configurations. Choose matching fabrics or mix things up to make it your own. Components can be easily reconfigured or added later to adapt to the changing needs of any home or workspace. The tight seat and back give the design a clean-lined, contemporary look, and each component has French seams to subtly soften the edges. Select components include a matching bolster cushion for added style and comfort. Constructed with kiln-dried 100% FSC®-Certified hardwood in support of responsible forest management.
8 different components - Arm Left Facing, Arm Right Facing, Armless, Corner, Arc, Wedge, Ottoman & Block Table.
Components with a back (except for the Arc and Wedge) come with a matching bolster which is filled with eco-friendly synthetic-down, derived from recycled PET plastic.
Each component includes concealed connectors to securely join them to each other while in sectional, sofa or chaise formation.
Frame is kiln-dried 100% FSC®-Certified hardwood (FSC® 092551).
Wood block legs are FSC®-Certified Ash in a Black stain.
Plastic bumpers on all legs to prevent floor damage.
All joints have been stress tested.
9 gauge No-Sag, injection-molded sinuous spring clip system.
All modular components can be joined using integrated connectors on underside.
Components include matching bolster cushion (ottoman excluded).
Maroc Lyric and Bayview Dandelion available on the Armless and Ottoman components only.
Manufactured to meet California TB117-2013 fire safety standards without the use of flame retardant additives in the upholstery foam.
* Fabric samples available upon request
Need help? Chat with us online or send us an email to info@cityfurnitureshop.com
 Greenview Designs, LLC
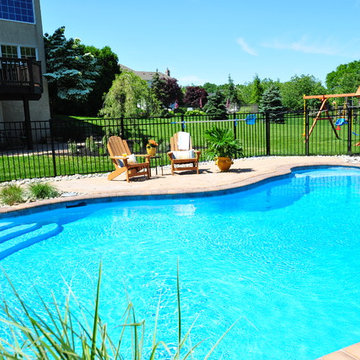
This Furlong, PA in ground pool was designed to fit perfectly in this back yard. The pool deck was extended so that sun bathing chairs could be facing out into the open views of the land. The natural wooded area of the back of the property was softened by various rows of colorful plantings. An aluminum fence surrounds the pool following code. A small pocket of grasses and river jack stone add beauty to the pool side.
 ED Enterprises, Inc.
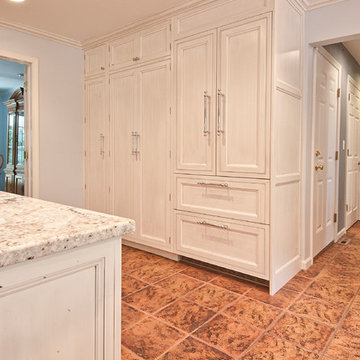
The customer and E D Enterprises, Inc. were excited as the old soffits, wall, closets, and header were removed, as well as relocating the dining room door, to reveal and transform the space into an expansive new kitchen.
All electrical plumbing, and HVAC was relocated to comply with the village code.
Our skilled craftsmen installed all of the cabinetry, custom hood, and crown molding, as well.
A bar, (blue tone cabinet) was installed in the dinette area creating an attractive, functional area. Note the tile pattern back splash above the cook top and the brick pattern tile back splash below the glass door cabinet.
Recessed ceiling lights and under cabinet lighting were installed to illuminate the new work space.
General Contractor / Remodel: E D Enterprises, Inc.
Rick Tripple Photography
 Sosna Inc
After serving as a rental for some time, this home was ready to be reclaimed by its owner and her son.
Gutting “back to the studs” was an understatement for this one. This transformation involved replanning everything; including the roof, the HVAC system, the entire plumbing system, and relocating the side entrance and staircase to the back of the house. Only the subfloors, the exterior framing structure, and the brick remains from this original 1940’s-built bungalow.
When we’re renovating an old structure, we’re bound to find some surprises. This renovation did not disappoint! From basement to roof, we found more than a few, shall we say, potentially catastrophic surprises along the way.
Let’s start with the basement. The homeowner wanted to update the basement and make it a usable living space for her adult son as well as a spa with a sauna for her. This required bringing the 6 foot ceiling height up to code at 7 feet. To do this, we had to re-think the HVAC system that was in the basement ceiling. When we opened up the basement ceiling to remove the HVAC supply and return trunks, we discovered asbestos! The asbestos had to be removed before we could dismantle and remove the HVAC system.
For the main floor, when we were replanning the existing 2-bedroom layout to create two master bedrooms each with their own ensuites, we looked at the possibility of removing the main load-bearing wall. But our investigations led to the discovery that the load bearing wall was not lined up with the roof or the basement load points, so the load of the house was not continuous throughout. This was a disaster waiting to happen. And as we found out, this lack of alignment was causing major issues with the roof when we went to replace the shingles. We discovered portions of the roof truss in very poor condition, literally moments away from giving out. These were replaced and other truss components were fortified before we went on to re-shingle the roof and replace all the soffits and eavestroughs.
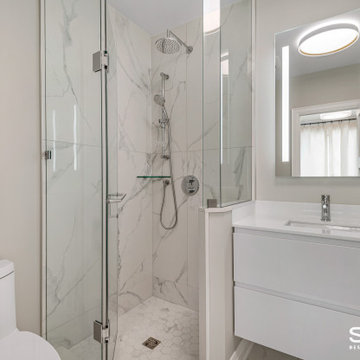
Once the structural and space planning elements were sorted out, we could turn our focus to helping this homeowner select the finishes she and her son wanted for their new spaces. She wanted white all the way, and he wanted bold colours. You will see these color choices reflected in their private bathrooms as well as in the upper kitchen and living area that she will mostly use, and the basement entertainment area that he will mostly use.
To round out the personalization of this made-new-again home, we converted the basement into an entertainment center with a bar for her son, and a sauna and third full bathroom with a jacuzzi tub for a spa-like feel for her.
Without having to build from scratch, this homeowner got the custom home of her dreams.
While you “can’t teach an old dog new tricks”, the sky’s the limit on how you can transform an old home into the home of your dreams. When your “old dog” needs some new tricks, we are the Renovator You Can Count On.
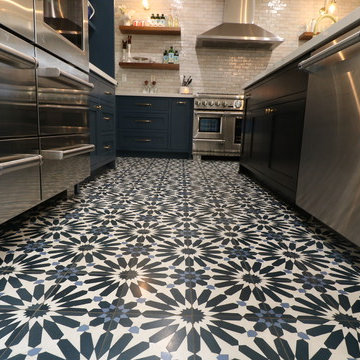 H&A My Design, Inc.
Full Kitchen Remodeling by H&A My Design at Simi Valley.
We provided electrical & plumbing work and we installed new clay tile.
Include complete painting of kitchen + bathroom entry.
Include all new custom cabinets: self-closing, soft touch.
Include fabrication and installation of new counter top.
Install new tile back splash.
Install new sink & faucet.
We always make sure that everything is done according to city code.
Call now for FREE estimate
1-800-285-3002
www.hnamydesign.com
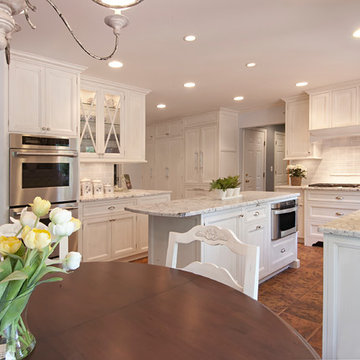 ED Enterprises, Inc.
The customer and E D Enterprises, Inc. were excited as the old soffits, wall, closets, and header were removed, as well as relocating the dining room door, to reveal and transform the space into an expansive new kitchen.
All electrical plumbing, and HVAC was relocated to comply with the village code.
Our skilled craftsmen installed all of the cabinetry, custom hood, and crown molding, as well.
A bar, (blue tone cabinet) was installed in the dinette area creating an attractive, functional area. Note the tile pattern back splash above the cook top and the brick pattern tile back splash below the glass door cabinet.
Recessed ceiling lights and under cabinet lighting were installed to illuminate the new work space.
General Contractor / Remodel: E D Enterprises, Inc.
Rick Tripple Photography
Sponsored
Fredericksburg, OH

High Point Cabinets
Columbus' Experienced Custom Cabinet Builder | 4x Best of Houzz Winner
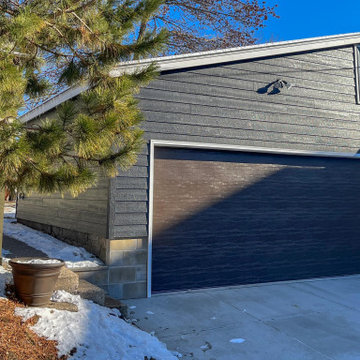
 Jacobson Construction
Their South Minneapolis home was built in 1917, and while the home received lots of care and updates over the years, updating the garage had been put on the back burner for way too long. The original 14 X 20-foot garage, of unknown age, was just big enough for a single car. The owners jokingly called it a “Potato House,” as it was built into the ground, similar to a farmer’s out-building to store root vegetables (see before photo).
As an Architect, the owner wanted the garage to have a more unusual design than the usual symmetrical gable roof of Minneapolis garages. The simplest way to construct a garage roof is with wood trusses. By simply altering the angles of the wood trusses allowed the structure to have a distinctive, asymmetrical roof design.
The new 20 X 20-foot garage easily handles two cars. A single double-wide garage door makes parking cars in the busy alley quick and easy. To meet local construction codes, the South facing wall – five feet from the neighbor’s garage - is constructed with enhanced fire protection. The exterior siding is LP Smart Siding – a pre-finished wood product that is easy to install, durable, and looks great.
The rear of the garage (facing the back of the home) uses the original front door of the main home built in 1917, adding character to the project. Three Andersen double pane windows let in ambient light.
Although the garage is not heated, a new 120/240 Volt electric service and panel was installed, ready to recharge an electric vehicle.
The result: a new, big, easily accessible garage that looks so much better than a “Potato House.”
Note: Photos & design by Ken Stone, AIA.
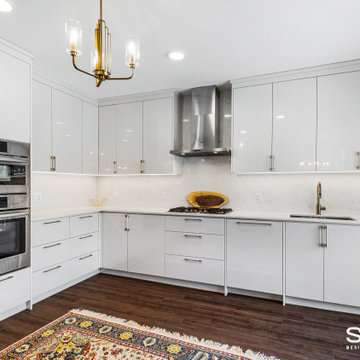 Sosna Inc
After serving as a rental for some time, this home was ready to be reclaimed by its owner and her son.
Gutting “back to the studs” was an understatement for this one. This transformation involved replanning everything; including the roof, the HVAC system, the entire plumbing system, and relocating the side entrance and staircase to the back of the house. Only the subfloors, the exterior framing structure, and the brick remains from this original 1940’s-built bungalow.
When we’re renovating an old structure, we’re bound to find some surprises. This renovation did not disappoint! From basement to roof, we found more than a few, shall we say, potentially catastrophic surprises along the way.
Let’s start with the basement. The homeowner wanted to update the basement and make it a usable living space for her adult son as well as a spa with a sauna for her. This required bringing the 6 foot ceiling height up to code at 7 feet. To do this, we had to re-think the HVAC system that was in the basement ceiling. When we opened up the basement ceiling to remove the HVAC supply and return trunks, we discovered asbestos! The asbestos had to be removed before we could dismantle and remove the HVAC system.
For the main floor, when we were replanning the existing 2-bedroom layout to create two master bedrooms each with their own ensuites, we looked at the possibility of removing the main load-bearing wall. But our investigations led to the discovery that the load bearing wall was not lined up with the roof or the basement load points, so the load of the house was not continuous throughout. This was a disaster waiting to happen. And as we found out, this lack of alignment was causing major issues with the roof when we went to replace the shingles. We discovered portions of the roof truss in very poor condition, literally moments away from giving out. These were replaced and other truss components were fortified before we went on to re-shingle the roof and replace all the soffits and eavestroughs.
Once the structural and space planning elements were sorted out, we could turn our focus to helping this homeowner select the finishes she and her son wanted for their new spaces. She wanted white all the way, and he wanted bold colours. You will see these color choices reflected in their private bathrooms as well as in the upper kitchen and living area that she will mostly use, and the basement entertainment area that he will mostly use.
To round out the personalization of this made-new-again home, we converted the basement into an entertainment center with a bar for her son, and a sauna and third full bathroom with a jacuzzi tub for a spa-like feel for her.
Without having to build from scratch, this homeowner got the custom home of her dreams.
While you “can’t teach an old dog new tricks”, the sky’s the limit on how you can transform an old home into the home of your dreams. When your “old dog” needs some new tricks, we are the Renovator You Can Count On.
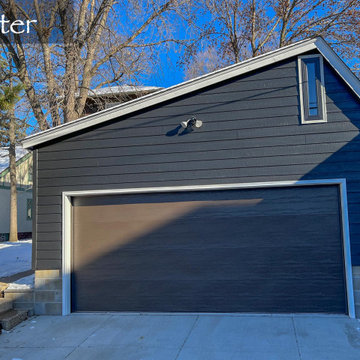 Jacobson Construction
Their South Minneapolis home was built in 1917, and while the home received lots of care and updates over the years, updating the garage had been put on the back burner for way too long. The original 14 X 20-foot garage, of unknown age, was just big enough for a single car. The owners jokingly called it a “Potato House,” as it was built into the ground, similar to a farmer’s out-building to store root vegetables (see before photo).
As an Architect, the owner wanted the garage to have a more unusual design than the usual symmetrical gable roof of Minneapolis garages. The simplest way to construct a garage roof is with wood trusses. By simply altering the angles of the wood trusses allowed the structure to have a distinctive, asymmetrical roof design.
The new 20 X 20-foot garage easily handles two cars. A single double-wide garage door makes parking cars in the busy alley quick and easy. To meet local construction codes, the South facing wall – five feet from the neighbor’s garage - is constructed with enhanced fire protection. The exterior siding is LP Smart Siding – a pre-finished wood product that is easy to install, durable, and looks great.
The rear of the garage (facing the back of the home) uses the original front door of the main home built in 1917, adding character to the project. Three Andersen double pane windows let in ambient light.
Although the garage is not heated, a new 120/240 Volt electric service and panel was installed, ready to recharge an electric vehicle.
The result: a new, big, easily accessible garage that looks so much better than a “Potato House.”
Note: Photos & design by Ken Stone, AIA.
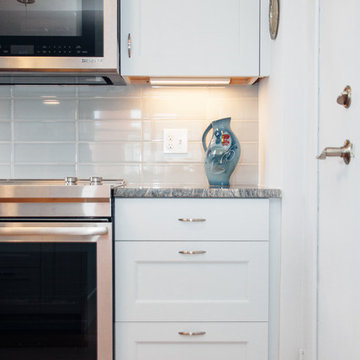
 Mobi Cabinets
The fridge was moved away from the fire hazard and the opening was back up to code. The range was moved down to be centered on the back wall allowing bigger cabinets to be added to either side so the homeowner has better storage and counter space. Instead of using undercabinet lighting molding, the cabinet doors were extended down a few inches to cover the base of the cabinets and lights.
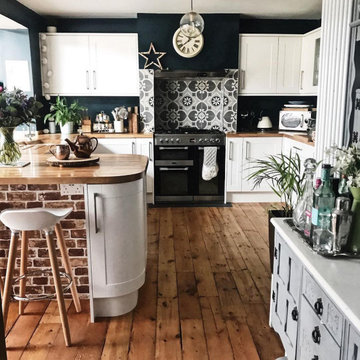

 D-Trac Construction Inc.
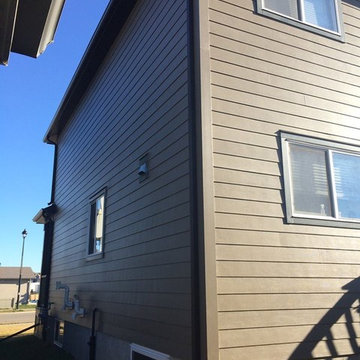
D-Trac Construction was contracted to address install issues from a previous contractor related to the workmanship and install of the exterior hardie board package. Because of the issues, the local county would not pass building permit inspection due to non-compliance with the Alberta Building Code and the Safety Codes Act.
Issues and corrective actions included:
1. Aluminum J and corner trim does not allow for the plank to be sealed (caulked at termination).
Corrective Action: Install 5/4" Smart Trim and color match caulk at all terminations.
2. Flashing detail on primary head flashings are cut and bent, creating point of entry on each end dam at the back side of drip.
Corrective Action: Install new primary head flashings using the fold method to create end dam.
3: Incorrect stagger on plank install, Not enough distance between butt joints on stagger, no slip plates at butt joints.
Corrective Action: Install new plank using a either a 24" or 32" stagger pattern, with aluminum slip plates behind all butt joints.
4: Many terminations through plank siding have no trim block, not sealed correctly.
Corrective Action: Install 5/4" trim blocks to allow plank to be sealed(caulked to termination.
At the end of the project, a final inspection was completed and the local county passed the building permit inspection.
 User
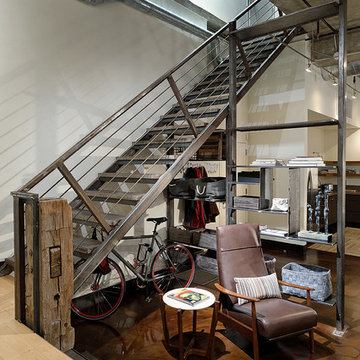
UserWe needed to bring the stiarcase up to code. We needed to narrow the space between the risers but didn't want to make the staircase heavy. A simple section of metal at the back of each riser did the trick. After the landing, there are 2 more stairs. This also needed to be brought up to code. We used a found piece of wood that the client had to create both interest and function.
Mountain Home Photography, Michael Brands
 Kraft Custom Construction
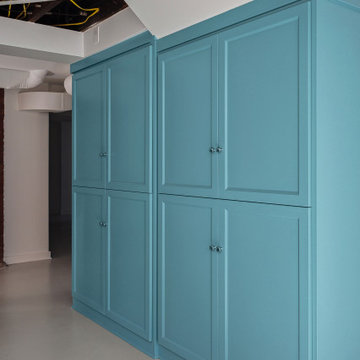
The owners of this beautiful 1908 NE Portland home wanted to breathe new life into their unfinished basement and dysfunctional main-floor bathroom and mudroom. Our goal was to create comfortable and practical spaces, while staying true to the preferences of the homeowners and age of the home.
The existing half bathroom and mudroom were situated in what was originally an enclosed back porch. The homeowners wanted to create a full bathroom on the main floor, along with a functional mudroom off the back entrance. Our team completely gutted the space, reframed the walls, leveled the flooring, and installed upgraded amenities, including a solid surface shower, custom cabinetry, blue tile and marmoleum flooring, and Marvin wood windows.
In the basement, we created a laundry room, designated workshop and utility space, and a comfortable family area to shoot pool. The renovated spaces are now up-to-code with insulated and finished walls, heating & cooling, epoxy flooring, and refurbished windows.
The newly remodeled spaces achieve the homeowner's desire for function, comfort, and to preserve the unique quality & character of their 1908 residence.
30