
Search results for "Backing effectively" in Home Design Ideas

 Michael Davis Design & Construction
Example of a large classic gray two-story wood exterior home design in New York with a shingle roof
 CO Interiors
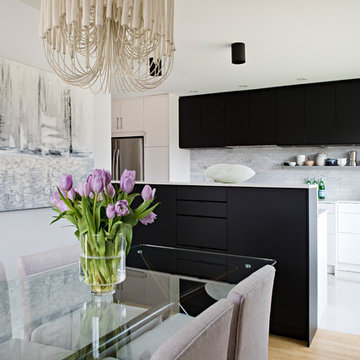
An open concept layout can sometimes create its own challenges when there is little wall space available to dedicate to storage. An effective solution is adjoining storage units back to back. Instead of segregating the dining room storage onto a wall, we choose to incorporate it along the back of the kitchen island. This not only visually increased the size of the island but also provided organizational storage for dining ware, table cloths and fancy glass ware that didn’t invade the primary kitchen storage for all the cookware/every day dishware.
Photographer: Mike Chajecki
 Frederick Cooke Architecture, LLC
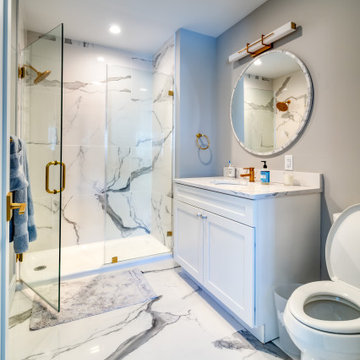
Welcome home to this luxe, modern, and inviting townhome in the heart of downtown Jersey City! We are ecstatic to see this project completed.
This 4-story multifamily underwent a major renovation and was transformed into a spacious and functional family home for our clients. Careful consideration of our client’s lifestyle and plans for the future dictated every design decision. They needed a space that would function well now that they are a young professional couple and a space that would nicely accommodate a growing family in the future. Greater emphasis was placed on common family spaces and bedrooms were designed exclusively for sleep with minimal room for work or study and without TV connections to discourage those activities from taking place in these spaces. Instead, common places such as the family room and the kitchen are inviting and foster those activities.
Due to sagging floors in need of extensive repair, it made more financial sense to replace them entirely. We took this historic house and by re-pitching the roof in an inverted form we were able to gain an overall 36” which we used for raising the floors. This, in turn, allowed us to bring the ground level up to code and be suitable for living space and gave us additional ceiling room on the upper floors. The ground floor was designed to be used as a rental unit and can be reincorporated into the home later when more space is needed.
Both front and back facades were replaced with timeless brick and vertical wood siding and all windows and front doors were replaced. The ground floor features a one-bedroom suite, living room, and open kitchen-dining area. On the first floor, we achieved a more effective entry sequence to the living room, an open-concept design leading to the kitchen. The interior is bright and airy, and the kitchen opens up to the deck in the back and the patio, making entertaining indoors and outdoors seamless. The design works in a way to accommodate the addition of a stair leading to the ground level when the rental unit is incorporated back into the house.
Up on the second floor, a suite with a bathroom was designed with grandparents or guests in mind. Also, two additional bedrooms are now being used as an exercise room and a zoom-worthy office but can later be used as kids’ rooms.
Last but not least, the third floor features the master suite with his and hers walk-in closets, a master bath, and a library.
Find the right local pro for your project

 Atlas Roofing - Shingles
Summer will soon be knocking at your door, begging you to come outside and spend time in its warm sunshine. The nicer weather means hosting family barbecues and parties, kicking back in the shade with a good book or floating around in the pool, allowing the stresses of everyday life to slowly drift away.
Outdoor Seating - Sectional
Is your back yard ready for all of the summertime fun? More specifically, take a good look at your patio furniture. Perhaps certain pieces should be spruced up or repurposed, while others may need to be replaced altogether.
Whether you’re dealing with a big or small project, don’t let the details intimidate you. With the right preparation and planning, you can transform your outdoor living space into an oasis where everyone can relax and enjoy themselves.
Choose Your Aesthetic
Before you dive into an outdoor renovation and end up feeling like you’re drowning in all of the possibilities and decisions, take some time to think about how you envision your new space. How will you be using it? Do you spend more time entertaining or relaxing? What kind of seating do you need? Does it need to be kid- and/or pet-friendly? Do you prefer clean, modern lines or playful, colorful textures? Do you like harder surfaces, such as wood, or softer ones, like cushions?
Addressing these questions should help you narrow down the outdoor seating options that work best for your family.
Get Trendy
Once you’ve honed in on your desired aesthetic, start putting your ideas into action. Looking at this year’s trends can help.
For instance, the biggest trend of 2017 is bringing the indoor look outdoors. This theme incorporates plush sofas made from durable fabrics, side tables, ottomans, vibrant-colored throw pillows and outdoor rugs. To protect their outdoor living room, many homeowners also opt for a patio cover, which can be either a hard cover or soft awning.
Outdoor Seating - Benches
This year’s outdoor furniture also blends wood-grain finishes with worn surface textures and pairs neutral colors with pastels for a washed-out effect. When it comes to dining tables and chairs, classic wrought-iron tea garden furniture is always in style.
Go Green
Adding a new chair or replacing an entire outdoor living room can be a great opportunity to bring in materials that look great and are also good for the environment. You can make your own (try these ideas from WooHome) or purchase eco-friendly furniture from shops such as Breezesta and Viesso, which offer “green” seating options in a variety of styles and colors.
Create A Warm Front
While you’ll probably focus on furnishing your back yard, don’t forget to pay some attention to the front of your house, too. Curb appeal counts – it’s the first thing your friends and neighbors see, so making a good impression is a must.
Be sure to keep the area clean. As for décor, don’t over-decorate. A simple rocking chair or swing can generate a warm, welcoming feeling for all.
Stay On Budget
Outdoor Seating - Wicker
Whether money is no object or you follow a strict budget, options are available for every wallet.
High-end luxury furniture sites such as Frontgate, offer posh designer couches, mosaic dining tables, cushioned hammocks and even a hanging daybed.
However, affordable, luxurious-looking options are available, too — especially if you’re not afraid to roll up your sleeves and do some of the work yourself. Pinterest provides countless design inspirations for do-it-yourselfers, such as repurposing an old tire into a cushioned seat and building a lawn chair using wood pallets, among others.
Plus, check out money-saving suggestions from Better Homes and Gardens’ Budget-Friendly Ideas for Outdoor Rooms, DIY Network’s 10 Outdoor Rooms on a Budget and HGTV’s 25 Budget-Friendly Ideas for Small Outdoor Spaces.
Remember, you don’t have to do everything at once. Concentrate on small areas and budget your time and money for the items that will best fit each space.
Have you recently redone your outdoor living space? We’d love to see photos! Post them in the comments below.
 Frederick Cooke Architecture, LLC
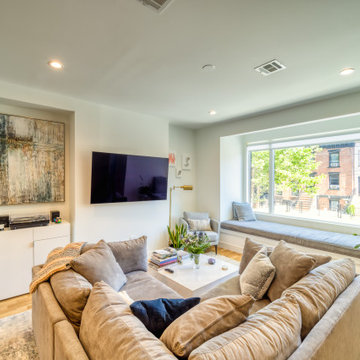
Welcome home to this luxe, modern, and inviting townhome in the heart of downtown Jersey City! We are ecstatic to see this project completed.
This 4-story multifamily underwent a major renovation and was transformed into a spacious and functional family home for our clients. Careful consideration of our client’s lifestyle and plans for the future dictated every design decision. They needed a space that would function well now that they are a young professional couple and a space that would nicely accommodate a growing family in the future. Greater emphasis was placed on common family spaces and bedrooms were designed exclusively for sleep with minimal room for work or study and without TV connections to discourage those activities from taking place in these spaces. Instead, common places such as the family room and the kitchen are inviting and foster those activities.
Due to sagging floors in need of extensive repair, it made more financial sense to replace them entirely. We took this historic house and by re-pitching the roof in an inverted form we were able to gain an overall 36” which we used for raising the floors. This, in turn, allowed us to bring the ground level up to code and be suitable for living space and gave us additional ceiling room on the upper floors. The ground floor was designed to be used as a rental unit and can be reincorporated into the home later when more space is needed.
Both front and back facades were replaced with timeless brick and vertical wood siding and all windows and front doors were replaced. The ground floor features a one-bedroom suite, living room, and open kitchen-dining area. On the first floor, we achieved a more effective entry sequence to the living room, an open-concept design leading to the kitchen. The interior is bright and airy, and the kitchen opens up to the deck in the back and the patio, making entertaining indoors and outdoors seamless. The design works in a way to accommodate the addition of a stair leading to the ground level when the rental unit is incorporated back into the house.
Up on the second floor, a suite with a bathroom was designed with grandparents or guests in mind. Also, two additional bedrooms are now being used as an exercise room and a zoom-worthy office but can later be used as kids’ rooms.
Last but not least, the third floor features the master suite with his and hers walk-in closets, a master bath, and a library.



 Reynard Architectural Designs
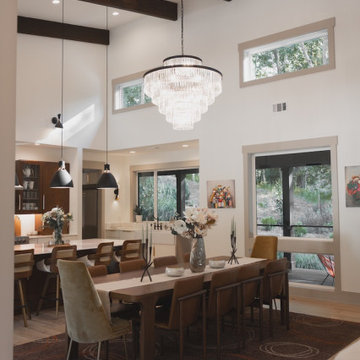
Dining Area
Chandelier: A massive, multi-tiered crystal chandelier hangs as the centerpiece directly above the dining table, adding a touch of glamour that contrasts with the rustic wood beams.
Furniture: A long, dark wood rectangular dining table sits in the center. It is surrounded by leather-upholstered chairs with metal frames along the sides. The head of the table features a distinct, tall-back chair upholstered in a light gold/beige velvet fabric.
Table Decor: The table is styled with a light runner, tall thin candlesticks, and a large central vase filled with white floral arrangements.
Rug: The brown area rug with orange and white circular geometric patterns anchors the dining set.
Architecture & Windows
Window Wall: The right wall features a striking asymmetrical window layout. There are two small rectangular clerestory windows high up near the roofline and a large lower picture window (possibly a sliding door) with black frames that looks out onto a deck and wooded area.
Beams: The dark exposed wood beams on the vaulted white ceiling are clearly visible, running the width of the room.
Kitchen & Background
Kitchen Connection: The kitchen island with its waterfall stone edge and cane-back bar stools is visible in the background to the left.
Lighting: The three black dome pendants over the kitchen island are visible, creating a layered lighting effect with the dining chandelier.
Artwork: Colorful framed artwork hangs on the wall between the kitchen and the window wall, adding pops of color to the neutral space.
Atmosphere The space feels airy and grand due to the high ceilings and natural light, yet grounded by the warm wood tones of the beams, flooring, and furniture. The mix of crystal lighting with rustic beams creates a "mountain modern" or "transitional" aesthetic.
 Tile Doctor Ltd
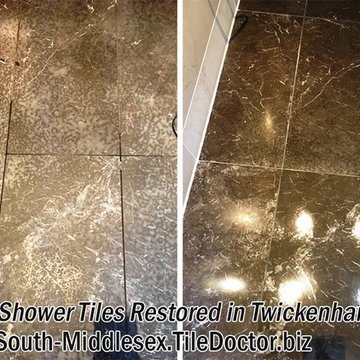
Here at Tile Doctor we can’t stress often enough how careful you have to be when choosing a cleaning product for use on natural stone. Acid bases cleaners in particular can etch the surface so always read the label before buying. Unfortunately, this customer, who lives in Twickenham, learned this the hard way.
Limescale build-up on shower tiles can be an unsightly problem in hard water areas and this customer’s house cleaner had attempted to treat it with Cillit Bang on their Marble tiled shower room floor. Whilst good at removing Limescale on ceramic tiles, the product is acid-based and in this case caused severe etching to the surface of the Marble.
This customer is not the first to experience this problem with Cillit Bang and we have looked into this before and I can confirm it does say on the back on the bottle that you should not use it on all natural stone including Marble and Granite.
The mistake had really damaged the appearance of this lovely floor however the good news is etched Marble can be refinished and we do offer this service. Fortunately, this customer found us on-line and called us in to rectify the problem as
With high quality, acid-sensitive stone we find that rather than cleaning with a liquid product, it is lot effective to use a process known as burnishing. This involves the application of abrasive diamond encrusted pads to cut back through the damaged stone. This removes a layer from the surface to expose the undamaged stone, which in then polished.
Using different grades of small diamond pads fitted to a hand buffer I began burnishing the floor tiles. I started the process with a Coarse pad and worked my way through to Medium, Fine and eventually the Very Fine pad. A small amount of lubrication in the form water is used with each pad, but no chemical products are needed, making this a completely natural process. The floor was rinsed with water afterwards to remove any slurry from the polishing.
After allowing the floor dry out overnight, I returned to apply two coats of Tile Doctor Colour Grow, which is a solvent-based, impregnating sealer designed to enhance the variety of natural colours and shades in the stone. It also protects the stone against daily exposure to chemical-based shampoo and soaps.
The customer was worried that the floor could not be restored, but she can now rest assured knowing not only knowing that the floor is back into top condition, but that professional help is at hand in case mistakes happen again in the future! Another happy customer for the Middlesex Tile Doctor.
Jonathan Oldham
South Middlesex Tile Doctor
 King Home Design
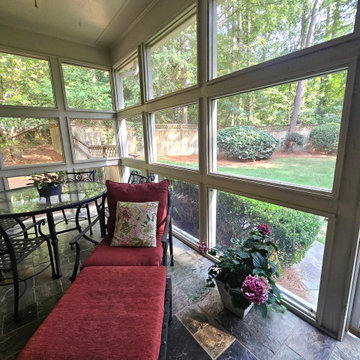
This unique porch design has a contemporary feel, and lets in plenty of natural light. The screened sides are disected in such a way as to create a window effect.
 Pools For Home Design
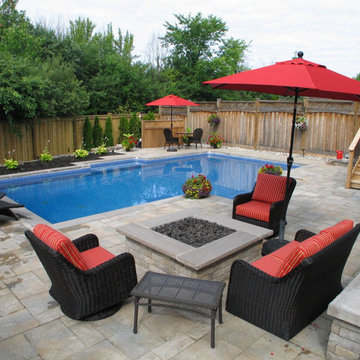
Pool - large traditional backyard tile and rectangular lap pool idea in Toronto
 Frederick Cooke Architecture, LLC
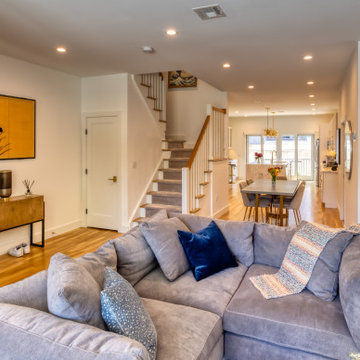
Welcome home to this luxe, modern, and inviting townhome in the heart of downtown Jersey City! We are ecstatic to see this project completed.
This 4-story multifamily underwent a major renovation and was transformed into a spacious and functional family home for our clients. Careful consideration of our client’s lifestyle and plans for the future dictated every design decision. They needed a space that would function well now that they are a young professional couple and a space that would nicely accommodate a growing family in the future. Greater emphasis was placed on common family spaces and bedrooms were designed exclusively for sleep with minimal room for work or study and without TV connections to discourage those activities from taking place in these spaces. Instead, common places such as the family room and the kitchen are inviting and foster those activities.
Due to sagging floors in need of extensive repair, it made more financial sense to replace them entirely. We took this historic house and by re-pitching the roof in an inverted form we were able to gain an overall 36” which we used for raising the floors. This, in turn, allowed us to bring the ground level up to code and be suitable for living space and gave us additional ceiling room on the upper floors. The ground floor was designed to be used as a rental unit and can be reincorporated into the home later when more space is needed.
Both front and back facades were replaced with timeless brick and vertical wood siding and all windows and front doors were replaced. The ground floor features a one-bedroom suite, living room, and open kitchen-dining area. On the first floor, we achieved a more effective entry sequence to the living room, an open-concept design leading to the kitchen. The interior is bright and airy, and the kitchen opens up to the deck in the back and the patio, making entertaining indoors and outdoors seamless. The design works in a way to accommodate the addition of a stair leading to the ground level when the rental unit is incorporated back into the house.
Up on the second floor, a suite with a bathroom was designed with grandparents or guests in mind. Also, two additional bedrooms are now being used as an exercise room and a zoom-worthy office but can later be used as kids’ rooms.
Last but not least, the third floor features the master suite with his and hers walk-in closets, a master bath, and a library.

 Bercum Builders Inc.
Backsplash on bar and Island top inlaid with backlit translucent Caesarstone Concetto creates a beautiful shimmering effect. Our highly experienced team can take your ideas to the next level.
Photo Credits: Prime • Light Media
Photo Credits: Prime • Light Media

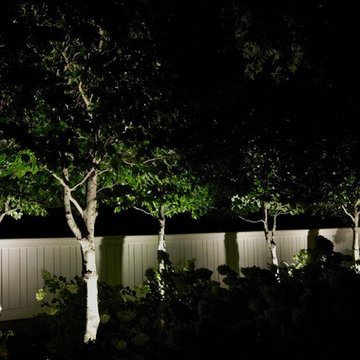
 Red Oak Outdoor Lighting
Using up lights on a row of Beech trees provides a dramatic effect that the client views from inside the house.
Garden Design by Joseph Hillenmeyer Garden Design.
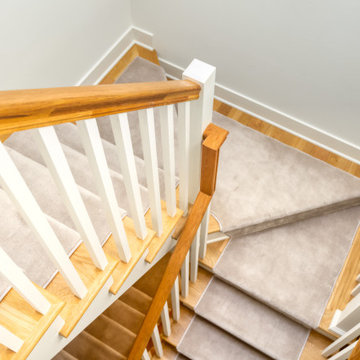 Frederick Cooke Architecture, LLC
Welcome home to this luxe, modern, and inviting townhome in the heart of downtown Jersey City! We are ecstatic to see this project completed.
This 4-story multifamily underwent a major renovation and was transformed into a spacious and functional family home for our clients. Careful consideration of our client’s lifestyle and plans for the future dictated every design decision. They needed a space that would function well now that they are a young professional couple and a space that would nicely accommodate a growing family in the future. Greater emphasis was placed on common family spaces and bedrooms were designed exclusively for sleep with minimal room for work or study and without TV connections to discourage those activities from taking place in these spaces. Instead, common places such as the family room and the kitchen are inviting and foster those activities.
Due to sagging floors in need of extensive repair, it made more financial sense to replace them entirely. We took this historic house and by re-pitching the roof in an inverted form we were able to gain an overall 36” which we used for raising the floors. This, in turn, allowed us to bring the ground level up to code and be suitable for living space and gave us additional ceiling room on the upper floors. The ground floor was designed to be used as a rental unit and can be reincorporated into the home later when more space is needed.
Both front and back facades were replaced with timeless brick and vertical wood siding and all windows and front doors were replaced. The ground floor features a one-bedroom suite, living room, and open kitchen-dining area. On the first floor, we achieved a more effective entry sequence to the living room, an open-concept design leading to the kitchen. The interior is bright and airy, and the kitchen opens up to the deck in the back and the patio, making entertaining indoors and outdoors seamless. The design works in a way to accommodate the addition of a stair leading to the ground level when the rental unit is incorporated back into the house.
Up on the second floor, a suite with a bathroom was designed with grandparents or guests in mind. Also, two additional bedrooms are now being used as an exercise room and a zoom-worthy office but can later be used as kids’ rooms.
Last but not least, the third floor features the master suite with his and hers walk-in closets, a master bath, and a library.
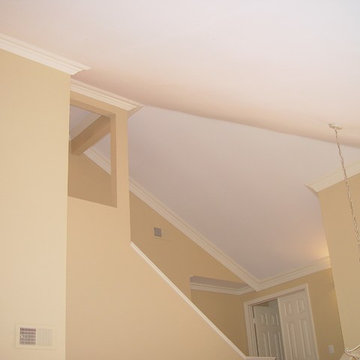
 TFLarkin, Inc
This is a picture of vaulted crown moulding with a rope light inserted behind it to light up the ceiling. It really had a cool effect. The crown was not only vaulted, it was lowered three inches from the ceiling and secured for the lighting.
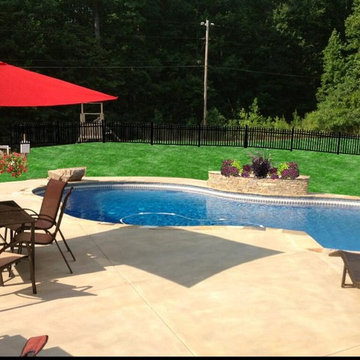
 Stillwater Pools Inc.
Pool - large transitional backyard concrete and custom-shaped pool idea in Atlanta

Sponsored
Columbus, OH

Hope Restoration & General Contracting
Columbus Design-Build, Kitchen & Bath Remodeling, Historic Renovations
 User
UserThe clients enjoy entertaining guests in their home. They enjoy sports events, but don't necessarily enjoy the hustle 'n bustle of going to the stadium, finding a place to park, and in the case of football, freezing to death. They much prefer sharing the ambiance of their comfortable home, offering snacks and drinks from the bar, and enjoying a round of pool during intermissions and halftime, or watching halftime shows on a state-of-the-art home theater.
These clients were so committed to this enterprise, they dedicated their 3,000 sq’ basement, except those areas already used for utility, storage, and mechanical needs, the renovation.To make sure the clients' every wish was met, a complete entertainment area was designed and constructed with ease of movement, lighting, and safety in mind. The area would include a home theater with totally wireless controls, a pool room, and a social area replete with a commercial-grade wet bar.
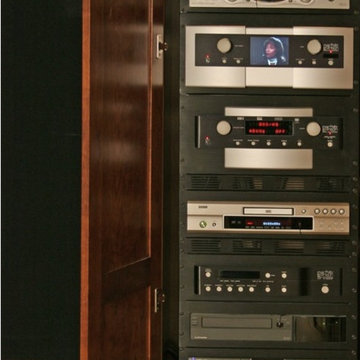
The home theater consists of a screen within a custom cabinet system that also houses the complete audio-visual equipment center. Speakers are nestled in custom benches with the sound cones discretely hidden behind fabric panels. The motor for the panel that hides the screen when not in use is behind a similar fabric panel.The furniture style cabinet has Shaker style doors with walnut peg inlays and leaded glass panels. There are multiple lighting "scenes" for ambiance; low-voltage lighting inside the crown molding, and recessed can lights are discretely placed so that they can provide an extra level of illumination when required.The pool room was walled with a custom wainscot paneling with clear cherry stiles and rails finished with a clear satin lacquer.
The panels are of Madagascar ebony with a light satin stain and a clear lacquer finish. A custom cue rack was constructed from clear cherry and backed with the Madagascar ebony panel.Drink rails were custom fabricated from cherry and custom crown molding was fabricated to match the rest of the house. The space is lit with a combination of recessed lights and a series of hidden lights behind crown molding for dramatic effect. The bar area is topped with a custom crown detail to contain the lighting.
The bar is constructed in the same manner and fashion as the theater and pool rooms with Shaker style cabinetry with square walnut peg in the door corners and decorative leaded glass door fronts with more than enough front and back bar space to serve and enjoy drinks and snacks. Entry behind the bar is through custom, bi-directional butler doors. A custom bottle display and storage area takes up the bottom half of the bar's back wall. And, for the sake of convenience, a full size automatic dishwasher is installed under the bar for cleaning glasses and stemware. The bar is also tricked out with an espresso machine, its own flat screen TV and AmX video controller.
The bar is lit with puck lights in the upper cabinets that illuminate downward through glass shelves, and low-voltage lighting is used behind the bottle display. The bar itself is lit by a series of earthen tone pendant lights.All three areas complement each other and are in total harmony with the remainder of the house. Moldings were matched, carpeting styles were chosen to complement rather than compromise, and muted, natural colors and textures were chosen that complement the surroundings. There is a seamless transition between the newer areas of the home and those already in everyday use. The entire area is a nebula of electrons operating servos, quietly opening and closing hidden switches, mysteriously dimming and brightening lights, and not only creating an alluring atmosphere, but one that is programmable, available at the touch of a finger to a heat sensitive screen, for an individual, or a group. At a single touch the lights in the theater and bar areas dim as the theater screen lowers into viewing position. Not only does the AMX controller open and close shades and window treatments to facilitate better viewing, but on an entirely different level it controls the very access to the property. It opens and closes entryways, external doors and gates as well.None of this magic came easily. Electrical circuits were at a premium. Over heating plagued the AV rack, and pesky rays of light seemed to creep in where and when they were least welcome. An exhaust fan was installed in the AV cabinet to dissipate the heat. New electrical outlets were scheduled and placed while others were moved. The bar area received custom wire chases hidden within the cabinetry. Exterior roll-a-way shutters, all controlled from the AMX controller, were installed and programmed as the answer to those pesky light rays.
 safe ZOnea
Every year, the same thing happens. The first real snowfall arrives, demand for de-icing materials spikes overnight, and the businesses that waited too long find themselves scrambling for supply at the worst possible moment. Facility managers, property owners, contractors, and municipalities all depend on a steady supply of salt and ice melt to keep their properties safe and operational through winter. The ones who plan ahead sail through. The ones who don't pay more, wait longer, and take on real risk.
Sourcing de-icing materials well is not complicated, but it does require thinking ahead and understanding the options. The choices you make about what to buy, how to buy it, and who to buy it from have a direct effect on your costs, your reliability, and your ability to keep people safe when conditions turn dangerous. This article lays out what matters.
Why Your Choice of Supplier Matters More Than You Think
It is easy to treat de-icing material as a commodity, something you grab whenever you need it without much thought about where it comes from. That works fine until the moment it doesn't, usually in the middle of a storm when everyone needs supply at once and the casual sources have run dry. At that point, the relationships you built before the season become the difference between staying stocked and being stuck.
Reliable supply is the whole game in winter operations. A property that runs out of ice melt during a storm faces safety hazards, liability exposure, and disruption, none of which can wait for a back-ordered shipment. This is why establishing relationships with dependable rock salt suppliers before the season starts is one of the smartest moves a facility manager or contractor can make. It locks in supply, often locks in better pricing, and removes a major source of mid-winter stress.
The lesson here is to treat sourcing as a planning decision rather than a last-minute errand. The businesses that come through winter smoothly are almost always the ones that secured their supply chain early, chose suppliers who could actually deliver when it counted, and never had to gamble on finding material during a shortage. Reliability bought in advance is far cheaper than scarcity paid for in a crisis.
Bagged or Bulk: Matching the Material to the Job
One of the first practical decisions is whether to buy de-icing material in bags or in bulk, and the right answer depends entirely on the operation. Each format has clear advantages, and many operations end up using both for different purposes.
Bagged material offers convenience, control, and easy storage. It is simple to handle, easy to distribute to different locations or crews, straightforward to store without special equipment, and convenient for spot application by hand. It suits smaller properties, businesses without bulk storage, and situations where portion control and tidiness matter. Bulk material, on the other hand, tends to make sense for large operations that go through high volumes, where buying in quantity lowers the per-unit cost and the operation has the equipment and space to store and handle it. The tradeoff is between the convenience and flexibility of bags and the volume economics of bulk.
For many operations, the right approach is a mix: bulk for the high-volume core of the work and bags for flexibility, spot treatment, and locations where bulk handling is impractical. The key is to match the format to how the material will actually be stored, moved, and applied, rather than defaulting to one or the other out of habit. Thinking this through in advance avoids both the waste of over-buying bulk you can't handle and the expense of relying entirely on bags for a large operation.
Rock Salt Is Not Your Only Option
Rock salt, or sodium chloride, is the workhorse of winter de-icing for good reason. It is effective, widely available, and cost-efficient, which makes it the default choice for most operations most of the time. But it has limits, and understanding the alternatives helps you choose the right material for the conditions you actually face.
The most important limitation is temperature. Rock salt becomes less effective as temperatures drop, and in genuinely cold conditions it can struggle to do the job at all. This is where alternatives come in. Calcium chloride, for instance, works at much lower temperatures than rock salt and acts quickly, which makes it valuable when conditions are severe or when fast melting matters. Operations that face hard freezes or need dependable performance in extreme cold often keep calcium chloride for sale on hand for exactly those situations, using it alongside rock salt rather than instead of it.
The practical approach is to understand the conditions your property faces and stock accordingly. For many operations, rock salt handles the bulk of the work while a faster, colder-rated material like calcium chloride covers the extreme days when ordinary salt falls short. Matching the material to the temperature and the urgency of the situation is what separates an operation that stays ahead of winter from one that is constantly reacting to it.
Securing Your Supply Before the Season
Knowing what to buy is only half the equation. The other half is making sure you can actually get it when you need it, which means securing your supply before winter arrives rather than after it has already started. Timing is one of the most underrated factors in winter operations.
The logic is simple. Demand for de-icing materials is highly seasonal and spikes sharply during storms, when everyone needs supply simultaneously. Prices and availability both move against the buyer at exactly those moments. By contrast, planning ahead, estimating your needs and arranging supply before the season, puts you in a far stronger position. Working with established rock salt suppliers ahead of time means your material is accounted for before the rush, often at better pricing and with the confidence that it will be there when the first storm hits.
This kind of planning also lets you think clearly rather than react under pressure. You can estimate your seasonal needs based on your property and past winters, decide on the right mix of materials and formats, and arrange storage in advance. Operations that do this consistently spend less, worry less, and never find themselves making frantic calls during a storm. The effort of planning ahead is modest, and the payoff in reliability and cost savings is substantial.
Storing and Handling What You Buy
Securing supply is not much use if the material degrades before you can use it, which makes proper storage and handling an important and often overlooked part of the equation. De-icing materials are sensitive to moisture, and poor storage can turn a good supply into a clumped, hardened mess that is difficult to apply.
The fundamentals are straightforward. Keep material dry and protected from moisture, since salt and ice melt readily absorb water and can harden if exposed. Store it in a way that suits the format, whether that means a proper bulk storage area or a dry space for stacked bags. Keep it accessible, so crews can get to it quickly when a storm hits and time is short. And handle it with the right equipment for the format and volume, which protects both the material and the people working with it. None of this is complicated, but neglecting it can undermine even a well-planned supply.
Good storage practices protect the investment you made in securing supply early. There is little point in arranging your materials ahead of the season only to have them degrade before use. Treating storage and handling as part of the overall plan, rather than an afterthought, ensures that the material you secured is actually usable when the moment comes. It is the final link in a supply chain built to perform under winter conditions.
Estimating How Much You Actually Need
One question trips up operations of every size: how much de-icing material to buy. Order too little and you risk running short during a storm. Order too much and you tie up money and storage space in material you may not use. Getting the estimate reasonably right is a meaningful part of sourcing well.
Several factors shape the answer. The size and type of the areas you treat, sidewalks, lots, entrances, and drive lanes, set the baseline for how much material each application consumes. The local climate matters too, since colder regions and those with frequent snowfall go through far more material than milder ones. Application frequency depends on how often storms hit and how quickly surfaces need to be cleared, which varies with the kind of property and the expectations of the people who use it. And the type of material plays a role, since different products are applied at different rates.
Past experience is often the best guide. Operations that track what they used in previous winters, adjusted for the size of the property and the severity of the season, can estimate their needs with reasonable confidence. For newer operations without that history, it helps to plan conservatively and to work with a supplier who can replenish stock reliably, so that a low estimate does not turn into a mid-storm shortage.
The goal is not perfect precision but a sound, slightly cautious estimate paired with a dependable supply relationship. That combination lets an operation keep enough material on hand to handle the season without over-committing to volume it cannot store or use. Thinking this through before winter, rather than guessing during it, is one more way that planning ahead pays off when the snow starts to fall.
The Bottom Line
Sourcing de-icing materials well comes down to a few straightforward principles: plan ahead, choose reliable suppliers before the season, match your materials and formats to your actual needs and conditions, and store what you buy properly. The operations that follow these principles move through winter with confidence, while those that improvise pay more and take on needless risk.
Winter is predictable in one respect: it arrives every year, and demand for de-icing material spikes the moment it does. The businesses that prepare for that reality, rather than being surprised by it, are the ones that keep their properties safe, their costs controlled, and their operations running no matter what the season throws at them. A little foresight before the first snowfall pays off through every storm that follows.
 Tile Doctor Ltd
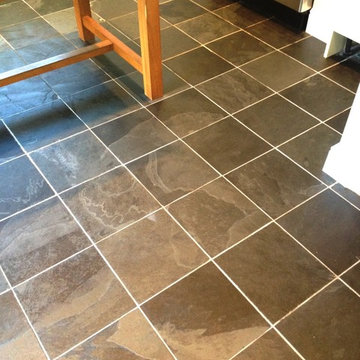
Slate is a popular choice for tiled kitchen floors and when properly maintained looks fantastic, however like all natural stone products without an effective cleaning plan dirt will become ingrained in the stone and will start to lose its appearance.
This was the case with this fantastic Slate tiled kitchen floor in Twickenham which had the potential to look really nice, but hadn’t received the proper maintenance for a long while, leaving it looking very tired. It now needed what was left of its old surface sealer stripped off, followed by a deep cleaning of the tile and grout before having a fresh seal applied.
To begin the restoration, I mixed a 50:50 solution of Tile Doctor Remove and Go and Tile Doctor Pro Clean. This was applied to the floor and allowed to dwell. Remove and Go functions as a stripper that breaks down the old sealer, while Pro Clean is a versatile, high alkaline cleaner that is safe to use on all types of natural stone flooring.
To use it to full effect, I machine scrubbed this solution into the floor to completely remove all dirt, stains, and old sealer. I also ran a stiff brush along the grout lines to remove the particularly stubborn dirt ingrained in the grout. The resulting cleaning slurry was then rinsed with water and extracted using a wet vacuum and the floor checked for stubborn marks which were retreated using the same process.
The floor was left to dry overnight and I came back the next day to apply a new seal. It’s important to leave a tiled floor to dry completely before sealing and at this time of year 24 hours is usually enough. This is necessary to ensures there is no excess moisture in the tile as this has the potential to cloud the sealer and affect its effectiveness.
The customer required a low sheen finish and a floor that was easy to maintain. I opted to use Seal & Go, which provides exactly that. It is a water-based with a high sheen blend of acrylic polymers that offers a both a stain resistant surface seal and a durable low sheen finish, also being water based it doesn’t leave a smell as it dries. Seal and Go is also a breathable sealer that will allow moisture to rise up through the tile and allow the floor to breathe.
As you can see from the pictures, the lustre has been completely restored to the Slate tiles and the sealer will allow for easy maintenance for the customer in the future.
Jonathan Oldham
South Middlesex Tile Doctor
58