
Search results for "Base intense" in Home Design Ideas
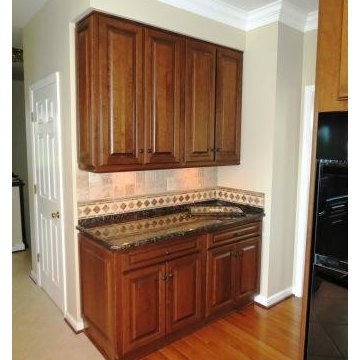
 Kitchen Solvers of Frederick
This was a custom kitchen remodeling project where we refaced the kitchen cabinets in Natural Cherry with Walzcraft 5 piece mortise and tenon raised panel doors with 5 piece mortise and tenon raised panel drawer fronts. The stain used was Heritage Wiping Stain with Dark Brown Glaze with Heavy Intensity with Satin Finish Topcoat.
We then added two low voltage under cabinet lights to new cabinet over desk. We also replaced all drawer boxes with new dovetail hardwood drawer boxes with side mount full extension soft close drawer guides.
Some additional work that we did to the kitchen was added fluted pilasters and wainscot paneling on the island. We also modified the cabinet to left of sink to improve appearance with two larger doors. We replaced 12” wide four drawer base with a 15” wide four drawer base cabinet and also replaced the floor of sink base cabinet. We then added raised panel ends on wall and base cabinets. Lastly, we modified the double oven opening and set new double oven furnished by Owner. The microwave and dishwasher remained in place.
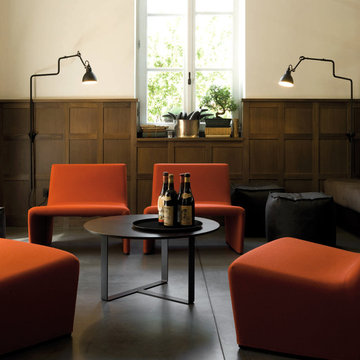
 Cassoni Furniture & Accessories
- PATTY LOUNGE CHAIR. Lounge chair in a simple design, comfortable, and suitable for conversations, designed both to be used at home and for intense contract use: reception rooms, waiting rooms, hotel rooms. Covers are fully and easily removable.
Dimensions: 31"W x 29"1/8D x 26"3/4H.
https://cassoni.com/Patty-lounge-chair-01
- ARGO COFFEE TABLE. Table top in MDF, coffee brown color (RAL 8019) matt lacquered, thickness 5/8”; base in metal, varnished in the same coloring.
Dimensions: Ø 31"1/2 x 17"H.
https://cassoni.com/Argo-coffee-table-01
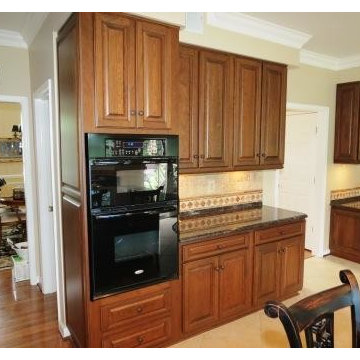 Kitchen Solvers of Frederick
This was a custom kitchen remodeling project where we refaced the kitchen cabinets in Natural Cherry with Walzcraft 5 piece mortise and tenon raised panel doors with 5 piece mortise and tenon raised panel drawer fronts. The stain used was Heritage Wiping Stain with Dark Brown Glaze with Heavy Intensity with Satin Finish Topcoat.
We then added two low voltage under cabinet lights to new cabinet over desk. We also replaced all drawer boxes with new dovetail hardwood drawer boxes with side mount full extension soft close drawer guides.
Some additional work that we did to the kitchen was added fluted pilasters and wainscot paneling on the island. We also modified the cabinet to left of sink to improve appearance with two larger doors. We replaced 12” wide four drawer base with a 15” wide four drawer base cabinet and also replaced the floor of sink base cabinet. We then added raised panel ends on wall and base cabinets. Lastly, we modified the double oven opening and set new double oven furnished by Owner. The microwave and dishwasher remained in place.
Find the right local pro for your project
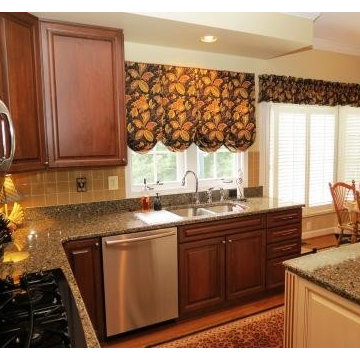 Kitchen Solvers of Frederick
This was a custom kitchen remodeling project where we refaced the kitchen cabinets and butler’s pantry in Cherry with Walzcraft 5 piece mortise and tenon raised panel doors with 5 piece mortise and tenon raised panel drawer fronts. We used Maple with MDF center panels on the door and drawers.
The stain used was Heritage Color Wiping Stain, Solvent Wiped Dark Brown Glaze with Heavy Intensity, Satin Finish Topcoat. For the island, the stain used was Linen Solid Tone Finish with Dry Wiped Light Brown Glaze with Heavy Glaze Intensity, Satin Finish Topcoat.
We modified the base cabinets in Butler’s Pantry to allow installation of a wine cooler. We then replaced the drawer boxes and guides, adding full extension drawer guides. We also provided new door and drawer pulls.
Some additional work that we did to the kitchen was added fluted pilasters and wainscot paneling on the island. We also added raised panel ends on wall and base cabinets. The existing appliances remained in place, at wall oven cabinet refacing materials were installed by loosening wall ovens and applying refacing, then re-securing ovens. Microwave and dishwasher remained in place.

 Massiano
This distinctive sofa, featuring a sloping, curved arm and intensely angular, matte black metal legs, emits a 1960s Parisian vibe, as if inspired by the French modernist architects. There’s a hint of intrigue, too, as the upholstered portion of the sofa appears to float effortlessly above its sturdy base. Our Morris sofa is covered in a pleasing, natural textured fabric. With its narrow seat depth and restrained proportions, this is a great choice for smaller living spaces. Matching chair available.
Dimensions: 81W x 35D x 30.75H
Seat Height: 20 Arm Height: 27.5
Features:
Seat Width: 71.5 Seat Depth: 21 Loose Seat and Back Cushions, Metal Leg
Construction:
Blendown Supreme Cushion, No Sag Seat, Feather Down Pillows

 Alterra Landscape Design
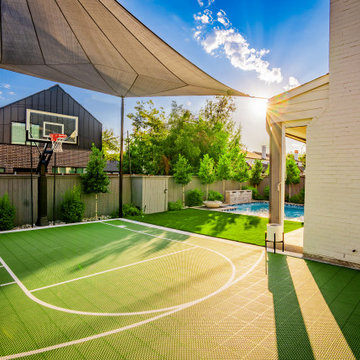
This vibrant outdoor living space showcases how professional landscape architecture can transform a standard backyard into an athletic retreat. A custom-tiled basketball court serves as the focal point, featuring a high-tension shade sail—an essential building strategy for the intense North Texas sun. To ensure longevity against the region’s expansive clay soils, the court is installed over a reinforced sub-base. The perimeter is softened by native ornamental trees and white river rock, providing a clean, modern aesthetic that balances the high-energy sports zone.


 kmjee
kmjeePepper plants are a delightful addition to any garden, offering a vibrant burst of color and spice to your culinary creations. However, even experienced gardeners can encounter challenges when growing pepper plants. In this blog, we'll explore some common issues you might face and provide practical solutions to help your pepper plants thrive.
1. Slow or Stunted Growth
Issue: Slow or stunted growth in pepper plants can be discouraging, but there are specific steps you can take to address this issue effectively.
Solution:
a. Soil Health:
- Well-Draining Soil: Ensure your pepper plants are in well-draining soil to prevent waterlogged roots, which can inhibit growth.
- Organic Matter: Incorporate plenty of organic matter, such as compost or well-rotted manure, into the soil to improve its texture and nutrient content.
- pH Level: Test the soil pH and adjust it to the ideal range between 6.0 and 6.8 using lime or sulfur as needed.
b. Fertilization:
- Balanced Fertilizer: Use a balanced, slow-release fertilizer designed for vegetables to provide essential nutrients steadily throughout the growing season.
- Compost: Amend the soil with compost to enhance nutrient availability and soil structure. This can promote healthier growth.
c. Watering:
- Consistent Moisture: Maintain consistent soil moisture levels by watering your pepper plants regularly but avoid waterlogging. Aim for 1-2 inches of water per week, adjusting based on your local climate and weather conditions.
- Mulching: Apply mulch around the base of the plants to retain soil moisture and regulate temperature.
2. Yellowing Leaves
Issue: Yellowing leaves can be a sign of various underlying problems, but addressing them promptly can restore the vibrancy of your pepper plants.
Solution:
a. Nutrient Deficiencies:
- Balanced Fertilization: Use a well-balanced fertilizer that includes micronutrients to address nutrient deficiencies.
- Specific Nutrients: If you suspect a particular deficiency, such as magnesium, iron, or nitrogen, apply the appropriate nutrient supplement following package instructions.
b. Pest and Disease Control:
- Pest Inspection: Regularly inspect the leaves and stems for common pests like aphids and mites. Remove affected leaves and treat with organic pesticides if necessary.
- Disease Management: Look out for signs of diseases like bacterial leaf spot or fungal issues. Apply organic fungicides or bactericides as recommended.
3. Blossom Drop
Issue: When pepper plants drop their blossoms prematurely, it can hinder fruit development and lead to disappointment.
Solution:
a. Temperature Control:
- Stable Temperatures: Ensure your pepper plants are exposed to consistent temperatures between 70°F and 80°F (21°C to 27°C) during flowering. Avoid sudden temperature fluctuations by providing shelter or using row covers.
b. Pollination:
- Assist with Pollination: If growing peppers indoors or in a greenhouse, help with pollination by gently shaking the plants or using a small brush to transfer pollen between flowers. Outdoor pepper plants are usually pollinated by insects.
4. Wilting Plants
Issue: Wilting or drooping pepper plants can be a sign of various problems, but proper care can revive them.
Solution:
a. Watering:
- Consistent Moisture: Adjust your watering routine to keep the soil consistently moist but not waterlogged. Water early in the day to prevent fungal issues.
- Drainage: Ensure proper soil drainage by amending the soil or using raised beds to prevent waterlogged roots.
b. Pest Control:
- Pest Inspection: Examine the undersides of leaves for signs of pests like aphids, spider mites, or whiteflies. Treat infestations promptly with biological insecticides.
5. Curling Leaves
Issue: Curling or misshapen leaves indicate stress in pepper plants, which can be caused by various factors.
Solution:
a. Environmental Stress:
- Stable Conditions: Ensure your pepper plants are in an environment with stable humidity, temperature, and adequate air circulation. Avoid sudden changes in conditions.
- Proper Ventilation: Adequate air circulation can reduce humidity and prevent fungal issues.
b. Pest and Disease Management:
- Pest Inspection: Regularly inspect your plants for pests and diseases, addressing them promptly with organic remedies as needed.
6. Sunscald
Issue: Sunscald can lead to discolored, leathery patches on pepper fruits when exposed to intense sunlight.
Solution:
a. Shade Cloth:
- Sun Protection: Shield your pepper plants from harsh sunlight during the hottest part of the day using shade cloth or by planting them where they receive some filtered sunlight.
b. Pruning:
- Fruit Shading: Prune excess foliage to allow better fruit shading, reducing the risk of sunscald. Ensure that there's a balance between foliage and fruit.
7. Pepper Plant Pests and Diseases
Issue: Aphids, mites, whiteflies, and various diseases can affect pepper plants, but you can manage them effectively.
Solution:
a. Regular Inspection:
- Vigilant Monitoring: Regularly inspect your pepper plants for signs of pests or diseases, paying close attention to the undersides of leaves and stems.
b. Organic Remedies:
- Pest Control: Use organic remedies like neem oil, insecticidal soap, or diatomaceous earth for pest control.
- Disease Management: Apply organic fungicides or bactericides as recommended to manage diseases like powdery mildew or bacterial spot.
While growing pepper plants can present various challenges, these common issues are manageable with the right knowledge and care. Regular monitoring, proper soil preparation, and timely intervention can help you enjoy a bountiful harvest of vibrant, spicy peppers. Remember that gardening is a learning experience, and each challenge you face is an opportunity to improve your skills and enjoy the rewards of homegrown peppers in your favorite dishes.
 Decra-Scape, Inc.
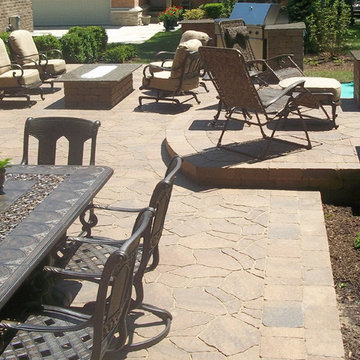
This modern fire and ice interpretation was designed to showcase the native environment and its integration with the distinctive neo-classic architecture of this new home. This property is located in a southeast suburb of Michigan, Canton. A natural ravine sits at the back of the home creating magnificent views of the Washtenaw watershed. The fall colors are amazing with Hickory golds and vibrant Maple reds ablaze.
The client had been to numerous design centers and displays to research what they wanted to create in their backyard. They were interested in an outdoor fireplace and cook center with a bar. Our initial consultation provided them with some other options that would not be obtrusive to their magnificent vistas. The cook center and bar evolved into a smaller counter space and fire feature coffee table.
The design process started with a clean canvas. It progressed into a formal design that provided modern conveniences and an outdoor living space. The client was presented with a concept drawing on the second visit as a starting off point and they agreed to proceed with a design fee to bring that concept into fruition. The formal landscape elements close to the residence contrast the natural surroundings. The result: tremendous interest created by the tension of the formal hardscape against dramatic vistas of the ravine which appears endless. We created four defined areas within the patio space: dining, cooking, coffee table conversation area and a fire wall relaxation terrace. The relaxation terrace was elevated so that it could be viewed and enjoyed from both inside and out. The cook center was installed around the owners existing grill with the potential for a future, more permanent unit. Area rug patterns were designed within the paver field to soften and define spaces.
During installation, clay loam soils were discovered. This slowed down he base preparation, drain tile installation, and running of utilities. These non native soils are common in new construction sites. The business development associate oversaw the entire process along with the team leader. Caution was also taken to preserve a Shagbark Hickory close to the newly installed walkway.
The largest challenge of this project was the fabrication of the burners to provide a dramatic flame. These burners were custom made and installed to provide the homeowners with the climactic effects they were looking for. An intensive drainage system was installed to accommodate a water issue in the rear yard but to also be cognizant of the native surroundings and ravine.
Overall, an environment was created that was reminiscent of the homeowner’s favorite après ski, sitting next to an open fire after a long descent to the base of the Rockies. The end result not only thrilled the owner but the Canton community as well. Since the installation, the Village of Canton has asked us to present these fire features at their home show.
 Alice Welborn
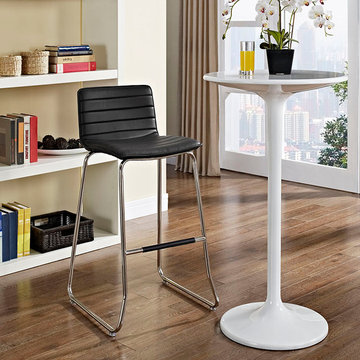
Plunge straight into the heart of lively conversations with a piece that inspires progress. The broadened stainless steel base further emphasizes momentum, in this piece that is both graceful and intensely ambitious. Dive is perfect for bars, restaurants, hotels and home use in kitchen and lounge areas.Yes,the Dive Bar stool, cracks me up:)Nice depth on the seat…that matters!
Buy Now
OVERALL PRODUCT DIMENSIONS 22.5″D x 21″W x 39″H
SEAT DIMENSIONS 15.5″L x 30.5″H
FOOTREST HEIGHT 13.5″H
 Erin Woodbury for Ethan Allen
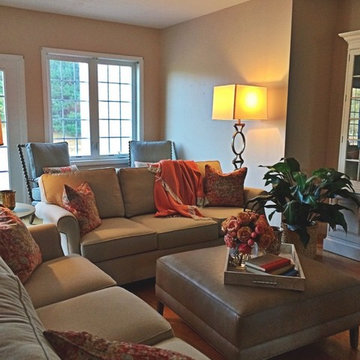
Paired on the Basic Color Wheel orange and blue have a special relationship. When they are placed next to each other, they make the other appear more intense and brighter. That’s because, being opposite, one color is always cool and the other always warm with the greatest contrast.
 Freedom Contractors Inc.
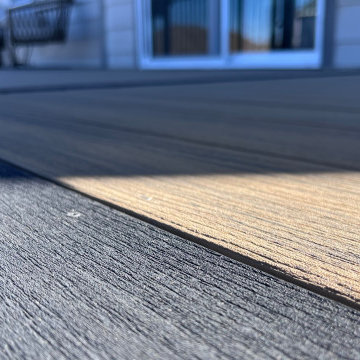
This image beautifully captures the elegance and functionality of a premium composite decking, meticulously crafted by Freedom Contractors for a Colorado residence. The decking's rich color and wood-grain finish offer the natural charm of traditional lumber while bestowing the superior resilience of composite materials. Engineered to endure Colorado's variable climate, this composite deck stands up against intense UV exposure, resisting fading and deterioration. Additionally, it's impervious to the state's snowy winters and does not warp, crack, or splinter in freezing temperatures, eliminating the need for annual staining or sealing. With its exceptional durability and low maintenance, this composite decking provides a long-lasting, inviting outdoor space ideal for gatherings, relaxation, and enjoying the great Colorado outdoors.
 Tile Doctor Ltd
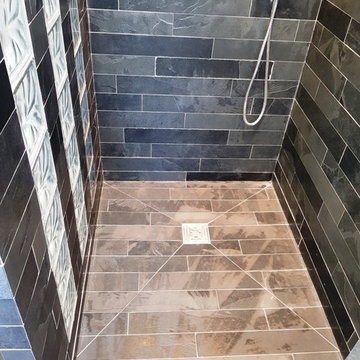
Our client contacted Tile Doctor as they were having problems cleaning their Slate tiled ensuite bathroom. We visited the property in nearby Stevenage, a London commuter town which is between Letchworth Garden City and Welwyn Garden City. The bathroom had been fitted some time ago, but due to the hard water in the area, there had been a large build up of limescale. The dark slate tiles showed this up even more.
My client had tried numerous household products on the tiles, but nothing was shifting the heavy build up. I discussed with them what Tile Doctor could do and completed a small demonstration. They were surprised how easily we were able to improve the tiles. We agreed a price and a timescale and booked the work in for a few weeks’ time.
The ensuite shower required intensive cleaning to the shower walls and floor where excessive limescale was present so we got to work cleaning with Tile Doctor Oxy-Gel, this is a strong alkaline based cleaner and degreaser, it is a gel so it works well on vertical surfaces where a long dwell time is required to break down dirt, grime, soap scum, oil based products. We left the product on the surface for approximately 10 minutes, removing all previous sealers and dirt. The residue was rinsed off and followed this up with a second clean using Tile Doctor Grout Clean-Up.
Grout Clean-Up is an acidic product designed to remove mineral deposits however you need to be careful with some types of stone as it can etch the surface if used incorrectly. To apply the product was diluted with water in a spray bottle and sprayed on to the wall tiles where it was scrubbed in and then rinsed off. The process was then repeated on the floor rinsing down thoroughly afterwards with water.
Once the slate was clean and dry we proceeded to cut out the existing silicone sealant which was equally stained and was beyond cleaning. This is a slow job and care needs to be taken not to scratch the tiles. It is important to ensure all the old silicone is removed so there is a nice clean surface to reapply the new. This also gave the shower area more time to dry out.
We tested with the moisture meter to ensure the shower area was fully dry and then applied the sealer. We chose to apply three coats of Tile Doctor Colour Grow, this is an impregnating sealer that works by occupying the pores in the stone, so dirt can’t become ingrained there, its also a colour enhancing sealer that provides durable protection. We applied the coats then lightly buffed off the excess with a soft cloth and allowed the slate to dry. The following day we returned to re-silicone all the edges and joints.
We recommended to the customer to use a mild solution of Tile Doctor Stone Soap as a maintenance cleaner for the slate. The client was very happy with the result and could see that cleaning with the appropriate product would ensure the ensuite bathroom continued to look good. The whole job took a day and a half to complete.
Robert Voyce
Hertfordshire Tile Doctor

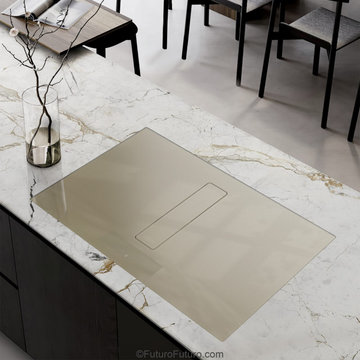
 Futuro Futuro Kitchen Range Hoods
The Futuro Futuro 32-Inch Portofino Champagne Downdraft Induction Cooktop is a next-generation kitchen solution that redefines elegance, performance, and efficiency. Combining the seamless power of induction cooking with a built-in downdraft ventilation system, this innovative appliance eliminates the need for traditional overhead range hoods—creating a sleek, open-concept kitchen design. Its striking champagne finish adds a touch of luxury while offering timeless style that blends perfectly with both modern and transitional interiors.
Seamless Induction Cooking Meets Advanced Ventilation
Designed for high-performance kitchens, this model features a powerful automatic downdraft hood that activates at the optimal speed based on cooking intensity. As heat, steam, and odors rise, the system adapts suction power in real time to ensure fresh, clean air throughout your kitchen. When cooking is finished, the fan gradually reduces speed, eliminating lingering odors and vapors for maximum comfort.
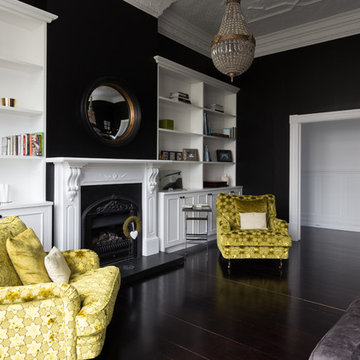
 Shannon Pepper Design
Intense Photography
Inspiration for a transitional dark wood floor living room remodel in Auckland with black walls, a standard fireplace and no tv
Inspiration for a transitional dark wood floor living room remodel in Auckland with black walls, a standard fireplace and no tv
 Tile Doctor Ltd
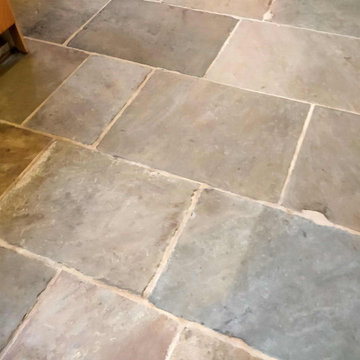
The owner of this period cottage in the old market town of Tadcaster near Leeds, had what was once a beautiful Yorkshire stone floor in the kitchen. It has been a long time since it had been given a proper clean so over the years and with the Kitchen being a high traffic area the whole floor including the grout had darkened and he now wanted it refurbished in time for Christmas.
I visited the property to assess what needed to be done and could see straight away that any protective sealer that was once on the floor had long since worn off. In fact, it was so consistently dirty with years of built-up grease and dirt I had to wonder if one had ever been applied.
I explained what the floor needed was a really deep intensive clean and then a sealer applied to make it easy to keep clean. The problem with most tile and stone is its porosity and if left unprotected dirt easily becomes lodged into its pores making cleaning a struggle.
To prove the difference that can be achieved and to allow me to work out a process on which I could base an accurate quote I ran a test clean on part of the kitchen floor. The test clean went very well, the difference was remarkable, and the cleaned section really stood out. Pleased with the potential of a clean floor they accepted my quote, and we pencilled a date in the diary.
I returned on the appointed date and began by removing the kickboards from under the kitchen units to protect them from splashing. Next, I set about spaying the floor with a strong dilution of Tile Doctor Pro-Clean, this is a purpose made tile and grout cleaner that eats into the grease and dirt so it can be removed. This product works best if you leave it for ten minutes before scrubbing in using a heavy-duty machine fitted with a heavy-duty brush. The soil released from the floor was then extracted using a wet vacuum.
The Pro-Clean did a good job on the grout however it was clear something stronger was required to really get the stone clean, so I stepped up a gear and applied Tile Doctor Remove and Go using the same process as before. This is a really good product for removing deeply ingrained grease and dirt.
The final step of the cleaning process was to give the stone and acid wash using Tile Doctor Grout Clean-Up to remove old grout haze and other mineral deposits; additionally, being an acidic product, it counters the alkaline cleaning products used earlier neutralising the pH level of the floor and leaving it ready for sealing.
Before sealing I like to discuss the different products available and the finishes they can provide. In this case my clients’ main concerns were that they wanted the stone to look natural and easy to maintain going forward.
With this in mind, Tile Doctor Seal & Go Extra was chosen, it’s a modern acrylic-based sealer that brings out the natural colours in the stone and gives a very slight smooth finish. The protection it provides will prevent dirt becoming ingrained int the pores of the stone and ensure the floor is easier to maintain. Several coats were applied, until we achieved the required finish.
The deep cleaning process and fresh sealer transformed the stone floor bringing out its original beauty and my customer couldn’t believe the difference in the floor and was highly delighted.
For aftercare I gave the client a bottle of Tile Doctor Neutral Cleaner, this product is pH neutral so it will clean the floor but won’t damage the sealer. Often people use household cleaners for cleaning tiled floors, but due to the strong chemicals they contain, they can do more harm than good by slowly stripping away the protective sealer and taking the floor back to square one. Tile Doctor Neutral Tile Cleaner is reasonably priced, and the concentrated formula means a small amount goes a long way so it’s well worth using.
This was a pleasurable job for me as it was good to see the floor transform from dull and lifeless to clean and showing the natural colour and beauty of the York stone, and always lovely to have another satisfied client.
Simon Testa
North East Yorkshire Tile Doctor
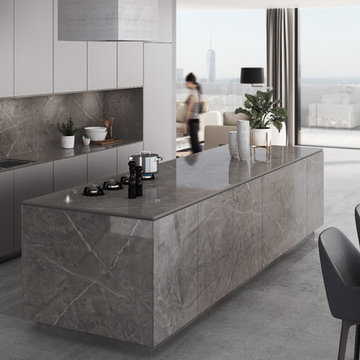
 Cosentino North America
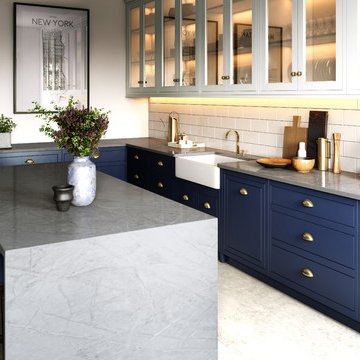
Inspired by Grey Pulpis natural stone, Dekton Korso replicates its delicate design with an ultrabrilliant finish. A random distribution of gray veins of diverse intensity contrasts over a chromatic base built with earthy tones. Visual strength and great personality and define Deton Korso.
 Cosentino North America
Inspired by Grey Pulpis natural stone, Dekton Sogne replicates its delicate design with an ultrabrilliant finish. A random distribution of veining of diverse intensity contrasts over a chromatic base built with grey tones. Visual strength and great personality and define Deton Sogne.
 China Marmoglass Co.,Limited
Home > Products
Crystallized Glass,Crystallized stone 6
Crystallized Glass,Crystallized stone,Crystallized glass panel
Marmoglass,Nanoglass,Marmoglass Composite Collectively referred to as Crystallized Glass
Crystallized Glass Application:
1). Interior & external wall cladding
2). Flooring Tile, Stair, Column cladding
3). Basin, Countertop, Table, Bar
4). bath, Kitchen, any tops, round pillar and furniture decoration etc .
Crystal white is a kind of artificial stone . It is made of glass ,which should be burned in the oven for two days under the more than 1000C temperature . It is much different from natural stone from all sides.
1. Natural and soft texture,
2. Varied colors such white, beige, carrara white
3. Good weather resisting property and durability
4. Zero percent of water absorption , not be polluted easily
5. Green environmental building material
6. High-intensity, light weight
7. Bending formation, economical, time saving
8. scratch resistant ,withstand high-heat .
More details about it :
1. There are more than 10 colors of crystallized glass panel products available: Pure white, yellow, silver yellow, silver grey, grey in white, grey spot white, USA grey spot white, yellow in white….
2. Panel thickness: 10-30MM
3. Normal specifications (mm):
1800*3000*18 1200*2400*18 600*600*18 1200*1200*18
1600*2400*18 1800*3000*30 800*800*18 1000*1000*18
Thin tiles:
305*305*12mm, 450*450*12mm
457*457*12mm, 400*400*12mm
600*600*12mm 1200*2400*12mm
4. Material: crystal quartz sand
5. Packaging: Fumigated wooden crates, Bundles,foam
6. Brand name: China Marmoglass / Nanoglass
7. Place of origin: Xiamen, Fujian ,China
8. Model NO.: GS001, SN002, NANO2009, NNAO2011
9. Supply ability: 20000M2/MONTH, 30TON/DAY
10. Delivery time: generally within 10 days, after the order confirmed and the deposit received
11. Arc panel specifications (mm):
Thickness: 18-30mm
Diameter : 30cm-120cm
1.What is crystallized glass stone(Marmoglass SN002 )?
The micro crystal stone is an innovative product designed as a substitute for the rare natural white marble. It is superior to the natural white marble in terms of characteristics, where the micro crystal stone possesses extreme density making it anti-breakage, giving it zero water absorption qualities, and making it resistant to acidic and alkaline substances. at the pace that mankind is consuming the natural resources in today’s world, the micro crystal stone is the ultimate solution, the superior alternative for the external and internal applications. It is certainly a revolutionary product and the finest construction material of the 21st century.
2.Why choose crystallized glass stone(Marmoglass SN002)?
The micro-crystal stone, also known as the micro-crystal glass, Marmoglass, is a new type of high-level decoration material. It is derived from natural inorganic material through a high temperature process, and it possesses excellent characteristics including the followings:
1. High Performance
The micro-crystal stone has even texture and high density, which makes it crush resistant, anti-bending and high resistant resulting its performance being higher than natural stone. It can be used for long period with minimal damage.
2. Acid-proof alkalinity and anti-corrosion
Not only does the micro-crystal stone posses special micro-crystal characteristics, it also has special glass features such as a fine texture, shiny surface and light reflection effect.
3. Fine Texture
We have the flexibility to manufacture any colors as per customer requirements while also making up the defect of color differences, which exists in natural stone. While the product is widely used for interior and interior decoration of star-level hotels, subways, local landmark buildings, airports, and office building etc, it is more suitable for high-level home decoration.
4. Pollution-resistance and easy maintenance
The micro-crystal is a kind of inorganic crystalline material with stable chemical characteristics. Its acid proof alkalinity and anti-corrosion nature are superior to nature stone, specifically its anti-weather characteristics whereby it is unaffected by the wind or sunlight.
5.A wide application range
The water absorption rare of micro-crystal is quite low, close to zero. Several types of dirty pulps and dyed solution have difficulty in penetrating it. Any dirt on the surface is easily cleaned and it is convenient to mankind.
6. Heat-bend reformation
With the heating method, the micro-crystal can be made into various arched profiles and arched slabs. the process is simple and it allows us to save time, cost, material and resources.
7. No radioactive elements
In the process of manufacturing the micro-crystal stone, we have integrated the elimination of all the harmful radioactive elements that are found in natural stone from its components. It is therefore the safest and most environmentally friendly building material in our modern world.
Crystallized glass can be processed into slab, tile, countertop, column and vanity top, wash basin and etc. It is applicable for flooring, interior and exterior wall cladding, stairs and table. Contributed to the character of no color difference, so it is widely used for top grade hotel, business building shopping mall and such great construction.
Physical Parameter
Density
2.70 g/cm
Water Absorption
0.01%
Compressive Strength
126 Mpa
Radioactive
Class A (Suitable for indoor and outdoor)
Size
Slabs
2400/2600/2800/3000 x 1800/1600/1400/1500mm
Cut-to-size Tiles
30 / 40 / 50 / 60 / 80 / 100cm X 30 /40/50 /60/80 /100cm
12"x12", 24"X12", 24"x24" or customized size
Thickness
1.2cm,1.8cm (3/4'), 2.0cm, 2.5cm, 3.0cm,
Finishing
Polished, honed
Usage
Flooring, Walls, Stairs / Steps, Counter tops, Vanity, Paving / Curbstone, Pillar, Column, Border, Skirting, Window Sills
Quality Control
Thickness Tolerance
+- 1mm;
Polishing Grade
above 100 degree
Crack / Spot
EU / US Standard: zero
QC Standard
AQL2.5/4.0 ITS
Certificate
CE, ISO, GB/T19001-2008
Advantage
1. Own factory with stable supply;
2. Factory direct with good price and prompt delivery;
3. Good Management System for good quality;
4. Value-added service.
large glass white artificial stone of Packing
Inner Packing
Cover with foam and plastic film, corner paper board protection
Individual Carton
Individual carton packing with trademark is available upon request
Outer Packing
Plastic tapes in 6 sides, further strengthened with iron sheet in the corner
Shipping Mark
OEM
Port of Loading
Xiamen Port of China
Delivery Lead Time
Normally 10-15 days for one 20’ GP, faster delivery is available upon confirmation
Trade Term
FOB, CFR, CIF, etc.
Loading Info.
Thickness
Qty per pallet
Pallets per 20ft container
QTY per 20ft container
Square Meter per 20ft container
Weight per 20ft container
Big slab size
3000*1200mm
12mm
25pcs
7
175pcs
600-900 m2
21000kgs
3000*1400mm
15mm
20pcs
7
175pcs
500-700 m2
21000kgs
3000*1600mm
20mm
15pcs
7
105pcs
350-500 m2
21000kgs
3200*1600mm
30mm
10pcs
7
70pcs
250-358 m2
21000kgs
Installation Recommendations
Wall Cladding
1.Wall should be leveled and cleaned,
2.Fix the panel on the wall with wire and expansion screw tightly,
3.Fill the space between the panel and the wall with cement mortar of ratio 1:3,
4.Clean the extra mortar and dirt on the surface.
Floor Installation
1.Mark out the baseline of gound level,
2.Mix the mortar with ratio of 1 cement to 4 sand to have semi-day mortar,
3.Lay the mixed mortar in level with a layer of 3-4cm thickness,place the tile over the mortar and adjust the height properly to be leveled,
4.Remove the tile after level adjustment.Put a thin layer of cement powder on the mortar and add water on it to become wet,
5.Put the tile on top and gently knock with rubber hammer until it sealed with the mortar properly. Make sure the tile is leveled and has the same space between each other. Those tiles which are not leveled with others should be removed and repeat the leveling procedure in step 4.Genetally,the space between two tiles should be 2mm for water evaporation and normal expansion.
Daily maintenance of Micro Crystal Stone
1.The laying area of micro crystal stone can only be opened for use or stacking any item on top after at least 24 hours of filling the gap,
2.The ground must be covered with plywood or carpet for protection in case of doing other decoration work after the installation of micro crystal stone floor,
3.In areas like exit and entrance, the surface of micro crystal stone floor should be covered by carpet or plywood to protect it from the damage of abrasion of sand or other hard material.
4.Do not use general floor wax on micro crystal stone,General floor wax is an oil-based wax which is easily stuck to dust.
5.Please use rubber wheels for shopping cart and trolley on micro crystal stone floor, for the hard wheel may scratch and damage the surface,
6.Regular care and maintenance is the key for long lasting of micro crystal stone’s high glossy and reflection.
Important Notice
1.Make sure the ground of laying area is dry and clean before laying mortar. The ratio 1:3(volume ratio) must be strictly followed and no extra water added during the installation progress
2.In the choice of using white cement as the filling material, the strength and quality of the cement must be checked properly.
3.It is not recommended to store micro crystal stone outdoor for long time. It should be covered with rock wool in winter and moved into indoor 2 hours in advance before installation. It also needs to be covered with waterproof cloth when installing during the rainy days outdoor,
4.When using micro crystal stone as ground floor,2mm wild gap must be left between the joints for the benefit of the water vaporization and physical expansion. In the case of large-scale installation, it is recommended to leave an 8mm expansion joint,
5.It is recommended that the area of micro crystal stone to remain-not used-for at least 24 hours and kept 2-3 days before passing or storing items on top.
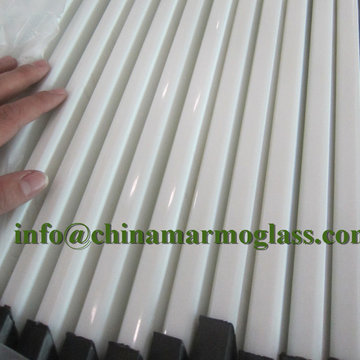
Marmoglass Polished Edge, Shining !
China Marmoglass SN002 Slabs Packing and Ready for ship
We not only make Slabs, we also can make:
- Project Tiles
- Countertop
- Tabletop
- Vanitytop
- Column
Tags: Marmoglass, Crystallized glass panel, nano crystallized glass panel, pore marmoglass, pore crystallized glass panel, Artificial Stone, Hole-Free Micro Crystal Stone, Pure white stone, Crystallized glass tile, Crystal glass tile, pure white artificial white marble, Marmo Glass, Glass Marble, White Marble, Marmoglass, nano marmoglass, no pore marmoglass, non-pore crystallized glass panel, glass marble, white marble, crystal white marble, white stone, white marble tile, Micro-crystal stone, Crystallized glass, Crystallized White Stone, Crystallized White Stone, Micro-crystallized composite tile, Hole-Free Micro Crystal Stone, Micro-crystallized composite tile, White Marble Tiles, pure white marble
China Marmoglass SN002 Strong Packing Crates
China Marmoglass SN002 and Nanoglass NANO3 Container Loading
Welcome to our product page of China Marmoglass, in which you can find detailed information of Marmoglass. China Marmoglass Co.,Limited offer Crystallized White Marmoglass is good in quality and competitive in price. China Marmoglass Co.,Limited is the manufacturer and supplier of Marmoglass,White Crystallized Glass Panel,Nanoglass. Crystallized Glass Stone,Crystallized Glass Panel,Crystallized Glass Stone Tile,Crystallized Glass Stone Countertop,Marmoglass also known as Nanoglass and White Crystallized Glass,Marmoglass, Crystallized Glasss is the popular materials for interior and exterior applications, including kitchen countertops, bathroom vanities, commercial foyer wall claddings, etc. China Marmoglass Co.,Limited is the Manufacturer and export Crystallized Glass and Crystallized Glass products. Crystallized Glass can be used Interior & external wall cladding, Flooring Tile, Stair, Column cladding, Basin, Countertop, Table, Bar, bath, Kitchen, any tops, round pillar and furniture decoration etc. Super White Nanoglass Slab, You Can Buy Various High Quality Super White Nanoglass Slab Products from Super White Nanoglass Slab Suppliers and Super White Nanoglass Slab Manufacturers at Chinamarmoglass.com
 User
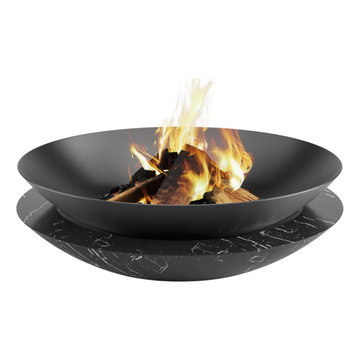
UserSphere highlights the harmony between its curvy lines and its round shape. A customizable fire pit with a marble base and a carbon steel and refractory steel plate, that will allow you to live intensely through your outdoor moments.
https://www.myface.eu/en/products/sphere-fire-pit/
8