
Search results for "Become" in Home Design Ideas
 Village Home Stores
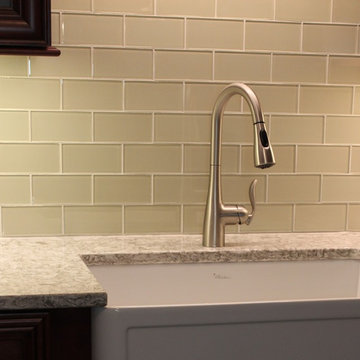
Beautiful glass subway tile by Jeffery Court perfectly illuminated by our Diode LED lighting system.
Mid-sized elegant home design photo in Chicago
Mid-sized elegant home design photo in Chicago

 safe ZOnea
If you’re active on GardenWeb sharing plant photos, asking for advice, tracking seasonal progress you already understand how much detail goes into gardening. Soil pH, rainfall, emerging leaves, bloom counts, fertilizer schedules it adds up fast. But all that rich information often remains buried in posts, lists or memory. What if you could visualize that data and turn it into clear quick insights? That’s where a graph maker becomes a game-changer for your gardening workflow.
1. Why garden data belongs on a graph
On GardenWeb, you’ll find forums for everything from perennial care, vegetable gardening, patios, herbs, even cooking and craft projects. While plant lovers share observations and ask questions, many track progress manually in spreadsheets or memory. A graph maker flips that around:
Instead of a list of numbers (e.g., “Soil test: pH 6.4 in May, 6.1 in October”), you get a line graph showing the decline over time.
Instead of guessing which plant bloomed most, you see a bar chart comparing counts across plants.
Instead of manually calculating average rainfall effect, you plot scatter points of bloom count vs. rainfall.
By turning your data into visuals, you’re not just recording—you’re analysing, learning and improving. For GardenWeb users this means smarter decisions: Which fertilizer actually improves bloom count? Which shady spot recovers slower? A graph maker gives clarity.
2. What is a graph maker and how to use one
A graph maker is a web tool or software that lets you input raw data (numbers, dates, categories) and output visual charts like line graphs, bar charts, scatter plots, etc. It might allow you to import a spreadsheet, select chart type, customize colours, label axes, and export the image for your blog, forum post or personal log.
Here’s how you could apply it for gardening:
Log blooms per week for each rose plant.
Using the graph maker, choose line graph to track changes over weeks.
Label your y-axis “Number of Blooms”, x-axis “Week of Year”.
Add colour lines for each plant for easy comparison.
Export as PNG and embed it in a GardenWeb forum post: “See bloom trend for my ‘Peace’ vs ‘Knock Out’ roses”.
This isn’t just pretty-to-look-at: it makes the trend obvious, invites discussion (“Hey, your ‘Knock Out’ line dips after week 28—what changed?”) and helps you refine your routine.
3. Use these specific scenarios on GardenWeb
A. Soil pH and plant health tracking
After multiple tests you have pH values over time and bloom results. Upload both datasets into the graph maker, produce a dual-axis line graph: soil pH on one axis, bloom count on the other. Post your findings in the “Soil, Fertility & Nutrients” forum and get feedback.
B. Seasonal pest or disease appearance
Record number of aphids spotted each month and whether you used treatment. A bar chart via the graph maker can show pre- and post-treatment figures. Then ask the “Insect & Disease Control” forum for advice based on your visual data.
C. Yield comparison between varieties
You grow two zucchini varieties. You keep weekly yield in pounds. Use the graph maker for a side-by-side bar chart. Share in the “Vegetable Gardening” forum: “Which was better this year? See the chart”.
D. Rainfall vs growth rate
You log weekly rainfall and growth (in cm) of your tomato plants. Use scatter plot in graph maker. If a pattern emerges, you’re ready to post: “Is my growth plateau due to drought? Chart shows a clear correlation.”
4. Why this elevates your GardenWeb contributions
When you post with a chart made by a graph maker, you’re doing more than asking or showing off. You’re investigating. You’re analysing. You invite the community to give feedback on data, not just anecdotes. That elevates the discussion. Instead of “My plant died, any ideas?” you post “See this graph of pH drop and bloom count—what might be the limiting factor?” High-quality visuals raise your post’s value and garner more thoughtful responses.
Plus, your posts become useful references for others: someone else can say, “Cool graphic, can you share your data sheet?” You build credibility and help the forum become a learning hub—not just a Q&A board.
5. Tips for using a graph maker effectively in the GardenWeb context
Keep it simple: One chart, one insight. Don’t overcrowd.
Label clearly: Titles, axis labels, units (e.g., cm/week, mg/L, °F).
Use readable colours: Avoid faint tones that vanish on mobile.
Annotate when needed: Add notes like “Fertiliser switched week 12” or “Shade cloth added”.
Provide context in your post: Don’t leave the chart alone—write a few sentences explaining what it shows and what you’re seeking.
Embed carefully: Make sure your image displays properly in GardenWeb; check mobile view.
Share raw data: If possible link to your spreadsheet so others can replicate or comment.
Be open to feedback: The chart invites questions; embrace them.
6. Possible pitfalls and how to avoid them
Bad data = bad chart: If your measurements aren’t consistent, your graph will mislead. Use standardized data collection.
Too much complexity: Multi-axis charts, too many variables—confusing. Stick to one or two variables.
Overlooking mobile viewers: Many GardenWeb users browse via phones. Use large fonts and simple visuals.
Ignoring the narrative: Chart alone won’t answer. Explain what it means and what you need.
Outdated charts: If you update your data annually, keep your visuals current or label them clearly as “2024 data”.
7. Final thoughts
On GardenWeb you’ll find a vibrant community of gardeners, DIYers, cooks and design lovers.Using a graph maker for your posts and progress turns your experience from casual hobby-logging into smart data-driven gardening. You’ll not only learn more—your peers will learn more, too.
So next time you log your plant growth, record your yield, test your soil or track pests—don’t just note it. Plot it. Use a graph maker. Share it in the forum. Let your garden tell the story, and let the community help you write the next chapter.
 Just the Thing Decorating, Staging, and Windows
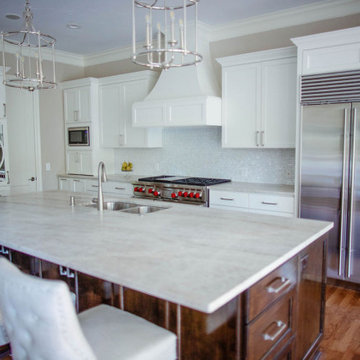
This recent renovation project began with a desire to open up the kitchen to the family room. Today everyone seems to want the big island to live and entertain around, right?
I always recommend taking your time during the planning phase—6 weeks at least! Kitchens and bathrooms are highly functional areas, so you want to give yourself time to think thoughts like, “where am I going to put all my plastic cups?” I ask my clients lots of questions during this phase to help them design a kitchen that truly has a place for everything. Appliances and plumbing are part of this phase as well.
Once the cabinet design was finalized, the demo began! Because that troublesome wall was load bearing, so the GC, Miland Home Construction, had to install a beam to support the second floor. But once that was done, boy we had a lot of space to work with!
Picking your countertops is a little like picking an ice cream flavor: you really want to see all your options! Not only is function important here, but your counter material is really a major element of the kitchen, so pick one you love! This client fell in love with Taj Mahal Quartzite.
The backsplash was the next layer of fun. Now the mood of the kitchen becomes clear. Will it be elegant? Homey? Rustic? Picking the lighting then becomes like the fine tuner on a microscope, adjusting the view to its perfect clarity.
With construction underway, and the mood of the new space established, soft furnishings become the focus. Layering in luxurious, yet durable fabrics are the name of the game for most families. We all want beautiful spaces that can stand up to spouses, kids, and pets! It’s always a lot fun to select a deep and comfy sofa and chairs!
The finishing touches are what really give the project that designer look—so be sure to save room in the budget for art, window treatments, and accessories. In this home I wallpapered the wall behind the tv with a subtle grasscloth, selected a large abstract to center the room, and echoed its colors throughout the accessories. The result is eye-pleasing indeed: soft, textured, interesting and peaceful. This busy family was thrilled with the results.
Find the right local pro for your project
 Ready?Set,Sell! Home Staging,ReDesign&Color Expert
Laura S. Baker
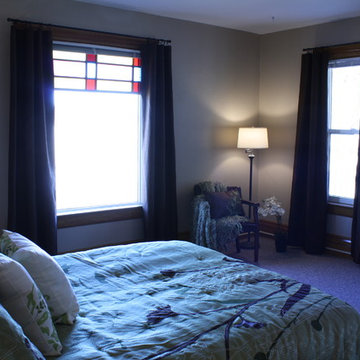
Example of a mid-sized transitional master carpeted bedroom design in Milwaukee with beige walls and no fireplace
Example of a mid-sized transitional master carpeted bedroom design in Milwaukee with beige walls and no fireplace
 ALL Renovation & Design LLC
Cramped space, narrow doorways, and dated cabinets – that is what the Trupe's had.
The time was right to set a transformation in motion.
The first step was to call Amos from ALL Renovation & Design.
They had been friends for the past 20 years, thanks to a deck he had built for them.
And Amos immediately caught their vision for the kitchen.
More space.
An island for entertainment.
And a striking look.
The Trupe's dream kitchen wasn't going to be without challenges.
The door leading to the outside had to go.
But how to match the 20-year-old siding?
The narrow doorway between the kitchen and the dining room had to go too.
But what to do with the wires in the wall?
And though getting rid of the outside door and the doorway gave more room, how would an island, big enough to be useful, fit?
Space. That was the challenge.
Countless design concepts.
Countless ideas to work through.
From the beginning, Amos committed to the extra mile.
Once the island size and cabinet placement were decided, Amos’s team began work in earnest.
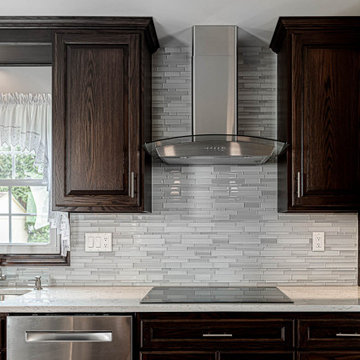
The custom-built oak cabinets with an espresso stain finish were the starting place for the project.
All other colors and materials were chosen to compliment the cabinetry.
Like the Daltile glazed porcelain tile floor in the Saddle Brook style and the Farmhouse color.
The backsplash proved to be a challenge. Have you ever settled on the absolutely perfect option only to find that it is forever discontinued by the manufacturer? That's what happened. Thankfully the Trupe's second choice of Anatolia Bliss Fusion Ice mosaic blended beautifully with the granite countertop.
Amazingly, the team was able to match the 20-year-old siding perfectly.
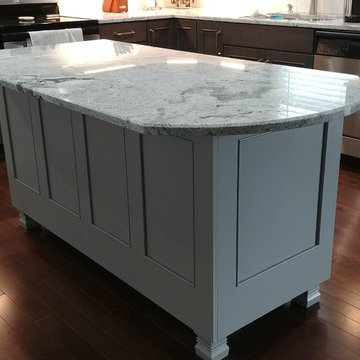
The corner cabinet took creativity as well. Cutting the corner (literally) did the trick. By adding a corner cabinet and cutting the corner of the island countertop, the Trupe's are delighted to have a usable walkway around the island.
“It sounds trivial,” Mr. Trupe remembers, but, instead of going with a plain side to the wood-work around the fridge, the ALL R&D team suggested matching the detail of the cabinet paneling: “I love it.”
Trivial? Not at all. That is part of making your dreams even better in reality.
 CYNTHIA E STEWART / Hoffman and Albers Interiors
Home design - transitional home design idea in Cincinnati
 D.L. Rhein
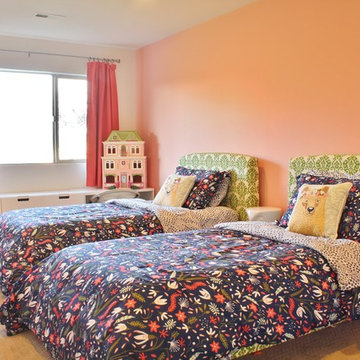
Kids' room - mid-sized contemporary girl carpeted kids' room idea in Los Angeles with multicolored walls

 Tile Doctor Ltd
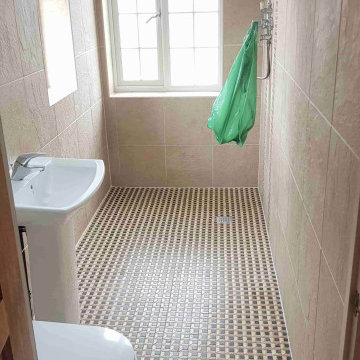
This wet room in Doncaster had become so mouldy and dirty the owners didn’t know what to do with it. The Limestone and Marble Mosaics on the floor and the Ceramic wall tile and Grout throughout the bathroom had become so badly affected with mould, nothing they could buy from could resolve it.
Following my site visit I was confident the room could be cleaned up (in-fact I have seen worse), I explained what we could do to restore and revamp the wet room and they were happy to go ahead with my quote.
First, I opened windows to maximise ventilation and then working top down I set about tackling the Ceramic wall tile and grout by spraying on a strong dilution of Tile Doctor Pro-Clean. Spraying on the solution mixes it with air making it lighter and easier to stick to the wall where it can soak in and get to work breaking down the mould.
After about fifteen minutes it was scrubbed into the tile and specifically the grout joints where it was needed most. This action releases grime and other contamination from the grout. The room needed a series of different treatments due to the different tiles and areas of mould, so I followed that up with Tile Doctor Duo Clean. This is a bleach-based cleaner which is brilliant at tackling mould and getting the grout back to its original colour.
The Ceramic tile in this bathroom has a textured surface which traps dirt so to get them clean I also used Tile Doctor Oxy-Gel. Being a Gel is easily sticks to the vertical surface allowing for longer dwell times which allows the product to dissolve the dirt and make it easier to remove.
With the walls looking much clear for my efforts I turned my attention to the Mosaic floor tiles. For these I went straight in with a cocktail combination of Tile Doctor Pro-Clean and Duo Clean cleaners which I knew from cleaning the wall tiles would have the right impact.
I was also able to use a buffing machine fitted with a poly brush attachment and running at medium speed to do most of the scrubbing. The grout lines were green with mould, and I was able to get this process to return the Mosaics and grout lines back to their original state.
The slurry was removed with a wet vacuum and rinsed thoroughly with water. It took many hours and repeated scrubbing to get the room looking like it should. I was then able to finally leave for the day and allow the wet room to dry out overnight.
I returned the following morning and started by removing all the old silicone from the corners of the room, much of it had become stained and difficult to get clean so replacement was the best option. The waste was removed and replaced with a new bead of mould resistant silicone colour matched to suit the tiles.
The Mosaics has fully dried by this point, so I was then able to apply a sealer to floor to seal in the Marble and Limestone floor Mosaics and grout. I used a couple of coats of Tile Doctor Colour Grow for this, it’s a breathable impregnating sealer that’s suitable for wet rooms. For the wall tile and grout, I used an aerosol sealer which will help protect the walls from getting mouldy and dirty again.
Once I had finished, I educated the owners on how to keep up the cleaning of the room supplying them with a complimentary bottle of Tile Doctor Aqua-Pro shower tile Cleaner. This is much better than any supermarket cleaner as it is pH neutral and will ensure that the newly applied sealant will not be prematurely affected. Hopefully, this will ensure it never gets quite so bad in the future however improved ventilation is the real key to solving that problem. They were very satisfied with the work we carried out and as you can see from the photographs on this page, the wet room has been transformed.
Matthew Lovett
South Yorkshire Tile Doctor
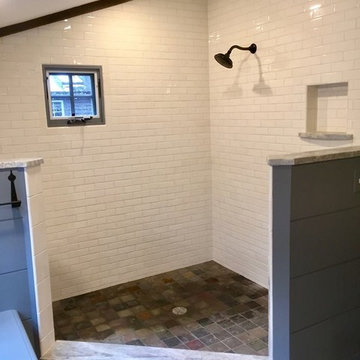



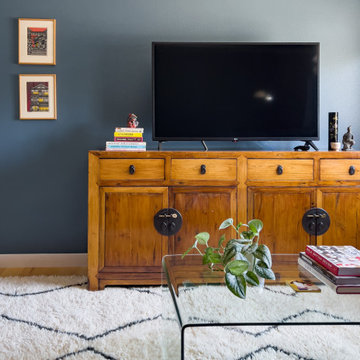


 Refined Renovations & Refined Home
Max Holiver
Example of an arts and crafts home design design in Boston
Example of an arts and crafts home design design in Boston
 Esther Hershcovich
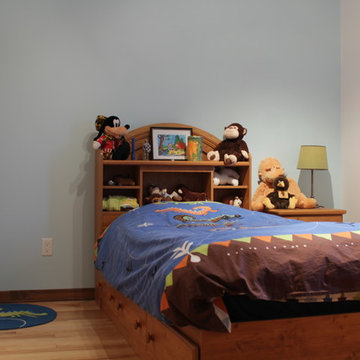
The son's bedroom is small and cozy. They had wall-to-wall closet doors for extra storage built in at the suggestion of the architect.
Photo: Esther Hershcovic © 2014 Houzz
 Modern & Contemporary Interior Design
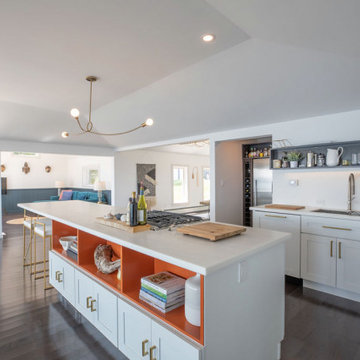
A sleek white, ultra modern island allows for guests to enjoy island seating and the view at the same time.
Slim, angular custom designed brass legs support the 13 foot long island, creating a cooking area with downdraft, preparation area, storage and seating.
The pop of orange lifts the scene from the cozy social seating to the front of the kitchen.
 Prime Realty
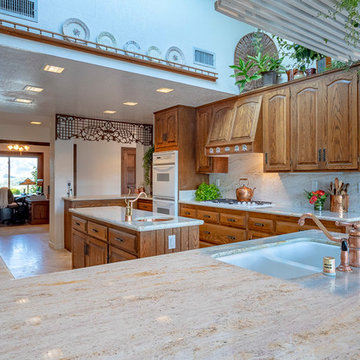
Example of a large farmhouse galley travertine floor and beige floor open concept kitchen design in Los Angeles with an undermount sink, raised-panel cabinets, medium tone wood cabinets, granite countertops, beige backsplash, stone slab backsplash, white appliances, an island and beige countertops


 Anna Jacoby Interiors
Ian Coleman
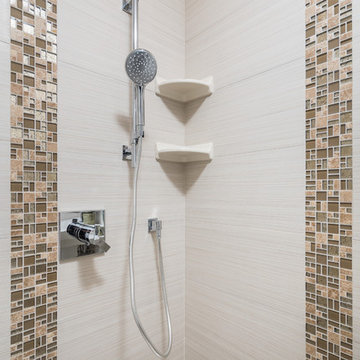
Inspiration for a small contemporary 3/4 beige tile and porcelain tile porcelain tile and beige floor corner shower remodel in San Francisco with a two-piece toilet, beige walls, a pedestal sink and a hinged shower door
Inspiration for a small contemporary 3/4 beige tile and porcelain tile porcelain tile and beige floor corner shower remodel in San Francisco with a two-piece toilet, beige walls, a pedestal sink and a hinged shower door
 ALL Renovation & Design LLC
Cramped space, narrow doorways, and dated cabinets – that is what the Trupe's had.
The time was right to set a transformation in motion.
The first step was to call Amos from ALL Renovation & Design.
They had been friends for the past 20 years, thanks to a deck he had built for them.
And Amos immediately caught their vision for the kitchen.
More space.
An island for entertainment.
And a striking look.
The Trupe's dream kitchen wasn't going to be without challenges.
The door leading to the outside had to go.
But how to match the 20-year-old siding?
The narrow doorway between the kitchen and the dining room had to go too.
But what to do with the wires in the wall?
And though getting rid of the outside door and the doorway gave more room, how would an island, big enough to be useful, fit?
Space. That was the challenge.
Countless design concepts.
Countless ideas to work through.
From the beginning, Amos committed to the extra mile.
Once the island size and cabinet placement were decided, Amos’s team began work in earnest.
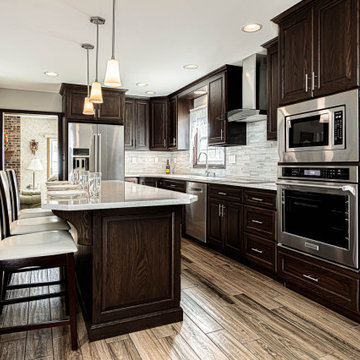
The custom-built oak cabinets with an espresso stain finish were the starting place for the project.
All other colors and materials were chosen to compliment the cabinetry.
Like the Daltile glazed porcelain tile floor in the Saddle Brook style and the Farmhouse color.
The backsplash proved to be a challenge. Have you ever settled on the absolutely perfect option only to find that it is forever discontinued by the manufacturer? That's what happened. Thankfully the Trupe's second choice of Anatolia Bliss Fusion Ice mosaic blended beautifully with the granite countertop.
Amazingly, the team was able to match the 20-year-old siding perfectly.
The corner cabinet took creativity as well. Cutting the corner (literally) did the trick. By adding a corner cabinet and cutting the corner of the island countertop, the Trupe's are delighted to have a usable walkway around the island.
“It sounds trivial,” Mr. Trupe remembers, but, instead of going with a plain side to the wood-work around the fridge, the ALL R&D team suggested matching the detail of the cabinet paneling: “I love it.”
Trivial? Not at all. That is part of making your dreams even better in reality.
99