
Search results for "Certificate requirement" in Home Design Ideas

 Flooring Supply Shop
SERENE STEAM SHOWER SPA SENSORY SPLASH MODEL COMPLETE UNIT
NO Generators - NO Electrical Required!
Install the world’s first Eco Friendly Steam Spa in your home shower enclosure.
The Sensory Splash model is our latest, signature spa system, including our exclusive steam/hot vapor feature, Bluetooth audio and an Essential Oils mechanism. This model also includes a full shower feature described as a pressure balanced, hot and cold mixing valve with a two function diverter for switching between a shower head and a hand held shower for regular shower use, and incorporates a pressure balanced mixing valve system for optimum performance.
Steam/hot vapor is our patented, signature feature.
Available finishes are: Brushed Satin - Polished Mirror
An impressive alternative to regular steam generators
With a Serene Steam system you can enjoy all the benefits of a personal spa in the comfort of your home. Rejuvenate your senses and relax with a hot and humid spa session.
Most people would jump at an opportunity like this and Serene Steam has invented and designed innovative methods to create a complete wellness environment producing heat, steam/hot vapor infused with your choice of Essential Oils for the ultimate relaxation and rejuvenation as an elegant stand-alone unit installed in your shower enclosure .
Serene Steam is bringing innovation to the wellness culture. The way we perceive and gauge relaxation is about to change with a Serene Steam spa system. Now you have the perfect opportunity to pamper yourself in your personal shower enclosure with a beautifully designed spa system which produces a hot and humid spa environment.
Benefits - A hot steam spa, or steam shower environment has a physiological effect on the body which is very similar to that of a sauna. The hot vapors and heat may open up the pores, increases the metabolism, elevates the heart rate, and the body begins to sweat. This can result in health benefits, especially when a hot steamy environment is used safely and frequently (please read precautions). Some spas have also introduced the use of Aromatherapy in their systems to provide additional health benefits and relax clients. Enjoy a Serene Steam Spa system in your own shower enclosure.
Clearer skin - May improve the clarity of their skin over time.
Stress relief - One of the most powerful benefits may be the ability to reduce both physical and mental stress.
Metabolism and weight loss - In some instances, a hot steamy environment can even assist with weight management due to heavier perspiration.
WHY CONSIDER A SERENE STEAM SPA SYSTEM?
The fundamental reason among others, is that Serene Steam does not require any generators, nor any electricity at all. Rather, It is an impressive alternative to bulky electrical generators and has been certified by IAPMO for easy installation by a qualified plumber or contractor. A Serene Steam Spa system brings a moist heat, Essential Oils infused steam/Spa experience into your existing shower enclosure and generally requires basic installation.
Unlike competitors who require generators and an electrical supply to create a hot spa environment, (also known as a steam shower, wet sauna and alike), Serene Steam only requires the two primary connections which already exist in every bathroom - A water supply, and a drain, that's it. There are also no extra "a la carte" expenses required (other than basic plumbing parts) after you have purchased a Serene Steam Spa system. Everything is ready out of the box and only requires basic off the shelf plumbing fittings to install. You may require an additional spa bench for your new spa (not included).
All models are inclusive of our patented steam/hot vapor feature, a Bluetooth Audio system for music and phone calls, and a dedicated Aromatherapy feature for using Essential oils . When constructing a shower enclosure to use with any steam product, or alike, the type of wall materials which you use may also have an impact on the shower enclosure temperature and the time required to reach optimal comfort, please check with your local contractor. Remember, regardless of which steam system you use, all shower enclosures must be steam ready, and your local contractor or plumber should know how to seal your shower enclosure correctly to avoid the hot water vapors from exiting your shower enclosure during use.
PREFERRED SHOWER SIZE:
During use, Serene Steam provides an impressive amount of steam/hot vapor to occupy most standard shower enclosures, However, as with most steam shower enclosures, the smaller the area, the more effective the heat will feel.
With Serene Steam there is no specific size shower required due to the way it functions, also bearing in mind that with a movable spa bench (not included) it is possible to position yourself within any desired location should you have an extra-large/nonstandard shower enclosure. The diagram below should be a good indication of the preferred size of your shower enclosure. Please note that not all shower enclosures will provide the exact same results.
Certifications: cUPC - IAPMO certified, meets all local and federal ASTM standards ICG-54-2019 for shower panels and steam showers. Green Business Bureau Certified.
Product Specifications
Constructed from 16 gauge, 304 Stainless Steel.
The main body panel and mixing valve panel are designed to appear as one-themed unit for a beautiful flush wall mount.
Main hot & cold mixing valve
Aromatherapy Feature
Main body panel
Height: 27 inches
Width: 6 inches
Depth: 3.5 inches - Flush mount
Mixing valve panel
Height: 9 inches
Width: 6 inches
Depth: based on construction parameters
Total height and width of the installed unit is approximately: 38 x 6 inches (flush with wall).
Patented and IAPMO certified.
Disclaimer
The content on this site is not a substitute for a qualified physician, pharmacist, or other healthcare professionals. All content regarding benefits of a hot spa, or steam environment on this site is opinion, and is based entirely on ubiquitous publications supporting the opinion. Content is also gathered from public, & known sources & is as accurate as the general information provided & is opinion only, and not claimed by Serene Steam in any way whatsoever.
MADE IN USA
Join us at flooringsupplyshop.com for this product and many others
Patent U.S.A. & INTERNATIONAL
 Dallas Builders Association
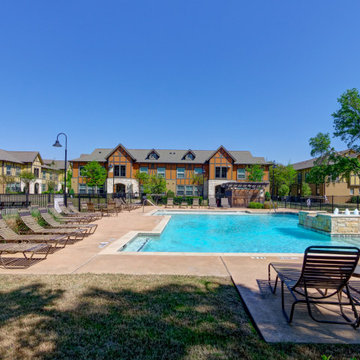
Britain Way Apartments, located at 333 Lane St. in Irving, has reborn with a fresh rejuvenated appeal. Built in 1962, the original development structure had been noticeably deteriorating in recent years. It had limited amenities, 17 repetitive, monotonous buildings with dull colors and obsolete mansard roofs in dilapidated condition. There was poor on-site drainage and lighting, no perimeter fencing, and several city code violations were recorded in prior years. The Developer’s mission was to convert this dated project into a high quality, eco-friendly, modern, and affordable housing community for the citizens of Irving.
After the remodel was completed, enhanced features include visually pleasing facades using heavy stone accents and sloping roofs, and lush landscaping distributed throughout the site. Additional improvements include expanded kitchen areas with upgraded interior amenities and energy efficient appliances; second bathrooms added to select two- and three-bedroom units; a brand-new spacious clubhouse and community center was provided; pool and picnic areas and an on-site resident activities coordinator to lead an abundance of community services provided to residents at no extra cost. Strategic partnerships, with community-based organizations, local volunteer groups and non-profits offer lifestyle and learning activities such as arts and crafts and after-school reading and tutoring for children, computer classes, lifestyle enrichment classes, nutrition classes and aquatic activities for children and adults.
Britain Way is the first LEED Gold Certified affordable multifamily community in the city of Irving. LEED certification ensures the property will be healthier and safer for residents in addition to providing lower utility expenses, as well as, conserving energy and water. Obtaining LEED Gold Certification for a 60-year-old project was a herculean effort.
Further enhancing the project’s resident quality of life initiatives, the new, stylish Britain Way is designed per implementing “Crime Prevention Through Environmental Design” (CPTED) requirements. Among several other updates, the property was made safer by adding perimeter fencing and increasing lighting levels throughout the site.
To tour Britain Way or for more information on availability of this apartment community or any other available properties, please visit www.omhousing.com or https://www.britainwayapts.com/
This Home of the Week is presented by the Dallas Builders Association. For information on the Association please visit www.dallasbuilders.com.

 Lemon Remodeling & Services
Lemon Remodeling Earns Diamond Certified®!
Scores Highest in Quality in Local Service Company Customer Satisfaction Study
Lemon Remodeling a design and build construction business in the bay area, has been awarded the prestigious Diamond Certified symbol after being rated highest in quality in ongoing customer satisfaction ratings performed by American Ratings Corporation.
In order to earn Diamond Certified, a local service company must apply to be rated by American Ratings Corporation (ARC) and pass each step of its twelve-step rating and certification process. ARC actually pulls a random sample of past customers from the applicant company’s files and surveys typically 100 customers by telephone. Not only do the customers rate the applicant company on a 1 to 10 scale for quality, but also they indicate their willingness to return or refer other consumers to the company. Most companies can’t pass the rating because a customer satisfaction survey score of greater than 90 on a 100 scale is required. In addition, ARC verifies liability and workers’ compensation insurance, state license status, complaint status, business practices, financial stability and legal judgment status. Additionally, ongoing customer satisfaction surveys are conducted to ensure the Diamond Certified Company is maintaining its high customer satisfaction.
“Our entire team at Lemon Remodeling is pleased to earn this prestigious award. And, it is especially gratifying because it’s based on our customers’ perception of our quality,” said the owner of Lemon Remodeling and Services.
“Personally, I’ve been focused on rating local service companies for the past 20 years and I’m always impressed at how certain organizations are so focused on satisfying their customers. Your Company Name is one of those special companies,” said the Founder and CEO of American Ratings Corporation.
About American Ratings Corporation
American Ratings Corporation’s mission is to define excellence and to identify for consumers the highest quality local companies. It rates local service companies in Northern California and awards the Diamond Certified symbol to companies rated highest in quality. It backs these companies for consumers by providing, when necessary, Diamond Certified mediation services and a money-back guarantee. For more information, visit www.diamondcertified.org or call 800-738-1138.
Find the right local pro for your project
 Poovi Art
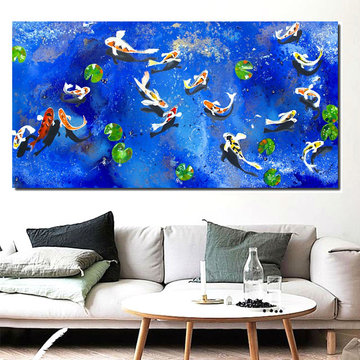
TITLE: Streak of Luck 2
Size - 24 x 48 in inches
Koi can be represented in interior design with artwork such as paintings, photographs or sculpture. Its placement is said to attract auspicious abundance and prosperity into your home and life and some opt to have multiple representations of this fish.The Koi fish symbolize good luck, abundance and perseverance. Symbolic in Buddhism is to represent courage. Today the fish are considered to be symbolic of advancement materially and spiritually.
Some of the characteristics associated with the koi include:
Good fortune
Success
Prosperity
Longevity
Courage
Ambition
Perseverance
This is a one of a kind authentic painting. This painting is signed by the artist and comes accompanied by with a certificate of authenticity.
If you love this piece and my style of work but it's not the right size/colours, I would be deligthed to discuss your personal requirements. Please contact me for information about commissions.
If you have any questions please don't hesitate to contact me.
Send me a conversation about style, size, and color if what you see here is not perfect.
****STRETCHED CANVAS - ORIGINAL PAINTING - READY TO HANG **** The canvas is stretched on a wooden frame and artwork is ready to hang. Framing is not required.
The painting will be shipped and packed professionally. In order to protect your painting I will personally pack your painting with great care using high quality, shipping industry approved
CUSTOMS FEES AND DUTIES
Customs fees and duties vary from country to country and are the responsibility of the recipient. Please understand we have no knowledge or control over those fees.
Please let us know if you have any questions. We are always happy to assist you quickly.
PooviArtGallery - Copyright © All rights reserved.
 Talon Construction Inc.
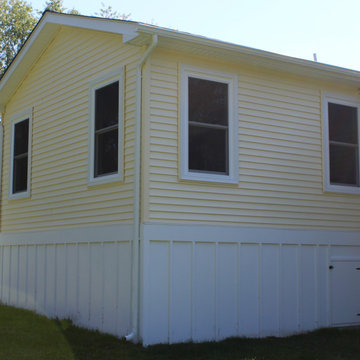
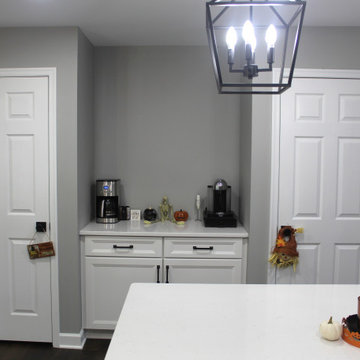
Designing and building a kitchen addition is a complex process that involves multiple steps and considerations. Here is a general outline to help you get started on your kitchen addition project:
Define Your Goals and Budget:
• Determine the purpose of the kitchen addition. Is it for more cooking space, a dining area, or a combination of both?
• Establish a realistic budget for your project. Consider all costs, including construction, permits, materials, and furnishings.
Hire a Design Professional:
• Seek the services of a design build company who specializes in kitchen additions.
• Discuss your vision, needs, and budget with the design professional to create a design concept.
Site Evaluation:
• Assess the existing space and structural condition of your home to ensure it can support the addition.
• Consider factors like zoning regulations, setbacks, and building codes.
Design Development:
• Collaborate with your design professional to refine the concept, including the layout, size, and architectural style.
• Choose materials, finishes, and fixtures that fit your design and budget.
Obtain Permits:
• Consult with your local design build contractor to determine the necessary permits and approvals.
• Prepare and submit all required documents, including architectural drawings and engineering plans.
Create Construction Documents:
• Work with your design build professional to develop detailed construction drawings and specifications.
• These documents will serve as a guide for contractors during construction.
Hire a design build contractor:
• Check references, credentials, and licenses before selecting a contractor.
• Sign a detailed contract that outlines the scope of work, timeline, and payment schedule.
Construction Phase:
• Demolition: If needed, remove any existing structures or walls.
• Foundation: Construct the foundation for the addition.
• Framing: Build the structural framework of the addition.
• Plumbing, Electrical, and HVAC: Install or update utilities as required.
• Insulation: Ensure proper insulation for energy efficiency.
• Drywall and Finish Work: Complete the walls and ceilings.
• Flooring and Cabinetry: Install flooring and kitchen cabinets.
• Appliances and Fixtures: Add appliances, plumbing fixtures, and lighting.
• Paint and Finish: Apply paint and finishes to achieve the desired look.
• Final Inspection: Schedule inspections to ensure compliance with building codes.
Final Inspections and Approvals:
• Arrange for final inspections to ensure the addition meets all safety and code requirements.
• Obtain any necessary certificates of occupancy or compliance.
Move In and Enjoy:
• Once all inspections and approvals are received, you can move into your new kitchen addition and start enjoying it.
Remember that every kitchen addition project is unique, so adapt this outline to your specific needs and circumstances. Consulting with professionals and obtaining the required permits and inspections is crucial to a successful and safe project.
 Talon Construction Inc.
Designing and building a kitchen addition is a complex process that involves multiple steps and considerations. Here is a general outline to help you get started on your kitchen addition project:
Define Your Goals and Budget:
• Determine the purpose of the kitchen addition. Is it for more cooking space, a dining area, or a combination of both?
• Establish a realistic budget for your project. Consider all costs, including construction, permits, materials, and furnishings.
Hire a Design Professional:
• Seek the services of a design build company who specializes in kitchen additions.
• Discuss your vision, needs, and budget with the design professional to create a design concept.
Site Evaluation:
• Assess the existing space and structural condition of your home to ensure it can support the addition.
• Consider factors like zoning regulations, setbacks, and building codes.
Design Development:
• Collaborate with your design professional to refine the concept, including the layout, size, and architectural style.
• Choose materials, finishes, and fixtures that fit your design and budget.
Obtain Permits:
• Consult with your local design build contractor to determine the necessary permits and approvals.
• Prepare and submit all required documents, including architectural drawings and engineering plans.
Create Construction Documents:
• Work with your design build professional to develop detailed construction drawings and specifications.
• These documents will serve as a guide for contractors during construction.
Hire a design build contractor:
• Check references, credentials, and licenses before selecting a contractor.
• Sign a detailed contract that outlines the scope of work, timeline, and payment schedule.
Construction Phase:
• Demolition: If needed, remove any existing structures or walls.
• Foundation: Construct the foundation for the addition.
• Framing: Build the structural framework of the addition.
• Plumbing, Electrical, and HVAC: Install or update utilities as required.
• Insulation: Ensure proper insulation for energy efficiency.
• Drywall and Finish Work: Complete the walls and ceilings.
• Flooring and Cabinetry: Install flooring and kitchen cabinets.
• Appliances and Fixtures: Add appliances, plumbing fixtures, and lighting.
• Paint and Finish: Apply paint and finishes to achieve the desired look.
• Final Inspection: Schedule inspections to ensure compliance with building codes.
Final Inspections and Approvals:
• Arrange for final inspections to ensure the addition meets all safety and code requirements.
• Obtain any necessary certificates of occupancy or compliance.
Move In and Enjoy:
• Once all inspections and approvals are received, you can move into your new kitchen addition and start enjoying it.
Remember that every kitchen addition project is unique, so adapt this outline to your specific needs and circumstances. Consulting with professionals and obtaining the required permits and inspections is crucial to a successful and safe project.
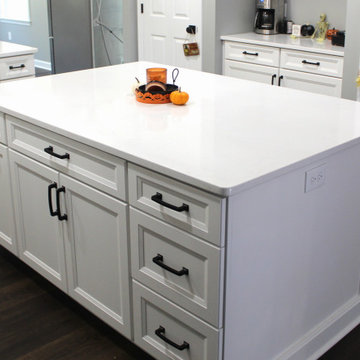 Talon Construction Inc.
Designing and building a kitchen addition is a complex process that involves multiple steps and considerations. Here is a general outline to help you get started on your kitchen addition project:
Define Your Goals and Budget:
• Determine the purpose of the kitchen addition. Is it for more cooking space, a dining area, or a combination of both?
• Establish a realistic budget for your project. Consider all costs, including construction, permits, materials, and furnishings.
Hire a Design Professional:
• Seek the services of a design build company who specializes in kitchen additions.
• Discuss your vision, needs, and budget with the design professional to create a design concept.
Site Evaluation:
• Assess the existing space and structural condition of your home to ensure it can support the addition.
• Consider factors like zoning regulations, setbacks, and building codes.
Design Development:
• Collaborate with your design professional to refine the concept, including the layout, size, and architectural style.
• Choose materials, finishes, and fixtures that fit your design and budget.
Obtain Permits:
• Consult with your local design build contractor to determine the necessary permits and approvals.
• Prepare and submit all required documents, including architectural drawings and engineering plans.
Create Construction Documents:
• Work with your design build professional to develop detailed construction drawings and specifications.
• These documents will serve as a guide for contractors during construction.
Hire a design build contractor:
• Check references, credentials, and licenses before selecting a contractor.
• Sign a detailed contract that outlines the scope of work, timeline, and payment schedule.
Construction Phase:
• Demolition: If needed, remove any existing structures or walls.
• Foundation: Construct the foundation for the addition.
• Framing: Build the structural framework of the addition.
• Plumbing, Electrical, and HVAC: Install or update utilities as required.
• Insulation: Ensure proper insulation for energy efficiency.
• Drywall and Finish Work: Complete the walls and ceilings.
• Flooring and Cabinetry: Install flooring and kitchen cabinets.
• Appliances and Fixtures: Add appliances, plumbing fixtures, and lighting.
• Paint and Finish: Apply paint and finishes to achieve the desired look.
• Final Inspection: Schedule inspections to ensure compliance with building codes.
Final Inspections and Approvals:
• Arrange for final inspections to ensure the addition meets all safety and code requirements.
• Obtain any necessary certificates of occupancy or compliance.
Move In and Enjoy:
• Once all inspections and approvals are received, you can move into your new kitchen addition and start enjoying it.
Remember that every kitchen addition project is unique, so adapt this outline to your specific needs and circumstances. Consulting with professionals and obtaining the required permits and inspections is crucial to a successful and safe project.
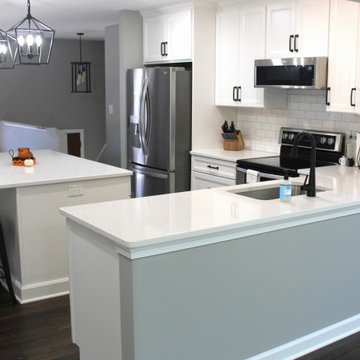 Talon Construction Inc.
Designing and building a kitchen addition is a complex process that involves multiple steps and considerations. Here is a general outline to help you get started on your kitchen addition project:
Define Your Goals and Budget:
• Determine the purpose of the kitchen addition. Is it for more cooking space, a dining area, or a combination of both?
• Establish a realistic budget for your project. Consider all costs, including construction, permits, materials, and furnishings.
Hire a Design Professional:
• Seek the services of a design build company who specializes in kitchen additions.
• Discuss your vision, needs, and budget with the design professional to create a design concept.
Site Evaluation:
• Assess the existing space and structural condition of your home to ensure it can support the addition.
• Consider factors like zoning regulations, setbacks, and building codes.
Design Development:
• Collaborate with your design professional to refine the concept, including the layout, size, and architectural style.
• Choose materials, finishes, and fixtures that fit your design and budget.
Obtain Permits:
• Consult with your local design build contractor to determine the necessary permits and approvals.
• Prepare and submit all required documents, including architectural drawings and engineering plans.
Create Construction Documents:
• Work with your design build professional to develop detailed construction drawings and specifications.
• These documents will serve as a guide for contractors during construction.
Hire a design build contractor:
• Check references, credentials, and licenses before selecting a contractor.
• Sign a detailed contract that outlines the scope of work, timeline, and payment schedule.
Construction Phase:
• Demolition: If needed, remove any existing structures or walls.
• Foundation: Construct the foundation for the addition.
• Framing: Build the structural framework of the addition.
• Plumbing, Electrical, and HVAC: Install or update utilities as required.
• Insulation: Ensure proper insulation for energy efficiency.
• Drywall and Finish Work: Complete the walls and ceilings.
• Flooring and Cabinetry: Install flooring and kitchen cabinets.
• Appliances and Fixtures: Add appliances, plumbing fixtures, and lighting.
• Paint and Finish: Apply paint and finishes to achieve the desired look.
• Final Inspection: Schedule inspections to ensure compliance with building codes.
Final Inspections and Approvals:
• Arrange for final inspections to ensure the addition meets all safety and code requirements.
• Obtain any necessary certificates of occupancy or compliance.
Move In and Enjoy:
• Once all inspections and approvals are received, you can move into your new kitchen addition and start enjoying it.
Remember that every kitchen addition project is unique, so adapt this outline to your specific needs and circumstances. Consulting with professionals and obtaining the required permits and inspections is crucial to a successful and safe project.
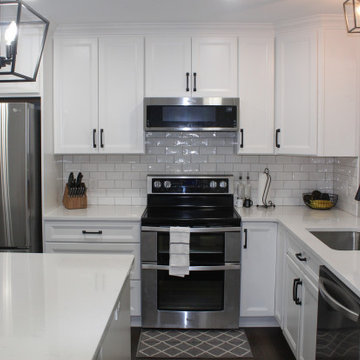 Talon Construction Inc.
Designing and building a kitchen addition is a complex process that involves multiple steps and considerations. Here is a general outline to help you get started on your kitchen addition project:
Define Your Goals and Budget:
• Determine the purpose of the kitchen addition. Is it for more cooking space, a dining area, or a combination of both?
• Establish a realistic budget for your project. Consider all costs, including construction, permits, materials, and furnishings.
Hire a Design Professional:
• Seek the services of a design build company who specializes in kitchen additions.
• Discuss your vision, needs, and budget with the design professional to create a design concept.
Site Evaluation:
• Assess the existing space and structural condition of your home to ensure it can support the addition.
• Consider factors like zoning regulations, setbacks, and building codes.
Design Development:
• Collaborate with your design professional to refine the concept, including the layout, size, and architectural style.
• Choose materials, finishes, and fixtures that fit your design and budget.
Obtain Permits:
• Consult with your local design build contractor to determine the necessary permits and approvals.
• Prepare and submit all required documents, including architectural drawings and engineering plans.
Create Construction Documents:
• Work with your design build professional to develop detailed construction drawings and specifications.
• These documents will serve as a guide for contractors during construction.
Hire a design build contractor:
• Check references, credentials, and licenses before selecting a contractor.
• Sign a detailed contract that outlines the scope of work, timeline, and payment schedule.
Construction Phase:
• Demolition: If needed, remove any existing structures or walls.
• Foundation: Construct the foundation for the addition.
• Framing: Build the structural framework of the addition.
• Plumbing, Electrical, and HVAC: Install or update utilities as required.
• Insulation: Ensure proper insulation for energy efficiency.
• Drywall and Finish Work: Complete the walls and ceilings.
• Flooring and Cabinetry: Install flooring and kitchen cabinets.
• Appliances and Fixtures: Add appliances, plumbing fixtures, and lighting.
• Paint and Finish: Apply paint and finishes to achieve the desired look.
• Final Inspection: Schedule inspections to ensure compliance with building codes.
Final Inspections and Approvals:
• Arrange for final inspections to ensure the addition meets all safety and code requirements.
• Obtain any necessary certificates of occupancy or compliance.
Move In and Enjoy:
• Once all inspections and approvals are received, you can move into your new kitchen addition and start enjoying it.
Remember that every kitchen addition project is unique, so adapt this outline to your specific needs and circumstances. Consulting with professionals and obtaining the required permits and inspections is crucial to a successful and safe project.
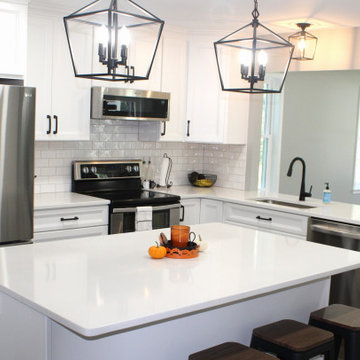 Talon Construction Inc.
Designing and building a kitchen addition is a complex process that involves multiple steps and considerations. Here is a general outline to help you get started on your kitchen addition project:
Define Your Goals and Budget:
• Determine the purpose of the kitchen addition. Is it for more cooking space, a dining area, or a combination of both?
• Establish a realistic budget for your project. Consider all costs, including construction, permits, materials, and furnishings.
Hire a Design Professional:
• Seek the services of a design build company who specializes in kitchen additions.
• Discuss your vision, needs, and budget with the design professional to create a design concept.
Site Evaluation:
• Assess the existing space and structural condition of your home to ensure it can support the addition.
• Consider factors like zoning regulations, setbacks, and building codes.
Design Development:
• Collaborate with your design professional to refine the concept, including the layout, size, and architectural style.
• Choose materials, finishes, and fixtures that fit your design and budget.
Obtain Permits:
• Consult with your local design build contractor to determine the necessary permits and approvals.
• Prepare and submit all required documents, including architectural drawings and engineering plans.
Create Construction Documents:
• Work with your design build professional to develop detailed construction drawings and specifications.
• These documents will serve as a guide for contractors during construction.
Hire a design build contractor:
• Check references, credentials, and licenses before selecting a contractor.
• Sign a detailed contract that outlines the scope of work, timeline, and payment schedule.
Construction Phase:
• Demolition: If needed, remove any existing structures or walls.
• Foundation: Construct the foundation for the addition.
• Framing: Build the structural framework of the addition.
• Plumbing, Electrical, and HVAC: Install or update utilities as required.
• Insulation: Ensure proper insulation for energy efficiency.
• Drywall and Finish Work: Complete the walls and ceilings.
• Flooring and Cabinetry: Install flooring and kitchen cabinets.
• Appliances and Fixtures: Add appliances, plumbing fixtures, and lighting.
• Paint and Finish: Apply paint and finishes to achieve the desired look.
• Final Inspection: Schedule inspections to ensure compliance with building codes.
Final Inspections and Approvals:
• Arrange for final inspections to ensure the addition meets all safety and code requirements.
• Obtain any necessary certificates of occupancy or compliance.
Move In and Enjoy:
• Once all inspections and approvals are received, you can move into your new kitchen addition and start enjoying it.
Remember that every kitchen addition project is unique, so adapt this outline to your specific needs and circumstances. Consulting with professionals and obtaining the required permits and inspections is crucial to a successful and safe project.
 Talon Construction Inc.
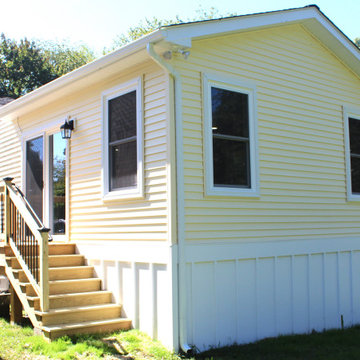
Designing and building a kitchen addition is a complex process that involves multiple steps and considerations. Here is a general outline to help you get started on your kitchen addition project:
Define Your Goals and Budget:
• Determine the purpose of the kitchen addition. Is it for more cooking space, a dining area, or a combination of both?
• Establish a realistic budget for your project. Consider all costs, including construction, permits, materials, and furnishings.
Hire a Design Professional:
• Seek the services of a design build company who specializes in kitchen additions.
• Discuss your vision, needs, and budget with the design professional to create a design concept.
Site Evaluation:
• Assess the existing space and structural condition of your home to ensure it can support the addition.
• Consider factors like zoning regulations, setbacks, and building codes.
Design Development:
• Collaborate with your design professional to refine the concept, including the layout, size, and architectural style.
• Choose materials, finishes, and fixtures that fit your design and budget.
Obtain Permits:
• Consult with your local design build contractor to determine the necessary permits and approvals.
• Prepare and submit all required documents, including architectural drawings and engineering plans.
Create Construction Documents:
• Work with your design build professional to develop detailed construction drawings and specifications.
• These documents will serve as a guide for contractors during construction.
Hire a design build contractor:
• Check references, credentials, and licenses before selecting a contractor.
• Sign a detailed contract that outlines the scope of work, timeline, and payment schedule.
Construction Phase:
• Demolition: If needed, remove any existing structures or walls.
• Foundation: Construct the foundation for the addition.
• Framing: Build the structural framework of the addition.
• Plumbing, Electrical, and HVAC: Install or update utilities as required.
• Insulation: Ensure proper insulation for energy efficiency.
• Drywall and Finish Work: Complete the walls and ceilings.
• Flooring and Cabinetry: Install flooring and kitchen cabinets.
• Appliances and Fixtures: Add appliances, plumbing fixtures, and lighting.
• Paint and Finish: Apply paint and finishes to achieve the desired look.
• Final Inspection: Schedule inspections to ensure compliance with building codes.
Final Inspections and Approvals:
• Arrange for final inspections to ensure the addition meets all safety and code requirements.
• Obtain any necessary certificates of occupancy or compliance.
Move In and Enjoy:
• Once all inspections and approvals are received, you can move into your new kitchen addition and start enjoying it.
Remember that every kitchen addition project is unique, so adapt this outline to your specific needs and circumstances. Consulting with professionals and obtaining the required permits and inspections is crucial to a successful and safe project.
 Poovi Art
TITLE: Streak of Luck 2
Size - 24 x 48 in inches
Koi can be represented in interior design with artwork such as paintings, photographs or sculpture. Its placement is said to attract auspicious abundance and prosperity into your home and life and some opt to have multiple representations of this fish.The Koi fish symbolize good luck, abundance and perseverance. Symbolic in Buddhism is to represent courage. Today the fish are considered to be symbolic of advancement materially and spiritually.
Some of the characteristics associated with the koi include:
Good fortune
Success
Prosperity
Longevity
Courage
Ambition
Perseverance
This is a one of a kind authentic painting. This painting is signed by the artist and comes accompanied by with a certificate of authenticity.
If you love this piece and my style of work but it's not the right size/colours, I would be deligthed to discuss your personal requirements. Please contact me for information about commissions.
If you have any questions please don't hesitate to contact me.
Send me a conversation about style, size, and color if what you see here is not perfect.
****STRETCHED CANVAS - ORIGINAL PAINTING - READY TO HANG **** The canvas is stretched on a wooden frame and artwork is ready to hang. Framing is not required.
The painting will be shipped and packed professionally. In order to protect your painting I will personally pack your painting with great care using high quality, shipping industry approved
CUSTOMS FEES AND DUTIES
Customs fees and duties vary from country to country and are the responsibility of the recipient. Please understand we have no knowledge or control over those fees.
Please let us know if you have any questions. We are always happy to assist you quickly.
PooviArtGallery - Copyright © All rights reserved.
 Poovi Art
TITLE: Streak of Luck 2
Size - 24 x 48 in inches
Koi can be represented in interior design with artwork such as paintings, photographs or sculpture. Its placement is said to attract auspicious abundance and prosperity into your home and life and some opt to have multiple representations of this fish.The Koi fish symbolize good luck, abundance and perseverance. Symbolic in Buddhism is to represent courage. Today the fish are considered to be symbolic of advancement materially and spiritually.
Some of the characteristics associated with the koi include:
Good fortune
Success
Prosperity
Longevity
Courage
Ambition
Perseverance
This is a one of a kind authentic painting. This painting is signed by the artist and comes accompanied by with a certificate of authenticity.
If you love this piece and my style of work but it's not the right size/colours, I would be deligthed to discuss your personal requirements. Please contact me for information about commissions.
If you have any questions please don't hesitate to contact me.
Send me a conversation about style, size, and color if what you see here is not perfect.
****STRETCHED CANVAS - ORIGINAL PAINTING - READY TO HANG **** The canvas is stretched on a wooden frame and artwork is ready to hang. Framing is not required.
The painting will be shipped and packed professionally. In order to protect your painting I will personally pack your painting with great care using high quality, shipping industry approved
CUSTOMS FEES AND DUTIES
Customs fees and duties vary from country to country and are the responsibility of the recipient. Please understand we have no knowledge or control over those fees.
Please let us know if you have any questions. We are always happy to assist you quickly.
PooviArtGallery - Copyright © All rights reserved

 Paradise Theater
Stunning private theater with incredible performance! Professional level Dolby Atmos audio system with incredible 4K Laser projection. Seating for 21 by Cineak. Complete acoustical engineering by Paradise Theater to deliver incredible sound performance.

 Bellingham Bay Builders
The Twin Peaks Passive House + ADU was designed and built to remain resilient in the face of natural disasters. Fortunately, the same great building strategies and design that provide resilience also provide a home that is incredibly comfortable and healthy while also visually stunning.
This home’s journey began with a desire to design and build a house that meets the rigorous standards of Passive House. Before beginning the design/ construction process, the homeowners had already spent countless hours researching ways to minimize their global climate change footprint. As with any Passive House, a large portion of this research was focused on building envelope design and construction. The wall assembly is combination of six inch Structurally Insulated Panels (SIPs) and 2x6 stick frame construction filled with blown in insulation. The roof assembly is a combination of twelve inch SIPs and 2x12 stick frame construction filled with batt insulation. The pairing of SIPs and traditional stick framing allowed for easy air sealing details and a continuous thermal break between the panels and the wall framing.
Beyond the building envelope, a number of other high performance strategies were used in constructing this home and ADU such as: battery storage of solar energy, ground source heat pump technology, Heat Recovery Ventilation, LED lighting, and heat pump water heating technology.
In addition to the time and energy spent on reaching Passivhaus Standards, thoughtful design and carefully chosen interior finishes coalesce at the Twin Peaks Passive House + ADU into stunning interiors with modern farmhouse appeal. The result is a graceful combination of innovation, durability, and aesthetics that will last for a century to come.
Despite the requirements of adhering to some of the most rigorous environmental standards in construction today, the homeowners chose to certify both their main home and their ADU to Passive House Standards. From a meticulously designed building envelope that tested at 0.62 ACH50, to the extensive solar array/ battery bank combination that allows designated circuits to function, uninterrupted for at least 48 hours, the Twin Peaks Passive House has a long list of high performance features that contributed to the completion of this arduous certification process. The ADU was also designed and built with these high standards in mind. Both homes have the same wall and roof assembly ,an HRV, and a Passive House Certified window and doors package. While the main home includes a ground source heat pump that warms both the radiant floors and domestic hot water tank, the more compact ADU is heated with a mini-split ductless heat pump. The end result is a home and ADU built to last, both of which are a testament to owners’ commitment to lessen their impact on the environment.

 U.S. Green Building Council (USGBC)
LEED Certification level: lEE FOR HOMES (V.3),SILVER.
In Oct 8,2015, USGBC honored a Brazilian Project with the First LEED FOR HOMES certificate of Brazil, awarded with a high Silver score, ((81.5 final ptos - 12.5( HSA) resulting 69 ptos)) due to green strategies applied in different areas of construction. This outstanding result could only be achieved with the collaboration of a well-integrated team of professionals, focused on unifying solutions suitable to all areas of construction, with materials that provide high efficiency and counted on an experienced and dedicated team, the support given by homeowner during entire process was essential to success of this project.
The owner, who embraced LEED concepts, found his incentive on his granddaughter, who must have the opportunity to grow in an environment with availability of all natural resources, and endeavored to gather the team and to find solutions that best fit each opportunity.
The consequence of this work was an exceptional residence, being an impressive showcase of green building strategies that have come together in a home. Alphaville Dom Pedro Residence, as the project was named, sets an example of quality and sustainability, achieving new standards required by condominium rules of construction in Campinas city, 80 miles from São Paulo, state's capital capital.
The construction was managed by LCP Engineering & Construction, using the innovative Ecogrid® technology, based on SCIP (Structured Concrete Insulated Panel) construction, which provided this home a high thermal-acoustic performance, reduction on waste generation during construction and minimal energy consumption. Furthermore, this project was planned to take full advantage of the sun’s potential, through the usage of solar and photovoltaic panels, designed to produce the energy needed to heat all water from house and pool, as well as generate part of the electricity consumed.
Being one of the most treasured resources, a special care was given by the project team to the water management system. Saving water plays a big role in this fascinating project: action was taken to allow all water used in showers, sinks and from the rain to be reused after the treatment through a natural process, phytoremediation by wetland, for irrigation and toilets. Also efficient faucets and showers that have a low flow rate were used. The irrigation and landscape design, fully done with native vegetation, demands a low amount of water to fuel the drip irrigation system implemented on 100% of the landscape area.
Separate zones of irrigation were installed according to watering needs, equipped with an automatic activation system, moisture sensor and pressure regulation devices, all programmed to minimize evaporation losses. Polypropylene Random Copolymer (PPR) pipes were used replacing the PVC as non-toxic material, guarantying the joints between pipes and fittings for total security system . Furthermore, a high degree of internal living quality was achieved minimizing the bacterial proliferation; mold, mildew and termite free due to the Ecogrid Technology.
All finishing used on this residence, like tiles, faucets, toilets have a high percentage of recycle materials, provided by local manufacturers, promoting the maturity of the local industries complying with the rating of the certification process.
This marvel project is extremely important to the national market, representing a significant milestone in the Latin in Brazilian Residential Building Sector, bringing the LEED for Homes certification and establishing sustainable parameters to future home builders for example:
The house produces 46% of the energy used, NET Zero,
Inverter Split air conditioning system,
100% of the hot water coming from solar panel,
PVC free, use PPR pipes,
Use phytoremediation process achieving 62% efficient water reuse,
95% efficiency in non construction waste,
Confortable and Healthy Interior Environment.
In rapids highlights,
*Inovation in the technologic process of construction , ECOGRIDE, witch besides the environmental comfort, regards for the salubrity and owner,s welfare.
*Exceeded average rates of energy efficiency with the use of photovoltaic panels, HVAC and home appliances with the inverter technology.
*Consolidated the importance of social and education environmental practices of the workers and owner.
*Reference on sustainable urban condominiums with quality and connectivity in the state of Sao Paulo and Contribute for the Brazilian market improvement and proved that actual market is already prepare to supply the sustainable construction.
But the must important was….
“Once Upon a Time“… there was a devoted grandfather, who believed in a better world for his granddaughter, seeking for solutions to leave a legacy of learning and achievements ways for future generations.
This beautiful love story has a happy ending, with the reception of First Leed For Homes Silver in Brazil and First Leed For Homes Silver in Latin America, for this wonderful residence.
A home full of love, affection and “sweet home” for many happy moments between this grandfather and his granddaughter.
 U.S. Green Building Council (USGBC)
LEED Certification level: lEE FOR HOMES (V.3),SILVER
In Oct 8,2015, USGBC honored a Brazilian Project with the First LEED FOR HOMES certificate of Brazil, awarded with a high Silver score, ((81.5 final ptos - 12.5( HSA) resulting 69 ptos)) due to green strategies applied in different areas of construction. This outstanding result could only be achieved with the collaboration of a well-integrated team of professionals, focused on unifying solutions suitable to all areas of construction, with materials that provide high efficiency and counted on an experienced and dedicated team, the support given by homeowner during entire process was essential to success of this project.
The owner, who embraced LEED concepts, found his incentive on his granddaughter, who must have the opportunity to grow in an environment with availability of all natural resources, and endeavored to gather the team and to find solutions that best fit each opportunity.
The consequence of this work was an exceptional residence, being an impressive showcase of green building strategies that have come together in a home. Alphaville Dom Pedro Residence, as the project was named, sets an example of quality and sustainability, achieving new standards required by condominium rules of construction in Campinas city, 80 miles from São Paulo, state's capital capital.
The construction was managed by LCP Engineering & Construction, using the innovative Ecogrid® technology, based on SCIP (Structured Concrete Insulated Panel) construction, which provided this home a high thermal-acoustic performance, reduction on waste generation during construction and minimal energy consumption. Furthermore, this project was planned to take full advantage of the sun’s potential, through the usage of solar and photovoltaic panels, designed to produce the energy needed to heat all water from house and pool, as well as generate part of the electricity consumed.
Being one of the most treasured resources, a special care was given by the project team to the water management system. Saving water plays a big role in this fascinating project: action was taken to allow all water used in showers, sinks and from the rain to be reused after the treatment through a natural process, phytoremediation by wetland, for irrigation and toilets. Also efficient faucets and showers that have a low flow rate were used. The irrigation and landscape design, fully done with native vegetation, demands a low amount of water to fuel the drip irrigation system implemented on 100% of the landscape area.
Separate zones of irrigation were installed according to watering needs, equipped with an automatic activation system, moisture sensor and pressure regulation devices, all programmed to minimize evaporation losses. Polypropylene Random Copolymer (PPR) pipes were used replacing the PVC as non-toxic material, guarantying the joints between pipes and fittings for total security system . Furthermore, a high degree of internal living quality was achieved minimizing the bacterial proliferation; mold, mildew and termite free due to the Ecogrid Technology.
All finishing used on this residence, like tiles, faucets, toilets have a high percentage of recycle materials, provided by local manufacturers, promoting the maturity of the local industries complying with the rating of the certification process.
This marvel project is extremely important to the national market, representing a significant milestone in the Latin in Brazilian Residential Building Sector, bringing the LEED for Homes certification and establishing sustainable parameters to future home builders for example:
The house produces 46% of the energy used, NET Zero,
Inverter Split air conditioning system,
100% of the hot water coming from solar panel,
PVC free, use PPR pipes,
Use phytoremediation process achieving 62% efficient water reuse,
95% efficiency in non construction waste,
Confortable and Healthy Interior Environment.
In rapids highlights,
*Inovation in the technologic process of construction , ECOGRIDE, witch besides the environmental comfort, regards for the salubrity and owner,s welfare.
*Exceeded average rates of energy efficiency with the use of photovoltaic panels, HVAC and home appliances with the inverter technology.
*Consolidated the importance of social and education environmental practices of the workers and owner.
*Reference on sustainable urban condominiums with quality and connectivity in the state of Sao Paulo and Contribute for the Brazilian market improvement and proved that actual market is already prepare to supply the sustainable construction.
But the must important was….
“Once Upon a Time“… there was a devoted grandfather, who believed in a better world for his granddaughter, seeking for solutions to leave a legacy of learning and achievements ways for future generations.
This beautiful love story has a happy ending, with the reception of First Leed For Homes Silver in Brazil and First Leed For Homes Silver in Latin America, for this wonderful residence.
A home full of love, affection and “sweet home” for many happy moments between this grandfather and his granddaughter.


 Eldorado Stone
Across the country, builders and architects are embracing sustainable building and design practices more than ever before. The use of eco-friendly products and materials help to create living environments that are not only sensitive to nature, but still achieves the look and feel desired by the original design.
Eldorado Stone is proud to be part of a growing number of award-winning projects that have won the highest levels in sustainable building practices and products available today. Whether it’s a traditional or contemporary design, Eldorado’s versatility and appeal offers an authentic architectural statement while adding the warmth and texture that only stone can provide.
Studio26homes, a design/ build firm dedicated to creating highly efficient, healthy homes, recently completed a 4,700+ sf project in Orefield, PA. The private residence earned the Gold rating from the National Association of Home Builders’ (NAHB) National Green Building Guidelines certification program as the 19th certified project of any level in the country. To reach the gold standard, Orefield had to earn at least 395 points and ended up surpassing that requirement with a grand total of 542 points.
Studio26homes hadn’t used Eldorado Stone before this project and were pleased to find that Eldorado is not only passionate about what they do but also back up their products should any problems arise. The fact that Eldorado Stone is locally manufactured, offers low maintenance, is competitively priced, and features the geometric shape they were looking for provided further confirmation that this was the company to work with. They chose Eldorado’s Castle Stone and were originally going to only apply it onto the fireplace and chimney. However, because the product complemented the home’s shade of red, they chose to do a more dramatic application, which resulted in great satisfaction for both the team and the homeowners.
Eldorado Stone Profile Featured: Custom Castle Stone
Builder: studio26homes, Orefield, PA
Website: www.studio26homes.com
Architect: Alan Mascord Design Associates, Portland, OR
Website: www.mascord.com
Mason: CM Masonry, Allentown, PA
Website: www.cmmasonry.com
 Roux MacNeill Studio
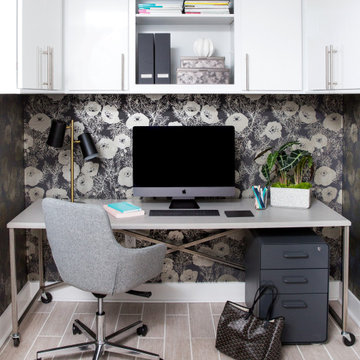
Our client tasked us with creating a versatile workspace for their family, including a daughter in college. Space was at a premium in their downtown loft, so we needed to create an efficient space that could be changed in the future to fulfill other needs. Our solution was a custom metal desk on casters, topped with concrete quartz. The office has little natural light, so white lacquered cabinets and metallic wallpaper were used to add life to the space.
7