
Search results for "Clean up" in Home Design Ideas

 Elizabeth Bolognino Interiors LLC
Photo by Adam Kane Macchia
Mid-sized transitional dark wood floor and brown floor great room photo in New York with a standard fireplace and white walls
Mid-sized transitional dark wood floor and brown floor great room photo in New York with a standard fireplace and white walls
 Tile Doctor Ltd
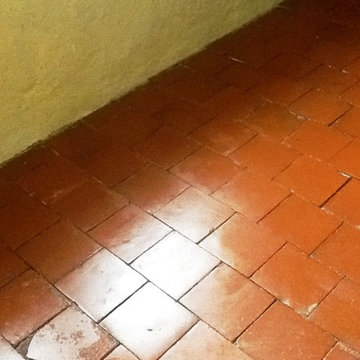
Here’s an interesting work I recently completed on a red Quarry tiled floor at a house in the town of Abington, Northampton. In post-war Britain (more specifically in the 1940s and 1950s), many new homes were built with Quarry tiled hallways and kitchens, so quite a popular feature back then. These floors are typically quite hard wearing and therefore ideal for such high traffic areas; additionally they don’t need a great deal of maintenance but their appearance will degrade over time.
In this particular house, the Quarry tiled floor had been covered with linoleum for many years, causing significant patches of visible black mould. The floor also had a loose tile (which I promptly reset to mitigate the potential tripping hazard) and splashes of paint due to a lack of precaution while the house was being renovated. Needless to say, the floor needed a lot of work.
Before beginning the cleaning I made sure to vacuum up all of the loose debris from the floor. I then applied Tile Doctor Remove & Go to the tiles, left it to dwell for a short period, and then agitated the area with a black stripping pad, adding water to aid the process. This helped to break down any old and ineffectual sealer, along with the paint splashes marking the tiles, leaving a much cleaner and more refined appearance.
I followed this up with Tile Doctor Grout Clean-Up to eliminate the odd speck of cement and grout haze dating back to when the floor was first installed; Gout Clean-up has an acid base so it’s not advised to leave it on the tiles for too long, consequently as soon as I was happy it had done the job I rinsed it off with water and give the floor a thorough wash down.
I used a wet-vacuum machine to extract as much water as possible and gave the floor a once over with steam cleaner which improves the evaporation of any remaining moisture by heating up the tiles.
After completing the cleaning process, I left the house to allow time for the floor to dry completely. Upon my return, I conducted a damp test which showed the floor needed to dry further before sealing so I left an industrial fan in place for a couple of hours to help speed things up.
Once I was satisfied that the floor was dry enough to take the sealant, I sealed the floor using Tile Doctor Colour Grow which is an interesting product that will not only provide durable stain protection but also improves the natural colours of the tile.
While the floor required a lot of time and work to restore, I think you will agree the results were certainly worth waiting for.
Phil Vissian
Northamptonshire Tile Doctor
 Tile Doctor Ltd
These pictures of a Victorian Tiled Hallway are from a property in Canterbury that was once a nursing home and was now being renovated to become a children’s home. The building was being gutted and extended at the same time and when the carpet was pulled up in the hallway, they were surprised to find a relatively intact Victorian tiled floor underneath.
Whilst they thought it bizarre that anyone would want to cover up such an attractive floor the carpet had protected it over the years. They realized it would make a marvellous feature at the entrance to the property, but professional restoration would be needed to do it justice. After a bit of research, they came across Tile Doctor and got in touch.
Canterbury comes under my North Kent designation, so I went to visit the property and survey the floor and quote for doing the restoration. There were a few missing and loose tiles that would need replacing and refixing also there was a lot of ingrained dirt so a deep clean and application of a new sealer would be required. I gave them a price for the work which they readily accepted, and we arranged a suitable time to carry out the work. Subject to the building schedule I had calculated the floor would take three days to restore.
On the first day I set about replacing and re-fixing the missing, broken, and loose tiles. This is delicate work as you need to extract the old tile without disturbing its neighbours and then clean up the area ready for its replacement. Being a Tile Doctor I keep a selection of stock tiles for repairs, some are reclaimed, and some are replica. Also, there are several companies still making Victorian style tiles so I can usually source what I need.
After the individual missing and broken tiles had been replaced and the adhesive had set, it was then a matter of renovating the floor as a whole. The tiles were covered in a thick layer of carpet adhesive which needed a combination of specialist tools and products to remove. First, a liberal layer of Tile Doctor Remove and Go was applied and left to dwell for thirty minutes. Next, Tile Doctor Pro-Clean was added and scrubbed in with a black pad.
This process softened the adhesive sufficiently in readiness for the next stage which involves using a set of diamond burnishing pads on a weighted buffing machine. Several applications were needed, each time with a successively finer grade of diamond pad and rinsing off the slurry in between. The tiles were first milled using a very coarse 50-grit pad, followed by 100, 200 and finally burnished with a 400-grit burnishing pads. This removed all the adhesive and dirt in the tiles, which was cleaned up using the wet vacuum.
Old Victorian floors like this do not have a damp proof membrane installed under the floor, and with a lot of water being used in the cleaning process I was concerned White efflorescence salts could appear later as the floor dried. To counter this, I gave the floor an acid wash using Tile Doctor Acid Gel to counter and dissolve the salts, it also gives the tiles another clean and will remove any old grout smears further improving the appearance of the tiles. Once done the floor was left to dry overnight.
On my return I tested the floor was dry by taking several moisture readings around the floor with a damp meter. Applying sealer to a damp floor is never advised and can lead to clouding and an unwanted finish.
Happy that the tiles were dry, a single coat of Tile Doctor Colour Grow sealer was applied. This is an impregnating sealer with a colour enhancing component to ‘lift’ the stronger colours of the floor. Colour Grow however does leave a matt appearance and as the client had asked for a shiny finish it was topped up with five coats of Tile Doctor Seal and Go. This is a compatible topical sealer which added a mid to high sheen.
By the end of the third day the Victorian floor looked brand new, and I received the following feedback from the client. Its rare to receive feedback from commercial customers so they were clearly overwhelmed with the transformation.
Did not think this glued covered bad old floor could look sooooo good Fabulous Fantastic job Looks Amazing Thank you
For aftercare I recommend the use of Tile Doctor Neutral Cleaner which isn’t as harsh as many of the products you find in supermarket. Stronger products can actually strip off the sealer over time leaving it vulnerable to dirt and detracting from its appearance.
Graham Davis
North Kent Tile Doctor
Find the right local pro for your project

 Beacon Construction Group
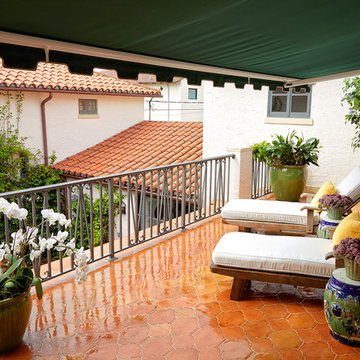
Inspiration for a mediterranean metal railing balcony remodel in Miami with an awning

Inspiration for a transitional light wood floor kitchen remodel in Houston with an undermount sink, recessed-panel cabinets, gray cabinets, white backsplash, subway tile backsplash, stainless steel appliances, an island and white countertops

 KW Designs
Chipper Hatter Photography
Inspiration for a mid-sized contemporary light wood floor kitchen remodel in San Diego
Inspiration for a mid-sized contemporary light wood floor kitchen remodel in San Diego
Sponsored
Sunbury, OH

J.Holderby - Renovations
Franklin County's Leading General Contractors - 2X Best of Houzz!
 Garrison Foundry Architecture + Decor
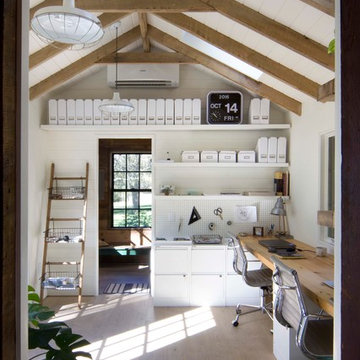
Home office - country built-in desk light wood floor home office idea in New York with white walls
 Tile Doctor Ltd
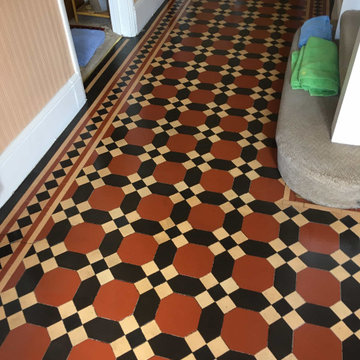
This Victorian floor in Twickenham, Middlesex was in good physical condition for its age but needed a good deep clean. Our customer had informed us that they had never cleaned or sealed the floor in the sixteen years that they had lived there so it was well overdue.
I went over to survey the floor and completed a test clean on a small section of tiling to see which products/techniques would work best. I like to do this as it demonstrates to the client what can be done, and it allows me to come up with an accurate price for doing the work.
As you can see from the pictures, there was quite a difference in the test patch compared to the rest of the floor. Years of foot traffic from the street had taken its’ toll and the floor was very dirty. Luckily, the floor was in very good condition and had not worn too badly.
Once they had seen the test patch, they were confident that it would be worth go ahead with my quote. It would ensure that the period feature was retained for many years to come. The colours on the floor were quite faded so it would be nice to get it restored.
I started the cleaning process by first taping up the surrounding skirting boards and doors to ensure they were protected from potential splashing. Cleaning involved spraying the Victorian tiles with a strong dilution of Tile Doctor Pro-Clean which is a dedicated Tile and Grout cleaning product. This was left to soak in for about ten minutes and then scrubbed in using a black pad fitted to a heavy-duty rotary scrubber.
This gives the floor a good mechanical scrub and works wonders releasing the ground-in dirt and soil from the tiles. The strong dilution of Pro-Clean will also remove any remaining sealers from the tile, however after sixteen years I doubted there would much trace of sealer left. Once done the floor was rinsed with water and all the soils removed with a wet vacuum.
Following the initial clean the colours were already much stronger. Next step however was to improve on that by giving the floor an acid rinse using Tile Doctor Grout Clean-Up. This removes mineral deposits and generally brightens up the appearance of the tile. After another round of scrubbing the floor was rinsed with our high-pressure washer and then vacuumed, extracting all of the dirty water and dirt away in one go. The floor was looking a lot better and was left to dry overnight.
After allowing the floor to dry overnight, we returned the next day to seal the floor. First, checking the floor was dry using the damp meter. Floors of this age can take a little longer to dry as there is no damp-proof membrane so it’s always worth checking as applying a sealer to damp tiles is not a good idea.
Once I was satisfied it was dry eight coats of Tile Doctor Seal and Go sheen finish sealer were applied. This takes a while to do as each coat needs to dry before applying the next. The sealer will protect the Victorian tiles for dirt and stains, it also enhanced the colours in the tile and will make it easier to keep the floor clean going forward.
My client was very pleased with the floor and mentioned that they should have called me in sooner! For aftercare cleaning I recommended Tile Doctor Neutral Clean which is an effective cleaner with a neutral pH, its designed for cleaning tiles without degrading the sealer.
Jonathan Oldham
South Middlesex Tile Doctor

 User
UserRead more: https://www.homepolish.com/journal/kelly-oxford-la-office-interior-design?p=hp-houzz
Photos by Bethany Nauert

 Ann Lowengart Interiors
The three-level Mediterranean revival home started as a 1930s summer cottage that expanded downward and upward over time. We used a clean, crisp white wall plaster with bronze hardware throughout the interiors to give the house continuity. A neutral color palette and minimalist furnishings create a sense of calm restraint. Subtle and nuanced textures and variations in tints add visual interest. The stair risers from the living room to the primary suite are hand-painted terra cotta tile in gray and off-white. We used the same tile resource in the kitchen for the island's toe kick.
 TaylorPro Design and Remodeling, Inc.
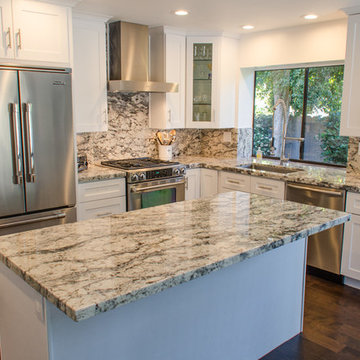
"We decided to do a complete remodel of our kitchen after the pipe burst in our kitchen. We picked Taylor Pro to work with after getting extensive quotes and looked at many reviews. Easy to work with, always on time, and cleaned up everyday. The TaylorPro crew installed everything from new cabinets and hardware, plumbing, appliances, and contracted painters, granite installer, and flooring for us. They raised our kitchen ceiling by six inches, installed new lighting, and fixed the area of damaged wall in the kitchen and dining room. Any issues we ran into during this long process were fixed immediately by Kerry or his team. The crew was friendly, punctual and cleaned up on a daily basis as well as an in-depth cleaning at the end of the remodel. We got our up dream kitchen and are so happy the way the dining room and family room look with new paint, lighting fixtures, and flooring. Although it was tough to be without a kitchen, the end result was more than worth it!"
~ Adam L, Client
Cabinets by Kitchen Emporium, Jenn-Air appliances, hardwood floors by Joe's Hardwood, granite backsplash, under cabinet lighting, rectangular sink, corner cabinet, glass cabinet, lazy susan.
Photo by: Kerry W. Taylor
 T. McIntyre Associates, Inc.
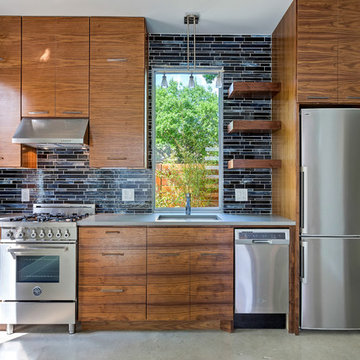
Inspiration for a contemporary single-wall kitchen remodel in Austin with an undermount sink, flat-panel cabinets, medium tone wood cabinets, black backsplash and stainless steel appliances





 Charles Douglas
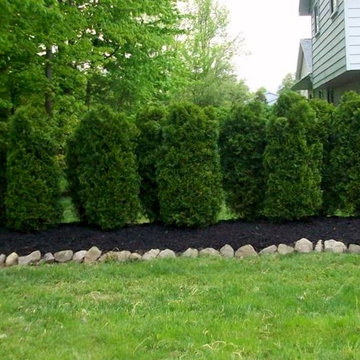
The beds along the side of the house needed de-weeding and mulching. The hedges which serve as a privacy border were shaped to provide a more uniform appearance.

 Barten Bros. Junk & Clean Up
Shed demolition and disposal can be tricky and dangerous if you don't have a good understanding of how it was built and how it will come down. We are a full service company and both demolish the structure and haul it away for you in one step. We focus on keeping the job site safe and clean during every step of the process. We also offer peace of mind knowing we are experienced, licensed and insured.
Sponsored
Columbus, OH

Structural Remodeling
Franklin County's Heavy Timber Specialists | Best of Houzz 2020!
 Barten Bros. Junk & Clean Up
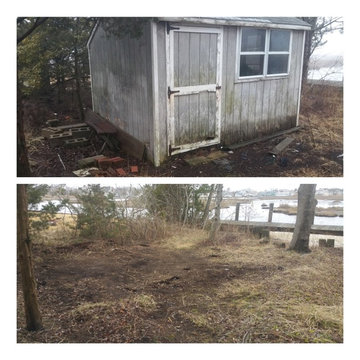
Shed demolition and disposal can be tricky and dangerous if you don't have a good understanding of how it was built and how it will come down. We are a full service company and both demolish the structure and haul it away for you in one step. We focus on keeping the job site safe and clean during every step of the process. We also offer peace of mind knowing we are experienced, licensed and insured.
 Charles Douglas
Removal of dead organic material from over winter, pruning of trees, shrubs and ornamentals and mulching the property for a fresh look.
Photo of a mid-sized traditional shade backyard landscaping in Cleveland for summer.
Photo of a mid-sized traditional shade backyard landscaping in Cleveland for summer.
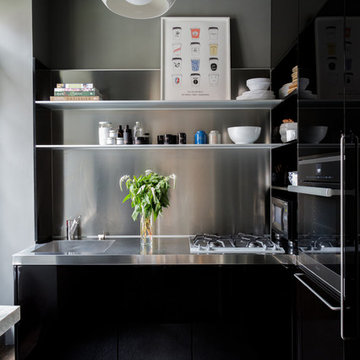
 Lucy Harris Studio
Notable design elements include: Roll and Hill Bluff City pendant.
Photography: Francesco Bertocci
Small trendy dark wood floor kitchen photo in New York with an integrated sink, flat-panel cabinets, black cabinets, stainless steel countertops, metallic backsplash and no island
Small trendy dark wood floor kitchen photo in New York with an integrated sink, flat-panel cabinets, black cabinets, stainless steel countertops, metallic backsplash and no island
18