
Search results for "Cloud based solutions" in Home Design Ideas
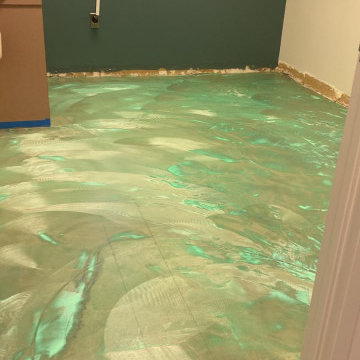
 MD Flooring Solutions, LLC
- To move furniture: 12x huge and heavy pieces of furniture out and back in from Main floor: break room, one bathroom, 6 exam rooms, lab room
To move Appliances out and back in: Fridge and mini fridge
- Take Up, Remove & Haul Away 12x12 Glued Down VCT (Vinyl Composition Tile) from floors from Main floor: break room, one bathroom, 6 exam rooms, lab room - 849.72 sqft
- Take Up, Remove & Haul Away vinyl cove base baseboards from Main floor: kitchen, one bathroom, 6 exam rooms, kitchenette - 849.72 sqft
- To Install glued down Luxury Vinyl Planks on floors on Main floor: break room, one bathroom, 6 exam rooms, lab room - 849.72 sqft
- To install Glued Down 4" Cove Base Baseboards on Main floor: break room, one bathroom, 6 exam rooms, lab room (292 LNFT)
- To install 6x black rubber T- moldings transition pieces - 3.5 LFT each
 Custom Surface Solutions
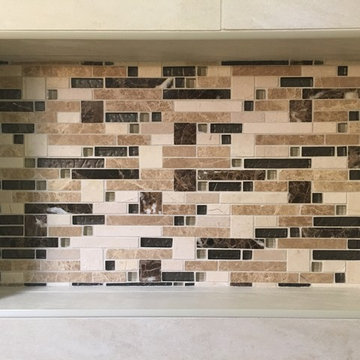
Custom Surface Solutions (www.css-tile.com) - Owner Craig Thompson (512) 430-1215. This project shows a complete remodel with before and after pictures including tub-to-shower conversion using 12" x 24" Porcelain wall tile, linear mosaic accent tile, shower niche, Alaska White granite shelf and step, pebble shower floor tile, and Delta Multi-Setting H2Okinetic In2ition Showerhead and Hand Shower. Bathroom floor tile is same as 12" x 24" Porcelain wall tile with tile floor based capped with Schluter Systems Jolly profile edge. Custom Factory Builder Store vanity with Alaska White granite counter top and Delta Windemere wide spread faucet.
 Kitchen Solvers of Coastal Connecticut
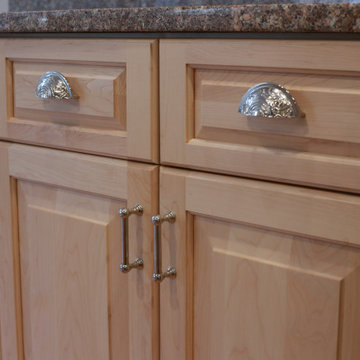
We helped our clients make some gorgeous upgrades to the hub of their daily lives – their kitchen. They wanted a more modern, lighter finish, and enhanced visual interest. We met those goals with these gorgeous clear-coated maple wood cabinets. The varied heights and depths of the wall cabinets create an inviting visual complexity, which is emphasized by the crown moldings. The glass-front feature cabinet really draws the eye, as the sparkling obscured glass complements the beauty and natural brightness of their space. All of this combines to bring a comforting, airy spaciousness and interesting feel to the whole kitchen. The wall cabinets are new frameless cabinets, and the base cabinets are re-used, re-surfaced with a veneer of the same clear-coat-conversion-varnished maple wood as the doors. We added rollout storage drawers to the base cabinets to make it easier to get to their items. These clients made fantastic upgrade choices to maximize beauty and function for a more comfortable and satisfying daily life in and around their kitchen.
Find the right local pro for your project
 Drury Design
THE SETUP
Multiple ovens, multiple workspaces, multiple sinks – when you think about it, non-jewish kitchens have been adapting the criteria of kosher kitchens for years.
Gladys’ clients in West Rogers Park are Orthodox Jewish. The house they bought already had a kosher kitchen – it just wasn’t done that well. It needed some more things to be duplicated for the dairy side and the meat side. Plus, it was dark and the configuration wasn’t very conducive for a family of eight.
It was time for a remodel.
Design Objectives
Improve kosher kitchen
Add more storage in the island
Better lighting
More open, lighter feel
Change the wood floor in the kitchen to tile
THE REMODEL
Design Challenges
- We had originally planned on removing a wing wall by the breakfast area. During demolition, we learned it contained a support beam.
- The kitchen is a substantial size, but having two sinks, dishwashers, and ovens presented a challenge – how do we fit it all in and make it flow with the storage still accessible near the work areas?
Where do you stop the materials for the new space? - -- The right tile, paint, lighting, etc. would be needed to make the remodeled area cohesive with the rest of the main floor.
- An existing column limited cabinet options and thus, storage capacity. Could we conceal it without disrupting the cabinetry flow?
Design Solutions
- We had to keep the wing wall, but decided to continue the tile on the sides of the cabinets and maintain the height of the tile to line up with the rest of the backsplash. This actually presented a very nice and cohesive look, especially since the opposite side has a wing wall to the left of the refrigerator.
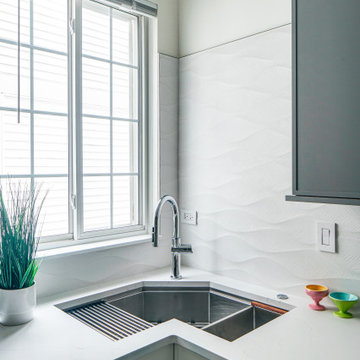
- We used “L-shaped” corner sinks instead of the rectangular ones set on an angle. This gave us more of the legs of the triangles versus the hypotenuse, which allowed for the two dishwashers, and the pullout utensil canisters and spice pullouts while still keeping the 3-drawer cabinets on either side of the range (by the sinks). The old island had the recess for stools which the family never used. By extending the width of the island 6” and utilizing this leg space, we were able to fit 18”-deep cabinets on this side – adding lots of accessible storage. The family can now work simultaneously on the dairy side (the side with the fridge) and the meat side (opposite) without getting in each other’s way. We separated the cooking by using the range oven for the meat and a built-in microwave in the base cabinet. The wall oven with built-in microwave on top is for dairy.
- Corner sinks opened up the middle area for a wider range – we went from a 30” to a 36”. Removing all the wall cabinets (on the range wall) made a big difference. That opened up the entire space while adding some visual impact. (Not pictured: We also made the cabinets directly opposite the range wall tall and removed the countertop, resulting in more room for rollouts and even more storage!) The kitchen now has more storage than it did before.
- We ended up painting the ceiling of the kitchen into the hallway that leads to the foyer. The living and dining rooms were separated by a soffit, so that became a natural boundary. We kept the tile in the kitchen by stopping it short of the hallway and lining it up with the pantry wall. This creates a border between the breakfast area and family room. The rest of the existing wood floors were refinished to refresh and make the hue darker. We also painted a dark accent wall and carried it into the breakfast area to make the rooms look deeper.
- The in-the-way column housed plumbing and couldn’t be moved. We still built cabinets in that spot – we just had to build a chase inside it to conceal the pipes. There was still plenty of room for new storage. We also took the cabinets all the way to the ceiling. The continuous tall cabinets added a functional elegance to the space.
THE RENEWED SPACE
The client’s long-awaited dream of a better kosher kitchen has finally been achieved, beautifully combining enhanced storage solutions with adherence to the family’s orthodox dietary laws. The kitchen’s standout feature, an expanded island, now offers a spacious and efficient workspace. This allows several family members to cook together comfortably, without the inconvenience of bumping into each other, ensuring a harmonious and productive cooking environment.
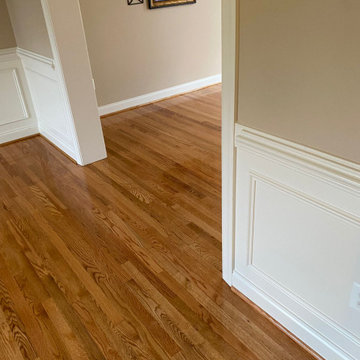 MD Flooring Solutions, LLC
- Take Up, Remove & Haul Away Carpet from First level: family room, dining room - 370.54 sqft
- To install underlayment on First level: family room, dining room - 370.54 sqft
- To install 2-1/4" wide Unfinished Nailed Down Hardwood Floors on First level: family room, dining room - 370.54 sqft
Stain: Summer Oak, Water-Based polyurethane, Finish: Satin
- Sand and refinish 2-1/4" red oak hardwood floors on First level: family room, dining room.
- To Install Shoe Molding
- To move furniture.
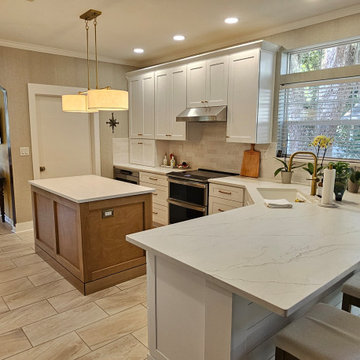
 Kitchen Solvers of Jacksonville
This coastal cottage on Amelia Island was in need of an update. The cabinets had 20-year-old foil covered doors that was peeling off, making it not a candidate for painting or refacing. The customer wanted a clean, fresh look within a budget. We came up with a perfect solution for them. We replaced the microwave with a hood that we vented to the outside and opted for a microwave drawer in the base cabinets. The island was made larger and in a contrasting sandstone stain, including a pull out for trash instead of a free-standing trash can. The two-level counter was cut down to one layer and we added ship lap to the front since we were working to not have to redo all the wallpaper in the kitchen. A coffee service area was added with glass front cabinet. The taller gap leaves room for taller appliances and the ability to fill the water tanks. The pantry was fitted with adjustable height rollouts on a pilaster system. We added an appliance garage on the counter, over the microwave for the toaster. The customers could not be happier with the result. Finally, shaker style crown molding was added to complement the shaker doors and not compete with the existing crown molding at the ceiling.
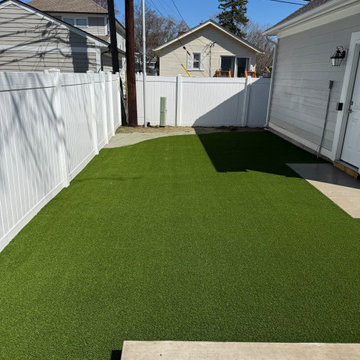
 Grow Garden & Landscape Design
Completed artificial turf installation in Royal Oak, featuring lush, clean, pet-friendly synthetic grass with optimized drainage and odor control.
Photo of a modern landscaping in Detroit.
Photo of a modern landscaping in Detroit.
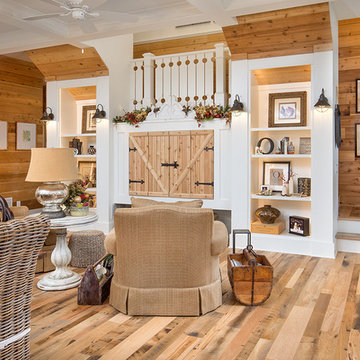

 Kylie M Interiors
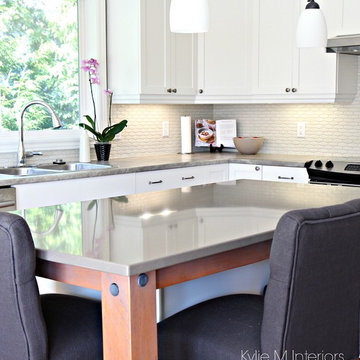
This photo gives a closer view of the gray quartz, Cloud White cabinets and cream coloured hexagon subway tile style backsplash. The island countertop is supported by reclaimed wood legs with a gray glaze wash on them. The perimeter counertops are Soapstone Sequoia by Formica - a budget friendly solution.
 MD Flooring Solutions, LLC
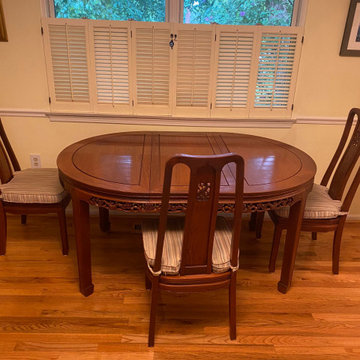
Stain: Colonial Maple
Final coat of polyurethane: Oil-based
Finish: Semi-Gloss.
- To move furniture
- Sand and refinish Prefinished hardwood floors
- To remove Bevels
- To move Fridge and electric stove & sand and refinish the area underneath
- Sand and refinish 8x steps
- To Water Pop floors & Steps
- To Install Unfinished Quarter Round and stain to match
 MD Flooring Solutions, LLC
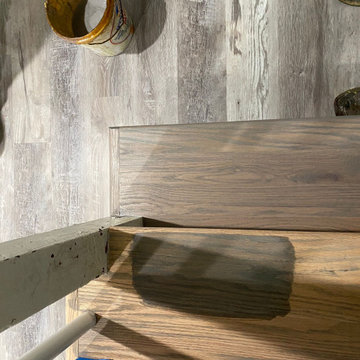
Basement steps project:
1x coat of Minwax or DuraSeal Stain: Stain to best match LVP in basement —1 color included
1x coat of ZINSSER®SealCoat™ Universal Sanding Sealer.
1x coat of Water-Based Oil-Modified polyurethane by default.
1x final coat of SamSeal or Masterline Oil-based polyurethane.
Finish: to best match LVP in basement
- To sand and refinish Unfinished hardwood 11x Treads only
 Custom Surface Solutions
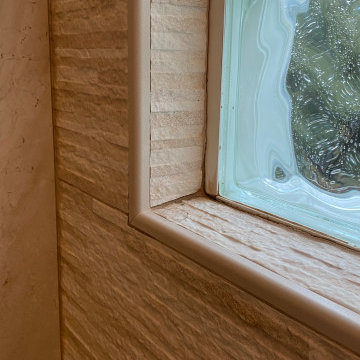
Custom Surface Solutions (www.css-tile.com) - Owner Craig Thompson (512) 966-8296. This project shows a complete master bathroom remodel with before and after pictures including large 9' 6" shower replacing tub / shower combo with dual shower heads, body spray, rail mounted hand-held shower head and 3-shelf shower niches. Titanium granite seat, curb cap with flat pebble shower floor and linear drains. 12" x 48" porcelain tile with aligned layout pattern on shower end walls and 12" x 24" textured tile on back wall. Dual glass doors with center glass curb-to-ceiling. 12" x 8" bathroom floor with matching tile wall base. Titanium granite vanity countertop and backsplash.
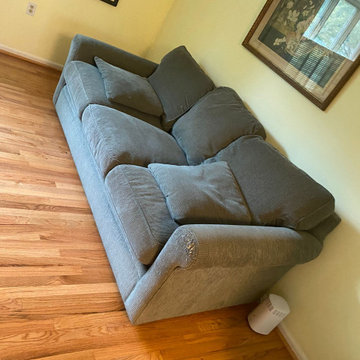 MD Flooring Solutions, LLC
Stain: Colonial Maple
Final coat of polyurethane: Oil-based
Finish: Semi-Gloss.
- To move furniture
- Sand and refinish Prefinished hardwood floors
- To remove Bevels
- To move Fridge and electric stove & sand and refinish the area underneath
- Sand and refinish 8x steps
- To Water Pop floors & Steps
- To Install Unfinished Quarter Round and stain to match
 Custom Storage Solutions
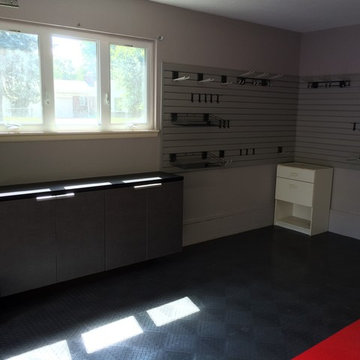
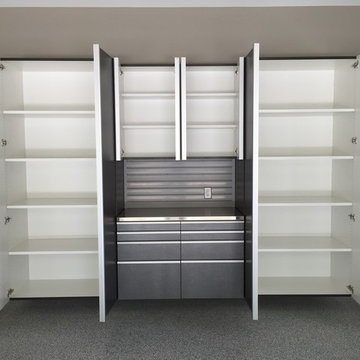
This garage had a badly damaged floor due to the harsh Ohio winters. Garage floor was cleaned and a gray PVC floor was installed with a red O in the center. We also added slatwall storage, some tall cabinets, upper cabinets, a base and a black countertop.
 NanaWall
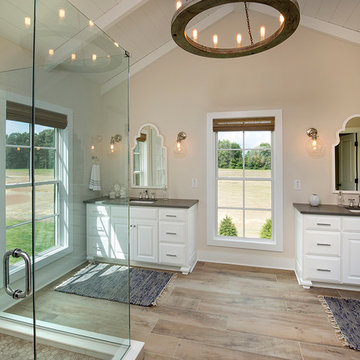
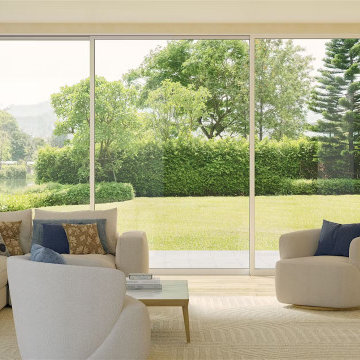
Custom-Built Architectural Solution with Limitless Flexibility
As a custom-built architectural solution, NW MultiSlide 630 offers the unique flexibility option of multidirectional panels for those who seek ultimate versatility. This allows the user to open at the left or the right of the system based on daily needs.
 Custom Surface Solutions
Custom Surface Solutions (www.css-tile.com) - Owner Craig Thompson (512) 966-8296. This project shows a complete master bathroom remodel with before and after pictures including large 9' 6" shower replacing tub / shower combo with dual shower heads, body spray, rail mounted hand-held shower head and 3-shelf shower niches. Titanium granite seat, curb cap with flat pebble shower floor and linear drains. 12" x 48" porcelain tile with aligned layout pattern on shower end walls and 12" x 24" textured tile on back wall. Dual glass doors with center glass curb-to-ceiling. 12" x 8" bathroom floor with matching tile wall base. Titanium granite vanity countertop and backsplash.
 Custom Storage Solutions
New garage makeover with one of our newest colors, pewter. Custom garage cabinets are 8 foot tall with one inch thick shelves made to support very heavy items. Aluminum handles offer a contemporary look, with our stainless steel tops. Drawers with full drawer runners, slatwall storage and epoxy flooring with a full broadcast and two coats of uv resistant clear. Designed and installed by Shawn Leach of Custom Storage Solutions.
 Custom Surface Solutions
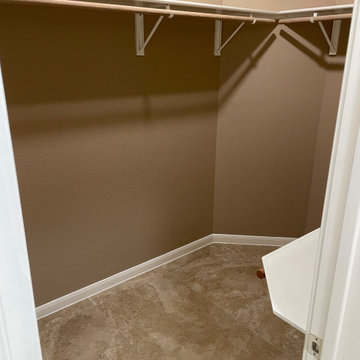
Custom Surface Solutions (www.css-tile.com) - Owner Craig Thompson (512) 966-8296. This project shows an master bath and bedroom remodel moving shower to tub area and converting shower to walki-n closet, new frameless vanities, LED mirrors, electronic toilet, and miseno plumbing fixtures and sinks.
Shower is 65 x 35 using 12 x 24 porcelain travertine wall tile installed horizontally with aligned tiled and is accented with 9' x 18" herringbone glass accent stripe on the back wall. Walls and shower box are trimmed with Schluter Systems Jolly brushed nickle profile edging. Shower floor is white flat pebble tile. Shower storage consists of a custom 3-shelf shower box with herringbone glass accent. Shelving consists of two Schluter Systems Shelf-N shelves and two Schluter Systems Shelf-E corner shelves.
Bathroom floor is 24 x 24 porcelain travvertine installed using aligned joint pattern. 3 1/2" floor tile wall base with Schluter Jolly brushed nickel profile edge also installed.
Vanity cabinets are Dura Supreme with white gloss finish and soft-close drawers. A matching 30" x 12" over toilet cabint was installed plus a Endura electronic toilet.
Plumbing consists of Misenobrushed nickel shower system with rain shower head and sliding hand-held. Vanity plumbing consists of Miseno brushed nickel single handle faucets and undermount sinks.
Vanity Mirrors are Miseno LED 52 x 36 and 32 x 32.
24" barn door was installed at the bathroom entry and bedroom flooring is 7 x 24 LVP.
 Custom Storage Solutions
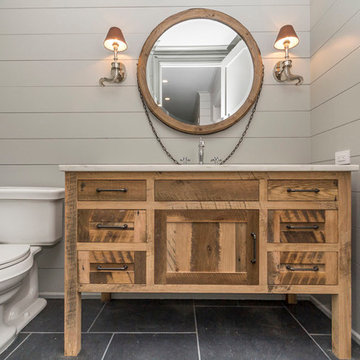
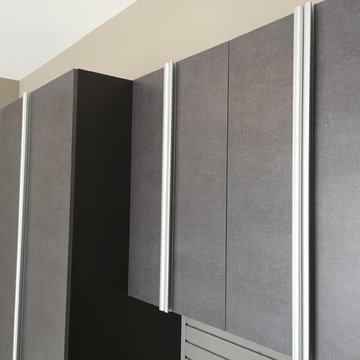
New garage makeover with one of our newest colors, pewter. Custom garage cabinets are 8 foot tall with one inch thick shelves made to support very heavy items. Aluminum handles offer a contemporary look, with our stainless steel tops. Drawers with full drawer runners, slatwall storage and epoxy flooring with a full broadcast and two coats of uv resistant clear. Designed and installed by Shawn Leach of Custom Storage Solutions.
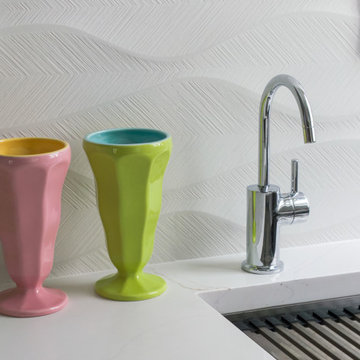 Drury Design
THE SETUP
Multiple ovens, multiple workspaces, multiple sinks – when you think about it, non-jewish kitchens have been adapting the criteria of kosher kitchens for years.
Gladys’ clients in West Rogers Park are Orthodox Jewish. The house they bought already had a kosher kitchen – it just wasn’t done that well. It needed some more things to be duplicated for the dairy side and the meat side. Plus, it was dark and the configuration wasn’t very conducive for a family of eight.
It was time for a remodel.
Design Objectives
Improve kosher kitchen
Add more storage in the island
Better lighting
More open, lighter feel
Change the wood floor in the kitchen to tile
THE REMODEL
Design Challenges
- We had originally planned on removing a wing wall by the breakfast area. During demolition, we learned it contained a support beam.
- The kitchen is a substantial size, but having two sinks, dishwashers, and ovens presented a challenge – how do we fit it all in and make it flow with the storage still accessible near the work areas?
Where do you stop the materials for the new space? - -- The right tile, paint, lighting, etc. would be needed to make the remodeled area cohesive with the rest of the main floor.
- An existing column limited cabinet options and thus, storage capacity. Could we conceal it without disrupting the cabinetry flow?
Design Solutions
- We had to keep the wing wall, but decided to continue the tile on the sides of the cabinets and maintain the height of the tile to line up with the rest of the backsplash. This actually presented a very nice and cohesive look, especially since the opposite side has a wing wall to the left of the refrigerator.
- We used “L-shaped” corner sinks instead of the rectangular ones set on an angle. This gave us more of the legs of the triangles versus the hypotenuse, which allowed for the two dishwashers, and the pullout utensil canisters and spice pullouts while still keeping the 3-drawer cabinets on either side of the range (by the sinks). The old island had the recess for stools which the family never used. By extending the width of the island 6” and utilizing this leg space, we were able to fit 18”-deep cabinets on this side – adding lots of accessible storage. The family can now work simultaneously on the dairy side (the side with the fridge) and the meat side (opposite) without getting in each other’s way. We separated the cooking by using the range oven for the meat and a built-in microwave in the base cabinet. The wall oven with built-in microwave on top is for dairy.
- Corner sinks opened up the middle area for a wider range – we went from a 30” to a 36”. Removing all the wall cabinets (on the range wall) made a big difference. That opened up the entire space while adding some visual impact. (Not pictured: We also made the cabinets directly opposite the range wall tall and removed the countertop, resulting in more room for rollouts and even more storage!) The kitchen now has more storage than it did before.
- We ended up painting the ceiling of the kitchen into the hallway that leads to the foyer. The living and dining rooms were separated by a soffit, so that became a natural boundary. We kept the tile in the kitchen by stopping it short of the hallway and lining it up with the pantry wall. This creates a border between the breakfast area and family room. The rest of the existing wood floors were refinished to refresh and make the hue darker. We also painted a dark accent wall and carried it into the breakfast area to make the rooms look deeper.
- The in-the-way column housed plumbing and couldn’t be moved. We still built cabinets in that spot – we just had to build a chase inside it to conceal the pipes. There was still plenty of room for new storage. We also took the cabinets all the way to the ceiling. The continuous tall cabinets added a functional elegance to the space.
THE RENEWED SPACE
The client’s long-awaited dream of a better kosher kitchen has finally been achieved, beautifully combining enhanced storage solutions with adherence to the family’s orthodox dietary laws. The kitchen’s standout feature, an expanded island, now offers a spacious and efficient workspace. This allows several family members to cook together comfortably, without the inconvenience of bumping into each other, ensuring a harmonious and productive cooking environment.
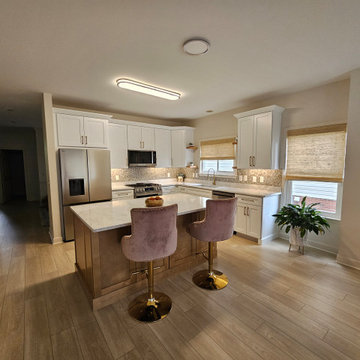
 Kitchen Solvers of Spring Hill
Sometimes the best solution isn't the one you originally planned.
This homeowner wanted to add an island and stacked cabinets to gain more storage in her small kitchen. After months of waiting for another contractor to provide a quote, she turned to a friend for a recommendation—and that's how she found Kitchen Solvers.
After evaluating the space, we recommended a different approach that would solve more of her challenges while maximizing her investment. We installed new 42" upper cabinets for additional storage, refaced the base cabinets to match, created a custom refrigerator surround, and added a beautiful wood island that brings warmth and character to the space.
To complete the transformation, we paired Matterhorn Dolomite countertops with the existing mosaic backsplash, saving the homeowner money by incorporating elements she already had. We also installed a new flat-top range, added roll-out trays for improved organization, and finished the space with floating shelves around the window for a warm, custom touch.
The result is a kitchen that feels larger, functions better, and has become a space she loves to cook, gather, and entertain in. Best of all, the entire transformation was completed in just a few weeks!
97