
Search results for "Cloud based solutions" in Home Design Ideas

 360 Designs Kitchen and Bath
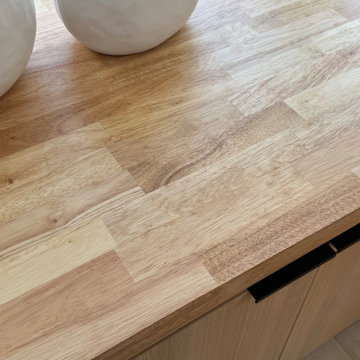
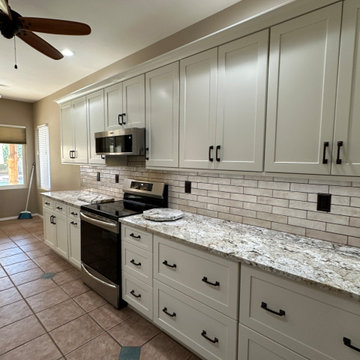
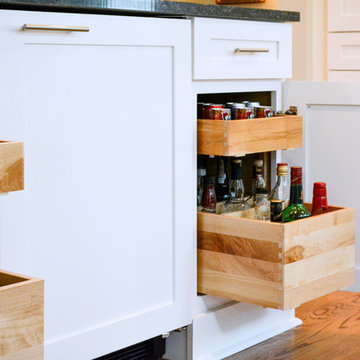
Challenge: Increase storage capacity within the existing space.
Solution: We achieved this by replacing standard bases with drawer bases and installing taller wall cabinets.
 MD Flooring Solutions, LLC
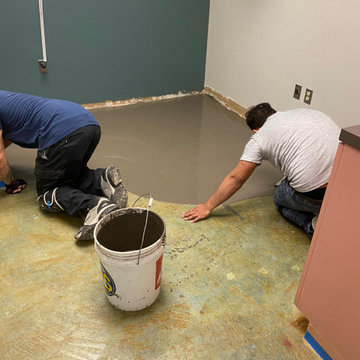
- To move furniture: 12x huge and heavy pieces of furniture out and back in from Main floor: break room, one bathroom, 6 exam rooms, lab room
To move Appliances out and back in: Fridge and mini fridge
- Take Up, Remove & Haul Away 12x12 Glued Down VCT (Vinyl Composition Tile) from floors from Main floor: break room, one bathroom, 6 exam rooms, lab room - 849.72 sqft
- Take Up, Remove & Haul Away vinyl cove base baseboards from Main floor: kitchen, one bathroom, 6 exam rooms, kitchenette - 849.72 sqft
- To Install glued down Luxury Vinyl Planks on floors on Main floor: break room, one bathroom, 6 exam rooms, lab room - 849.72 sqft
- To install Glued Down 4" Cove Base Baseboards on Main floor: break room, one bathroom, 6 exam rooms, lab room (292 LNFT)
- To install 6x black rubber T- moldings transition pieces - 3.5 LFT each
Find the right local pro for your project
 Kustom Home Design
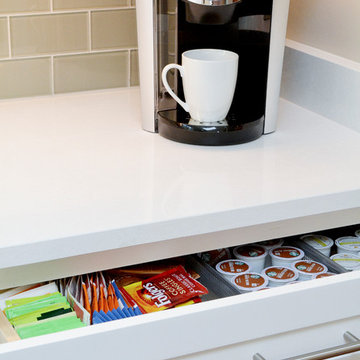
This amazing renovation focused on solving a series of problems that a previous kitchen expansion had created. By rearranging the appliance placement, updating the cabinetry, designing all new storage solutions and maximizing the amazing outdoor views; we cured the spit personality disorder plaguing the existing kitchen. The home now has a beautifully redesigned kitchen and living space perfect for entertaining, relaxing and enjoying the outside views. Vaulted ceilings with bright skylights, reflective glass wall tiles, sleek sophisticated Cambria quartz counter tops, fingerprint-free faucet, multi-functional Prolific kitchen sink by Kohler, stainless steel appliances, creative storage solutions, all new lighting and timeless shaker cabinets by Wellborn lend to the now bright, open, vivacious and flawless function of this newly renovated galley style kitchen. White base cabinets along the outside walls contrast perfectly with the dark grey island cabinets. Linear satin nickel door and drawer pulls coordinate with the stainless steel appliances and sink. An eclectic blend of vintage and modern furnishings, artwork and rugs create a comfortable balance that feels and looks timeless. Breathtaking backyard views are artfully framed by new Pella windows and doors with integral blinds between the glass. Calm, inviting neutral tones provide the perfect backdrop for this refined design.
Photos by: Kimberly Kerl
 Tile Doctor Ltd
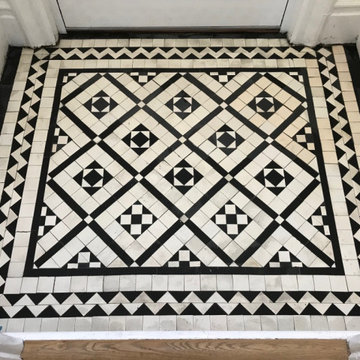
I visited this property in Lytham St Annes to survey a small Victorian tiled lobby which was in a sorry state. The client was keen to have it restored and wanted to know if it was possible. I discussed with them what we could do, and I gave them a quote for the work. Although it was only a small lobby, I could see the job could be quite involved and would be subject to the replacement tiles which I was confident we could source.
This is one of those jobs you wish you hadn’t started as there were a lot more tiles to remove than anticipated and it mushroomed into replacing half the floor. Once the area was cleaned up, I applied a self-levelling compound to bring up the height of the base.
Once the levelling compound had set, I was able relay the Victorian tiles using a combination of original tiles and replacements which had to be cut to shape. Cutting tiles to fit is quite intricate and time-consuming work especially when you consider new tiles are all metric in size and a 2mm difference becomes very telling after a foot or so! My solution was to use 150 mm tiles which are the biggest the stockist offers and then cut them down on my Rubi cutter using a template made from the original tiles. This the only way I could get it to look tight, it takes longer but it makes for a thorough job and a better finish.
I always use flexible floor adhesive when laying tiles, my preference is Keraquick Grey from Mapei. There are other brands off course but this one is quite easy to get hold of and as the term grouting is a relatively modern invention (in the past it was called pointing ) I find it looks right with this type of tile and similar to the screed cement the Victorians used in the past.
After the tiling had been completed, I left the floor to cure and fully dry and returned at a later date to give the floor an overall clean. For this I ran a coarse 200-grit diamond floor pad across the floor lubricated with water and used handheld diamond blocks for the edges where the pad can’t reach. The slurry was rinsed off with water and extracted with a wet vacuum.
With old floors like this, which don’t have a damp-proof membrane installed under the floor, efflorescence is always a concern and can lead to white salts appearing on the surface of the tile as moisture rises through the floor. To counter this, I finished cleaning the floor by scrubbing it with Tile Doctor Acid Gel. This was then rinsed off with water and the soil extracted using a wet vacuum.
The client was happy to seal the floor themselves (they wanted to save some money and it wasn’t a big area) so I supplied them with a bottle of Tile Doctor Colour Grow. I recommended this sealer as it will enhance the dark colours and being fully breathable it will cope with any moisture rising through the base. I recommended they apply two coats to start leaving time to allow the first coast to dry they could also then decide to leave it at that if they were happy with the finish.
Russell Taylor
Lancashire Tile Doctor
 Custom Storage Solutions
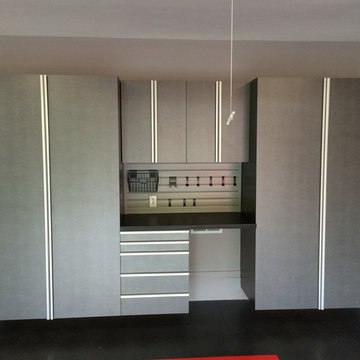
This garage had a badly damaged floor due to the harsh Ohio winters. Garage floor was cleaned and a gray PVC floor was installed with a red O in the center. We also added slatwall storage, some tall cabinets, upper cabinets, a base and a black countertop.
 Crown Point Cabinetry
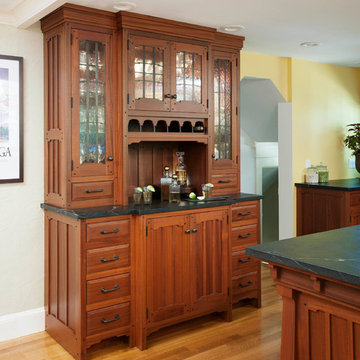
This Pasadena Arts & Crafts custom kitchen features stained cabinetry that blends seamlessly with the rest of the home. The designer paid close attention to every authentic detail while incorporating the needs of a functional kitchen. Design details include glass lead doors, cloud-lift detail on doors and end panel rails, Ebony square protruding pegs with pillow tops, drop stiles with inside corner radius on wall cabinets, an inclined routed foot detail on the base cabinet stiles, crown G & upper scribe molding that displays stepped surfaces w/ rounded edge detail, a wine rack with oil bronze tubes, and Pasadena Island brackets and posts! The kitchen features Sapele wood, Nutmeg stain, with Monterey & Pasadena door styles with Pasadena 5pc drawer fronts along with integrated Waterfall drawer fronts. Photo by Crown Point Cabinetry

Sponsored
Sunbury, OH

J.Holderby - Renovations
Franklin County's Leading General Contractors - 2X Best of Houzz!
 Innovate Building Solutions
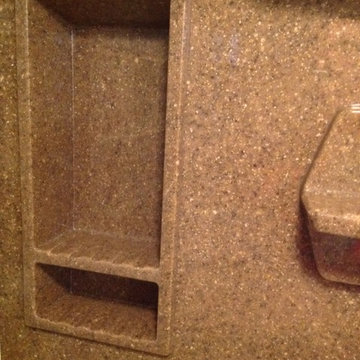
Solid surface soap and shampoo niche
Mid-sized elegant beige tile and stone slab doorless shower photo in Cleveland with beige walls
Mid-sized elegant beige tile and stone slab doorless shower photo in Cleveland with beige walls
 Kustom Home Design
This amazing renovation focused on solving a series of problems that a previous kitchen expansion had created. By rearranging the appliance placement, updating the cabinetry, designing all new storage solutions and maximizing the amazing outdoor views; we cured the spit personality disorder plaguing the existing kitchen. The home now has a beautifully redesigned kitchen and living space perfect for entertaining, relaxing and enjoying the outside views. Vaulted ceilings with bright skylights, reflective glass wall tiles, sleek sophisticated Cambria quartz counter tops, fingerprint-free faucet, multi-functional Prolific kitchen sink by Kohler, stainless steel appliances, creative storage solutions, all new lighting and timeless shaker cabinets by Wellborn lend to the now bright, open, vivacious and flawless function of this newly renovated galley style kitchen. White base cabinets along the outside walls contrast perfectly with the dark grey island cabinets. Linear satin nickel door and drawer pulls coordinate with the stainless steel appliances and sink. An eclectic blend of vintage and modern furnishings, artwork and rugs create a comfortable balance that feels and looks timeless. Breathtaking backyard views are artfully framed by new Pella windows and doors with integral blinds between the glass. Calm, inviting neutral tones provide the perfect backdrop for this refined design.
Photos by: Kimberly Kerl
 Toronto Bath Centre
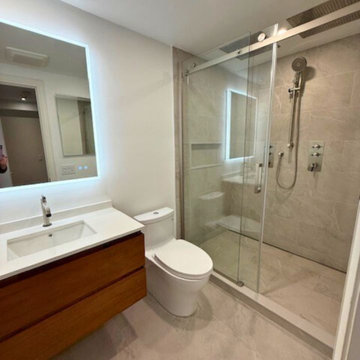
This guest bathroom renovation in the heart of Yorkville maximizes style and functionality in a compact space. The project features a Schluter Kerdi shower base with a Vario Linear drain for a sleek and efficient waterproofing solution. We installed a Tenzo Signature shower system with precision controls and a slide bar for a modern, spa-like experience.
To enhance luxury and comfort, we incorporated an Aquadesign recessed ceiling rain shower head, paired with a Fleurco glass shower door. Storage and lighting were addressed with a Fleurco Lune LED mirror and a Fleurco Luna recessed medicine cabinet, offering both elegance and utility. The bathroom is completed with a Toto toilet, known for its clean lines and reliable performance.
This project is a perfect example of a small bathroom remodel done right—balancing smart design choices with high-quality materials to elevate everyday living.
 Crown Point Cabinetry
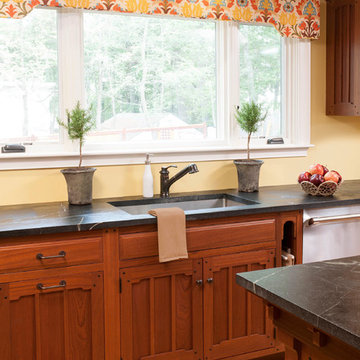
This Pasadena Arts & Crafts custom kitchen features stained cabinetry that blends seamlessly with the rest of the home. The designer paid close attention to every authentic detail while incorporating the needs of a functional kitchen. Design details include glass lead doors, cloud-lift detail on doors and end panel rails, Ebony square protruding pegs with pillow tops, drop stiles with inside corner radius on wall cabinets, an inclined routed foot detail on the base cabinet stiles, crown G & upper scribe molding that displays stepped surfaces w/ rounded edge detail, a wine rack with oil bronze tubes, and Pasadena Island brackets and posts! The kitchen features Sapele wood, Nutmeg stain, with Monterey & Pasadena door styles with Pasadena 5pc drawer fronts along with integrated Waterfall drawer fronts. Photo by Crown Point Cabinetry
 The Design Gallery
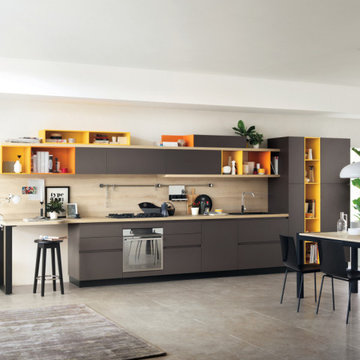
Foodshelf is the innovative response to contemporary home design solutions in which the kitchen and living area become more "fluid" and multifunctional and their characteristics tend to merge.
Like a latest-generation bookshelf, the Foodshelf kitchen - in which the French designer’s creativity of genius and Scavolini’s vast experience combine to perfection - features a "new horizontal linearity". It is centered on a series of wood look shelves that run the entire kitchen and living area length, acquiring different functions at various points (worktop, strip underneath the base units, or as shelves fitted below and above the wall units.)
This design concept also combines base and wall units of different colors, subdividing the kitchen into "graphic" blocks while retaining its modular structure.
For creating innovative compositions, with unusual, attractive chromatic and architectural effects every time.
#designerkitchenexperience #scavolinifoodshelf #creativity #designerkitchens #scavolinikitchens #madeinitaly #availableinkenya #custommade
 Patio Productions
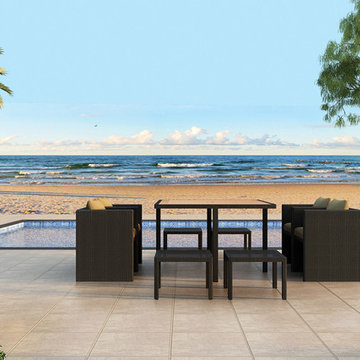
For tight spaces, our 9-Pc Arbor Cube Dining Set by Harmonia Living (HL-ARCU-9DN) is the ultimate solution. When not being used, the four chairs slide completely underneath the table taking up only 45" square of floor space. Plus hidden underneath each dining chair you will find pull out ottoman for relaxing after dinner or use them for additional seating to comfortably seat 8 people for drinks! The four dining chairs offer comfortable Sunbrella seat and back cushions and the dining table top features a stunning teak top complete with umbrella hole. The Cube Dining Set comes in a Coffee Bean color HDPE (High-Density Polyethylene) wicker. Umbrella and umbrella base sold separately.
Set Includes: Four arm chairs with cushions, a table, and four small benches.

 Custom Surface Solutions
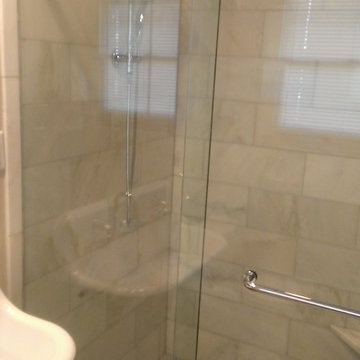
Custom Surface Solutions (www.css-tile.com) - Owner Craig Thompson (512) 430-1215. This project shows the remodel of a small 1950's vintage home master bathroom. 8"" x 18" Calcutta gold marble tile was used on the shower walls and floor wall base and ceramic gray penny tile on the floor. Shower includes curbless pan / floor, dual shower boxes, frameless glass slider, trough duel fixture sink and chrome fixtures.
 TVL Creative Ltd.
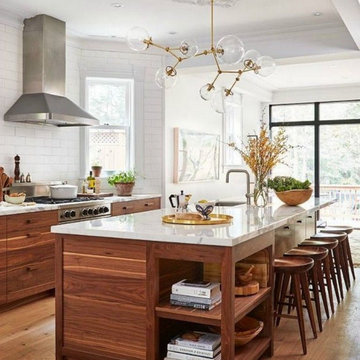
Cramped kitchen be gone! That was the project motto and top priority. The goal was to transform the current layout from multiple smaller spaces into a connected whole that would activate the main level for our clients, a young family of four.
The biggest obstacle was the wall dividing the kitchen and the dining room. Removing this wall was central to opening up and integrating the main living spaces, but the existing ductwork that ran right through the center of the wall posed a design challenge, er design opportunity. The resulting design solution features a central pantry that captures the ductwork and provides valuable storage- especially when compared to the original kitchen's 18" wide pantry cabinet. The pantry also anchors the kitchen island and serves as a visual separation of space between the kitchen and homework area.
Through our design development process, we learned the formal living room was of no service to their lifestyle and therefore space they rarely spent time in. With that in mind, we proposed to eliminate the unused living room and make it the new dining room. Relocating the dining room to this space inherently felt right given the soaring ceiling and ample room for holiday dinners and celebrations. The new dining room was spacious enough for us to incorporate a conversational seating area in the warm, south-facing window alcove.
Now what to do with the old dining room?! To answer that question we took inspiration from our clients' shared profession in education and developed a craft area/homework station for both of their boys. The semi-custom cabinetry of the desk area carries over to the adjacent wall and forms window bench base with storage that we topped with butcher block for a touch of warmth. While the boys are young, the bench drawers are the perfect place for a stash of toys close to the kitchen.
The kitchen begins just beyond the window seat with their refrigerator enclosure. Opposite the refrigerator is the new pantry with twenty linear feet of shelving and space for brooms and a stick vacuum. Extending from the backside of the pantry the kitchen island design incorporates counter seating on the family room side and a cabinetry configuration on the kitchen side with drawer storage, a trashcan center, farmhouse sink, and dishwasher.
We took careful time in design and execution to align the range and sink because while it might seem like a small detail, it plays an important role in supporting the symmetrical configuration of the back wall of the kitchen. The rear wall design utilizes an appliance garage mirrors the visual impact of the refrigerator enclosure and helps keep the now open kitchen tidy. Between the appliance garage and refrigerator enclosure is the cooking zone with 30" of cabinetry and work surface on either side of the range, a chimney style vent hood, and a bold graphic tile backsplash.
The backsplash is just one of many personal touches we added to the space to reflect our client's modern eclectic style and love of color. Swooping lines of the mid-mod style barstools compliment the pendants and backsplash pattern. A pop of vibrant green on the frame of the pantry door adds a fresh wash of color to an otherwise neutral space. The big show stopper is the custom charcoal gray and copper chevron wall installation in the dining room. This was an idea our clients softly suggested, and we excitedly embraced the opportunity. It is also a kickass solution to the head-scratching design dilemma of how to fill a large and lofty wall.
We are so grateful to bring this design to life for our clients and now dear friends.
 Drury Design
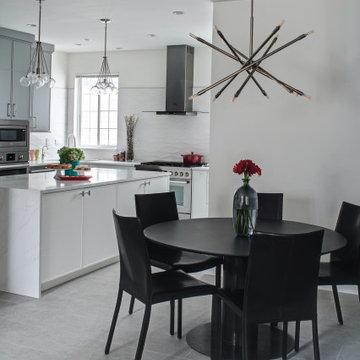
THE SETUP
Multiple ovens, multiple workspaces, multiple sinks – when you think about it, non-jewish kitchens have been adapting the criteria of kosher kitchens for years.
Gladys’ clients in West Rogers Park are Orthodox Jewish. The house they bought already had a kosher kitchen – it just wasn’t done that well. It needed some more things to be duplicated for the dairy side and the meat side. Plus, it was dark and the configuration wasn’t very conducive for a family of eight.
It was time for a remodel.
Design Objectives
Improve kosher kitchen
Add more storage in the island
Better lighting
More open, lighter feel
Change the wood floor in the kitchen to tile
THE REMODEL
Design Challenges
- We had originally planned on removing a wing wall by the breakfast area. During demolition, we learned it contained a support beam.
- The kitchen is a substantial size, but having two sinks, dishwashers, and ovens presented a challenge – how do we fit it all in and make it flow with the storage still accessible near the work areas?
Where do you stop the materials for the new space? - -- The right tile, paint, lighting, etc. would be needed to make the remodeled area cohesive with the rest of the main floor.
- An existing column limited cabinet options and thus, storage capacity. Could we conceal it without disrupting the cabinetry flow?
Design Solutions
- We had to keep the wing wall, but decided to continue the tile on the sides of the cabinets and maintain the height of the tile to line up with the rest of the backsplash. This actually presented a very nice and cohesive look, especially since the opposite side has a wing wall to the left of the refrigerator.
- We used “L-shaped” corner sinks instead of the rectangular ones set on an angle. This gave us more of the legs of the triangles versus the hypotenuse, which allowed for the two dishwashers, and the pullout utensil canisters and spice pullouts while still keeping the 3-drawer cabinets on either side of the range (by the sinks). The old island had the recess for stools which the family never used. By extending the width of the island 6” and utilizing this leg space, we were able to fit 18”-deep cabinets on this side – adding lots of accessible storage. The family can now work simultaneously on the dairy side (the side with the fridge) and the meat side (opposite) without getting in each other’s way. We separated the cooking by using the range oven for the meat and a built-in microwave in the base cabinet. The wall oven with built-in microwave on top is for dairy.
- Corner sinks opened up the middle area for a wider range – we went from a 30” to a 36”. Removing all the wall cabinets (on the range wall) made a big difference. That opened up the entire space while adding some visual impact. (Not pictured: We also made the cabinets directly opposite the range wall tall and removed the countertop, resulting in more room for rollouts and even more storage!) The kitchen now has more storage than it did before.
- We ended up painting the ceiling of the kitchen into the hallway that leads to the foyer. The living and dining rooms were separated by a soffit, so that became a natural boundary. We kept the tile in the kitchen by stopping it short of the hallway and lining it up with the pantry wall. This creates a border between the breakfast area and family room. The rest of the existing wood floors were refinished to refresh and make the hue darker. We also painted a dark accent wall and carried it into the breakfast area to make the rooms look deeper.
- The in-the-way column housed plumbing and couldn’t be moved. We still built cabinets in that spot – we just had to build a chase inside it to conceal the pipes. There was still plenty of room for new storage. We also took the cabinets all the way to the ceiling. The continuous tall cabinets added a functional elegance to the space.
THE RENEWED SPACE
The client’s long-awaited dream of a better kosher kitchen has finally been achieved, beautifully combining enhanced storage solutions with adherence to the family’s orthodox dietary laws. The kitchen’s standout feature, an expanded island, now offers a spacious and efficient workspace. This allows several family members to cook together comfortably, without the inconvenience of bumping into each other, ensuring a harmonious and productive cooking environment.
 MD Flooring Solutions, LLC
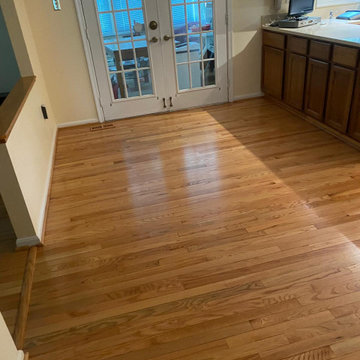
Natural
1x coat of ZINSSER®SealCoat™ Universal Sanding Sealer.
1x coat of Water-Based Oil-Modified polyurethane by default.
1x final coat of SamSeal or Masterline Oil-based polyurethane by default.
---} Finish: Semi-Gloss.
- To cover with plastic and use vacuum to do the job
- To remove current toilet from powder room and KEEP.
- Sand and refinish 2-1/4" red oak Prefinished Hardwood floors on First floor: front foyer, closet, dining room, kitchen, hallway & powder room (no family room, no living room) - 404.12 sqft
- To remove Bevels from floors on First floor: front foyer, closet, dining room, kitchen, hallway & powder room (no family room, no living room) - 404.12 sqft
- To Sand & Refinish T-moldings 3LFT + 3LFT + 3LFT between foyer to family room, dining room to living room
- To Install Unfinished Red Oak Shoe Molding to be polyurethaned on First floor: front foyer, closet, dining room, kitchen, hallway & powder room (no family room, no living room) + around powder room vanity
- To reinstall same toilet, including new ring after refinish.
Sponsored
Columbus, OH

Hope Restoration & General Contracting
Columbus Design-Build, Kitchen & Bath Remodeling, Historic Renovations
 Drury Design
THE SETUP
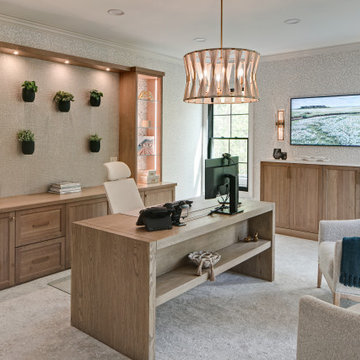
Originally an empty front living room, this space offered a blank canvas for transformation. Alicia’s client — a financial wealth management professional facing a career shift towards more home-based work — was excited to make it her new office. Capitalizing on the space’s abundant natural light, perfect for on-camera meetings, Alicia helped convert the area into a primary workspace.
Design Objectives:
- Create a functional and professional home office
Cultivate an aesthetic that is both comfortable and feminine
- Optimize the office for the space’s ideal lighting and provide an appealing background for virtual meetings
Design Challenges:
- Transforming a large, undefined space into a structured, functional office
- Selecting a color palette that enhances focus and professionalism, balanced with a feminine touch
- Strategically placing the desk to maximize functionality and aesthetics within the large area
Incorporating solutions for effective real-time stock trade tracking and analog task management
THE RENEWED SPACE
Design Solutions:
Workspace Configuration: Centered the desk to utilize indirect light, ideal for video calls, while providing a commanding view of the office, the outdoors and the entrance. A floor-installed power outlet under the desk ensures a clean, cord-free setup.
Aesthetic and Palette: Anchored by a striking wallpaper chosen by the client, Alicia developed a soft, neutral color scheme that complements the room’s black window frames and maintains a feminine touch.
Digital Integration: Included a screen dedicated to monitoring daily stock trends, positioned for easy viewing. The energy efficient monitor doubles as artwork when not in use, seamlessly blending functionality with style.
Organizational Features: Implemented dual large bulletin boards for task and project tracking, integrating them aesthetically with custom cabinetry and interesting, yet subdued, fabric backing.
Our client is thrilled with her new home office, which not only meets her professional needs but also adds comfort and style to her daily work routine. The space is highly functional for both solo work and client appointments, providing a perfect blend of business professionalism and personal comfort. It embodies the essence of a #girlboss, combining a professional atmosphere with feminine elegance, making every workday enjoyable and productive.
 Custom Storage Solutions
New garage makeover with one of our newest colors, pewter. Custom garage cabinets are 8 foot tall with one inch thick shelves made to support very heavy items. Aluminum handles offer a contemporary look, with our stainless steel tops. Drawers with full drawer runners, slatwall storage and epoxy flooring with a full broadcast and two coats of uv resistant clear. Designed and installed by Shawn Leach of Custom Storage Solutions.
 PEDINI NY
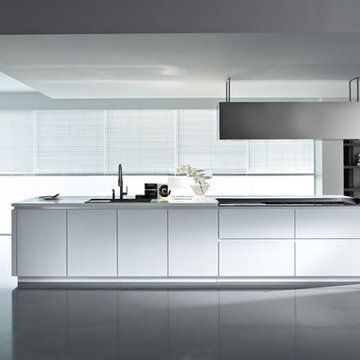
The inspiration for the Dune began with the simple idea to seamlessly connect the kitchen to the living space. Dune is a unique contemporary kitchen cabinet design without handles. It is defined by asymmetrically curved base units and echoing flowing forms found in nature. Opening is achieved by a groove on the edge of the extra thick 23mm front panel (base units) or by a vertical aluminum profile (tall units). Drawers in the curved units allow Pedini to offer this remarkable Italian kitchen design without compromising the environment, ergonomics or functionality.
Dune contemporary kitchens offer a high component of adaptability and individual variations, which allows room for harmony between the functional aspects of the house. Dune truly adapts to the nature of it’s surrounding.
Soft technology. Pedini makes daily living more practical thanks to the quality of the opening systems of doors and drawers, and with an automated closing mechanism, great storage capacity, and the total personalization of the spaces. Dune aesthetics provide attractive contrasts between wood veneers, steel, and quartz worktops. Modern kitchen designs like Dune are a perfect fit in any home. Dune, like all of Pedini’s contemporary kitchens, was designed with ease of function in mind. Dune is a flexible product for diversified solutions. Among the various possibilities of Dune, the option of the island allows complete access from more sides of the working area. Deep drawers are also a staple of the Dune line.
Dune is available in natural or stained eco friendly walnut as well as matte, high gloss and textured lacquer in any color. Aluminum profiles and plinths are available in white, gray, black or matte silver. Complementary glass fronts available with walnut frame and 6 colors of mirror glass.
93