
Search results for "Cloud first" in Home Design Ideas
 Synergy Design & Construction
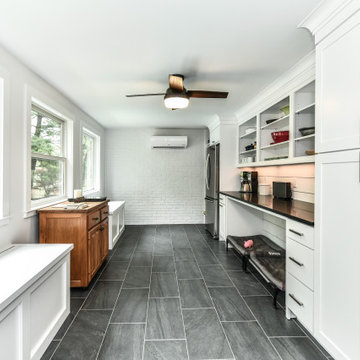
After. Field-built benches along the left hand side of the Pantry provide plenty of storage for pool equipment and other items. 6Square “Itasca” cabinetry in “White Cloud” provides additional storage space. A second refrigerator was also added along with open shelving. The family dogs weren’t forgotten about with room for 2 dog beds under the countertop.
 Synergy Design & Construction
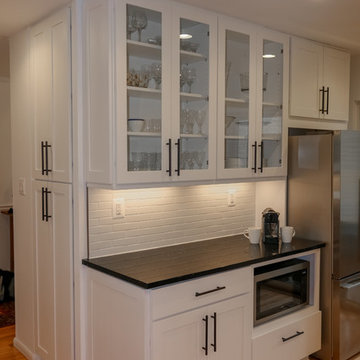
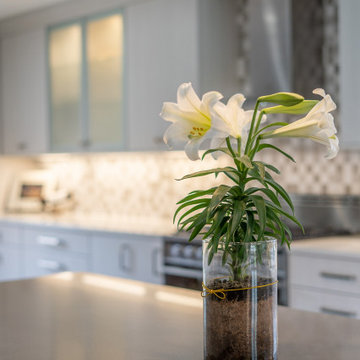
Cabinetry glass in select upper cabinets allows for display of dishes and glassware. A charging station was also added for out-of-sight convenience in a Kitchen drawer. A Whirlpool stainless steel countertop microwave is tucked out of the way under the countertop.

Find the right local pro for your project
 Meredith Ericksen
Mary Kate McKenna Photography, LLC
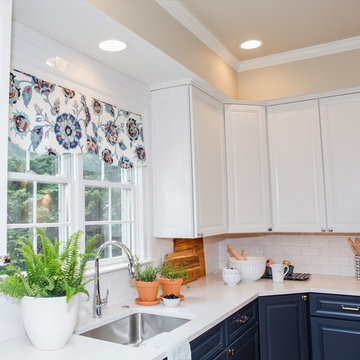
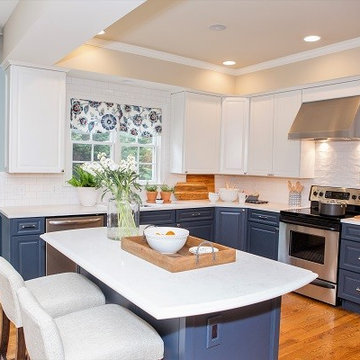
Example of a transitional l-shaped light wood floor kitchen design in DC Metro with an undermount sink, flat-panel cabinets, white cabinets, quartz countertops, white backsplash, subway tile backsplash, stainless steel appliances and an island
Example of a transitional l-shaped light wood floor kitchen design in DC Metro with an undermount sink, flat-panel cabinets, white cabinets, quartz countertops, white backsplash, subway tile backsplash, stainless steel appliances and an island
 Synergy Design & Construction
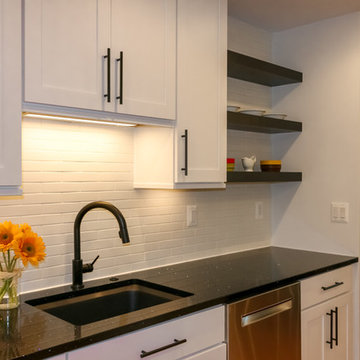
Additional display space for favorite dishes (without overdoing the open shelf look) was created by adding three 10” x 36” floating shelves in “Charcoal” from 6Square Cabinetry.
 J&J Carpet One Floor & Home
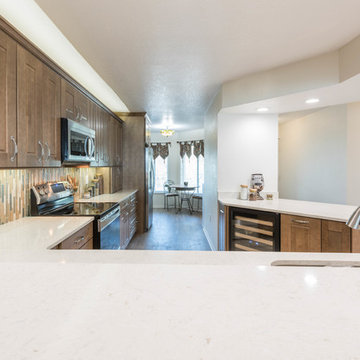
When you first entered this home, the first thing you saw was this oversized pantry, which made the entry way feel closed off, and the kitchen small. In order to create a more open space, Brittany removed the pantry to add a peninsula island with a wine fridge, trash pullout, and additional cabinetry storage below. The pass through looking into the living room was opened up and allowed for an increased ceiling height. This instantly transformed the entire home and now gives a view of the kitchen and living room from the entryway. To make use of every square inch of the kitchen space, Brittany also took down the wall besides the fridge, moved the fridge over to the right, and added more cabinetry.
 Meredith Ericksen
Mary Kate McKenna Photography, LLC
Kitchen - transitional l-shaped light wood floor kitchen idea in DC Metro with an undermount sink, flat-panel cabinets, white cabinets, quartz countertops, white backsplash, subway tile backsplash, stainless steel appliances and an island
Kitchen - transitional l-shaped light wood floor kitchen idea in DC Metro with an undermount sink, flat-panel cabinets, white cabinets, quartz countertops, white backsplash, subway tile backsplash, stainless steel appliances and an island
Sponsored
Columbus, OH

Trish Takacs Design
Award Winning & Highly Skilled Kitchen & Bath Designer in Columbus
 Meredith Ericksen
Mary Kate McKenna Photography, LLC
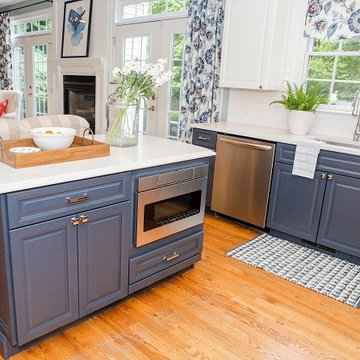
Transitional l-shaped light wood floor kitchen photo in DC Metro with an undermount sink, white cabinets, quartz countertops, white backsplash, subway tile backsplash, stainless steel appliances and an island
Transitional l-shaped light wood floor kitchen photo in DC Metro with an undermount sink, white cabinets, quartz countertops, white backsplash, subway tile backsplash, stainless steel appliances and an island
 Create Construction
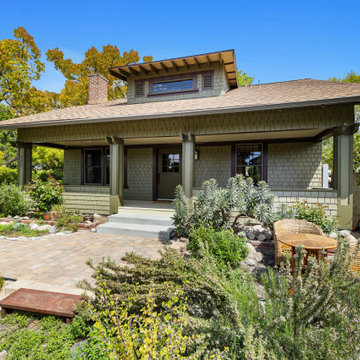
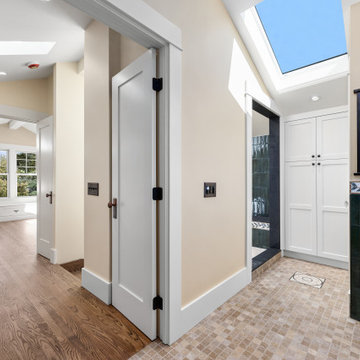
This extensive project showcases a remarkable transformation of a 1920s Craftsman home, combining a thoughtfully designed second-story addition with a full custom remodel of the first floor. The new upper level adds a spacious primary suite, complete with a bedroom, walk-in closet, laundry room, and a stunning bathroom with a drop-in tub, custom vanity, Caesarstone quartz countertops, and a walk-in shower wrapped in green subway tile, medallion accents, and natural stone.
The first floor was reimagined with a new layout to better suit modern living. The kitchen features custom cabinetry, a seamless Corian countertop with integrated sink, and copper hardware. A cozy built-in banquette and natural stone backsplash with medallion inserts bring both elegance and personality to the space. The formal dining room boasts wraparound custom millwork and hidden LED strip lighting within the crown to create ambient mood lighting.
Throughout the home, you’ll find true Craftsman detailing—from solid red oak floors and Marvin wood windows to picture railing trim, cloud corbel detailing, and stained wood baseboards and casings. Skylights with concealed LED strips flood the second floor with natural light while creating atmosphere. The original fireplace was preserved and enhanced with hand-stained brick, a unique custom drywall design, and Zia handmade tile on the hearth.
On the exterior, wood shingle siding and custom-built columns enclose the redesigned front porch, which features a pony wall and decorative wood corbels. The original 1920s dormer was meticulously restored, including custom rafter tail and window detailing that ties into the home’s timeless architecture.
This project is a true homage to Craftsman design—blending historic charm with modern luxury and handcrafted finishes in every room.

 Create Construction
This extensive project showcases a remarkable transformation of a 1920s Craftsman home, combining a thoughtfully designed second-story addition with a full custom remodel of the first floor. The new upper level adds a spacious primary suite, complete with a bedroom, walk-in closet, laundry room, and a stunning bathroom with a drop-in tub, custom vanity, Caesarstone quartz countertops, and a walk-in shower wrapped in green subway tile, medallion accents, and natural stone.
The first floor was reimagined with a new layout to better suit modern living. The kitchen features custom cabinetry, a seamless Corian countertop with integrated sink, and copper hardware. A cozy built-in banquette and natural stone backsplash with medallion inserts bring both elegance and personality to the space. The formal dining room boasts wraparound custom millwork and hidden LED strip lighting within the crown to create ambient mood lighting.
Throughout the home, you’ll find true Craftsman detailing—from solid red oak floors and Marvin wood windows to picture railing trim, cloud corbel detailing, and stained wood baseboards and casings. Skylights with concealed LED strips flood the second floor with natural light while creating atmosphere. The original fireplace was preserved and enhanced with hand-stained brick, a unique custom drywall design, and Zia handmade tile on the hearth.
On the exterior, wood shingle siding and custom-built columns enclose the redesigned front porch, which features a pony wall and decorative wood corbels. The original 1920s dormer was meticulously restored, including custom rafter tail and window detailing that ties into the home’s timeless architecture.
This project is a true homage to Craftsman design—blending historic charm with modern luxury and handcrafted finishes in every room.
 Renwick Tiles
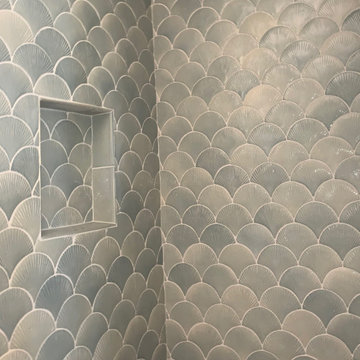
Scale tiles with texture used in a shower in Laguna Beach. This shower was done with a very light blue that we call First Dawn. It is a good example of hand glazing as the color is never flat. The client decided to lay the tiles in this way, which makes it look like clouds. All Renwick Tiles are hand made in Dana Point California. We source all our materials in the United States. This picture was taken while the tiles were still being installed. For this job they had a tile made to fit the shower box. in the same color. We offered to add the texture, but they didn't it. I love the look of the scale tile laid in this direction makes it look like clouds.
 Gerrad Hall Architects
Tash Hopkins
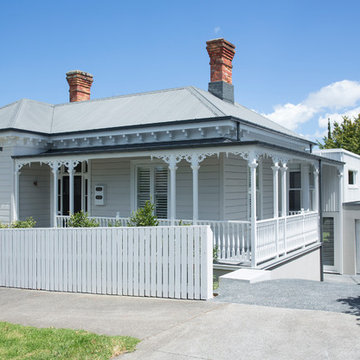
Inspiration for a contemporary two-story wood exterior home remodel in Auckland
Inspiration for a contemporary two-story wood exterior home remodel in Auckland
Sponsored
Columbus, OH
Trish Takacs Design
Award Winning & Highly Skilled Kitchen & Bath Designer in Columbus
 Create Construction
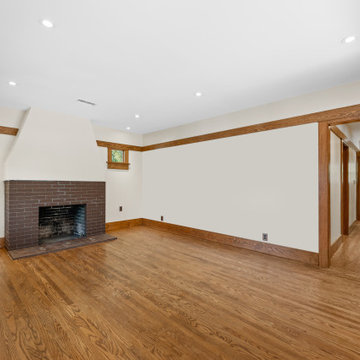
This extensive project showcases a remarkable transformation of a 1920s Craftsman home, combining a thoughtfully designed second-story addition with a full custom remodel of the first floor. The new upper level adds a spacious primary suite, complete with a bedroom, walk-in closet, laundry room, and a stunning bathroom with a drop-in tub, custom vanity, Caesarstone quartz countertops, and a walk-in shower wrapped in green subway tile, medallion accents, and natural stone.
The first floor was reimagined with a new layout to better suit modern living. The kitchen features custom cabinetry, a seamless Corian countertop with integrated sink, and copper hardware. A cozy built-in banquette and natural stone backsplash with medallion inserts bring both elegance and personality to the space. The formal dining room boasts wraparound custom millwork and hidden LED strip lighting within the crown to create ambient mood lighting.
Throughout the home, you’ll find true Craftsman detailing—from solid red oak floors and Marvin wood windows to picture railing trim, cloud corbel detailing, and stained wood baseboards and casings. Skylights with concealed LED strips flood the second floor with natural light while creating atmosphere. The original fireplace was preserved and enhanced with hand-stained brick, a unique custom drywall design, and Zia handmade tile on the hearth.
On the exterior, wood shingle siding and custom-built columns enclose the redesigned front porch, which features a pony wall and decorative wood corbels. The original 1920s dormer was meticulously restored, including custom rafter tail and window detailing that ties into the home’s timeless architecture.
This project is a true homage to Craftsman design—blending historic charm with modern luxury and handcrafted finishes in every room.

 Brooklyn City Furniture
Design: Jens Juul Eilersen
Quick ship : FABRIC: PLINDY 0016
Compare Tub to a cloud of down or a foamy mug of beer.
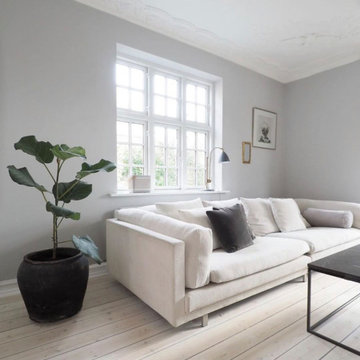
Jens Juul Eilersen has created a gigantic "sofa bathtub", which is an orgy of soft foam, down and pillows. Tub is the coolest and softest sofa yet in the Eilersen universe of floaters. And the contrast between the slim, tight outer shell and the interior heaven of foam and down creates dynamism in the language of form.
Like sitting on a soft bed.
"My goal was to create a well-being sofa where you can sit as if on a soft bed. And I succeeded! I actually fell asleep the first time I leaned back into the prototype, which was the deepest version," tells Jens Juul Eilersen. "When I woke up, I could certainly see that I had to develop a variation of the model in which people could stay awake". This resulted in a further 2 different depths where you sit more upright but still comfortably. Compared to Eilersen's other floater, Tub differentiates itself by the frame. Tub does not have a heavy frame, which is part of the comfort. But on the other hand a thin shell, which keeps the large, soft pillows in place. Externally, the lines are straight and tight and internally, the upholstery and pillows result in organic lines.
"The entire sitting comfort in Tub lies in the foam, which seems softer due to the large depth. This provides a feeling of elevation and larger submersion than in any of our other sofas. It is actually just like sitting in a large mug of foaming beer or on a cloud of down" says Jens Juul Eilersen who promises that even though Tub is soft, inviting and provoking, it cannot become flat. Tub is available in three depths and the series contains corner, end and centre sections, which can be combined as desired.
Quick ship : FABRIC: PLINDY 0016
For other fabric choices Email : info@cityfurnitureshop.com * Difference in shipping will vary
 Brooklyn City Furniture
Design: Jens Juul Eilersen
Quick ship : FABRIC: PLINDY 0016
Compare Tub to a cloud of down or a foamy mug of beer.
Jens Juul Eilersen has created a gigantic "sofa bathtub", which is an orgy of soft foam, down and pillows. Tub is the coolest and softest sofa yet in the Eilersen universe of floaters. And the contrast between the slim, tight outer shell and the interior heaven of foam and down creates dynamism in the language of form.
Like sitting on a soft bed.
"My goal was to create a well-being sofa where you can sit as if on a soft bed. And I succeeded! I actually fell asleep the first time I leaned back into the prototype, which was the deepest version," tells Jens Juul Eilersen. "When I woke up, I could certainly see that I had to develop a variation of the model in which people could stay awake". This resulted in a further 2 different depths where you sit more upright but still comfortably. Compared to Eilersen's other floater, Tub differentiates itself by the frame. Tub does not have a heavy frame, which is part of the comfort. But on the other hand a thin shell, which keeps the large, soft pillows in place. Externally, the lines are straight and tight and internally, the upholstery and pillows result in organic lines.
"The entire sitting comfort in Tub lies in the foam, which seems softer due to the large depth. This provides a feeling of elevation and larger submersion than in any of our other sofas. It is actually just like sitting in a large mug of foaming beer or on a cloud of down" says Jens Juul Eilersen who promises that even though Tub is soft, inviting and provoking, it cannot become flat. Tub is available in three depths and the series contains corner, end and centre sections, which can be combined as desired.
Quick ship : FABRIC: PLINDY 0016
For other fabric choices Email : info@cityfurnitureshop.com * Difference in shipping will vary
 Tile Doctor Ltd
At Tile Doctor, we often come across Victorian tiled hallways in need of restoration. They’re very popular due to their timeless and unique patterns – and as a result are still in production, having first being produced in the 19th century. While many have been maintained in their original state since first being laid (which is sometimes over a century ago), others have been hidden by carpet or linoleum for many years, only to be uncovered by new property owners.
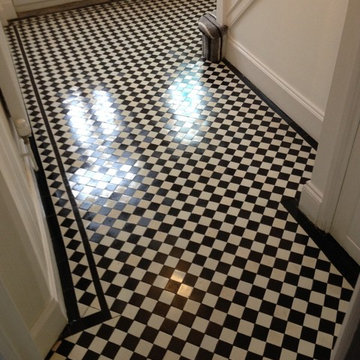
In this case, at a property in Newport – the port city of South East Wales – the Victorian tiled hallway had not been subject to an effective cleaning plan leaving the fantastic white and black checkered pattern grubby and unsightly. I was asked if I could help bring it back to life – and I was happy to oblige!
I started the restoration by applying a strong cleaning solution combined from mixing two Tile Doctor products in equal parts namely Remove and Go and Pro Clean. Together they create a powerful sealer remover and cleaner to break down any remaining old sealers, paint whilst lifting ingrained dirt and muck from the pores of the tile.
The two products were worked into the tiles using firstly a 17 inch black buffing pad to remove the initial layer of dirt, followed by a 6 inch buffing pad, wire brush, and hand-held scrapper to remove the more stubborn specks of paint and dirt. The resultant slurry was then rinsed away with water and a wet vacuum and stubborn areas retreated until I was satisfied. The results were great so after a final rinse I left tiles to dry off.
A couple of days later, after leaving the tiles to dry completely, I went back to the property to seal the floor. I checked first for any excess moisture as this can cloud the sealer and prevent it from acting an effective barrier against dirt and stains.
My choice of sealer included one coat of Tile Doctor Colour Grow to restore the rich colour to the black and white tiles, followed by seven coats of Tile Doctor Seal and Go to provide an aesthetically pleasing sheen finish. Colour Grow is an impregnating sealer that penetrates the pores of the tile to fill them and prevent dirt becoming trapped, while Seal and Go is a topical sealer that builds up an additional layer of protection on the surface of the tiles.
The combination of fresh sealers, preceded by a deep and thorough clean, really helped to restore these Victorian tiles to a condition in which they could be easily mistaken for newly laid! The customer was very pleased and undoubtedly will be looking forward to showing off the tiles to friends and family.
Paul Wales
Monmouthshire Tile Doctor
Sponsored
Columbus, OH
Trish Takacs Design
Award Winning & Highly Skilled Kitchen & Bath Designer in Columbus
 Tile Doctor Ltd
These pictures of a Victorian Tiled Hallway are from a property in Canterbury that was once a nursing home and was now being renovated to become a children’s home. The building was being gutted and extended at the same time and when the carpet was pulled up in the hallway, they were surprised to find a relatively intact Victorian tiled floor underneath.
Whilst they thought it bizarre that anyone would want to cover up such an attractive floor the carpet had protected it over the years. They realized it would make a marvellous feature at the entrance to the property, but professional restoration would be needed to do it justice. After a bit of research, they came across Tile Doctor and got in touch.
Canterbury comes under my North Kent designation, so I went to visit the property and survey the floor and quote for doing the restoration. There were a few missing and loose tiles that would need replacing and refixing also there was a lot of ingrained dirt so a deep clean and application of a new sealer would be required. I gave them a price for the work which they readily accepted, and we arranged a suitable time to carry out the work. Subject to the building schedule I had calculated the floor would take three days to restore.
On the first day I set about replacing and re-fixing the missing, broken, and loose tiles. This is delicate work as you need to extract the old tile without disturbing its neighbours and then clean up the area ready for its replacement. Being a Tile Doctor I keep a selection of stock tiles for repairs, some are reclaimed, and some are replica. Also, there are several companies still making Victorian style tiles so I can usually source what I need.
After the individual missing and broken tiles had been replaced and the adhesive had set, it was then a matter of renovating the floor as a whole. The tiles were covered in a thick layer of carpet adhesive which needed a combination of specialist tools and products to remove. First, a liberal layer of Tile Doctor Remove and Go was applied and left to dwell for thirty minutes. Next, Tile Doctor Pro-Clean was added and scrubbed in with a black pad.
This process softened the adhesive sufficiently in readiness for the next stage which involves using a set of diamond burnishing pads on a weighted buffing machine. Several applications were needed, each time with a successively finer grade of diamond pad and rinsing off the slurry in between. The tiles were first milled using a very coarse 50-grit pad, followed by 100, 200 and finally burnished with a 400-grit burnishing pads. This removed all the adhesive and dirt in the tiles, which was cleaned up using the wet vacuum.
Old Victorian floors like this do not have a damp proof membrane installed under the floor, and with a lot of water being used in the cleaning process I was concerned White efflorescence salts could appear later as the floor dried. To counter this, I gave the floor an acid wash using Tile Doctor Acid Gel to counter and dissolve the salts, it also gives the tiles another clean and will remove any old grout smears further improving the appearance of the tiles. Once done the floor was left to dry overnight.
On my return I tested the floor was dry by taking several moisture readings around the floor with a damp meter. Applying sealer to a damp floor is never advised and can lead to clouding and an unwanted finish.
Happy that the tiles were dry, a single coat of Tile Doctor Colour Grow sealer was applied. This is an impregnating sealer with a colour enhancing component to ‘lift’ the stronger colours of the floor. Colour Grow however does leave a matt appearance and as the client had asked for a shiny finish it was topped up with five coats of Tile Doctor Seal and Go. This is a compatible topical sealer which added a mid to high sheen.
By the end of the third day the Victorian floor looked brand new, and I received the following feedback from the client. Its rare to receive feedback from commercial customers so they were clearly overwhelmed with the transformation.
Did not think this glued covered bad old floor could look sooooo good Fabulous Fantastic job Looks Amazing Thank you
For aftercare I recommend the use of Tile Doctor Neutral Cleaner which isn’t as harsh as many of the products you find in supermarket. Stronger products can actually strip off the sealer over time leaving it vulnerable to dirt and detracting from its appearance.
Graham Davis
North Kent Tile Doctor
 MAKHNO STUDIO
At home, even the walls heal. Especially when they are Pantone-styled. Recently, the Pantone Institute of colour selected the “classic blue” to be the colour of 2020, and a year ago we decided that the walls inside the Ridnyi House should be the same.
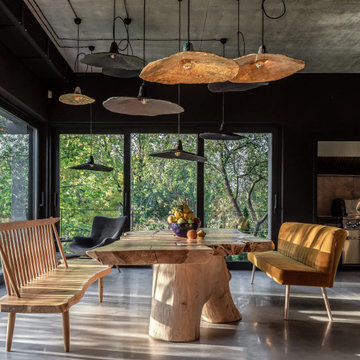
The first floor consists of a large living room, dining room, kitchen, and professional barbecue area. The living room with a fireplace is spacious and soft in its colour scheme. The designer ceramic vases with ikebanas fill the space with senses and flowers. Two floors have merged in the dining room, creating plenty of room for white loose clouds by Serhii Makhno.
large wooden bench and an Elephant armchair wait for dinner to be served. And dinner is being cooked in the kitchen — there are light oak slabs instead of the countertop. The barbecue area can easily become a terrace — the windows can be adjusted.large wooden bench and an Elephant armchair wait for dinner to be served. And dinner is being cooked in the kitchen — there are light oak slabs instead of the countertop. The barbecue area can easily become a terrace — the windows can be adjusted.
 Tile Doctor Ltd
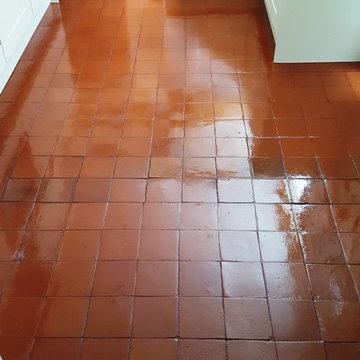
If you’re a first time buyer in the process of renovating or redecorating your new property, you may well discover some fantastic tiled floors hidden under your carpets. Certainly in my experience this happens quite often, so it came as no surprise when I got a call from a couple who had pulled up the carpet in the kitchen of their new house in Chester to find Quarry tiles, along with some fantastic Victorian tiles in the hallway.
While the Quarry tiles were in relatively good condition – having been shielded by carpet for many years – the couple were still understandably keen to get them back to looking their very best. I was more than happy to help them do just that.
Before beginning the restoration, I removed the kick boards from the kitchen cupboards so as not to damage them. I then applied a solution of our versatile, high alkaline cleaner, Tile Doctor Pro Clean, and let it soak into the tiles for a short period before scrubbing it in using a rotary machine fitted with a black scrubbing pad. Pro Clean is suitable for use on most natural stone tiles, including Quarry, Victorian and Slate, doing the trick to break down medium to heavy soil buildup.
The floor was then rinsed off with clean water, and the resulting slurry was promptly removed using a wet vac. I then left the floor dry out overnight.
I returned to the property the next morning, and started out by taking a couple of damp meter readings to make sure the floor was dry enough to seal. This is an essential task before sealing any tiled floor as even the smallest amount of excess moisture can cloud the sealer and damage its performance.
To seal the floor, I firstly applied one coat of Tile Doctor Colour Grow, which really brought out the natural reddish shades in the Quarry. As an impregnating sealer, Colour Colour fills the pores in the stone and prevents dirt from becoming ingrained. I followed the application of Colour Grow by applying three coats of Tile Doctor Seal and Go Extra. As a topical sealer, Seal and Go Extra forms an additional stain resistant seal on the surface of the tiles to protect against dirt and stains. It also gave the tiles a quality sheen finish as requested by the customer.
The customers were very happy with their newly restored Quarry tiled floor. They left the following feedback:
“We were both thrilled to bits with how nice the Quarry tiled kitchen floor looked, after being cleaned and sealed. Alastair was a pleasure to deal with and we would highly recommend him to anyone considering having their floor done.”
Alastair Robb
West Cheshire Tile Doctor
6