
Search results for "Complex process" in Home Design Ideas
 United Porte Inc
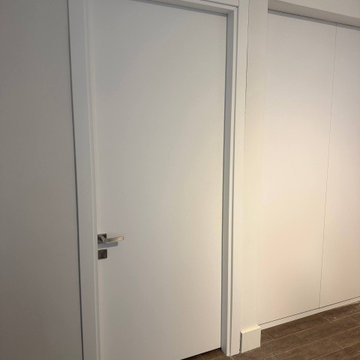
Our Double Barn Doors come in a stunning shade of White. A paradigm of elegance and minimalism, these doors blend seamlessly with your existing decor, adding a touch of sophistication and style. They believe in the saying that 'less is more,' and these doors perfectly encapsulate that spirit.
The Perfect Balance
In design, achieving harmony through a balance of contrasts is a treasured accomplishment. This notion is echoed explicitly in our Double Barn Doors. While the Color Palette is predominantly white, the doors are complemented by a handsome Black Rail. This combination is a testament to a well-balanced palette that never fails to impress.
Essence of Simplicity
Our Double Barn Doors perfectly blend practicality with simplicity. They circumvent the complexity of adding glass elements and instead, focus on providing a robust and hassle-free solution to your interior door needs.
The Mark of Quality
When you buy interior doors from us, you can be assured of impeccable quality. Each door is meticulously crafted and checked for quality to ensure it not only meets but exceeds your expectations.
We hold ourselves to an exceptionally high standard, and our Double Barn Doors are a reflection of our dedication to providing top-quality components to discerning homeowners.
Discover the mark of quality by choosing our Double Barn Doors for your home. Experience the tangible difference they can make in elevating your space from ordinary to extraordinary.
Take The Step Today
So, why wait? Elevate your living space with the addition of stunning Double Barn Doors. Bring in the perfect balance between style and functionality by making a change that will truly distinguish your home.
Order and buy doors from us today and rest assured, your home will be better for it. With a streamlined process and a commitment to providing only the best, we assure you of a home transformation that is nothing short of amazing.
A Final Note
We specialize in providing high-quality doors that are more than just functional installations. We provide timeless creations that serve to enhance the beauty and charm of your home. This philosophy coupled with our determination to serve you in the best way possible sets us apart. Choose us for a world-class door buying experience and make a statement with your doors today.

 User
This hillside home in Piedmont, CA was remodeled to change the style from a 1940's rancher with eight foot ceilings and dark interiors, into a modern geometric composition with vast white interiors for casual living and generous daylighting for displaying the artist-owner's works.
In a city known for rigorous and difficult design review, an addition, two variances, and a full stylistic change were unanimously approved on the first round. All sloped roofs and attics were eliminated and replaced by a series of stacked and overlapping flat roofs. This made the house taller on the inside and shorter on the outside, which helped earn design review cooperation in the community. Windows were concentrated toward the rear yard views or moved up high on the side walls for daylight and privacy, benefitting the owners as well as the neighbors.
At the start, the owner husband was so enthusiastic and engaged in transforming his house into something modern that he presented the architect with a scaled foamcore model, rather than the usual magazine clippings and wish list. He participated in the design decisions throughout the process. The owner wife is the artist who did all the artwork in the house. She had been craving a display space with large walls and good natural light. Both of them loved the location and great views.
The project was an opportunity to transform the style of an older traditional home into a modern one, while solving numerous problems. By rebuilding the 1800 ft2 top of the 3-story home it was possible to change the style of the whole building, since the lower floors were a neutral base, and also to change the lifestyle of the owners, who wanted to move their master suite upstairs and live primarily on the top floor as empty nesters.
Going into the project, the architect knew there were multiple encroachments into the setbacks and potential privacy issues with close by neighbors. He approached this as a complex puzzle made up of architectural and political pieces which all had to fit together elegantly. It took many careful moves, small and large, to arrive at a serene and cohesive result that tied old and new together seamlessly.
The design-build contractor worked closely with the owners and handled all of the construction phase documents and design adjustments, adding ideas of their own to make the project really sing.
The project was a collaboration in three acts. The owner had a strong design concept from the start. The architect developed it into a realistic project and garnered the design approvals. Then the contractor executed brilliantly.
 United Porte Inc
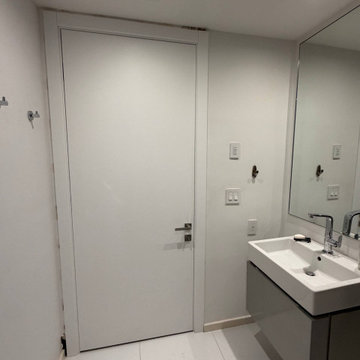
Our Double Barn Doors come in a stunning shade of White. A paradigm of elegance and minimalism, these doors blend seamlessly with your existing decor, adding a touch of sophistication and style. They believe in the saying that 'less is more,' and these doors perfectly encapsulate that spirit.
The Perfect Balance
In design, achieving harmony through a balance of contrasts is a treasured accomplishment. This notion is echoed explicitly in our Double Barn Doors. While the Color Palette is predominantly white, the doors are complemented by a handsome Black Rail. This combination is a testament to a well-balanced palette that never fails to impress.
Essence of Simplicity
Our Double Barn Doors perfectly blend practicality with simplicity. They circumvent the complexity of adding glass elements and instead, focus on providing a robust and hassle-free solution to your interior door needs.
The Mark of Quality
When you buy interior doors from us, you can be assured of impeccable quality. Each door is meticulously crafted and checked for quality to ensure it not only meets but exceeds your expectations.
We hold ourselves to an exceptionally high standard, and our Double Barn Doors are a reflection of our dedication to providing top-quality components to discerning homeowners.
Discover the mark of quality by choosing our Double Barn Doors for your home. Experience the tangible difference they can make in elevating your space from ordinary to extraordinary.
Take The Step Today
So, why wait? Elevate your living space with the addition of stunning Double Barn Doors. Bring in the perfect balance between style and functionality by making a change that will truly distinguish your home.
Order and buy doors from us today and rest assured, your home will be better for it. With a streamlined process and a commitment to providing only the best, we assure you of a home transformation that is nothing short of amazing.
A Final Note
We specialize in providing high-quality doors that are more than just functional installations. We provide timeless creations that serve to enhance the beauty and charm of your home. This philosophy coupled with our determination to serve you in the best way possible sets us apart. Choose us for a world-class door buying experience and make a statement with your doors today.
Find the right local pro for your project

 Ronnette Riley Architect
This 10,000 sf townhouse sits on one of Manhattan’s most beautiful Upper East Side streets and so the goal of the project was to return the house to its original grandeur. Previously a Kips Bay designer showcase house, the rooms were each designed in a differing style and therefore the lack of cohesion and flow made the house seem choppy. In addition, much of the interior was superficial in the sense that plumbing fixtures were not all connected, walls were “false walls” built in front of existing and much of the construction had to be rebuilt.
The scope included creating a large gourmet kitchen in the rear of the ground floor by closing off the winding corridor and creating a new door opening centered on the main entry hall with a paneled arched pocket door mimicking the original detailing of the parlor floor. The kitchen has a Calacatta Gold stone center island and dinning area flanked by counters that run the length of the east and west walls with glass front upper cabinets. A built-in buffet on the south wall anchors the space. A mud room, with access to the delivery entrance and additional storage space was added off the kitchen. A new slim profile steel and glass French door provides access to a new steel rear deck and stairs to the rear yard. On the second floor, a new tile floor was added throughout and RRA designed new stone mantle pieces fabricated from England in the living and dining rooms.
On the 3rd floor, a new wall was constructed in the 11’ wide central hallway to allow a new 135 sf master closet with custom designed built-in storage units and accessories. This concept was carried through to the 4th floor on a smaller scale and 4 new storage closets were added in the hallway. The existing bathroom on the 4th Floor was gutted and redesigned including a new 5’x5’ extra deep soaking tub and new fixtures. Silver travertine tiles were used throughout to give the room a durable, waterproof finish while also providing a warm, luxurious feel.
The 5th floor was converted into a playroom and TV room for the family’s two young children and was outfitted with chalkboard paint along the entire east wall in the play area and a bold color block wall treatment in the TV room. A new cork floor was installed for durability and resilience to lots of activity yet providing a soft and sustainable floor treatment for its intended user. A full laundry room was also created floor with new cabinetry, plumbing, and floor and wall tile. Additionally, 3 full baths and a powder room were refitted with tumbled travertine tiles on the top two floors. The exterior of the building was refurbished and new lighting and painted doors and frames were installed in accordance with Landmark designation. An additional challenge on the project was that a previously built extension on the PH level was illegally overbuilt and the property had received a violation. A 9 month process of filing drawings, completing zoning analyses and meetings with the DOB Commissioners ensued to get the extension approved allowing us to obtain a permit for the remainder of the work and complete the Certificate of Occupancy.
In spite of the complex process and scattered program, the completed townhouse has a cohesive aesthetic throughout, with upgraded amenities befitting this grand representation of elite New York living.
 Ronnette Riley Architect
This 10,000 sf townhouse sits on one of Manhattan’s most beautiful Upper East Side streets and so the goal of the project was to return the house to its original grandeur. Previously a Kips Bay designer showcase house, the rooms were each designed in a differing style and therefore the lack of cohesion and flow made the house seem choppy. In addition, much of the interior was superficial in the sense that plumbing fixtures were not all connected, walls were “false walls” built in front of existing and much of the construction had to be rebuilt.
The scope included creating a large gourmet kitchen in the rear of the ground floor by closing off the winding corridor and creating a new door opening centered on the main entry hall with a paneled arched pocket door mimicking the original detailing of the parlor floor. The kitchen has a Calacatta Gold stone center island and dinning area flanked by counters that run the length of the east and west walls with glass front upper cabinets. A built-in buffet on the south wall anchors the space. A mud room, with access to the delivery entrance and additional storage space was added off the kitchen. A new slim profile steel and glass French door provides access to a new steel rear deck and stairs to the rear yard. On the second floor, a new tile floor was added throughout and RRA designed new stone mantle pieces fabricated from England in the living and dining rooms.
On the 3rd floor, a new wall was constructed in the 11’ wide central hallway to allow a new 135 sf master closet with custom designed built-in storage units and accessories. This concept was carried through to the 4th floor on a smaller scale and 4 new storage closets were added in the hallway. The existing bathroom on the 4th Floor was gutted and redesigned including a new 5’x5’ extra deep soaking tub and new fixtures. Silver travertine tiles were used throughout to give the room a durable, waterproof finish while also providing a warm, luxurious feel.
The 5th floor was converted into a playroom and TV room for the family’s two young children and was outfitted with chalkboard paint along the entire east wall in the play area and a bold color block wall treatment in the TV room. A new cork floor was installed for durability and resilience to lots of activity yet providing a soft and sustainable floor treatment for its intended user. A full laundry room was also created floor with new cabinetry, plumbing, and floor and wall tile. Additionally, 3 full baths and a powder room were refitted with tumbled travertine tiles on the top two floors. The exterior of the building was refurbished and new lighting and painted doors and frames were installed in accordance with Landmark designation. An additional challenge on the project was that a previously built extension on the PH level was illegally overbuilt and the property had received a violation. A 9 month process of filing drawings, completing zoning analyses and meetings with the DOB Commissioners ensued to get the extension approved allowing us to obtain a permit for the remainder of the work and complete the Certificate of Occupancy.
In spite of the complex process and scattered program, the completed townhouse has a cohesive aesthetic throughout, with upgraded amenities befitting this grand representation of elite New York living.
 Talon Construction Inc.
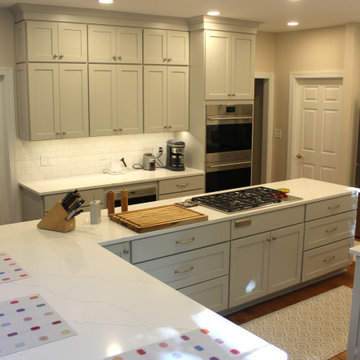
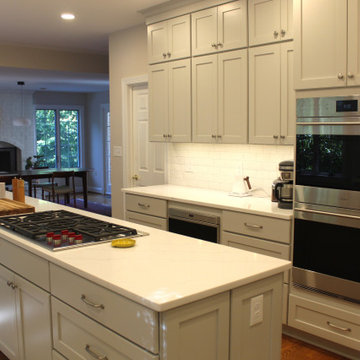
Renovating an open kitchen can be an exciting project that can improve the functionality, aesthetics, and value of your home. Here are some steps to guide you through the process:
Planning and Design:
Define your goals and budget for the renovation.
Determine the layout of your open kitchen. Consider factors like the work triangle (the relationship between the stove, sink, and refrigerator) and the flow of traffic.
Choose a design style and color scheme that suits your preferences and complements the rest of your home.
Research and Inspiration:
Collect inspiration from magazines, websites, and social media platforms to get ideas for your open kitchen design.
Create a mood board or vision board to help you visualize the final look.
Hiring Professionals:
Depending on the scale of your renovation, you may need to hire professionals, such as architects, interior designers, contractors, and electricians. Make sure to check references and get multiple quotes.
Demolition and Structural Work:
If your renovation involves structural changes, like removing walls, this is the time to do it. Ensure that the necessary permits are obtained.
Plumbing and Electrical Work:
Update or reconfigure plumbing and electrical systems as needed. This may include adding or moving outlets, switches, and lighting fixtures.
Cabinetry and Countertops:
Choose and install new kitchen cabinets and countertops. This is a significant part of your renovation and will greatly influence the kitchen's appearance and functionality.
Appliances:
Update or install new kitchen appliances, including the refrigerator, stove, oven, microwave, and dishwasher.
Flooring:
Select and install flooring that is suitable for a kitchen, such as hardwood, tile, laminate, or vinyl. Ensure it complements the overall design.
Backsplash and Wall Finishes:
Install a backsplash that matches your design and protects your walls. Consider materials like tile, glass, or stainless steel.
Lighting:
Choose and install various types of lighting, including ambient, task, and accent lighting. Pendant lights above an island or breakfast bar can add style and functionality.
Paint and Finishing Touches:
Paint the walls and ceiling in the colors you've selected. Add finishing touches like hardware, window treatments, and decorative elements.
Furniture and Accessories:
Bring in furniture, such as a dining table and chairs, barstools, and any other pieces you need to complete the space. Decorate with accessories like artwork, plants, and decorative items.
Final Inspection and Cleanup:
Ensure that all work meets safety and building code requirements. Clean the entire area thoroughly.
Enjoy Your New Kitchen:
Once the renovation is complete and everything is in its place, enjoy your beautiful, functional open kitchen.
Remember that open kitchen renovations can be complex and may require careful planning. It's essential to stay within your budget, communicate with your contractors and designers, and be flexible as unexpected issues may arise during the process. Ultimately, a well-executed open kitchen renovation can enhance the heart of your home and improve your overall living space.
 Tile Doctor Ltd
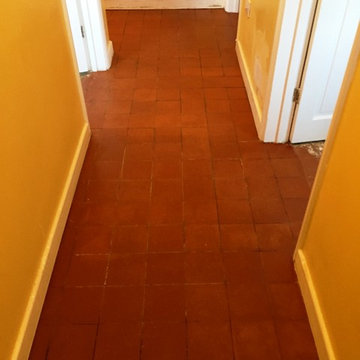
This ground floor flat in the City of Oxford had been converted from a shop which as you can imagine, was quite complex. One significant element involved in the conversation was the restoration of an old Quarry tiled floor which ran through the main hallway and had for many years been covered in a commercial linoleum covering.
When the linoleum covering was removed, the sheer amount of glue which had been used to affix it had completely ruined the appearance and condition of the Quarry tiles. There was also a lot of concrete in the bathroom, and our client was keen to have this removed in the hope that the tiles beneath were salvageable.
My first task at the property was to deal with the adhesive. I covered the entire floor area with Tile Doctor Remove and Go and then covered it with a plastic sheet and leaving it to soak into the glue and break it down overnight. Remove and Go is powerful stripper with a long-dwell time, formulated to break down adhesives and paint stains, amongst other coatings.
I returned the next day and, removing the plastic sheeting, I scrubbed the floor with a carbon brush attached to a rotary floor scrubber to remove the huge glue deposits. I worked in sections, rinsing each area of the floor with water after it had been scrubbed. Once I had finished the entire floor there was still some glue remaining, so I covered it again with a solution of Remove and Go combined with Tile Doctor HBU Nanotech, which utilises nano-sized particles to get underneath tough stains, dissolve them, and lift them out. I left this solution on the floor for about two hours to dwell and scrubbed it again.
During the next day of work, I used a very coarse 100 grit diamond burnishing pad to manually grind away the remaining stubborn bits of glue. Paying attention to the bathroom, I used a 50-grit coarse milling pad followed up with a 100-grit diamond burnishing pad to do the same to the area of concrete.
The next part of the process was to use Tile Doctor Grout Clean Up to acid wash the floor. This was successful in removing the last bits of cement and the remaining residue of the glue. To complete the cleaning process, I then rinsed the floor with plenty of water and vacuumed up any soiled solution.
I opted to leave the floor alone for a couple of days to fully dry off so that it could be sealed upon my return. This is crucial as any moisture or damp issues can damage the performance of the sealer and expose the floor to further ingrained dirt and staining.
To seal the floor, I used Tile Doctor Colour Grow. This is an impregnating sealer that also enhances the natural reddish shades in the Quarry. I applied two coats of the sealer, giving the floor the natural look matte finish the customer desired.
The customer was very impressed with the results of this thorough restoration. She even left the following feedback:
“I cannot recommend this service enough. The Oxford Tile Doctor (Barry) was a superstar: he cleaned up the tiles in my hallway, which were covered in a very thick layer of glue, and removed concrete from the tiles. They now look superb and I’m really happy with the outcome. Barry was always on time, considerate, and kept me up to date. The quote for the job was exactly right. I would not hesitate to recommend him.”
 Talon Construction Inc.
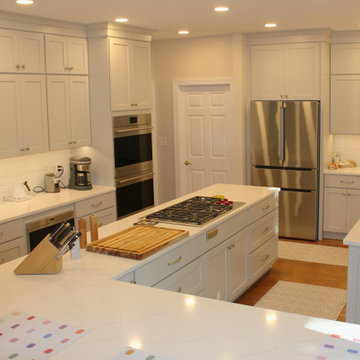
Renovating an open kitchen can be an exciting project that can improve the functionality, aesthetics, and value of your home. Here are some steps to guide you through the process:
Planning and Design:
Define your goals and budget for the renovation.
Determine the layout of your open kitchen. Consider factors like the work triangle (the relationship between the stove, sink, and refrigerator) and the flow of traffic.
Choose a design style and color scheme that suits your preferences and complements the rest of your home.
Research and Inspiration:
Collect inspiration from magazines, websites, and social media platforms to get ideas for your open kitchen design.
Create a mood board or vision board to help you visualize the final look.
Hiring Professionals:
Depending on the scale of your renovation, you may need to hire professionals, such as architects, interior designers, contractors, and electricians. Make sure to check references and get multiple quotes.
Demolition and Structural Work:
If your renovation involves structural changes, like removing walls, this is the time to do it. Ensure that the necessary permits are obtained.
Plumbing and Electrical Work:
Update or reconfigure plumbing and electrical systems as needed. This may include adding or moving outlets, switches, and lighting fixtures.
Cabinetry and Countertops:
Choose and install new kitchen cabinets and countertops. This is a significant part of your renovation and will greatly influence the kitchen's appearance and functionality.
Appliances:
Update or install new kitchen appliances, including the refrigerator, stove, oven, microwave, and dishwasher.
Flooring:
Select and install flooring that is suitable for a kitchen, such as hardwood, tile, laminate, or vinyl. Ensure it complements the overall design.
Backsplash and Wall Finishes:
Install a backsplash that matches your design and protects your walls. Consider materials like tile, glass, or stainless steel.
Lighting:
Choose and install various types of lighting, including ambient, task, and accent lighting. Pendant lights above an island or breakfast bar can add style and functionality.
Paint and Finishing Touches:
Paint the walls and ceiling in the colors you've selected. Add finishing touches like hardware, window treatments, and decorative elements.
Furniture and Accessories:
Bring in furniture, such as a dining table and chairs, barstools, and any other pieces you need to complete the space. Decorate with accessories like artwork, plants, and decorative items.
Final Inspection and Cleanup:
Ensure that all work meets safety and building code requirements. Clean the entire area thoroughly.
Enjoy Your New Kitchen:
Once the renovation is complete and everything is in its place, enjoy your beautiful, functional open kitchen.
Remember that open kitchen renovations can be complex and may require careful planning. It's essential to stay within your budget, communicate with your contractors and designers, and be flexible as unexpected issues may arise during the process. Ultimately, a well-executed open kitchen renovation can enhance the heart of your home and improve your overall living space.
 Talon Construction Inc.
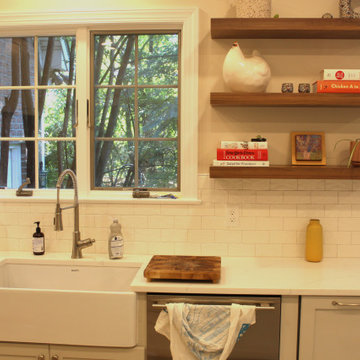
Renovating an open kitchen can be an exciting project that can improve the functionality, aesthetics, and value of your home. Here are some steps to guide you through the process:
Planning and Design:
Define your goals and budget for the renovation.
Determine the layout of your open kitchen. Consider factors like the work triangle (the relationship between the stove, sink, and refrigerator) and the flow of traffic.
Choose a design style and color scheme that suits your preferences and complements the rest of your home.
Research and Inspiration:
Collect inspiration from magazines, websites, and social media platforms to get ideas for your open kitchen design.
Create a mood board or vision board to help you visualize the final look.
Hiring Professionals:
Depending on the scale of your renovation, you may need to hire professionals, such as architects, interior designers, contractors, and electricians. Make sure to check references and get multiple quotes.
Demolition and Structural Work:
If your renovation involves structural changes, like removing walls, this is the time to do it. Ensure that the necessary permits are obtained.
Plumbing and Electrical Work:
Update or reconfigure plumbing and electrical systems as needed. This may include adding or moving outlets, switches, and lighting fixtures.
Cabinetry and Countertops:
Choose and install new kitchen cabinets and countertops. This is a significant part of your renovation and will greatly influence the kitchen's appearance and functionality.
Appliances:
Update or install new kitchen appliances, including the refrigerator, stove, oven, microwave, and dishwasher.
Flooring:
Select and install flooring that is suitable for a kitchen, such as hardwood, tile, laminate, or vinyl. Ensure it complements the overall design.
Backsplash and Wall Finishes:
Install a backsplash that matches your design and protects your walls. Consider materials like tile, glass, or stainless steel.
Lighting:
Choose and install various types of lighting, including ambient, task, and accent lighting. Pendant lights above an island or breakfast bar can add style and functionality.
Paint and Finishing Touches:
Paint the walls and ceiling in the colors you've selected. Add finishing touches like hardware, window treatments, and decorative elements.
Furniture and Accessories:
Bring in furniture, such as a dining table and chairs, barstools, and any other pieces you need to complete the space. Decorate with accessories like artwork, plants, and decorative items.
Final Inspection and Cleanup:
Ensure that all work meets safety and building code requirements. Clean the entire area thoroughly.
Enjoy Your New Kitchen:
Once the renovation is complete and everything is in its place, enjoy your beautiful, functional open kitchen.
Remember that open kitchen renovations can be complex and may require careful planning. It's essential to stay within your budget, communicate with your contractors and designers, and be flexible as unexpected issues may arise during the process. Ultimately, a well-executed open kitchen renovation can enhance the heart of your home and improve your overall living space.
 Talon Construction Inc.
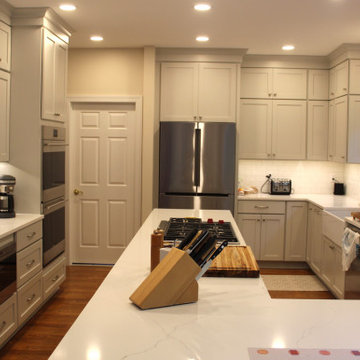
Renovating an open kitchen can be an exciting project that can improve the functionality, aesthetics, and value of your home. Here are some steps to guide you through the process:
Planning and Design:
Define your goals and budget for the renovation.
Determine the layout of your open kitchen. Consider factors like the work triangle (the relationship between the stove, sink, and refrigerator) and the flow of traffic.
Choose a design style and color scheme that suits your preferences and complements the rest of your home.
Research and Inspiration:
Collect inspiration from magazines, websites, and social media platforms to get ideas for your open kitchen design.
Create a mood board or vision board to help you visualize the final look.
Hiring Professionals:
Depending on the scale of your renovation, you may need to hire professionals, such as architects, interior designers, contractors, and electricians. Make sure to check references and get multiple quotes.
Demolition and Structural Work:
If your renovation involves structural changes, like removing walls, this is the time to do it. Ensure that the necessary permits are obtained.
Plumbing and Electrical Work:
Update or reconfigure plumbing and electrical systems as needed. This may include adding or moving outlets, switches, and lighting fixtures.
Cabinetry and Countertops:
Choose and install new kitchen cabinets and countertops. This is a significant part of your renovation and will greatly influence the kitchen's appearance and functionality.
Appliances:
Update or install new kitchen appliances, including the refrigerator, stove, oven, microwave, and dishwasher.
Flooring:
Select and install flooring that is suitable for a kitchen, such as hardwood, tile, laminate, or vinyl. Ensure it complements the overall design.
Backsplash and Wall Finishes:
Install a backsplash that matches your design and protects your walls. Consider materials like tile, glass, or stainless steel.
Lighting:
Choose and install various types of lighting, including ambient, task, and accent lighting. Pendant lights above an island or breakfast bar can add style and functionality.
Paint and Finishing Touches:
Paint the walls and ceiling in the colors you've selected. Add finishing touches like hardware, window treatments, and decorative elements.
Furniture and Accessories:
Bring in furniture, such as a dining table and chairs, barstools, and any other pieces you need to complete the space. Decorate with accessories like artwork, plants, and decorative items.
Final Inspection and Cleanup:
Ensure that all work meets safety and building code requirements. Clean the entire area thoroughly.
Enjoy Your New Kitchen:
Once the renovation is complete and everything is in its place, enjoy your beautiful, functional open kitchen.
Remember that open kitchen renovations can be complex and may require careful planning. It's essential to stay within your budget, communicate with your contractors and designers, and be flexible as unexpected issues may arise during the process. Ultimately, a well-executed open kitchen renovation can enhance the heart of your home and improve your overall living space.
 Talon Construction Inc.
Renovating an open kitchen can be an exciting project that can improve the functionality, aesthetics, and value of your home. Here are some steps to guide you through the process:
Planning and Design:
Define your goals and budget for the renovation.
Determine the layout of your open kitchen. Consider factors like the work triangle (the relationship between the stove, sink, and refrigerator) and the flow of traffic.
Choose a design style and color scheme that suits your preferences and complements the rest of your home.
Research and Inspiration:
Collect inspiration from magazines, websites, and social media platforms to get ideas for your open kitchen design.
Create a mood board or vision board to help you visualize the final look.
Hiring Professionals:
Depending on the scale of your renovation, you may need to hire professionals, such as architects, interior designers, contractors, and electricians. Make sure to check references and get multiple quotes.
Demolition and Structural Work:
If your renovation involves structural changes, like removing walls, this is the time to do it. Ensure that the necessary permits are obtained.
Plumbing and Electrical Work:
Update or reconfigure plumbing and electrical systems as needed. This may include adding or moving outlets, switches, and lighting fixtures.
Cabinetry and Countertops:
Choose and install new kitchen cabinets and countertops. This is a significant part of your renovation and will greatly influence the kitchen's appearance and functionality.
Appliances:
Update or install new kitchen appliances, including the refrigerator, stove, oven, microwave, and dishwasher.
Flooring:
Select and install flooring that is suitable for a kitchen, such as hardwood, tile, laminate, or vinyl. Ensure it complements the overall design.
Backsplash and Wall Finishes:
Install a backsplash that matches your design and protects your walls. Consider materials like tile, glass, or stainless steel.
Lighting:
Choose and install various types of lighting, including ambient, task, and accent lighting. Pendant lights above an island or breakfast bar can add style and functionality.
Paint and Finishing Touches:
Paint the walls and ceiling in the colors you've selected. Add finishing touches like hardware, window treatments, and decorative elements.
Furniture and Accessories:
Bring in furniture, such as a dining table and chairs, barstools, and any other pieces you need to complete the space. Decorate with accessories like artwork, plants, and decorative items.
Final Inspection and Cleanup:
Ensure that all work meets safety and building code requirements. Clean the entire area thoroughly.
Enjoy Your New Kitchen:
Once the renovation is complete and everything is in its place, enjoy your beautiful, functional open kitchen.
Remember that open kitchen renovations can be complex and may require careful planning. It's essential to stay within your budget, communicate with your contractors and designers, and be flexible as unexpected issues may arise during the process. Ultimately, a well-executed open kitchen renovation can enhance the heart of your home and improve your overall living space.
 Ronnette Riley Architect
This 10,000 sf townhouse sits on one of Manhattan’s most beautiful Upper East Side streets and so the goal of the project was to return the house to its original grandeur. Previously a Kips Bay designer showcase house, the rooms were each designed in a differing style and therefore the lack of cohesion and flow made the house seem choppy. In addition, much of the interior was superficial in the sense that plumbing fixtures were not all connected, walls were “false walls” built in front of existing and much of the construction had to be rebuilt.
The scope included creating a large gourmet kitchen in the rear of the ground floor by closing off the winding corridor and creating a new door opening centered on the main entry hall with a paneled arched pocket door mimicking the original detailing of the parlor floor. The kitchen has a Calacatta Gold stone center island and dinning area flanked by counters that run the length of the east and west walls with glass front upper cabinets. A built-in buffet on the south wall anchors the space. A mud room, with access to the delivery entrance and additional storage space was added off the kitchen. A new slim profile steel and glass French door provides access to a new steel rear deck and stairs to the rear yard. On the second floor, a new tile floor was added throughout and RRA designed new stone mantle pieces fabricated from England in the living and dining rooms.
On the 3rd floor, a new wall was constructed in the 11’ wide central hallway to allow a new 135 sf master closet with custom designed built-in storage units and accessories. This concept was carried through to the 4th floor on a smaller scale and 4 new storage closets were added in the hallway. The existing bathroom on the 4th Floor was gutted and redesigned including a new 5’x5’ extra deep soaking tub and new fixtures. Silver travertine tiles were used throughout to give the room a durable, waterproof finish while also providing a warm, luxurious feel.
The 5th floor was converted into a playroom and TV room for the family’s two young children and was outfitted with chalkboard paint along the entire east wall in the play area and a bold color block wall treatment in the TV room. A new cork floor was installed for durability and resilience to lots of activity yet providing a soft and sustainable floor treatment for its intended user. A full laundry room was also created floor with new cabinetry, plumbing, and floor and wall tile. Additionally, 3 full baths and a powder room were refitted with tumbled travertine tiles on the top two floors. The exterior of the building was refurbished and new lighting and painted doors and frames were installed in accordance with Landmark designation. An additional challenge on the project was that a previously built extension on the PH level was illegally overbuilt and the property had received a violation. A 9 month process of filing drawings, completing zoning analyses and meetings with the DOB Commissioners ensued to get the extension approved allowing us to obtain a permit for the remainder of the work and complete the Certificate of Occupancy.
In spite of the complex process and scattered program, the completed townhouse has a cohesive aesthetic throughout, with upgraded amenities befitting this grand representation of elite New York living.
 Ronnette Riley Architect
This 10,000 sf townhouse sits on one of Manhattan’s most beautiful Upper East Side streets and so the goal of the project was to return the house to its original grandeur. Previously a Kips Bay designer showcase house, the rooms were each designed in a differing style and therefore the lack of cohesion and flow made the house seem choppy. In addition, much of the interior was superficial in the sense that plumbing fixtures were not all connected, walls were “false walls” built in front of existing and much of the construction had to be rebuilt.
The scope included creating a large gourmet kitchen in the rear of the ground floor by closing off the winding corridor and creating a new door opening centered on the main entry hall with a paneled arched pocket door mimicking the original detailing of the parlor floor. The kitchen has a Calacatta Gold stone center island and dinning area flanked by counters that run the length of the east and west walls with glass front upper cabinets. A built-in buffet on the south wall anchors the space. A mud room, with access to the delivery entrance and additional storage space was added off the kitchen. A new slim profile steel and glass French door provides access to a new steel rear deck and stairs to the rear yard. On the second floor, a new tile floor was added throughout and RRA designed new stone mantle pieces fabricated from England in the living and dining rooms.
On the 3rd floor, a new wall was constructed in the 11’ wide central hallway to allow a new 135 sf master closet with custom designed built-in storage units and accessories. This concept was carried through to the 4th floor on a smaller scale and 4 new storage closets were added in the hallway. The existing bathroom on the 4th Floor was gutted and redesigned including a new 5’x5’ extra deep soaking tub and new fixtures. Silver travertine tiles were used throughout to give the room a durable, waterproof finish while also providing a warm, luxurious feel.
The 5th floor was converted into a playroom and TV room for the family’s two young children and was outfitted with chalkboard paint along the entire east wall in the play area and a bold color block wall treatment in the TV room. A new cork floor was installed for durability and resilience to lots of activity yet providing a soft and sustainable floor treatment for its intended user. A full laundry room was also created floor with new cabinetry, plumbing, and floor and wall tile. Additionally, 3 full baths and a powder room were refitted with tumbled travertine tiles on the top two floors. The exterior of the building was refurbished and new lighting and painted doors and frames were installed in accordance with Landmark designation. An additional challenge on the project was that a previously built extension on the PH level was illegally overbuilt and the property had received a violation. A 9 month process of filing drawings, completing zoning analyses and meetings with the DOB Commissioners ensued to get the extension approved allowing us to obtain a permit for the remainder of the work and complete the Certificate of Occupancy.
In spite of the complex process and scattered program, the completed townhouse has a cohesive aesthetic throughout, with upgraded amenities befitting this grand representation of elite New York living.
 Ronnette Riley Architect
This 10,000 sf townhouse sits on one of Manhattan’s most beautiful Upper East Side streets and so the goal of the project was to return the house to its original grandeur. Previously a Kips Bay designer showcase house, the rooms were each designed in a differing style and therefore the lack of cohesion and flow made the house seem choppy. In addition, much of the interior was superficial in the sense that plumbing fixtures were not all connected, walls were “false walls” built in front of existing and much of the construction had to be rebuilt.
The scope included creating a large gourmet kitchen in the rear of the ground floor by closing off the winding corridor and creating a new door opening centered on the main entry hall with a paneled arched pocket door mimicking the original detailing of the parlor floor. The kitchen has a Calacatta Gold stone center island and dinning area flanked by counters that run the length of the east and west walls with glass front upper cabinets. A built-in buffet on the south wall anchors the space. A mud room, with access to the delivery entrance and additional storage space was added off the kitchen. A new slim profile steel and glass French door provides access to a new steel rear deck and stairs to the rear yard. On the second floor, a new tile floor was added throughout and RRA designed new stone mantle pieces fabricated from England in the living and dining rooms.
On the 3rd floor, a new wall was constructed in the 11’ wide central hallway to allow a new 135 sf master closet with custom designed built-in storage units and accessories. This concept was carried through to the 4th floor on a smaller scale and 4 new storage closets were added in the hallway. The existing bathroom on the 4th Floor was gutted and redesigned including a new 5’x5’ extra deep soaking tub and new fixtures. Silver travertine tiles were used throughout to give the room a durable, waterproof finish while also providing a warm, luxurious feel.
The 5th floor was converted into a playroom and TV room for the family’s two young children and was outfitted with chalkboard paint along the entire east wall in the play area and a bold color block wall treatment in the TV room. A new cork floor was installed for durability and resilience to lots of activity yet providing a soft and sustainable floor treatment for its intended user. A full laundry room was also created floor with new cabinetry, plumbing, and floor and wall tile. Additionally, 3 full baths and a powder room were refitted with tumbled travertine tiles on the top two floors. The exterior of the building was refurbished and new lighting and painted doors and frames were installed in accordance with Landmark designation. An additional challenge on the project was that a previously built extension on the PH level was illegally overbuilt and the property had received a violation. A 9 month process of filing drawings, completing zoning analyses and meetings with the DOB Commissioners ensued to get the extension approved allowing us to obtain a permit for the remainder of the work and complete the Certificate of Occupancy.
In spite of the complex process and scattered program, the completed townhouse has a cohesive aesthetic throughout, with upgraded amenities befitting this grand representation of elite New York living.
 Ronnette Riley Architect
This 10,000 sf townhouse sits on one of Manhattan’s most beautiful Upper East Side streets and so the goal of the project was to return the house to its original grandeur. Previously a Kips Bay designer showcase house, the rooms were each designed in a differing style and therefore the lack of cohesion and flow made the house seem choppy. In addition, much of the interior was superficial in the sense that plumbing fixtures were not all connected, walls were “false walls” built in front of existing and much of the construction had to be rebuilt.
The scope included creating a large gourmet kitchen in the rear of the ground floor by closing off the winding corridor and creating a new door opening centered on the main entry hall with a paneled arched pocket door mimicking the original detailing of the parlor floor. The kitchen has a Calacatta Gold stone center island and dinning area flanked by counters that run the length of the east and west walls with glass front upper cabinets. A built-in buffet on the south wall anchors the space. A mud room, with access to the delivery entrance and additional storage space was added off the kitchen. A new slim profile steel and glass French door provides access to a new steel rear deck and stairs to the rear yard. On the second floor, a new tile floor was added throughout and RRA designed new stone mantle pieces fabricated from England in the living and dining rooms.
On the 3rd floor, a new wall was constructed in the 11’ wide central hallway to allow a new 135 sf master closet with custom designed built-in storage units and accessories. This concept was carried through to the 4th floor on a smaller scale and 4 new storage closets were added in the hallway. The existing bathroom on the 4th Floor was gutted and redesigned including a new 5’x5’ extra deep soaking tub and new fixtures. Silver travertine tiles were used throughout to give the room a durable, waterproof finish while also providing a warm, luxurious feel.
The 5th floor was converted into a playroom and TV room for the family’s two young children and was outfitted with chalkboard paint along the entire east wall in the play area and a bold color block wall treatment in the TV room. A new cork floor was installed for durability and resilience to lots of activity yet providing a soft and sustainable floor treatment for its intended user. A full laundry room was also created floor with new cabinetry, plumbing, and floor and wall tile. Additionally, 3 full baths and a powder room were refitted with tumbled travertine tiles on the top two floors. The exterior of the building was refurbished and new lighting and painted doors and frames were installed in accordance with Landmark designation. An additional challenge on the project was that a previously built extension on the PH level was illegally overbuilt and the property had received a violation. A 9 month process of filing drawings, completing zoning analyses and meetings with the DOB Commissioners ensued to get the extension approved allowing us to obtain a permit for the remainder of the work and complete the Certificate of Occupancy.
In spite of the complex process and scattered program, the completed townhouse has a cohesive aesthetic throughout, with upgraded amenities befitting this grand representation of elite New York living.
 Ronnette Riley Architect
This 10,000 sf townhouse sits on one of Manhattan’s most beautiful Upper East Side streets and so the goal of the project was to return the house to its original grandeur. Previously a Kips Bay designer showcase house, the rooms were each designed in a differing style and therefore the lack of cohesion and flow made the house seem choppy. In addition, much of the interior was superficial in the sense that plumbing fixtures were not all connected, walls were “false walls” built in front of existing and much of the construction had to be rebuilt.
The scope included creating a large gourmet kitchen in the rear of the ground floor by closing off the winding corridor and creating a new door opening centered on the main entry hall with a paneled arched pocket door mimicking the original detailing of the parlor floor. The kitchen has a Calacatta Gold stone center island and dinning area flanked by counters that run the length of the east and west walls with glass front upper cabinets. A built-in buffet on the south wall anchors the space. A mud room, with access to the delivery entrance and additional storage space was added off the kitchen. A new slim profile steel and glass French door provides access to a new steel rear deck and stairs to the rear yard. On the second floor, a new tile floor was added throughout and RRA designed new stone mantle pieces fabricated from England in the living and dining rooms.
On the 3rd floor, a new wall was constructed in the 11’ wide central hallway to allow a new 135 sf master closet with custom designed built-in storage units and accessories. This concept was carried through to the 4th floor on a smaller scale and 4 new storage closets were added in the hallway. The existing bathroom on the 4th Floor was gutted and redesigned including a new 5’x5’ extra deep soaking tub and new fixtures. Silver travertine tiles were used throughout to give the room a durable, waterproof finish while also providing a warm, luxurious feel.
The 5th floor was converted into a playroom and TV room for the family’s two young children and was outfitted with chalkboard paint along the entire east wall in the play area and a bold color block wall treatment in the TV room. A new cork floor was installed for durability and resilience to lots of activity yet providing a soft and sustainable floor treatment for its intended user. A full laundry room was also created floor with new cabinetry, plumbing, and floor and wall tile. Additionally, 3 full baths and a powder room were refitted with tumbled travertine tiles on the top two floors. The exterior of the building was refurbished and new lighting and painted doors and frames were installed in accordance with Landmark designation. An additional challenge on the project was that a previously built extension on the PH level was illegally overbuilt and the property had received a violation. A 9 month process of filing drawings, completing zoning analyses and meetings with the DOB Commissioners ensued to get the extension approved allowing us to obtain a permit for the remainder of the work and complete the Certificate of Occupancy.
In spite of the complex process and scattered program, the completed townhouse has a cohesive aesthetic throughout, with upgraded amenities befitting this grand representation of elite New York living.
 Ronnette Riley Architect
This 10,000 sf townhouse sits on one of Manhattan’s most beautiful Upper East Side streets and so the goal of the project was to return the house to its original grandeur. Previously a Kips Bay designer showcase house, the rooms were each designed in a differing style and therefore the lack of cohesion and flow made the house seem choppy. In addition, much of the interior was superficial in the sense that plumbing fixtures were not all connected, walls were “false walls” built in front of existing and much of the construction had to be rebuilt.
The scope included creating a large gourmet kitchen in the rear of the ground floor by closing off the winding corridor and creating a new door opening centered on the main entry hall with a paneled arched pocket door mimicking the original detailing of the parlor floor. The kitchen has a Calacatta Gold stone center island and dinning area flanked by counters that run the length of the east and west walls with glass front upper cabinets. A built-in buffet on the south wall anchors the space. A mud room, with access to the delivery entrance and additional storage space was added off the kitchen. A new slim profile steel and glass French door provides access to a new steel rear deck and stairs to the rear yard. On the second floor, a new tile floor was added throughout and RRA designed new stone mantle pieces fabricated from England in the living and dining rooms.
On the 3rd floor, a new wall was constructed in the 11’ wide central hallway to allow a new 135 sf master closet with custom designed built-in storage units and accessories. This concept was carried through to the 4th floor on a smaller scale and 4 new storage closets were added in the hallway. The existing bathroom on the 4th Floor was gutted and redesigned including a new 5’x5’ extra deep soaking tub and new fixtures. Silver travertine tiles were used throughout to give the room a durable, waterproof finish while also providing a warm, luxurious feel.
The 5th floor was converted into a playroom and TV room for the family’s two young children and was outfitted with chalkboard paint along the entire east wall in the play area and a bold color block wall treatment in the TV room. A new cork floor was installed for durability and resilience to lots of activity yet providing a soft and sustainable floor treatment for its intended user. A full laundry room was also created floor with new cabinetry, plumbing, and floor and wall tile. Additionally, 3 full baths and a powder room were refitted with tumbled travertine tiles on the top two floors. The exterior of the building was refurbished and new lighting and painted doors and frames were installed in accordance with Landmark designation. An additional challenge on the project was that a previously built extension on the PH level was illegally overbuilt and the property had received a violation. A 9 month process of filing drawings, completing zoning analyses and meetings with the DOB Commissioners ensued to get the extension approved allowing us to obtain a permit for the remainder of the work and complete the Certificate of Occupancy.
In spite of the complex process and scattered program, the completed townhouse has a cohesive aesthetic throughout, with upgraded amenities befitting this grand representation of elite New York living.
 Housing & Building Association of Colorado Springs
The Home
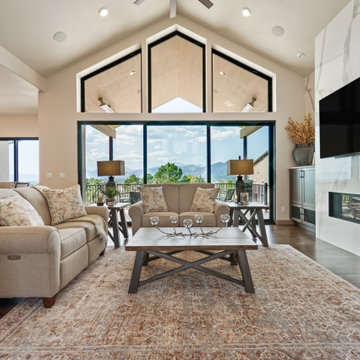
The Polaris is about coming home. The homeowner is a United States Air Force Academy alumnus and his family, who found the perfect location to overlook his alma mater. This home is built for today and tomorrow, with elevator and ADA access.
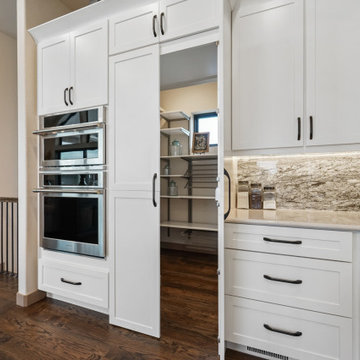
As you enter, sweeping Air Force Academy views greet you. The living area boasts a stunning fireplace wall, a crush-worthy kitchen and pantry and a lovely dining area. The mud room flows seamlessly into the master closet and kitchen. Along the way, a stop at the wine fridge is a nice perk. The office and second bedroom offer plenty of space for work and guests. With a gorgeous fire tray, grill area, infrared heaters and hot tub, the huge deck is a year-round destination.
The basement is built to play, but the homeowners can lock off part of it if they wish. The exercise room is decked out in Air Force
Academy blue flooring. The fun game room is next to the wet bar and walk-out rec room, with a powder room nearby. Two bedrooms
share a bathroom and have their own laundry room. A vault room under the front porch adds additional storage.
The Builder
Elevation Homes has been building custom homes in the Colorado Springs area for 18 years. We are a high-value, small team of experienced professionals who have the passion to take on the most complex projects. Our homes are built to the highest standards and are impeccably crafted for discerning customers. Our customers receive our personal attention through the entire process and we deliver exceptional service. We pride ourselves on being at the forefront of the homebuilding industry. We have recently obtained a Graduate Master Builder designation, one of only five awarded in the state of Colorado, in an effort to be educated about best building practices. The team also belongs to a National Association of Home Builders ‘Builder 20 Group’, a professional networking group that provides opportunities for collaboration and learning among builders. Additionally, we attend national building shows every year to remain current regarding the latest products and trends.
The Interior Design
Designer Jessica Brown at La-Z-Boy Furniture Galleries pulled off the feat of making this home comfortable and stylish at the same time. This breathtaking house is bathed in warm, neutral earth tones, which is complemented by the fresh yet comfortable furnishings — including La-Z-Boy’s sophisticated Duo Bennett Sofa that’s covered in an environmentally friendly Conserve fabric that feels as cozy as your favorite sweater. Each room flows to the next with an inviting palette and pops of color to surprise. The decor marries up with the natural light, dramatic wood, tile and granite to make the home feel warm and inviting
 Ronnette Riley Architect
This 10,000 sf townhouse sits on one of Manhattan’s most beautiful Upper East Side streets and so the goal of the project was to return the house to its original grandeur. Previously a Kips Bay designer showcase house, the rooms were each designed in a differing style and therefore the lack of cohesion and flow made the house seem choppy. In addition, much of the interior was superficial in the sense that plumbing fixtures were not all connected, walls were “false walls” built in front of existing and much of the construction had to be rebuilt.
The scope included creating a large gourmet kitchen in the rear of the ground floor by closing off the winding corridor and creating a new door opening centered on the main entry hall with a paneled arched pocket door mimicking the original detailing of the parlor floor. The kitchen has a Calacatta Gold stone center island and dinning area flanked by counters that run the length of the east and west walls with glass front upper cabinets. A built-in buffet on the south wall anchors the space. A mud room, with access to the delivery entrance and additional storage space was added off the kitchen. A new slim profile steel and glass French door provides access to a new steel rear deck and stairs to the rear yard. On the second floor, a new tile floor was added throughout and RRA designed new stone mantle pieces fabricated from England in the living and dining rooms.
On the 3rd floor, a new wall was constructed in the 11’ wide central hallway to allow a new 135 sf master closet with custom designed built-in storage units and accessories. This concept was carried through to the 4th floor on a smaller scale and 4 new storage closets were added in the hallway. The existing bathroom on the 4th Floor was gutted and redesigned including a new 5’x5’ extra deep soaking tub and new fixtures. Silver travertine tiles were used throughout to give the room a durable, waterproof finish while also providing a warm, luxurious feel.
The 5th floor was converted into a playroom and TV room for the family’s two young children and was outfitted with chalkboard paint along the entire east wall in the play area and a bold color block wall treatment in the TV room. A new cork floor was installed for durability and resilience to lots of activity yet providing a soft and sustainable floor treatment for its intended user. A full laundry room was also created floor with new cabinetry, plumbing, and floor and wall tile. Additionally, 3 full baths and a powder room were refitted with tumbled travertine tiles on the top two floors. The exterior of the building was refurbished and new lighting and painted doors and frames were installed in accordance with Landmark designation. An additional challenge on the project was that a previously built extension on the PH level was illegally overbuilt and the property had received a violation. A 9 month process of filing drawings, completing zoning analyses and meetings with the DOB Commissioners ensued to get the extension approved allowing us to obtain a permit for the remainder of the work and complete the Certificate of Occupancy.
In spite of the complex process and scattered program, the completed townhouse has a cohesive aesthetic throughout, with upgraded amenities befitting this grand representation of elite New York living.
 Housing & Building Association of Colorado Springs
The Home
The Polaris is about coming home. The homeowner is a United States Air Force Academy alumnus and his family, who found the perfect location to overlook his alma mater. This home is built for today and tomorrow, with elevator and ADA access.
As you enter, sweeping Air Force Academy views greet you. The living area boasts a stunning fireplace wall, a crush-worthy kitchen and pantry and a lovely dining area. The mud room flows seamlessly into the master closet and kitchen. Along the way, a stop at the wine fridge is a nice perk. The office and second bedroom offer plenty of space for work and guests. With a gorgeous fire tray, grill area, infrared heaters and hot tub, the huge deck is a year-round destination.
The basement is built to play, but the homeowners can lock off part of it if they wish. The exercise room is decked out in Air Force
Academy blue flooring. The fun game room is next to the wet bar and walk-out rec room, with a powder room nearby. Two bedrooms
share a bathroom and have their own laundry room. A vault room under the front porch adds additional storage.
The Builder
Elevation Homes has been building custom homes in the Colorado Springs area for 18 years. We are a high-value, small team of experienced professionals who have the passion to take on the most complex projects. Our homes are built to the highest standards and are impeccably crafted for discerning customers. Our customers receive our personal attention through the entire process and we deliver exceptional service. We pride ourselves on being at the forefront of the homebuilding industry. We have recently obtained a Graduate Master Builder designation, one of only five awarded in the state of Colorado, in an effort to be educated about best building practices. The team also belongs to a National Association of Home Builders ‘Builder 20 Group’, a professional networking group that provides opportunities for collaboration and learning among builders. Additionally, we attend national building shows every year to remain current regarding the latest products and trends.
The Interior Design
Designer Jessica Brown at La-Z-Boy Furniture Galleries pulled off the feat of making this home comfortable and stylish at the same time. This breathtaking house is bathed in warm, neutral earth tones, which is complemented by the fresh yet comfortable furnishings — including La-Z-Boy’s sophisticated Duo Bennett Sofa that’s covered in an environmentally friendly Conserve fabric that feels as cozy as your favorite sweater. Each room flows to the next with an inviting palette and pops of color to surprise. The decor marries up with the natural light, dramatic wood, tile and granite to make the home feel warm and inviting
20