
Search results for "Concentrates" in Home Design Ideas
 AMLD INTERIOR INC
AK4002: "The Pour" Skinny Rain
DESCRIPTION:
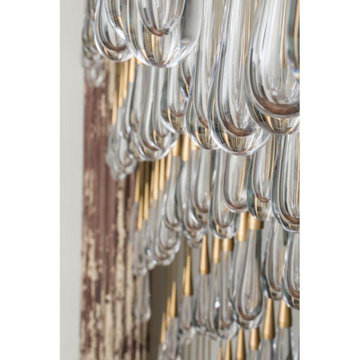
The light installation is a teardrop-shaped chandelier with deliciously unique lights that celebrate the fascinating nature of raindrops, where no drop is the same as the next. Each drop is hand-blown by artisans and intricately engineered to house the lighting strategy for the chandelier. When you see a light sculpture designed to increase the visual appeal of a room and define its luminous character, you stop on your way to admire it. It’s the case of the Raindrop chandelier known as “The Pour”, a modern light sculpture meant to illuminate and beautify its chosen location to create an architectural relationship with space. The drop itself is constructed of two parts: the brass screw cap, which houses the light, and the hand-blown crystal reflecting the light to create puddles on the floor below. To replicate the nature of raindrops, no two drops are blown identical. The name “The Pour” derives from the distinctive shape that the chandelier forms: an exaggeration of the dramatic motion of water pouring out of a carafe. Designed by forming a grid mimicking how puddles ripple outward in concentric circles, each teardrop is hung to brass pipes of varying lengths. Placed strategically on the grid, the teardrops lock into the mirrored base that fits seamlessly between the two existing columns. The mirrored base reflects the teardrops endlessly into the sky above and when lit. The chandelier echoes rain frozen in time with ephemeral puddles overlaid on the floor below.
SPECIFICATIONS:
Collection: Organic
Size: 58” Long x 13” Width x 72” Height (112 Lights)
Shape: Rectangular
Frame Finish: Patina Dark Bronze
Materials: Metal, Glass
Extension: 12' feet adjustable wiring available in black or silver
Glass: Hand-blown glass
Bulbs: 112 Bulbs 110V USA/220V Europe 40 W candelabra bulbs (included)
Weight: 135 lbs. (for the 58" L)
Assembly: Some Assembly
Dimmer Switch Compatible: Optional
Rush Order: 4-6 Weeks; 15% added to the total
Regular Lead Time: 8-12 Weeks
Warranty: 5 Years Full Coverage (includes parts replacement)
SIZE OPTIONS:
Size: Price:
30” Long x 13” Width x 66” Height (69 Lights) $3,360.00
36” Long x 13” Width x 66” Height (79 Lights) $4,660.00
42” Long x 13” Width x 66” Height (89 Lights) $6,470.00
58” Long x 16” Width x 72” Height (112 Lights) $7,670.00
71” Long x 20" Width x 82” Height (242 Lights) $9,820.00
Custom Sizes, Finishes, Colors Available Upon Request
Additional Info- Handblown Glass: 2" Width x 4" Height
 AMLD INTERIOR INC
AK4002: "The Pour" Skinny Rain
DESCRIPTION:
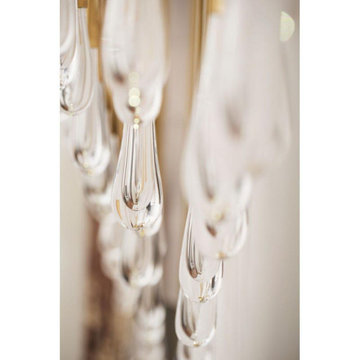
The light installation is a teardrop-shaped chandelier with deliciously unique lights that celebrate the fascinating nature of raindrops, where no drop is the same as the next. Each drop is hand-blown by artisans and intricately engineered to house the lighting strategy for the chandelier. When you see a light sculpture designed to increase the visual appeal of a room and define its luminous character, you stop on your way to admire it. It’s the case of the Raindrop chandelier known as “The Pour”, a modern light sculpture meant to illuminate and beautify its chosen location to create an architectural relationship with space. The drop itself is constructed of two parts: the brass screw cap, which houses the light, and the hand-blown crystal reflecting the light to create puddles on the floor below. To replicate the nature of raindrops, no two drops are blown identical. The name “The Pour” derives from the distinctive shape that the chandelier forms: an exaggeration of the dramatic motion of water pouring out of a carafe. Designed by forming a grid mimicking how puddles ripple outward in concentric circles, each teardrop is hung to brass pipes of varying lengths. Placed strategically on the grid, the teardrops lock into the mirrored base that fits seamlessly between the two existing columns. The mirrored base reflects the teardrops endlessly into the sky above and when lit. The chandelier echoes rain frozen in time with ephemeral puddles overlaid on the floor below.
SPECIFICATIONS:
Collection: Organic
Size: 58” Long x 13” Width x 72” Height (112 Lights)
Shape: Rectangular
Frame Finish: Patina Dark Bronze
Materials: Metal, Glass
Extension: 12' feet adjustable wiring available in black or silver
Glass: Hand-blown glass
Bulbs: 112 Bulbs 110V USA/220V Europe 40 W candelabra bulbs (included)
Weight: 135 lbs. (for the 58" L)
Assembly: Some Assembly
Dimmer Switch Compatible: Optional
Rush Order: 4-6 Weeks; 15% added to the total
Regular Lead Time: 8-12 Weeks
Warranty: 5 Years Full Coverage (includes parts replacement)
SIZE OPTIONS:
Size: Price:
30” Long x 13” Width x 66” Height (69 Lights) $3,360.00
36” Long x 13” Width x 66” Height (79 Lights) $4,660.00
42” Long x 13” Width x 66” Height (89 Lights) $6,470.00
58” Long x 16” Width x 72” Height (112 Lights) $7,670.00
71” Long x 20" Width x 82” Height (242 Lights) $9,820.00
Custom Sizes, Finishes, Colors Available Upon Request
Additional Info- Handblown Glass: 2" Width x 4" Height
 AMLD INTERIOR INC
AK4002RD "The Pour" Skinny Rain
DESCRIPTION:
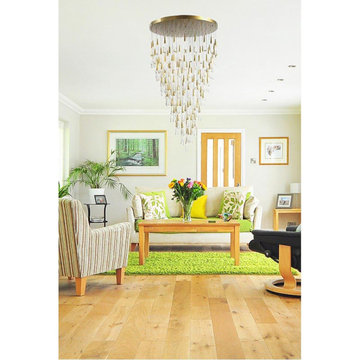
The light installation is a teardrop-shaped chandelier with deliciously unique lights that celebrate the fascinating nature of raindrops, where no drop is the same as the next. Each drop is hand-blown by artisans and intricately engineered to house the lighting strategy for the chandelier. When you see a light sculpture designed to increase the visual appeal of a room and define its luminous character, you stop on your way to admire it. It’s the case of the Raindrop chandelier known as “The Pour”, a modern light sculpture meant to illuminate and beautify its chosen location to create an architectural relationship with space. The drop itself is constructed of two parts: the brass screw cap, which houses the light, and the hand-blown crystal reflecting the light to create puddles on the floor below. To replicate the nature of raindrops, no two drops are blown identical. The name “The Pour” derives from the distinctive shape that the chandelier forms: an exaggeration of the dramatic motion of water pouring out of a carafe. Designed by forming a grid mimicking how puddles ripple outward in concentric circles, each teardrop is hung to brass pipes of varying lengths. Placed strategically on the grid, the teardrops lock into the mirrored base that fits seamlessly between the two existing columns. The mirrored base reflects the teardrops endlessly into the sky above and when lit. The chandelier echoes rain frozen in time with ephemeral puddles overlaid on the floor below.
SPECIFICATIONS:
Collection: Organic
Size: 42" Wide x 89" Height
Shape: Pendant
Frame Finish: Brushed Brass
Materials: Stainless Steel and Glass
Extension: 12 ft adjustable Cables/ or Metal Rods Available in any finish upon Request,
Glass: Hand-blown glass
Bulbs: 162 L Bulbs 25 W USA/220V Europe 40 W candelabra bulbs (included)
Weight: 144 lbs
Assembly: Some Assembly required. Each piece comes with easy to understand assembly instructions for your convenience.
Dimmer Switch Compatible: Optional
Rush Order: 4-6 Weeks; 15% added to total
Regular Lead Time: 6-10 Weeks
Warranty: 5 Years Full Coverage (includes replacement parts)
SIZE OPTION:
Size: Price:
24" Wide x 89" Height $3,260.00
30" Wide x 89" Height $4,870.00
36" Wide x 89" Height $6,260.00
42" Wide x 89" Height (as shown) $7,890.00
48" Wide x 89" Height $9,550.00
54" Wide x 89" Height $12,880.00
60" Wide x 89" Height $14,980.00
Custom Sizes, Finishes, Colors Available Upon Request
Find the right local pro for your project
 Roeser Home Remodeling
This active, forward-thinking couple bought a new house in order to “right-size” for the next chapter in their lives. They found a ranch home in a neighborhood they liked, but the floor plan needed a remodel in order to fit their lifestyle.
Two small bedrooms were combined in order to make one large master. The existing living room and garage were combined to make one large living space. The floor of the garage was raised to be on an equal plane to the existing living room. Hardwood was added to match the existing flooring and then all was refinished for a fresh look.
A large ViWinco Bay Window was added where the garage door once was, and a Velux Solar Skylight was installed to add to the natural sunlight coming from the bay. Custom built-ins lined the furthest wall for storage and closet space. Sliding doors were installed as an entrance and exit to the back of the existing house.
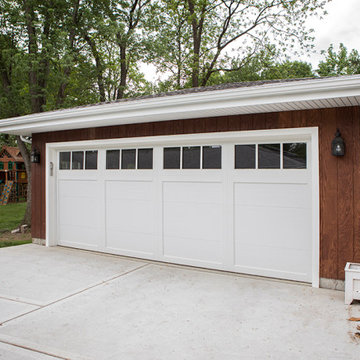
A new extended length garage was added for the owner’s vehicles with spare room for the homeowners brewing experiments. Azek window and door trim surrounded the newly installed ViWinco windows along with Cedar Siding mimicking the house. Liftmaster Garage Doors were installed with dual controls for the car and a spare for safety and easy entry.
Hangout for Grandchildren
These two people are much too busy with their jobs and their many hobbies, from beer brewing, to gardening, and everything in between. But they needed a place where grandchildren could hang out and watch a movie when they came to visit. A part of their basement was finished into a perfect space with a lot of storage for games, books, movies and any other toys or crafts that may need to be stored for frequent visits. Custom bookshelves lined two walls and one was designed for the television and all its components. The area was carpeted and a hall was created with tile to another storage cabinet for linens. A nice basement bathroom was created opposite to the laundry area.
Basement Bathroom Remodel
A Sterling Accord, 60” Seated Shower was installed in the bathroom with a Moen 4-functioning massaging hand shower with slide bar for the shower feature. A Wellborn select vanity was selected with upgraded solid wood, dovetail drawers. Moen’s hardware on the cabinets compliments the brushed nickel plumbing fixtures in Moen’s Voss Series.
The Highline Kohler comfort height toilet, along with the Grip-tight Cachet seat added to the practicality, along with the beauty of this basement bath. A Verdera Kohler mirrored cabinet was installed, giving this homeowner more storage for all those bathroom essentials.
Kohler was also installed in this remodel, as the Caxton sink is a bathroom favorite among many of our clients.
The Caesar stone countertop in Urban Safari, along with the 12” X 12” Castelbianco Nasino Ivory tile flooring, softens the look and brings it all together. This wonderful couple can now concentrate on their gardening and savoring the long days of summer.
 Tile Doctor Ltd
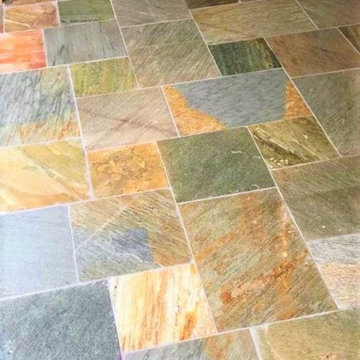
The tiles pictured are Chinese Slate which were laid in the Kitchen of a house in Chepstow around nine years ago. The town of Chepstow is located on the Welsh side of the River Seven and has the River Wye running through it.
The floor had not been professionally cleaned and sealed since installation. During this time the old sealer had mostly worn off allowing dirt to get into the pores of the stone leaving it looking dull, uninviting and dirty. The grout lines had also collected dirt and many of the lines had darkened.
I discussed with the client the process to get the floor cleaned and restored and demonstrated the effectiveness of the process on a small test area. They were impressed and were happy to go ahead with my quote, so we scheduled in the work which would take two days.
To get the floor clean and remove what was left of the old sealer I first made the floor wet and then added a strong dilution of Tile Doctor Pro-Clean mixed with Tile Doctor Remove and Go to give it extra power. This cleaning cocktail was left to soak into the tiles for ten minutes before being scrubbed in with a black scrubbing pad fitted to a rotary machine and by hand where necessary. This combination works well on really dirty floors such as this.
The scrubbing action released the years of dirt from the pores of the Slate and it wasn’t long before the cleaning solution turned black. This was then extracted off the floor using a wet vacuum. We then gave the floor a thorough inspection. There were one or two areas that were particularly stubborn, so these areas were retreated using the same process and the grout scrubbed by hand using more Tile Doctor Pro Clean.
The floor was then given another rinse with water and then dried as much as possible with the wet vacuum. This got the floor dry, but it would need to be completely dry before sealing so it was then left to dry off fully overnight.
I came back the next day to seal the floor first checking the moisture level of the stone by taking readings with a damp meter to ensure it was dry. I chose to use Tile Doctor Colour Grow for the sealer as the colour enhancing formula would be the best product to bring out the natural colours in the Chinese slate. Colour Grow is an impregnating sealer which will provides durable protection as well as allowing the surface to breath. Three coats were applied, allowing each to dry before applying the next one.
The client was so happy, so much that she said it looked better than when first laid!
I discussed aftercare with her and recommended the use of Tile Doctor Neutral Tile Cleaner, it’s pH balanced so it won’t prematurely erode the sealer which can be the problem with stronger products you find in supermarkets. It comes in concentrated form so one bottle lasts a long time.
Paul Wales
Monmouthshire Tile Doctor

 Joy Street Design
Bathroom renovation featuring marble subway tile, black cabinets, and quartz countertops.
Designed by Joy Street Design serving Oakland, Berkeley, San Francisco, and the whole of the East Bay.
For more about Joy Street Design, click here: https://www.joystreetdesign.com/
To learn more about this project, click here: https://www.joystreetdesign.com/portfolio/don-jose-drive
 Roeser Home Remodeling
This active, forward-thinking couple bought a new house in order to “right-size” for the next chapter in their lives. They found a ranch home in a neighborhood they liked, but the floor plan needed a remodel in order to fit their lifestyle.
Two small bedrooms were combined in order to make one large master. The existing living room and garage were combined to make one large living space. The floor of the garage was raised to be on an equal plane to the existing living room. Hardwood was added to match the existing flooring and then all was refinished for a fresh look.
A large ViWinco Bay Window was added where the garage door once was, and a Velux Solar Skylight was installed to add to the natural sunlight coming from the bay. Custom built-ins lined the furthest wall for storage and closet space. Sliding doors were installed as an entrance and exit to the back of the existing house.
A new extended length garage was added for the owner’s vehicles with spare room for the homeowners brewing experiments. Azek window and door trim surrounded the newly installed ViWinco windows along with Cedar Siding mimicking the house. Liftmaster Garage Doors were installed with dual controls for the car and a spare for safety and easy entry.
Hangout for Grandchildren
These two people are much too busy with their jobs and their many hobbies, from beer brewing, to gardening, and everything in between. But they needed a place where grandchildren could hang out and watch a movie when they came to visit. A part of their basement was finished into a perfect space with a lot of storage for games, books, movies and any other toys or crafts that may need to be stored for frequent visits. Custom bookshelves lined two walls and one was designed for the television and all its components. The area was carpeted and a hall was created with tile to another storage cabinet for linens. A nice basement bathroom was created opposite to the laundry area.
Basement Bathroom Remodel
A Sterling Accord, 60” Seated Shower was installed in the bathroom with a Moen 4-functioning massaging hand shower with slide bar for the shower feature. A Wellborn select vanity was selected with upgraded solid wood, dovetail drawers. Moen’s hardware on the cabinets compliments the brushed nickel plumbing fixtures in Moen’s Voss Series.
The Highline Kohler comfort height toilet, along with the Grip-tight Cachet seat added to the practicality, along with the beauty of this basement bath. A Verdera Kohler mirrored cabinet was installed, giving this homeowner more storage for all those bathroom essentials.
Kohler was also installed in this remodel, as the Caxton sink is a bathroom favorite among many of our clients.
The Caesar stone countertop in Urban Safari, along with the 12” X 12” Castelbianco Nasino Ivory tile flooring, softens the look and brings it all together. This wonderful couple can now concentrate on their gardening and savoring the long days of summer.
 Tile Doctor Ltd
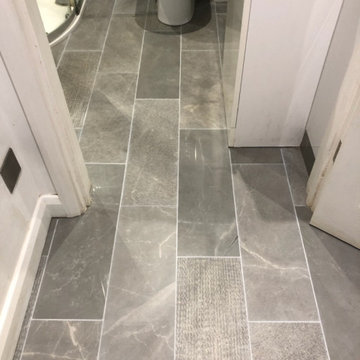
The pictures below detail the renovation of a Porcelain Tiled Floor I completed at a property in Ipswich. Installed throughout the Kitchen and into the adjacent WC the porcelain tile and grout were in a very dirty state and the client was desperate to get them clean. The situation wasn’t helped by their two dogs with grubby paws. She had tried all the usual household cleaners she could find, and nothing seemed to work. Unfortunately, household cleaners can make the problem worse due the strong chemicals they contain.
I visited the property to survey the floor and was able to reassure the client that although the grout was heavily stained it could be renovated by recolouring it with a Tile Doctor Grout Colourant. I was confident we would soon be able to get the floor looking great again and demonstrated the process I would use on a small part of the floor. The demonstration went well and happy with the result we agreed a date for my return the following week to complete the work which should be completed in a single day.
Returning on the agreed date we started by protecting the by applying a clear silicone sealant to the MDF skirting boards and kitchen base units. We left this to dry for an hour before proceeding with the cleaning.
The Porcelain tile and grout was cleaned with a strong dilution of Tile Doctor Pro-Clean using 3 parts cleaner to 5 parts water. The solution was applied to the tile and grout and then left to soak in for ten minutes before being worked in using a rotary machine fitted with a Black Scrubbing Pad. Tile Doctor Pro-Clean is a concentrated, multi-purpose high-alkaline cleaner which is designed for deep cleaning tile, stone and grout of dirt and grease and can also remove sealers.
Pads can struggle to reach into the recesses of the grout line so once I was finished with the tile, I hand scrubbed the grout with a wire brush. The floor was then rinsed with water and the resultant slurry extracted off the floor with wet vacuum.
The floor took about three hours to deep clean which was just the right timing for us to have lunch whilst the floor dried. The grout was much improved by the cleaning process but as suspected there were too many deep-seated stains to be able to guarantee a consistent finish. So as previously agreed with the client we set about colouring the grout using a light grey colourant. This took most of the afternoon as there was a lot of grout.
The Porcelain tiles were the non-porous type that won’t take a sealer and the colourant acts as a barrier over the grout protecting it and making it easy to clean so once I was done colouring there was no need to apply a sealer.
My client was relieved to have the floor looking clean and presentable again. For aftercare I recommended that moving forward it would be best to use Tile Doctor Neutral Tile Cleaner which is a pH neutral cleaner. This will ensure that with regular cleaning the floor will keep clean and the grout won’t be compromised by overly strong products.
Bruce Copping
Suffolk Tile Doctor
 Tile Doctor Ltd
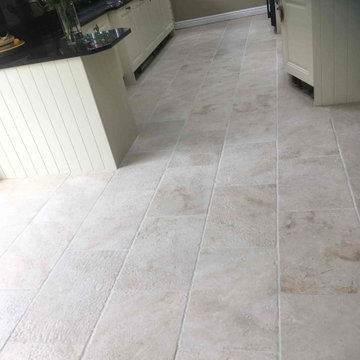
This client from Nantwich had a beautiful Travertine tiled floor installed in their very large kitchen and utility area. Realising that their tiles didn’t look as good as when they were installed, they got in touch to ask if I could clean and re-seal the tiles and grouting.
I went over to survey the floor and could see the grout had darkened (it was originally white) and the travertine was trapping dirt in the natural pits of the stone. I conducted a test clean on the grout and Travertine which responded well, the client was impressed, and I was asked to do the whole floor. Happy with my quote for restoring the tile and grout we scheduled a date to do the work.
Nantwich is a medieval market town in Cheshire, well known for its Tudor and Georgian architecture. It has one of the highest concentrations of listed buildings in England and many of these properties have very old floors.
We scheduled in a date for the work, and I began by cleaning the floor with a strong solution of Tile Doctor Remove and Go worked into the grout and pitting with hand brushes. I then used a wire brush on the grout to get it really clean. The soiled solution was rinsed off with water and extracted with a wet vacuum.
Once done the Travertine was burnished using a series of Tile Doctor burnishing pads from 400 through to 1500-grit attached to the rotary machine, rinsing with water in between to remove the soiling. The pads are encrusted with diamond and after being worked over each pad three times do an amazing job of removing ingrained dirt and bringing up the polish on the stone.
The floor needs to be dry before I can apply the sealer so once the burnishing was done, I gave it a final finish and extracted as much moisture as possible with the wet vacuum.
The Travertine was left to dry off overnight and I returned the next day to apply a sealer, first checking the floor was dry with a damp meter. The readings were acceptable, so I was able to get on with the sealing. My client had requested a natural finish, so I had recommended Tile Doctor Ultra-Seal which is almost invisible sealer that provides protection but doesn’t change the look of the stone. Only a couple of coats are required and being an impregnating sealer, it works by soaking into stone and occupying the pores so dirt can’t become ingrained there.
Once the sealer had dried the floor looked so much cleaner and I had a very happy customer who left the following feedback:
“Kamilla has totally transformed our tumbled travertine kitchen floor. It looks like new again, we are so pleased. Kamilla explained the whole process and was a pleasure to deal with. We are delighted with the end result, Kamilla worked so hard, would highly recommend.”
For aftercare cleaning and maintenance, I recommended they use Tile Doctor Stone Soap which is pH neutral and mild enough to use every day. You must be careful when choosing a cleaner for sealed floors as many products are too strong and will reduce the lifespan of the sealer.
Kamila Logonzy
East Cheshire Tile Doctor
 Metamorphosis Design
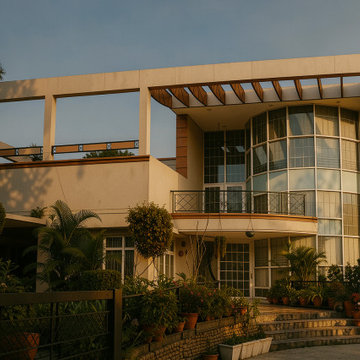
M Residence
(Residential Project)
Constructed 1999
Location :Chandigarh
A House Shaped by Frugal Engineering and Expansive Imagination
I had designed his factory years earlier — and he must have been pleased with the outcome. A 6,000 sq. ft. multi-storied factory conceived for an entirely new product line, marking a decisive shift from decades of manufacturing a declining product.
A careful analysis of the production dynamics led to a vertical organization of spaces, with multiple floor plates interconnected through the sequence of manufacturing operations. The heavy-duty work was concentrated in the basement, where storage for steel and brass raw materials and components was planned. Remarkably, the entire structure stood on just ten columns, each with a mere 30 cm square cross-section — a fact that still gives one nightmares. At the time, it was also the tallest structure in the area.
That same philosophy of frugal engineering later became the guiding principle for an addition to the family residence, more than a decade afterward. A narrow strip only 22 feet wide and less than 50 feet deep had to accommodate an entirely new home for a growing family moving steadily upward in life. The response was straightforward — a similarly efficient column-frame structure designed to extract the maximum usable space from the compact 22' × 50' site.
We began with a semi-basement, using battered retaining walls integrated with the structural columns to counter the thrust from the existing foundations along the length of the original house. A courtyard was introduced to preserve light and ventilation for the older structure, while also providing access to an elevator for a disabled family member. This naturally required ramps and seamless wheelchair mobility throughout. Maintaining connectivity with the old house was equally essential.
The result was a split-level home with interconnected vertical spaces spanning all three floors, linked by shallow, comfortable steps that made movement easy for everyone.
The extension evolved into a house of remarkable generosity — with five bedrooms, study rooms, dens, stores, walk-in closets, box rooms, drawing and dining spaces, lounges, enclosed verandahs, a games room, jacuzzis, decks and balconies, servant quarters, waterfalls, rainwater harvesting systems, SPV installations, solar chimney-assisted ventilation, and nearly every innovation one could imagine at the turn of the millennium.
We were also experimenting with what were then cutting-edge materials and technologies: 2' × 2' vitrified tiles brought all the way from Bombay, CFL lighting long before LEDs arrived, copper and composite aluminium plumbing, and solar water heating. Insulated glazing, integrated Venetian blinds, security systems, and emergency low-voltage lighting were all incorporated with enthusiasm. Wooden flooring in toilets and insulated foam concrete walls were considered radical ideas at the time.
Architecture students frequently visited the house for field studies. The owners’ young son would often dive into the pool before even entering the house, while the little daughter happily inhabited her own magical corner of it.
And for the architect — there was always a wonderful cup of coffee waiting on every visit.
Needless to say, there still is.

 Michael Nash Design, Build & Homes
2010 NATIONAL NARI REGIONAL AWARD WINNER
Project Scope
The owners of this 7,000 square foot colonial in Oakton, Virginia, were seeking a multi-level Mediterranean-style indoor/outdoor living space off the back of their home. They turned to Michael Nash Design, Build & Homes for a design solution that would include a stone patio, a second-story deck, a screened-in porch and linking staircases.
While the structure was designed primarily for family dining and entertaining, it also had to accommodate periodic social gatherings of one hundred guests or more. To meet these needs, the project would include a fully-equipped outdoor kitchen, several serving counters with permanent refrigeration, and well-delineated socializing and dining zones.
The existing home’s setting offered several impressive assets the new outdoor living area was designed to exploit. The sprawling acreage features old stand trees, wooded paths and a private lake. Beautifully landscaped, it unfolds as an idyllic panorama that naturally draws people to the outdoors.
Challenges
Since the rear elevation was situated on a slope that drops away from the house, the Michael Nash team had to raise the grade two feet within in a 2,000 square foot area extending out from the back of the house. Infrastructure plans also called for a sophisticated drainage system that had to accommodate a whole series of water “runoff” considerations to be integrated into the decking itself. Excavation included constructing retaining walls to bolster the elevated grade—which also had to support a concrete slab, the primary foundation for the entire complex.
Solutions
The ground level decking consists of a 2,000 square foot flagstone patio level with the home’s lower level doors. There is a decorative water fountain mid-patio—an ornate collectible acquired in Florida. Food preparation is concentrated within a specially designed semi-circular wall that creates an “outdoor kitchen” equipped with a 60” Viking barbecue grill, a prep sink, a warming drawer, refrigerator and appropriate storage. There is a granite surfaced dining counter with seating for eight.
Wrought iron railing and approximately 20 decorative columns (some encasing steel vertical supports) are incorporated into the design scheme. Many of the columns house accent lights.
The top level—supported by horizontal steel beams– is a 2,500 square foot deck constructed entirely of Trex decking. The open air decking is, again, directly accessible from rooms on the second level of the house including the kitchen, sunroom and family room.
The platform’s most prominent feature is a U-shaped “kitchenette” with cedar shake shingle roofing. Like its counterpart one level below, the facility is equipped with grill, refrigerator and stainless steel cabinetry.
One portion of the deck has been allocated for a 16’ x 16’ octagonal screened-in porch crowned by a pair of 2’ x 4’ skylights. The porch can be accessed from the home’s conservatory via a set of French doors. With its mosaic tile flooring, stained cedar panel ceiling and honed granite counters, the interior is elegant and calming. Hand-painted stenciling and a wall-mounted water feature provide distinctive detailing.
Finally, the design introduced elements to highlight and reinforce an awareness of the lovely bucolic setting. Fountains and water features combined with textured surfaces and mosaic tiling and backsplashes to present a villa-like ambiance well-suited to the Virginia countryside.

 Accoya Wood
Accoya was selected as the ideal material for this breathtaking home in West Vancouver. Accoya was used for the railing, siding, fencing and soffits throughout the property. In addition, an Accoya handrail was specifically custom designed by Upper Canada Forest Products.
Design Duo Matt McLeod and Lisa Bovell of McLeod Bovell Modern houses switched between fluidity, plasticity, malleability and even volumetric design to try capture their process of space-making.
Unlike anything surrounding it, this home’s irregular shape and atypical residential building materials are more akin to modern-day South American projects that stem from their surroundings to showcase concrete’s versatility. This is why the Accoya was left in its rough state, to accentuate the minimalist and harmonious aesthetics of its natural environment.
Photo Credit: Martin Tessler


 Gallery KBNY
For this Brooklyn condo renovation, Gallery Kitchen and Bath updated the entire kitchen and both bathrooms, as well as painted and laid out new flooring throughout the entire apartment. The owners wanted to unite the seeming medley of the existing space into a cohesive design more representative of their own style. With its ultra-high ceilings and exposed joints and beams, the space already lent itself to the farmhouse look. The end result is a modernized, eclectic farmhouse style that we keenly carried throughout the home.
MORE DETAILS
Compelling textures and color combos reign supreme. The kitchen features semi-custom Shaker-style stone gray cabinets, a white subway tile backsplash running all the way up the wall, and white quartz countertops. We built the island in part to create a pleasing yet efficient flow from the kitchen into the living and dining areas as the space was opened up. We also painted the plumbing stack white to not make it stand out.
We also redesigned the bathrooms, giving each a unique treatment. In the master bath, we took a Victorian-goes-modern approach with coral walls, champagne fixtures, and a clawfoot tub. In the guest bathroom, we stuck to a transitional style that approaches modern without becoming contemporary, pairing herringbone marble floor tiles with a mix of subway and penny tiles on the walls and in the shower. Both maintain elements, such as tiles, fixtures, and colors, that coordinate with the overall eclectic farmhouse look.
HOW WE COLLABORATE
Collaboration with our clients to their desired degree is one of our core pillars. In this condo renovation, the clients wanted central air and were initially considering a true central air system. We advised against it, as not only would it take away from the unique beauty of unusually tall ceilings by adding unsightly ductwork, but it would also significantly detract from the farmhouse look. Instead, we suggested a mini-split system. Our recommended units were both cost-effective and much more complementary to the comprehensive theme. Of course, we ultimately always honor the clients’ choices but it’s just as important to us that we make sure to provide all the necessary information so our clients can make educated decisions that are best for their needs.
SPACE PLANNING
Another key element of the renovation process is space planning. From this perspective, we consider the placement and positioning of objects with regard to the overall flow of space. The building where this renovation took place is U-shaped at one end, which happens to be where this particular apartment is located. Uniquely-shaped spaces naturally require more concentration than those built in the standard rectangular shape. Questions we consider include: Where will people really spend time in this space? What will the flow of foot traffic be? Is there easy access to the kitchen island? Does it flow well into the hallways? Does the island protrude into anything? Working in New York, with its variety of homes and architectural styles, has greatly developed our experience with standard spaces and unconventional ones alike.
SOME HIGHLIGHTS
- Ultra-tall ceilings, allowing for stacked cabinets in the kitchen, as well as long pendant light fixtures and more chandeliers than usual throughout the home
- Completely refurbished cast iron clawfoot tub in one bathroom, with a 270-degree shower curtain around the tub
- Vibrant color choices, including an all-blue bedroom in various shades
- Treated exposed brick walls
Fun Fact: A client once showed us inspiration photos that they sourced online of this exact project, having no idea it was one of ours.
Thinking about renovating your condo? Contact us today to find out how you can benefit from our expertise in remodeling New York City condos. We are a design-and-build firm with a full-scale approach that handles every single aspect of your condo renovation from start to finish.

 Teakwoodcentral
Light fixture with direct emission, with fluorescent sources
• Available with base or fixed support (pivot) made up of mass-coloured concrete
• Diffuser in mass-pigmented polypropylene, screen in light-diffusing silkscreened methacrylate, reflector in painted aluminum
• Mobile-arm structure in extruded EN-AW-6060 aluminum with bright anodizing treat¬ment
• Polished-painted articulations in die-cast EN-AB 46100 aluminum
• Adjustment system in AISI 316 stainless steel
• Silicone seal gaskets
• Suitable for watertight connection
• Electronic ballast
• c.UL.us listed
Lead time: 2 - 4 weeks
Lamping explanation:
INC = incandescent FLU = fluorescent HAL = 120V halogen LV HAL = 12V halogen
MH = metal halide SBF = self-ballasted fluorescent LED = light emitting diode
All lamps are included with the fixtures
Artemide's design and research team focuses on developing quality and long-lasting products.
Utilization of recyclable materials is high priority in our process of conceiving new design.
80% of our lights are energy efficient fluorescent or LED lighting.
But what's more green than having a beautifully crafted light that continues to function well and looks stunning decades from now
The Artemide light has never been solely a function of seeing, or an opportunity for formal experimentation with lamps as objects. For more than forty years, Artemide has aimed to propose light as a companion to people, as a source of physical pleasure and mental comfort. Artemide has done so, with different work groups, searching through the whole design process, starting with a declaration of values - The human light.
Beyond the definition, the human light is intelligent light. A light that knows it has to relate to people, accompanying them in their daily activities. That is why Artemide's attention today is concentrated on the concept of the context of life, understood as a specific microenvironment in which an event occurs where one or more persons are the protagonist, every context of life can be associated with different light contexts, or the different atmospheres of light characterized by the activities that, at various moments of the day, have us as protagonists, starting from these contexts and the lighting conditions that characterize them, Artemide proposes products capable of meeting people's multiple needs and offering the light performance characteristics most suited to each moment of life, it is light that is flexible and adaptable, which produces the optimum visual precision, and consumes the minimum environmental resources, it is Artemide light.
The Artemide group, founded by Ernesto Gismondi in 1959, today operates throughout the world, with 16 subsidiaries and affiliated companies, and 35 exclusive distributors. They have production centers in Italy, France, Germany, the USA, Hungary and the Czech Republic. In a policy aimed at satisfying all lighting needs, the Artemide group has recently acquired companies that reinforce its position as a world leader and further diversifies the offerings. For contexts of life, Artemide offers not only lamps for moments of relaxation at home, but also large sophisticated installations for lighting public and private professional activities.
Technological and productive expertise is achieved through research and development centers, with the product planning and engineering section, laboratories for technical conformity and self-certification tests, and production units equipped with avant-garde processes. A production structure that can offer expertise in the processing of traditional materials such as glass, as well as the capacity for innovation with recently introduced materials such as titanium. Lighting performance characteristics extend from a light with atmosphere, variable, colored, to the most precise of lights for community environments. The vast range of options reflects the commitment of the whole organization to provide a product guaranteed by the Artemide brand, throughout the world, with an image that is strong and consistent - That of a leader in the lighting industry.
Rezek, an Artemide brand, with product development and manufacturing in the United States. Founded by designer Ron Rezek in 1978, the Rezek company has gained strong recognition and appreciation among the architectural and interior design community for the distinctly creative design and quality construction of its American made lighting products for residential and commercial applications.


 Gallery KBNY
For this Brooklyn condo renovation, Gallery Kitchen and Bath updated the entire kitchen and both bathrooms, as well as painted and laid out new flooring throughout the entire apartment. The owners wanted to unite the seeming medley of the existing space into a cohesive design more representative of their own style. With its ultra-high ceilings and exposed joints and beams, the space already lent itself to the farmhouse look. The end result is a modernized, eclectic farmhouse style that we keenly carried throughout the home.
MORE DETAILS
Compelling textures and color combos reign supreme. The kitchen features semi-custom Shaker-style stone gray cabinets, a white subway tile backsplash running all the way up the wall, and white quartz countertops. We built the island in part to create a pleasing yet efficient flow from the kitchen into the living and dining areas as the space was opened up. We also painted the plumbing stack white to not make it stand out.
We also redesigned the bathrooms, giving each a unique treatment. In the master bath, we took a Victorian-goes-modern approach with coral walls, champagne fixtures, and a clawfoot tub. In the guest bathroom, we stuck to a transitional style that approaches modern without becoming contemporary, pairing herringbone marble floor tiles with a mix of subway and penny tiles on the walls and in the shower. Both maintain elements, such as tiles, fixtures, and colors, that coordinate with the overall eclectic farmhouse look.
HOW WE COLLABORATE
Collaboration with our clients to their desired degree is one of our core pillars. In this condo renovation, the clients wanted central air and were initially considering a true central air system. We advised against it, as not only would it take away from the unique beauty of unusually tall ceilings by adding unsightly ductwork, but it would also significantly detract from the farmhouse look. Instead, we suggested a mini-split system. Our recommended units were both cost-effective and much more complementary to the comprehensive theme. Of course, we ultimately always honor the clients’ choices but it’s just as important to us that we make sure to provide all the necessary information so our clients can make educated decisions that are best for their needs.
SPACE PLANNING
Another key element of the renovation process is space planning. From this perspective, we consider the placement and positioning of objects with regard to the overall flow of space. The building where this renovation took place is U-shaped at one end, which happens to be where this particular apartment is located. Uniquely-shaped spaces naturally require more concentration than those built in the standard rectangular shape. Questions we consider include: Where will people really spend time in this space? What will the flow of foot traffic be? Is there easy access to the kitchen island? Does it flow well into the hallways? Does the island protrude into anything? Working in New York, with its variety of homes and architectural styles, has greatly developed our experience with standard spaces and unconventional ones alike.
SOME HIGHLIGHTS
- Ultra-tall ceilings, allowing for stacked cabinets in the kitchen, as well as long pendant light fixtures and more chandeliers than usual throughout the home
- Completely refurbished cast iron clawfoot tub in one bathroom, with a 270-degree shower curtain around the tub
- Vibrant color choices, including an all-blue bedroom in various shades
- Treated exposed brick walls
Fun Fact: A client once showed us inspiration photos that they sourced online of this exact project, having no idea it was one of ours.
Thinking about renovating your condo? Contact us today to find out how you can benefit from our expertise in remodeling New York City condos. We are a design-and-build firm with a full-scale approach that handles every single aspect of your condo renovation from start to finish.
 Gallery KBNY
For this Brooklyn condo renovation, Gallery Kitchen and Bath updated the entire kitchen and both bathrooms, as well as painted and laid out new flooring throughout the entire apartment. The owners wanted to unite the seeming medley of the existing space into a cohesive design more representative of their own style. With its ultra-high ceilings and exposed joints and beams, the space already lent itself to the farmhouse look. The end result is a modernized, eclectic farmhouse style that we keenly carried throughout the home.
MORE DETAILS
Compelling textures and color combos reign supreme. The kitchen features semi-custom Shaker-style stone gray cabinets, a white subway tile backsplash running all the way up the wall, and white quartz countertops. We built the island in part to create a pleasing yet efficient flow from the kitchen into the living and dining areas as the space was opened up. We also painted the plumbing stack white to not make it stand out.
We also redesigned the bathrooms, giving each a unique treatment. In the master bath, we took a Victorian-goes-modern approach with coral walls, champagne fixtures, and a clawfoot tub. In the guest bathroom, we stuck to a transitional style that approaches modern without becoming contemporary, pairing herringbone marble floor tiles with a mix of subway and penny tiles on the walls and in the shower. Both maintain elements, such as tiles, fixtures, and colors, that coordinate with the overall eclectic farmhouse look.
HOW WE COLLABORATE
Collaboration with our clients to their desired degree is one of our core pillars. In this condo renovation, the clients wanted central air and were initially considering a true central air system. We advised against it, as not only would it take away from the unique beauty of unusually tall ceilings by adding unsightly ductwork, but it would also significantly detract from the farmhouse look. Instead, we suggested a mini-split system. Our recommended units were both cost-effective and much more complementary to the comprehensive theme. Of course, we ultimately always honor the clients’ choices but it’s just as important to us that we make sure to provide all the necessary information so our clients can make educated decisions that are best for their needs.
SPACE PLANNING
Another key element of the renovation process is space planning. From this perspective, we consider the placement and positioning of objects with regard to the overall flow of space. The building where this renovation took place is U-shaped at one end, which happens to be where this particular apartment is located. Uniquely-shaped spaces naturally require more concentration than those built in the standard rectangular shape. Questions we consider include: Where will people really spend time in this space? What will the flow of foot traffic be? Is there easy access to the kitchen island? Does it flow well into the hallways? Does the island protrude into anything? Working in New York, with its variety of homes and architectural styles, has greatly developed our experience with standard spaces and unconventional ones alike.
SOME HIGHLIGHTS
- Ultra-tall ceilings, allowing for stacked cabinets in the kitchen, as well as long pendant light fixtures and more chandeliers than usual throughout the home
- Completely refurbished cast iron clawfoot tub in one bathroom, with a 270-degree shower curtain around the tub
- Vibrant color choices, including an all-blue bedroom in various shades
- Treated exposed brick walls
Fun Fact: A client once showed us inspiration photos that they sourced online of this exact project, having no idea it was one of ours.
Thinking about renovating your condo? Contact us today to find out how you can benefit from our expertise in remodeling New York City condos. We are a design-and-build firm with a full-scale approach that handles every single aspect of your condo renovation from start to finish.
 Gallery KBNY
For this Brooklyn condo renovation, Gallery Kitchen and Bath updated the entire kitchen and both bathrooms, as well as painted and laid out new flooring throughout the entire apartment. The owners wanted to unite the seeming medley of the existing space into a cohesive design more representative of their own style. With its ultra-high ceilings and exposed joints and beams, the space already lent itself to the farmhouse look. The end result is a modernized, eclectic farmhouse style that we keenly carried throughout the home.
MORE DETAILS
Compelling textures and color combos reign supreme. The kitchen features semi-custom Shaker-style stone gray cabinets, a white subway tile backsplash running all the way up the wall, and white quartz countertops. We built the island in part to create a pleasing yet efficient flow from the kitchen into the living and dining areas as the space was opened up. We also painted the plumbing stack white to not make it stand out.
We also redesigned the bathrooms, giving each a unique treatment. In the master bath, we took a Victorian-goes-modern approach with coral walls, champagne fixtures, and a clawfoot tub. In the guest bathroom, we stuck to a transitional style that approaches modern without becoming contemporary, pairing herringbone marble floor tiles with a mix of subway and penny tiles on the walls and in the shower. Both maintain elements, such as tiles, fixtures, and colors, that coordinate with the overall eclectic farmhouse look.
HOW WE COLLABORATE
Collaboration with our clients to their desired degree is one of our core pillars. In this condo renovation, the clients wanted central air and were initially considering a true central air system. We advised against it, as not only would it take away from the unique beauty of unusually tall ceilings by adding unsightly ductwork, but it would also significantly detract from the farmhouse look. Instead, we suggested a mini-split system. Our recommended units were both cost-effective and much more complementary to the comprehensive theme. Of course, we ultimately always honor the clients’ choices but it’s just as important to us that we make sure to provide all the necessary information so our clients can make educated decisions that are best for their needs.
SPACE PLANNING
Another key element of the renovation process is space planning. From this perspective, we consider the placement and positioning of objects with regard to the overall flow of space. The building where this renovation took place is U-shaped at one end, which happens to be where this particular apartment is located. Uniquely-shaped spaces naturally require more concentration than those built in the standard rectangular shape. Questions we consider include: Where will people really spend time in this space? What will the flow of foot traffic be? Is there easy access to the kitchen island? Does it flow well into the hallways? Does the island protrude into anything? Working in New York, with its variety of homes and architectural styles, has greatly developed our experience with standard spaces and unconventional ones alike.
SOME HIGHLIGHTS
- Ultra-tall ceilings, allowing for stacked cabinets in the kitchen, as well as long pendant light fixtures and more chandeliers than usual throughout the home
- Completely refurbished cast iron clawfoot tub in one bathroom, with a 270-degree shower curtain around the tub
- Vibrant color choices, including an all-blue bedroom in various shades
- Treated exposed brick walls
Fun Fact: A client once showed us inspiration photos that they sourced online of this exact project, having no idea it was one of ours.
Thinking about renovating your condo? Contact us today to find out how you can benefit from our expertise in remodeling New York City condos. We are a design-and-build firm with a full-scale approach that handles every single aspect of your condo renovation from start to finish.
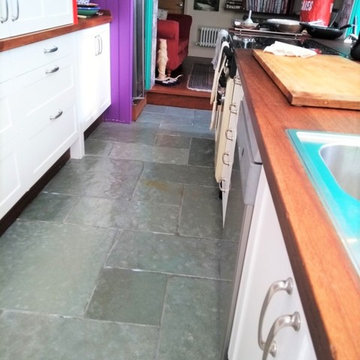 Tile Doctor Ltd
I recently helped a homeowner from my home town of Dursley who got in touch about her kitchen Flagstone floor. The problem revolved around an accident she had with raspberries which had stained the flagstones and the problem became compounded when a house hold clearing product was applied neat to clean up the mess. If you follow any of our Tile Doctor blogs, you will know that using strong household cleaning products can damage the sealer and, in this case, it had left white marks on the floor.
I called round to the property to survey the floor as was surprised to find out that the floor had been cleaned and sealed only four months prior by another company. I don’t like to comment on other people’s work, but I found the grout lines and flagstones were still badly ingrained with dirt, so it wasn’t a through job.
I completed by survey and demonstrated the process I would follow to resolve the issues on one of the flagstone tiles. She could not believe the difference I was able to make and booked me in straight away to restore the entire floor.
My first task was to protect the wooden kitchen units from splashing that can happen when cleaning the floor. Once that was done, I set about stripping the sealer from the floor and deep cleaning the tile and grout with a strong dilution of Tile Doctor Pro-Clean. Pro-Clean is a concentrated, multi-purpose high-alkaline cleaner, stripper and degreaser which is safe to use on all types of tile, stone and grout including natural stone.
Working in sections across the Kitchen and adjacent dining room I diluted one part Pro-Clean to two parts water and mopped it onto the flagstones and grout where I left it to soak in for roughly fifteen minutes. Then using a rotary floor buffer fitted with a black scrubbing pad I scrubbed the solution into the floor into the old sealer and trapped dirt came away turning the cleaning fluid black in the process. The soil was then rinsed off with water and then extracted with a powerful 3,000 watt wet and dry vacuum. This process was repeated until I was satisfied the floor was clean and I ran a stiff grout brush along the grout lines to ensure they also received a good scrub. After I was satisfied the section was clean it was rinsed thoroughly with water to neutralise the floor and remove any trace of product and then dried with the wet and dry vacuum.
The cleaning process took up the whole day, but the flagstones would need to be dry before sealing so after giving the owner an update I left the floor for two days, so it could dry out thoroughly.
On my return I tested the floor was dry in multiple places with a damp meter to ensure it was ready to be sealed. The readings showed that the wet and dry vacuum had done a good job in removing the moisture, so all was well. To seal I applied several coats of Tile Doctor Seal and Go allowing each coat to dry before applying the next however with such a large area to cover I was able to work in sections around the floor.
Seal and Go works really well on Flagstones and leaves a very appealing sheen finish, also being water based it doesn’t leave a smell as it dries.
The results were amazing, and the customer thanked me for making such a massive improvement on her floor. Before leaving I made sure to discuss after-care and to avoid the use of hash cleaning products.
Malcolm Crowther
Gloucester Tile Doctor
83