
Search results for "Connected posts" in Home Design Ideas
 BOWA
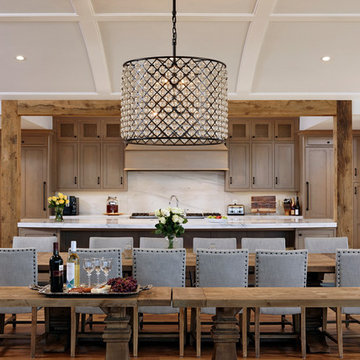
BOWASophisticated barrel vault ceiling that connects kitchen to dining room, Home automation package including audio/visual, lighting, and window coverings, Custom Hickory hardwood flooring throughout the home, New gas fireplace with golden honey quartzite, Rustic pine beams in the kitchen
Bob Narod Photography
 Visbeen Architects
Builder: Segard Builders
Photographer: Ashley Avila Photography
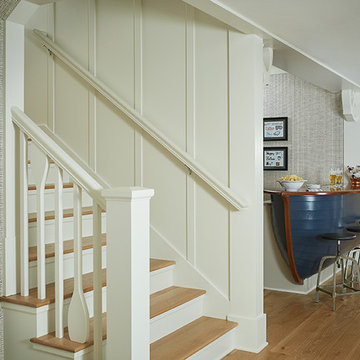
Symmetry and traditional sensibilities drive this homes stately style. Flanking garages compliment a grand entrance and frame a roundabout style motor court. On axis, and centered on the homes roofline is a traditional A-frame dormer. The walkout rear elevation is covered by a paired column gallery that is connected to the main levels living, dining, and master bedroom. Inside, the foyer is centrally located, and flanked to the right by a grand staircase. To the left of the foyer is the homes private master suite featuring a roomy study, expansive dressing room, and bedroom. The dining room is surrounded on three sides by large windows and a pair of French doors open onto a separate outdoor grill space. The kitchen island, with seating for seven, is strategically placed on axis to the living room fireplace and the dining room table. Taking a trip down the grand staircase reveals the lower level living room, which serves as an entertainment space between the private bedrooms to the left and separate guest bedroom suite to the right. Rounding out this plans key features is the attached garage, which has its own separate staircase connecting it to the lower level as well as the bonus room above.
 CBNT Co.
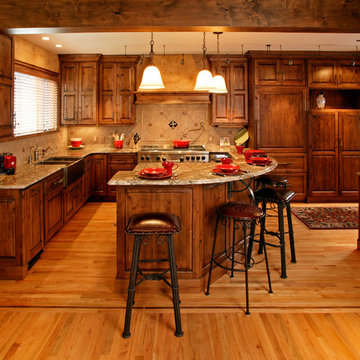
Example of a mountain style kitchen design in Denver with a farmhouse sink, raised-panel cabinets, medium tone wood cabinets, beige backsplash and paneled appliances
Find the right local pro for your project
 Ben Gebo Photography
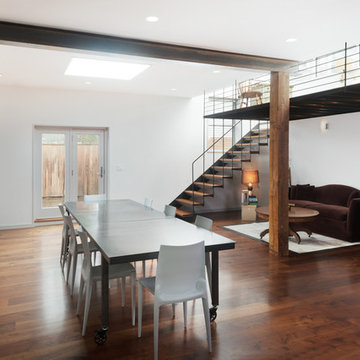
Ben Gebo Photography. Shot for Brown/Fenollossa Architects.
Mid-sized minimalist dark wood floor great room photo in Boston with white walls and a standard fireplace
Mid-sized minimalist dark wood floor great room photo in Boston with white walls and a standard fireplace
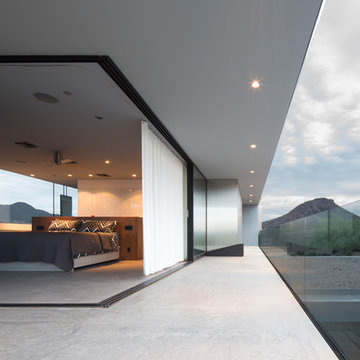
 Western Window Systems
Scottsdale-based architectural firm Chen + Suchart Studio created this modern home in Arizona with a private courtyard and pool on the lower level and rooms that take advantage of views of the McDowell Mountains upstairs. Sliding glass panels that disappear into walls, courtesy of Western Window Systems’ Series 600 Multi-Slide Doors, transform rooms into uninterrupted spaces that open to other living areas and allow for panoramic outlooks of the surroundings.

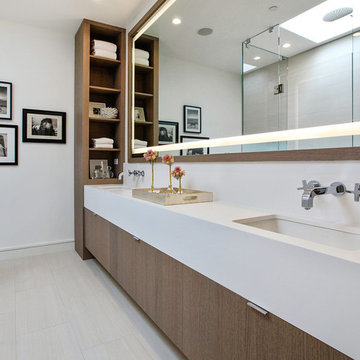
 Chr DAUER Architects
A post-war, Glen Park house was dark and tiny but had good bones and imaginable city views. It was one of those “little boxes on the hillside”. Our design transformed and expanded it into a bright, open, and comfortable four bedroom townhouse with panoramic city views.
A huge new sliding skylight/roof hatch above an open staircase illuminates and seamlessly connects the central living and circulation spaces.
All bedrooms plus a family room/guest suite are oriented towards the rear and front of house, ensuring direct connection to the out of doors, and privacy from family gathering spaces.
The home is modern but has touches of warm traditional styling, anticipating a family with kids, a couple who enjoy entertaining, and or folks who like hunkering down with a good book and a morning cup of coffee.
Structural Engineer: Gregory Paul Wallace SE
Photographer: Open Homes Photography
Sponsored
Columbus, OH
Free consultation for landscape design!

Peabody Landscape Group
Franklin County's Reliable Landscape Design & Contracting
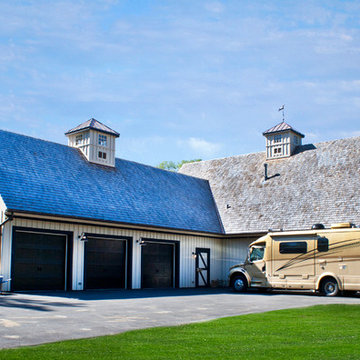
 Sand Creek Post & Beam
Sand Creek Post & Beam Traditional Wood Barns and Barn Homes
Learn more & request a free catalog: www.sandcreekpostandbeam.com
Shed - farmhouse shed idea in Other
Shed - farmhouse shed idea in Other
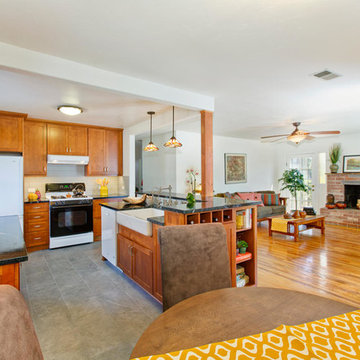
 CairnsCraft Design & Remodel
The client wanted to open up the front of the house, integrating the kitchen and the family room as one space. Two walls were removed and replaced with two support beams and a column, resulting in one spacious room.
In order to delineate a transition between the space, a two level kitchen island was built -- adding counter space and additional seating. The soapstone counter-top, farmhouse sink and faucet pair well with the craftsman style cabinets and 4x8 backsplash tile. The pendant lights that hang over the counter and the under-cabinet LED lights add a warm glow to the space. The 12x24 porcelain tile for the floor blends well with the warm oak flooring.
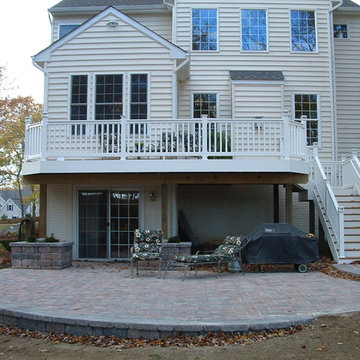
 Fence and Deck Connection
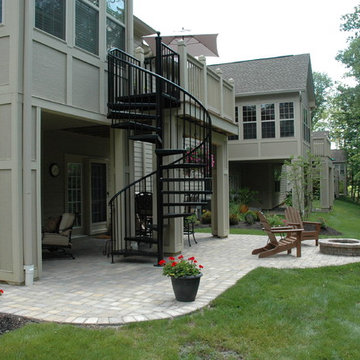
Raised upper deck with white PVC railing. Railing posts accented with post cap lights. Steps leading down to a multilevel paver patiio.
Example of a classic deck design in Baltimore
Example of a classic deck design in Baltimore
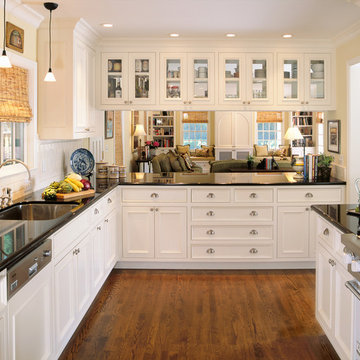
 Midland Cabinet Company
Seamless connection between kitchen and family room showcases complementary custom-designed cabinetry. Rusty Reniers
Example of a mid-sized classic u-shaped dark wood floor and brown floor enclosed kitchen design in San Francisco with an undermount sink, recessed-panel cabinets, white cabinets, white backsplash, paneled appliances and a peninsula
Example of a mid-sized classic u-shaped dark wood floor and brown floor enclosed kitchen design in San Francisco with an undermount sink, recessed-panel cabinets, white cabinets, white backsplash, paneled appliances and a peninsula
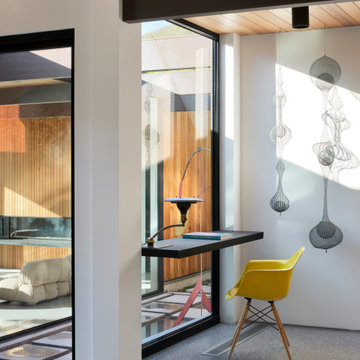
 Klopf Architecture
Malibu Glass Box House by Klopf Architecture
Following the devastating Woolsey Fire of 2018, the site in Malibu offered a unique opportunity to rebuild not just a home, but a new architectural composition that highlighted the property’s potential while navigating strict fire-rebuild codes in the area. Designed by Klopf Architecture, this project embraced a set of limitations and translated them into an architectural asset.
The city’s fire-rebuild process required the new structure to remain close to the original footprint, size and bulk, a constraint that ultimately clarified the architectural direction. Perched near the front of a long, narrow lot, the new home frames and overlooks a private, park-like rear expanse, an uncommon luxury especially in this part of Malibu .
Without a fixed program, the design process allowed for a different kind of creative focus allowing Klopf Architecture the opportunity to explore how a modernist home could best respond to this site. The team approached the project not with a list of requirements, but with a question: How might a modernist live here? What spatial qualities would inspire calm, connection, and a sense of wonder in this setting? The process became less about problem-solving and more about architectural storytelling—letting the site, the light, and the principles of modern design guide the form and flow of the home.
The response emerged in the form of a glass-box pavilion, an open, Mid-Century Modern inspired living, dining, and kitchen space that floats at the edge of the property’s natural descent. Connected to the more enclosed, private areas of the home by a glass-walled hallway, the living pavilion becomes a distinct centerpiece of the design. It opens on all four sides to the landscape with decks and patios on the flanks, an internal garden and water feature to the north, and a dramatic unguarded view of the expansive backyard and ocean horizon to the south.
Because of the mandated footprint, careful planning was required to ensure every space could still engage with light, landscape, or both. Strategic voids in the form of atriums and courtyards allow daylight to filter deep into the home’s core, while offering moments of surprise and retreat. These design gestures allow natural light to filter deep into the interior, creating a sense of brightness and openness throughout the day. At the same time, they expand the perceptual boundaries between inside and out, making the home feel more expansive while anchoring its connection to the surrounding landscape.
The siting of the house is what gives it its unique character. Rather than receding into the backyard like the neighboring homes, the house holds a slight prominence. From the central living pavilion, stepping down into the landscape feels more like entering a secluded park where a separate existing accessory structure, trail, and recreational areas await. The home’s modest street presence gives way to this unfolding drama of space, view, and nature.
Fire-resilient materials and assemblies are integrated seamlessly throughout including triple-pane glazing, under-slab and roof insulation, and locally sourced fire-rated cladding ensure the house not only meets Calfornia’s rigorous wildland-urban interface (WUI) standards, but feels effortlessly aligned with them. While technical decisions like fire-hardening and mechanical systems presented some construction challenges, particularly around the cantilevered glass box, the team found a functional compromise that preserved the integrity of the design.
Inside, a restrained palette and exposed post and beam design celebrate the ethos of mid-century modernism. A central circulation spine extends from the entry to the rear glass wall, offering a continuous visual link from street to ocean. Spaces such as the library and office, though more intimate in scale, are never cut off from nature as each opens to its own unique courtyard or garden view.
Though born out of a strict regulatory framework and developed without a specific client, the rebuild design unfolded with remarkable clarity. Grounded in site logic, refined by limitations and an emphasis on timeless spatial relationships – light, proportion, and a strong connection to nature, the resulting design feels both effortless and uplifting. The home lives lightly on the land, opens generously to its surroundings, and strikes a careful balance between privacy, openness, and calm. For Klopf Architecture, it stands as a compelling case study in how site, code, and circumstantial constraints can inspire enduring, modernist architecture. With years of experience reimagining mid-century modern design for how people live today, the firm took the project’s limitations as an opportunity. The result is a home shaped by open, flowing spaces, strong indoor-outdoor connections, and a calm, clear sense of structure. It’s a good reminder that even with strict constraints, there’s still room for architecture to breathe—and for modernism to keep moving forward.
Klopf Architecture project team: Geoff Campen, John Klopf, AIA, and Sherry Tan
Structural Engineer: ZFA
Contractor: Maison D’Artiste
Photography: ©2025 Mariko Reed
Year Completed: 2023
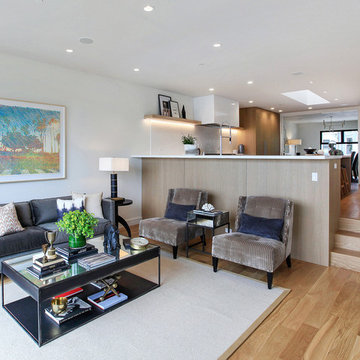 Chr DAUER Architects
A post-war, Glen Park house was dark and tiny but had good bones and imaginable city views. It was one of those “little boxes on the hillside”. Our design transformed and expanded it into a bright, open, and comfortable four bedroom townhouse with panoramic city views.
A huge new sliding skylight/roof hatch above an open staircase illuminates and seamlessly connects the central living and circulation spaces.
All bedrooms plus a family room/guest suite are oriented towards the rear and front of house, ensuring direct connection to the out of doors, and privacy from family gathering spaces.
The home is modern but has touches of warm traditional styling, anticipating a family with kids, a couple who enjoy entertaining, and or folks who like hunkering down with a good book and a morning cup of coffee.
Structural Engineer: Gregory Paul Wallace SE
Photographer: Open Homes Photography
Sponsored
Columbus, OH
Free consultation for landscape design!
Peabody Landscape Group
Franklin County's Reliable Landscape Design & Contracting
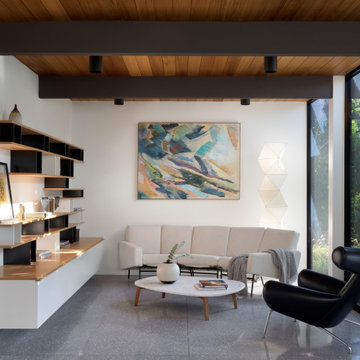 Klopf Architecture
Malibu Glass Box House by Klopf Architecture
Following the devastating Woolsey Fire of 2018, the site in Malibu offered a unique opportunity to rebuild not just a home, but a new architectural composition that highlighted the property’s potential while navigating strict fire-rebuild codes in the area. Designed by Klopf Architecture, this project embraced a set of limitations and translated them into an architectural asset.
The city’s fire-rebuild process required the new structure to remain close to the original footprint, size and bulk, a constraint that ultimately clarified the architectural direction. Perched near the front of a long, narrow lot, the new home frames and overlooks a private, park-like rear expanse, an uncommon luxury especially in this part of Malibu .
Without a fixed program, the design process allowed for a different kind of creative focus allowing Klopf Architecture the opportunity to explore how a modernist home could best respond to this site. The team approached the project not with a list of requirements, but with a question: How might a modernist live here? What spatial qualities would inspire calm, connection, and a sense of wonder in this setting? The process became less about problem-solving and more about architectural storytelling—letting the site, the light, and the principles of modern design guide the form and flow of the home.
The response emerged in the form of a glass-box pavilion, an open, Mid-Century Modern inspired living, dining, and kitchen space that floats at the edge of the property’s natural descent. Connected to the more enclosed, private areas of the home by a glass-walled hallway, the living pavilion becomes a distinct centerpiece of the design. It opens on all four sides to the landscape with decks and patios on the flanks, an internal garden and water feature to the north, and a dramatic unguarded view of the expansive backyard and ocean horizon to the south.
Because of the mandated footprint, careful planning was required to ensure every space could still engage with light, landscape, or both. Strategic voids in the form of atriums and courtyards allow daylight to filter deep into the home’s core, while offering moments of surprise and retreat. These design gestures allow natural light to filter deep into the interior, creating a sense of brightness and openness throughout the day. At the same time, they expand the perceptual boundaries between inside and out, making the home feel more expansive while anchoring its connection to the surrounding landscape.
The siting of the house is what gives it its unique character. Rather than receding into the backyard like the neighboring homes, the house holds a slight prominence. From the central living pavilion, stepping down into the landscape feels more like entering a secluded park where a separate existing accessory structure, trail, and recreational areas await. The home’s modest street presence gives way to this unfolding drama of space, view, and nature.
Fire-resilient materials and assemblies are integrated seamlessly throughout including triple-pane glazing, under-slab and roof insulation, and locally sourced fire-rated cladding ensure the house not only meets Calfornia’s rigorous wildland-urban interface (WUI) standards, but feels effortlessly aligned with them. While technical decisions like fire-hardening and mechanical systems presented some construction challenges, particularly around the cantilevered glass box, the team found a functional compromise that preserved the integrity of the design.
Inside, a restrained palette and exposed post and beam design celebrate the ethos of mid-century modernism. A central circulation spine extends from the entry to the rear glass wall, offering a continuous visual link from street to ocean. Spaces such as the library and office, though more intimate in scale, are never cut off from nature as each opens to its own unique courtyard or garden view.
Though born out of a strict regulatory framework and developed without a specific client, the rebuild design unfolded with remarkable clarity. Grounded in site logic, refined by limitations and an emphasis on timeless spatial relationships – light, proportion, and a strong connection to nature, the resulting design feels both effortless and uplifting. The home lives lightly on the land, opens generously to its surroundings, and strikes a careful balance between privacy, openness, and calm. For Klopf Architecture, it stands as a compelling case study in how site, code, and circumstantial constraints can inspire enduring, modernist architecture. With years of experience reimagining mid-century modern design for how people live today, the firm took the project’s limitations as an opportunity. The result is a home shaped by open, flowing spaces, strong indoor-outdoor connections, and a calm, clear sense of structure. It’s a good reminder that even with strict constraints, there’s still room for architecture to breathe—and for modernism to keep moving forward.
Klopf Architecture project team: Geoff Campen, John Klopf, AIA, and Sherry Tan
Structural Engineer: ZFA
Contractor: Maison D’Artiste
Photography: ©2025 Mariko Reed
Year Completed: 2023

 Industrial Projects
Creating a comfortable outdoor living space is a priority for many homeowners and DIY enthusiasts. With rising summer temperatures, installing a shade tarp in your backyard offers an affordable and effective solution for sun protection. We’ve developed this detailed, step-by-step guide to help you confidently install a shade tarp that not only shields you from the sun but also adds aesthetic appeal to your outdoor area.
Benefits of Installing a Backyard Shade Tarp
Before diving into the installation process, let’s explore the key benefits of having a backyard shade tarp:
Provides UV Protection: Keeps your family and guests safe from harmful sun exposure.
Reduces Outdoor Temperatures: Creates a cooler, more enjoyable outdoor space.
Protects Outdoor Furniture: Extends the life of patio furniture by reducing sun damage.
Enhances Outdoor Aesthetics: Adds a modern, stylish look to your yard.
Budget-Friendly: More affordable compared to permanent structures like pergolas.
Materials and Tools You’ll Need
To begin your DIY backyard shade project, gather the following materials and tools:
Materials:
Shade tarp (UV-resistant and breathable)
Sturdy posts or existing structures (trees, fences, walls)
Mounting hardware (eye bolts, D-rings, turnbuckles, snap hooks)
Nylon or polyester rope, or stainless-steel wire
Concrete (if installing new posts)
Tools:
Power drill
Measuring tape
Level
Ladder
Wrench or adjustable spanner
Post hole digger (if installing new posts)
Step 1: Plan Your Shade Tarp Layout
The first step in installing your backyard shade tarp is careful planning. Take time to assess your outdoor area and answer these key questions:
Where is the sun’s path throughout the day?
What size and shape of tarp best suits your space?
Will you anchor the tarp to existing structures or install new posts?
What height do you want the tarp to sit at for maximum shade and airflow?
Pro Tip: Use string or garden hoses to visualize the tarp layout on the ground before making permanent decisions.
Step 2: Measure and Mark Anchor Points
Once you’ve determined the tarp’s location and orientation:
Measure the tarp dimensions.
Mark the exact points where each corner of the tarp will be anchored.
Ensure that the anchor points are at least 5–10% longer than the tarp size to allow for tensioning and slight adjustments.
Consider slope angles for water runoff. Aim for at least a 20-degree angle to prevent water pooling on the tarp.
Step 3: Install Support Posts (If Necessary)
If your backyard lacks existing anchor points like trees or fences, you’ll need to install sturdy support posts:
Dig post holes at least 24 inches deep and 8-12 inches wide for stability.
Set posts in concrete, making sure they remain plumb and level.
Allow the concrete to cure for at least 24–48 hours before applying tension from the tarp.
We recommend using pressure-treated wood, galvanized steel poles, or aluminum posts for longevity and strength.
Step 4: Install Mounting Hardware
With your anchor points ready, it’s time to install the necessary hardware:
Attach eye bolts or pad eyes securely into walls, posts, or other fixed structures.
For added flexibility and adjustability, install turnbuckles or tensioners to fine-tune the tarp’s tightness.
Connect snap hooks, D-rings, or carabiners to make assembly and disassembly easier.
Make sure all hardware is rated for outdoor use to prevent rust and corrosion.
Step 5: Attach and Tension the Shade Tarp
Now it’s time for the most satisfying part—mounting the shade tarp:
Begin by attaching one corner of the tarp to an anchor point.
Gradually attach the remaining corners, moving diagonally for even tension.
Adjust each connection point using your turnbuckles, ropes, or cables.
Pull the tarp tight enough to avoid sagging, but not so tight that it risks tearing.
Check that the tarp maintains the desired slope for rainwater runoff and adjust tension as needed.
Step 6: Final Adjustments and Safety Check
Before enjoying your new shaded area:
Inspect all anchor points and hardware for stability.
Test the tarp’s tension and make adjustments for even distribution.
Ensure that no sharp edges or loose connections remain that could damage the tarp or pose a safety hazard.
Confirm that the tarp is secure in windy conditions by giving it a gentle tug.
If you live in an area with frequent high winds, consider removing the tarp during storms to prevent damage.
Step 7: Enjoy Your Shaded Backyard Oasis
Once installed, your backyard shade tarp provides a comfortable and protective space for outdoor gatherings, relaxation, or family activities. You can decorate underneath with outdoor furniture, string lights, or potted plants to create a personalized outdoor retreat.
Maintenance Tips for Long-Lasting Shade Tarp Performance
To extend the life of your shade tarp, follow these maintenance guidelines:
Regularly check for wear and tear, especially around anchor points and seams.
Clean the tarp periodically with mild soap and water to prevent mildew buildup.
Store the tarp indoors during harsh weather seasons if it's not designed for year-round use.
Tighten hardware as needed to maintain proper tension and avoid sagging.
By following these simple care steps, your shade tarp will continue to deliver years of sun protection and outdoor comfort.
Conclusion: Upgrade Your Outdoor Space with a DIY Shade Tarp
Installing a shade tarp in your backyard is a cost-effective and rewarding DIY project. With careful planning, quality materials, and proper installation techniques, you’ll enjoy cool, shaded outdoor living all season long. This step-by-step guide ensures your project goes smoothly from start to finish.
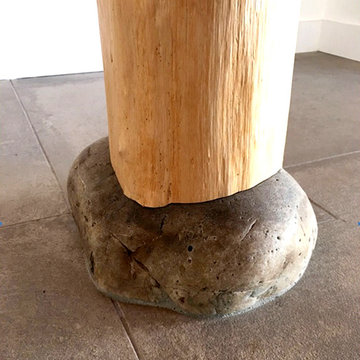
 Ki Arts
Detail foot of post joined to rock base. A hole was drilled through the stone allowing a stainless steel bolt to connect the post to the floor. The bottom of the cedar post was hand cut to conform to the contours of the stone.
 KingPost Design and Construction
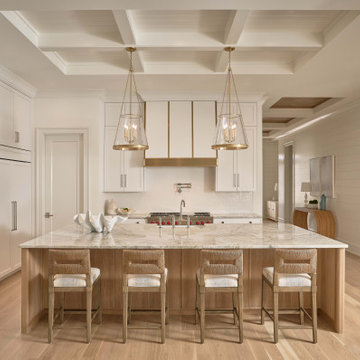
A custom luxury kitchen at Airlie at Wrightsville Sound featuring full-height cabinetry, an oversized natural stone island, integrated appliances, statement pendant lighting and warm wood detailing. The coffered ceiling and open connection to the outdoor living area bring depth and architectural interest to this Wilmington, NC custom home by KingPost Design & Construction.
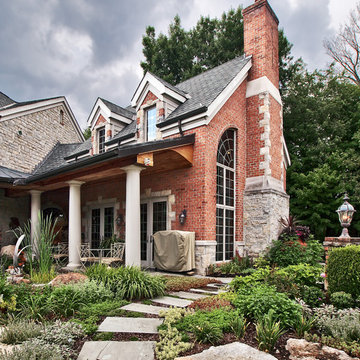
Sponsored
Columbus, OH

Structural Remodeling
Franklin County's Heavy Timber Specialists | Best of Houzz 2020!
 HARRISON FAE DESIGN
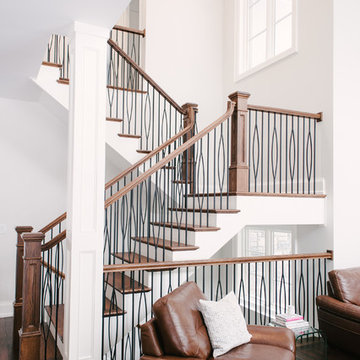
Staircase - huge contemporary wooden u-shaped mixed material railing staircase idea in Toronto with wooden risers
 Darlene Shaw Design Inc.
kwestimages.com
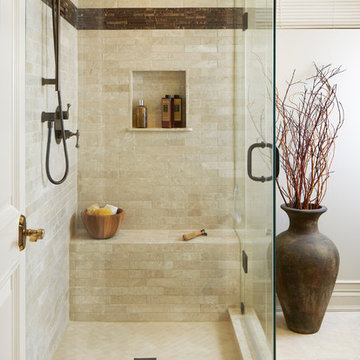
Inspiration for a transitional beige tile bathroom remodel in Toronto with a niche
Inspiration for a transitional beige tile bathroom remodel in Toronto with a niche
 Sigmar
Petr Krejci
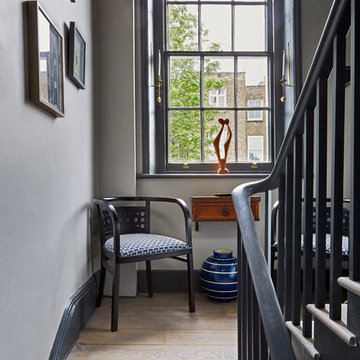
Staircase - transitional wooden u-shaped staircase idea in London with wooden risers
Staircase - transitional wooden u-shaped staircase idea in London with wooden risers
9