
Search results for "Creative video" in Home Design Ideas
 Systems Design & Integration, Inc.
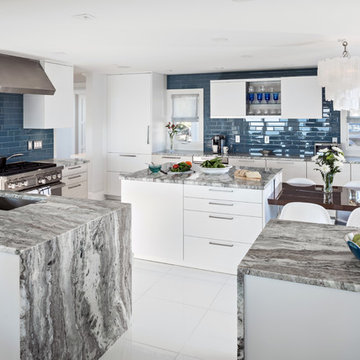
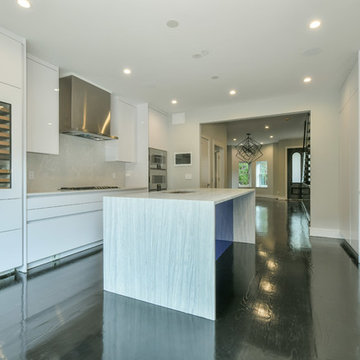
In this house, we prewired and installed for whole house audio, home automation, outdoor audio, network, and surveillance. We worked in collaboration with International Builders on this project.
Photo credit to: Dan Cutrona
 RAJ Kitchen and Bath, LLC
 “Full apartment design”.
IF you have not yet seen this apartment conversion before, we strongly urge you to go to the bottom left of this page and click on the short 2-minutes video. It would put a lot of things into perspective when you come back and continue reading this.
It is true we were literally handed the keys and told a list of things that they wanted to have happen and we were to go into the apartment, look at the space and come up with a design that would satisfy all of that need. UNTIL we showed up! The unit had really seen some better days but we knew we had to look past that and come up with a concept that would work for them.
The immediate challenges were centered around 3 big ideas:
1. Adding a second bedroom to the already small footprint
2. Figuring out a way to make the kitchen bigger, better and brighter
3. Creating a master room walk in closet
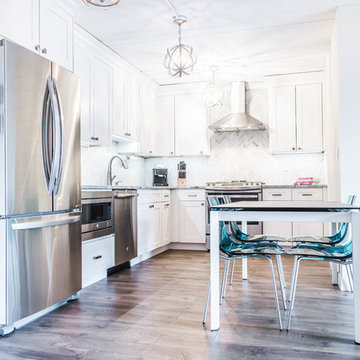
It’s always difficult to add new rooms into existing footprint without expanding out or up and not incurring any opportunity cost. In this case, that was exactly what we had to do. Item one and two above had to be tackled as one. We went ahead and switched out the location of the dining room and eliminating an area where there was a “nook” type eat-in area. By doing so, we were able to cut right into that footprint and change the layout of the kitchen.
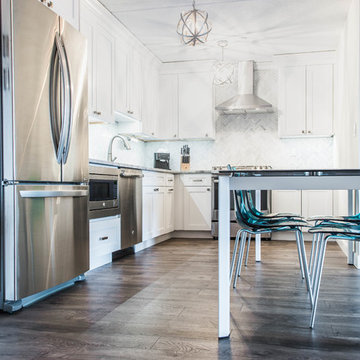
That one move allowed us to dig into the kitchen design because it was now the main focal point in the apartment. It was no longer an option to keep it in that tiny hole where it was, so we had to ensure that this design was functional and aesthetically pleasing at the same time. By adding the table into the space where an Island typically would go, we were able to both cut cost and still provide a dining experience. The Table serves as an Island as well when cooking.
We then proceeded to block in the existing doorway to the dining room. By doing this, we were able to create a full room which allowed us to put a door on the other side and called that room Bedroom #2. This was easier to do because all of the mechanicals were already in that space (light, heater and windows). By shifting things around, we also achieved a huge wall to wall closet from inside. PERFECT!
Then we moved into the Single bedroom. We thought it was a big room with a small closet, so by creatively adding an L shaped wall and steal some footprint into the bedroom side, we were able to put a door on that new room and design it for the walk-in closet. Even after this, the bedroom still holds a queen size bed with 2 night stands, a TV on the wall, a sitting chair and plenty of room to walk around. This was done by rethinking the location for the bed and night stands.
The bathroom was gutted to make sure there was no leaks and rebuild from the ground up. We kept all of the plumbing where it was, added a new vanity, medicine cabinet, tiles and lighting and it was done.
From there, the rest of the unit had new flooring all throughout, paint, and lighting. After completion and walk through, this project was handed over back to the clients.
Execution and collaboration between all the trades were: Reggie and his team from Premier Interiors and Rohan from RD Mechanical Services.
p.s. Please see our website to see the video.
 RAJ Kitchen and Bath, LLC
 “Full apartment design”.
IF you have not yet seen this apartment conversion before, we strongly urge you to go to the bottom left of this page and click on the short 2-minutes video. It would put a lot of things into perspective when you come back and continue reading this.
It is true we were literally handed the keys and told a list of things that they wanted to have happen and we were to go into the apartment, look at the space and come up with a design that would satisfy all of that need. UNTIL we showed up! The unit had really seen some better days but we knew we had to look past that and come up with a concept that would work for them.
The immediate challenges were centered around 3 big ideas:
1. Adding a second bedroom to the already small footprint
2. Figuring out a way to make the kitchen bigger, better and brighter
3. Creating a master room walk in closet
It’s always difficult to add new rooms into existing footprint without expanding out or up and not incurring any opportunity cost. In this case, that was exactly what we had to do. Item one and two above had to be tackled as one. We went ahead and switched out the location of the dining room and eliminating an area where there was a “nook” type eat-in area. By doing so, we were able to cut right into that footprint and change the layout of the kitchen.
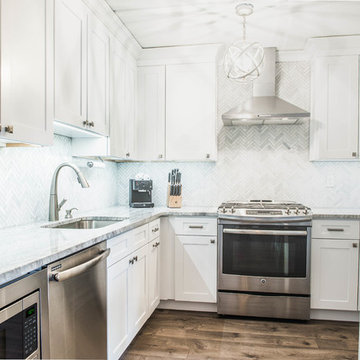
That one move allowed us to dig into the kitchen design because it was now the main focal point in the apartment. It was no longer an option to keep it in that tiny hole where it was, so we had to ensure that this design was functional and aesthetically pleasing at the same time. By adding the table into the space where an Island typically would go, we were able to both cut cost and still provide a dining experience. The Table serves as an Island as well when cooking.
We then proceeded to block in the existing doorway to the dining room. By doing this, we were able to create a full room which allowed us to put a door on the other side and called that room Bedroom #2. This was easier to do because all of the mechanicals were already in that space (light, heater and windows). By shifting things around, we also achieved a huge wall to wall closet from inside. PERFECT!
Then we moved into the Single bedroom. We thought it was a big room with a small closet, so by creatively adding an L shaped wall and steal some footprint into the bedroom side, we were able to put a door on that new room and design it for the walk-in closet. Even after this, the bedroom still holds a queen size bed with 2 night stands, a TV on the wall, a sitting chair and plenty of room to walk around. This was done by rethinking the location for the bed and night stands.
The bathroom was gutted to make sure there was no leaks and rebuild from the ground up. We kept all of the plumbing where it was, added a new vanity, medicine cabinet, tiles and lighting and it was done.
From there, the rest of the unit had new flooring all throughout, paint, and lighting. After completion and walk through, this project was handed over back to the clients.
Execution and collaboration between all the trades were: Reggie and his team from Premier Interiors and Rohan from RD Mechanical Services.
p.s. Please see our website to see the video.
Find the right local pro for your project
 RAJ Kitchen and Bath, LLC
 “Full apartment design”.
IF you have not yet seen this apartment conversion before, we strongly urge you to go to the bottom left of this page and click on the short 2-minutes video. It would put a lot of things into perspective when you come back and continue reading this.
It is true we were literally handed the keys and told a list of things that they wanted to have happen and we were to go into the apartment, look at the space and come up with a design that would satisfy all of that need. UNTIL we showed up! The unit had really seen some better days but we knew we had to look past that and come up with a concept that would work for them.
The immediate challenges were centered around 3 big ideas:
1. Adding a second bedroom to the already small footprint
2. Figuring out a way to make the kitchen bigger, better and brighter
3. Creating a master room walk in closet
It’s always difficult to add new rooms into existing footprint without expanding out or up and not incurring any opportunity cost. In this case, that was exactly what we had to do. Item one and two above had to be tackled as one. We went ahead and switched out the location of the dining room and eliminating an area where there was a “nook” type eat-in area. By doing so, we were able to cut right into that footprint and change the layout of the kitchen.
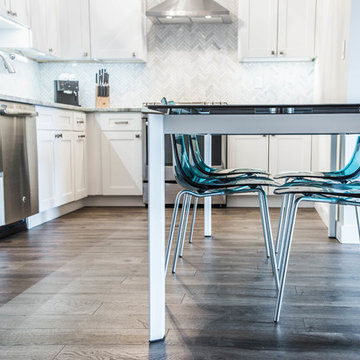
That one move allowed us to dig into the kitchen design because it was now the main focal point in the apartment. It was no longer an option to keep it in that tiny hole where it was, so we had to ensure that this design was functional and aesthetically pleasing at the same time. By adding the table into the space where an Island typically would go, we were able to both cut cost and still provide a dining experience. The Table serves as an Island as well when cooking.
We then proceeded to block in the existing doorway to the dining room. By doing this, we were able to create a full room which allowed us to put a door on the other side and called that room Bedroom #2. This was easier to do because all of the mechanicals were already in that space (light, heater and windows). By shifting things around, we also achieved a huge wall to wall closet from inside. PERFECT!
Then we moved into the Single bedroom. We thought it was a big room with a small closet, so by creatively adding an L shaped wall and steal some footprint into the bedroom side, we were able to put a door on that new room and design it for the walk-in closet. Even after this, the bedroom still holds a queen size bed with 2 night stands, a TV on the wall, a sitting chair and plenty of room to walk around. This was done by rethinking the location for the bed and night stands.
The bathroom was gutted to make sure there was no leaks and rebuild from the ground up. We kept all of the plumbing where it was, added a new vanity, medicine cabinet, tiles and lighting and it was done.
From there, the rest of the unit had new flooring all throughout, paint, and lighting. After completion and walk through, this project was handed over back to the clients.
Execution and collaboration between all the trades were: Reggie and his team from Premier Interiors and Rohan from RD Mechanical Services.
p.s. Please see our website to see the video.
 RAJ Kitchen and Bath, LLC
 “Full apartment design”.
IF you have not yet seen this apartment conversion before, we strongly urge you to go to the bottom left of this page and click on the short 2-minutes video. It would put a lot of things into perspective when you come back and continue reading this.
It is true we were literally handed the keys and told a list of things that they wanted to have happen and we were to go into the apartment, look at the space and come up with a design that would satisfy all of that need. UNTIL we showed up! The unit had really seen some better days but we knew we had to look past that and come up with a concept that would work for them.
The immediate challenges were centered around 3 big ideas:
1. Adding a second bedroom to the already small footprint
2. Figuring out a way to make the kitchen bigger, better and brighter
3. Creating a master room walk in closet
It’s always difficult to add new rooms into existing footprint without expanding out or up and not incurring any opportunity cost. In this case, that was exactly what we had to do. Item one and two above had to be tackled as one. We went ahead and switched out the location of the dining room and eliminating an area where there was a “nook” type eat-in area. By doing so, we were able to cut right into that footprint and change the layout of the kitchen.
That one move allowed us to dig into the kitchen design because it was now the main focal point in the apartment. It was no longer an option to keep it in that tiny hole where it was, so we had to ensure that this design was functional and aesthetically pleasing at the same time. By adding the table into the space where an Island typically would go, we were able to both cut cost and still provide a dining experience. The Table serves as an Island as well when cooking.
We then proceeded to block in the existing doorway to the dining room. By doing this, we were able to create a full room which allowed us to put a door on the other side and called that room Bedroom #2. This was easier to do because all of the mechanicals were already in that space (light, heater and windows). By shifting things around, we also achieved a huge wall to wall closet from inside. PERFECT!
Then we moved into the Single bedroom. We thought it was a big room with a small closet, so by creatively adding an L shaped wall and steal some footprint into the bedroom side, we were able to put a door on that new room and design it for the walk-in closet. Even after this, the bedroom still holds a queen size bed with 2 night stands, a TV on the wall, a sitting chair and plenty of room to walk around. This was done by rethinking the location for the bed and night stands.
The bathroom was gutted to make sure there was no leaks and rebuild from the ground up. We kept all of the plumbing where it was, added a new vanity, medicine cabinet, tiles and lighting and it was done.
From there, the rest of the unit had new flooring all throughout, paint, and lighting. After completion and walk through, this project was handed over back to the clients.
Execution and collaboration between all the trades were: Reggie and his team from Premier Interiors and Rohan from RD Mechanical Services.
p.s. Please see our website to see the video.
 Systems Design & Integration, Inc.
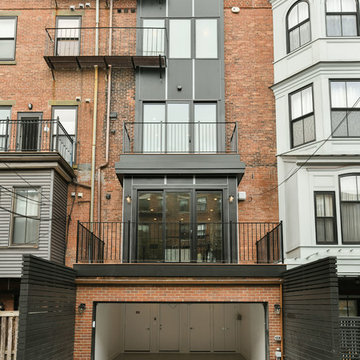
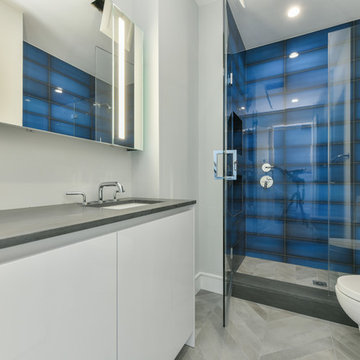
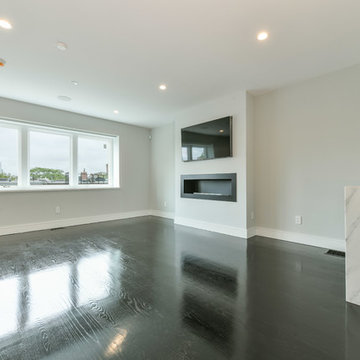
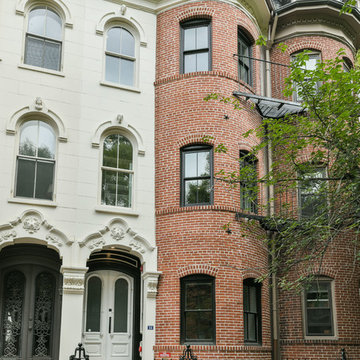
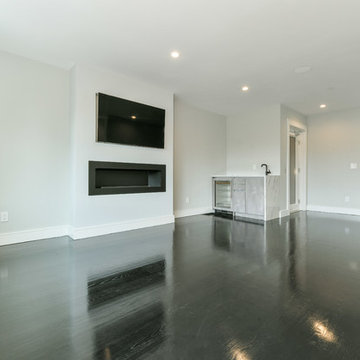
We designed, prewired, installed, and programmed this 5 story brown stone home in Back Bay for whole house audio, lighting control, media room, TV locations, surround sound, Savant home automation, outdoor audio, motorized shades, networking and more. We worked in collaboration with ARC Design builder on this project.
This home was featured in the 2019 New England HOME Magazine.
 Systems Design & Integration, Inc.
We designed, prewired, installed, and programmed this 5 story brown stone home in Back Bay for whole house audio, lighting control, media room, TV locations, surround sound, Savant home automation, outdoor audio, motorized shades, networking and more. We worked in collaboration with ARC Design builder on this project.
This home was featured in the 2019 New England HOME Magazine.
 Amazing Spaces
We started with a blank slate on this basement project where our only obstacles were exposed steel support columns, existing plumbing risers from the concrete slab, and dropped soffits concealing ductwork on the ceiling. It had the advantage of tall ceilings, an existing egress window, and a sliding door leading to a newly constructed patio.
This family of five loves the beach and frequents summer beach resorts in the Northeast. Bringing that aesthetic home to enjoy all year long was the inspiration for the décor, as well as creating a family-friendly space for entertaining.
Wish list items included room for a billiard table, wet bar, game table, family room, guest bedroom, full bathroom, space for a treadmill and closed storage. The existing structural elements helped to define how best to organize the basement. For instance, we knew we wanted to connect the bar area and billiards table with the patio in order to create an indoor/outdoor entertaining space. It made sense to use the egress window for the guest bedroom for both safety and natural light. The bedroom also would be adjacent to the plumbing risers for easy access to the new bathroom. Since the primary focus of the family room would be for TV viewing, natural light did not need to filter into that space. We made sure to hide the columns inside of newly constructed walls and dropped additional soffits where needed to make the ceiling mechanicals feel less random.
In addition to the beach vibe, the homeowner has valuable sports memorabilia that was to be prominently displayed including two seats from the original Yankee stadium.
For a coastal feel, shiplap is used on two walls of the family room area. In the bathroom shiplap is used again in a more creative way using wood grain white porcelain tile as the horizontal shiplap “wood”. We connected the tile horizontally with vertical white grout joints and mimicked the horizontal shadow line with dark grey grout. At first glance it looks like we wrapped the shower with real wood shiplap. Materials including a blue and white patterned floor, blue penny tiles and a natural wood vanity checked the list for that seaside feel.
A large reclaimed wood door on an exposed sliding barn track separates the family room from the game room where reclaimed beams are punctuated with cable lighting. Cabinetry and a beverage refrigerator are tucked behind the rolling bar cabinet (that doubles as a Blackjack table!). A TV and upright video arcade machine round-out the entertainment in the room. Bar stools, two rotating club chairs, and large square poufs along with the Yankee Stadium seats provide fun places to sit while having a drink, watching billiards or a game on the TV.
Signed baseballs can be found behind the bar, adjacent to the billiard table, and on specially designed display shelves next to the poker table in the family room.
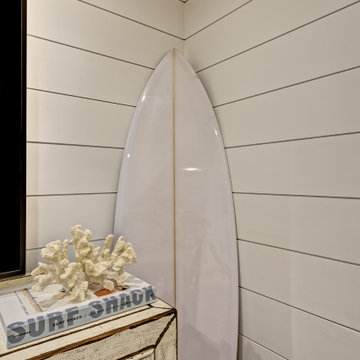
Thoughtful touches like the surfboards, signage, photographs and accessories make a visitor feel like they are on vacation at a well-appointed beach resort without being cliché.
 Systems Design & Integration, Inc.
We designed, prewired, installed, and programmed this 5 story brown stone home in Back Bay for whole house audio, lighting control, media room, TV locations, surround sound, Savant home automation, outdoor audio, motorized shades, networking and more. We worked in collaboration with ARC Design builder on this project.
This home was featured in the 2019 New England HOME Magazine.
 Systems Design & Integration, Inc.
We designed, prewired, installed, and programmed this 5 story brown stone home in Back Bay for whole house audio, lighting control, media room, TV locations, surround sound, Savant home automation, outdoor audio, motorized shades, networking and more. We worked in collaboration with ARC Design builder on this project.
This home was featured in the 2019 New England HOME Magazine.
 Systems Design & Integration, Inc.
We designed, prewired, installed, and programmed this 5 story brown stone home in Back Bay for whole house audio, lighting control, media room, TV locations, surround sound, Savant home automation, outdoor audio, motorized shades, networking and more. We worked in collaboration with ARC Design builder on this project.
This home was featured in the 2019 New England HOME Magazine.
 Systems Design & Integration, Inc.
We designed, prewired, installed, and programmed this 5 story brown stone home in Back Bay for whole house audio, lighting control, media room, TV locations, surround sound, Savant home automation, outdoor audio, motorized shades, networking and more. We worked in collaboration with ARC Design builder on this project.
This home was featured in the 2019 New England HOME Magazine.
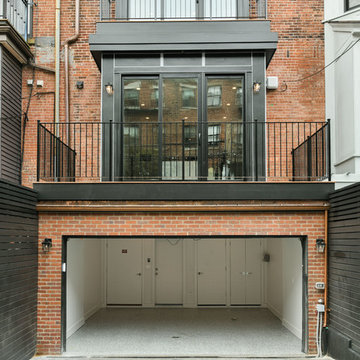 Systems Design & Integration, Inc.
We designed, prewired, installed, and programmed this 5 story brown stone home in Back Bay for whole house audio, lighting control, media room, TV locations, surround sound, Savant home automation, outdoor audio, motorized shades, networking and more. We worked in collaboration with ARC Design builder on this project.
This home was featured in the 2019 New England HOME Magazine.
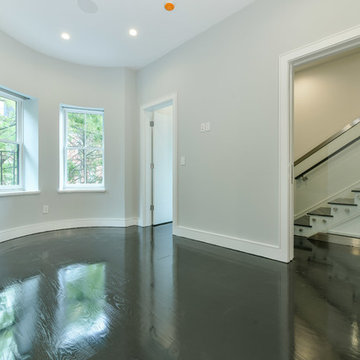 Systems Design & Integration, Inc.
We designed, prewired, installed, and programmed this 5 story brown stone home in Back Bay for whole house audio, lighting control, media room, TV locations, surround sound, Savant home automation, outdoor audio, motorized shades, networking and more. We worked in collaboration with ARC Design builder on this project.
This home was featured in the 2019 New England HOME Magazine.
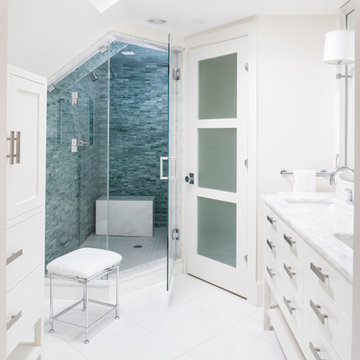 Systems Design & Integration, Inc.
In this house, we prewired and installed for whole house audio, home automation, outdoor audio, network, and surveillance. We worked in collaboration with International Builders on this project.
Photo credit to: Dan Cutrona
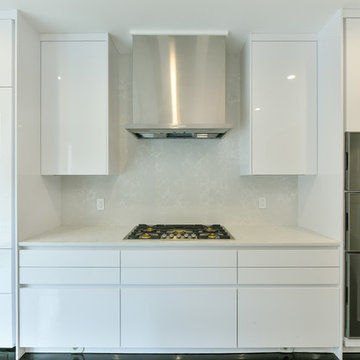 Systems Design & Integration, Inc.
We designed, prewired, installed, and programmed this 5 story brown stone home in Back Bay for whole house audio, lighting control, media room, TV locations, surround sound, Savant home automation, outdoor audio, motorized shades, networking and more. We worked in collaboration with ARC Design builder on this project.
This home was featured in the 2019 New England HOME Magazine.
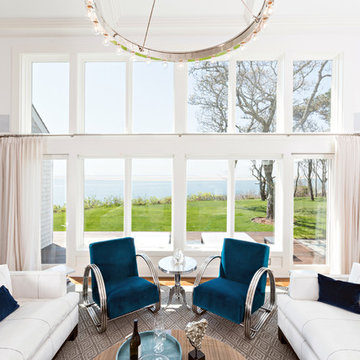 Systems Design & Integration, Inc.
In this house, we prewired and installed for whole house audio, home automation, outdoor audio, network, and surveillance. We worked in collaboration with International Builders on this project.
Photo credit to: Dan Cutrona
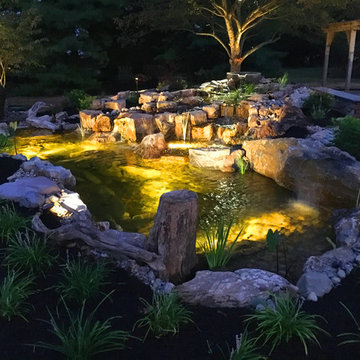
 C.E. Pontz Sons
Feast your eyes on our new Outdoor Living Display. The feature is located at our Creative Center on New Holland Pike in Lancaster, PA. This is the finished Product. We have documented the entire build from start to finish. Previous videos were shot in time-lapse during the duration of the build. Links to previous videos are at the bottom of the page.
The Display feature incorporates a little bit of the services we provide. We featured different aspects of outdoor living. The first thing to catch your eye is a fairly large-scale water feature. The water feature consist of a ecosystem pond. The water starts to flow from a spillway bowl fountain. The spillway pours into the bog filter. The water then flows down various cascading waterfalls. The waterfalls and pond were constructed out of 2 different types of boulders. We did this to show various options available. There is a gigantic boulder fountain that is incorporated into the pond as well. There is a skimmer in the pond the show functionality. The pond then flows over a zero edge waterfall into a large basin. Atop the basin is 3 fountains. 2 bubbling urn fountains as well as fire bowl fountain.
The patio area incorporates different styles and colors of pavers. Along with different styles of boarders. There is 2 seating walls on either side of the patio area. Each seating wall has a mixture of stone and brick veneer and topped with flagstone caps. There is a very unique shed next to the patio area. Surrounding the patio are we installed an outdoor audio system as well. This system cranks out some serious sound. Stop by and have a listen!
The entire project area is outfitted with landscape lighting. We incorporated up-lights, wall lights, path lights, and a couple spot lights. The entire water feature also has underwater lighting installed. Landscaping was installed around the project to finished it off. If you're in the Lancaster area be sure to stop by and check it out!!! Visitors are always welcome.
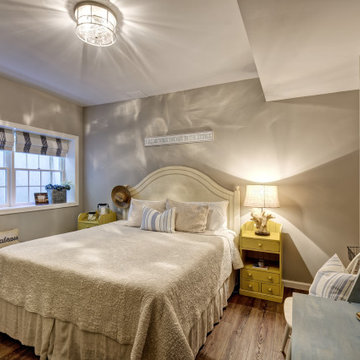 Amazing Spaces
We started with a blank slate on this basement project where our only obstacles were exposed steel support columns, existing plumbing risers from the concrete slab, and dropped soffits concealing ductwork on the ceiling. It had the advantage of tall ceilings, an existing egress window, and a sliding door leading to a newly constructed patio.
This family of five loves the beach and frequents summer beach resorts in the Northeast. Bringing that aesthetic home to enjoy all year long was the inspiration for the décor, as well as creating a family-friendly space for entertaining.
Wish list items included room for a billiard table, wet bar, game table, family room, guest bedroom, full bathroom, space for a treadmill and closed storage. The existing structural elements helped to define how best to organize the basement. For instance, we knew we wanted to connect the bar area and billiards table with the patio in order to create an indoor/outdoor entertaining space. It made sense to use the egress window for the guest bedroom for both safety and natural light. The bedroom also would be adjacent to the plumbing risers for easy access to the new bathroom. Since the primary focus of the family room would be for TV viewing, natural light did not need to filter into that space. We made sure to hide the columns inside of newly constructed walls and dropped additional soffits where needed to make the ceiling mechanicals feel less random.
In addition to the beach vibe, the homeowner has valuable sports memorabilia that was to be prominently displayed including two seats from the original Yankee stadium.
For a coastal feel, shiplap is used on two walls of the family room area. In the bathroom shiplap is used again in a more creative way using wood grain white porcelain tile as the horizontal shiplap “wood”. We connected the tile horizontally with vertical white grout joints and mimicked the horizontal shadow line with dark grey grout. At first glance it looks like we wrapped the shower with real wood shiplap. Materials including a blue and white patterned floor, blue penny tiles and a natural wood vanity checked the list for that seaside feel.
A large reclaimed wood door on an exposed sliding barn track separates the family room from the game room where reclaimed beams are punctuated with cable lighting. Cabinetry and a beverage refrigerator are tucked behind the rolling bar cabinet (that doubles as a Blackjack table!). A TV and upright video arcade machine round-out the entertainment in the room. Bar stools, two rotating club chairs, and large square poufs along with the Yankee Stadium seats provide fun places to sit while having a drink, watching billiards or a game on the TV.
Signed baseballs can be found behind the bar, adjacent to the billiard table, and on specially designed display shelves next to the poker table in the family room.
Thoughtful touches like the surfboards, signage, photographs and accessories make a visitor feel like they are on vacation at a well-appointed beach resort without being cliché.
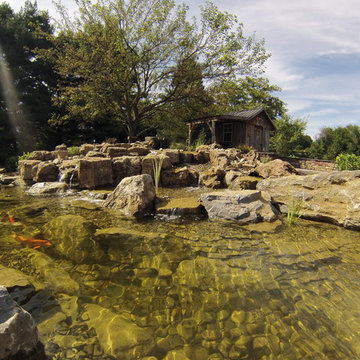 C.E. Pontz Sons
Feast your eyes on our new Outdoor Living Display. The feature is located at our Creative Center on New Holland Pike in Lancaster, PA. This is the finished Product. We have documented the entire build from start to finish. Previous videos were shot in time-lapse during the duration of the build. Links to previous videos are at the bottom of the page.
The Display feature incorporates a little bit of the services we provide. We featured different aspects of outdoor living. The first thing to catch your eye is a fairly large-scale water feature. The water feature consist of a ecosystem pond. The water starts to flow from a spillway bowl fountain. The spillway pours into the bog filter. The water then flows down various cascading waterfalls. The waterfalls and pond were constructed out of 2 different types of boulders. We did this to show various options available. There is a gigantic boulder fountain that is incorporated into the pond as well. There is a skimmer in the pond the show functionality. The pond then flows over a zero edge waterfall into a large basin. Atop the basin is 3 fountains. 2 bubbling urn fountains as well as fire bowl fountain.
The patio area incorporates different styles and colors of pavers. Along with different styles of boarders. There is 2 seating walls on either side of the patio area. Each seating wall has a mixture of stone and brick veneer and topped with flagstone caps. There is a very unique shed next to the patio area. Surrounding the patio are we installed an outdoor audio system as well. This system cranks out some serious sound. Stop by and have a listen!
The entire project area is outfitted with landscape lighting. We incorporated up-lights, wall lights, path lights, and a couple spot lights. The entire water feature also has underwater lighting installed. Landscaping was installed around the project to finished it off. If you're in the Lancaster area be sure to stop by and check it out!!! Visitors are always welcome.
17