
Search results for "Creative video" in Home Design Ideas
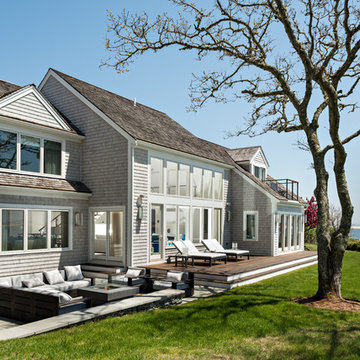
 Systems Design & Integration, Inc.
In this house, we prewired and installed for whole house audio, home automation, outdoor audio, network, and surveillance. We worked in collaboration with International Builders on this project.
Photo credit to: Dan Cutrona
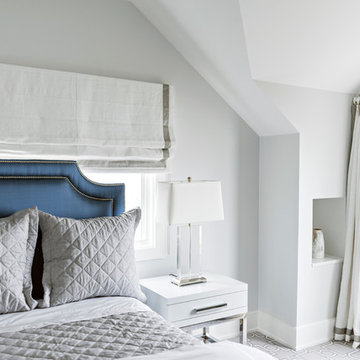 Systems Design & Integration, Inc.
In this house, we prewired and installed for whole house audio, home automation, outdoor audio, network, and surveillance. We worked in collaboration with International Builders on this project.
Photo credit to: Dan Cutrona
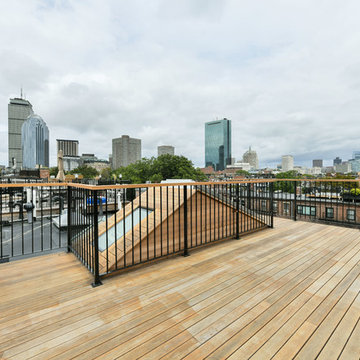 Systems Design & Integration, Inc.
We designed, prewired, installed, and programmed this 5 story brown stone home in Back Bay for whole house audio, lighting control, media room, TV locations, surround sound, Savant home automation, outdoor audio, motorized shades, networking and more. We worked in collaboration with ARC Design builder on this project.
This home was featured in the 2019 New England HOME Magazine.
Find the right local pro for your project
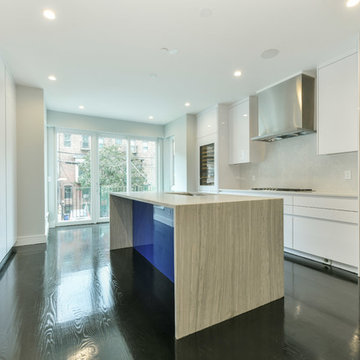 Systems Design & Integration, Inc.
We designed, prewired, installed, and programmed this 5 story brown stone home in Back Bay for whole house audio, lighting control, media room, TV locations, surround sound, Savant home automation, outdoor audio, motorized shades, networking and more. We worked in collaboration with ARC Design builder on this project.
This home was featured in the 2019 New England HOME Magazine.
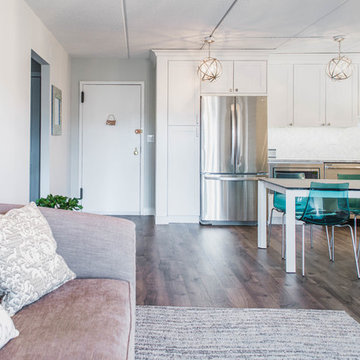
 RAJ Kitchen and Bath, LLC
 “Full apartment design”.
IF you have not yet seen this apartment conversion before, we strongly urge you to go to the bottom left of this page and click on the short 2-minutes video. It would put a lot of things into perspective when you come back and continue reading this.
It is true we were literally handed the keys and told a list of things that they wanted to have happen and we were to go into the apartment, look at the space and come up with a design that would satisfy all of that need. UNTIL we showed up! The unit had really seen some better days but we knew we had to look past that and come up with a concept that would work for them.
The immediate challenges were centered around 3 big ideas:
1. Adding a second bedroom to the already small footprint
2. Figuring out a way to make the kitchen bigger, better and brighter
3. Creating a master room walk in closet
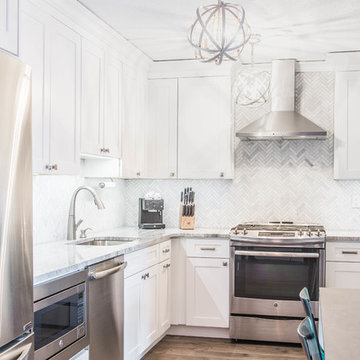
It’s always difficult to add new rooms into existing footprint without expanding out or up and not incurring any opportunity cost. In this case, that was exactly what we had to do. Item one and two above had to be tackled as one. We went ahead and switched out the location of the dining room and eliminating an area where there was a “nook” type eat-in area. By doing so, we were able to cut right into that footprint and change the layout of the kitchen.
That one move allowed us to dig into the kitchen design because it was now the main focal point in the apartment. It was no longer an option to keep it in that tiny hole where it was, so we had to ensure that this design was functional and aesthetically pleasing at the same time. By adding the table into the space where an Island typically would go, we were able to both cut cost and still provide a dining experience. The Table serves as an Island as well when cooking.
We then proceeded to block in the existing doorway to the dining room. By doing this, we were able to create a full room which allowed us to put a door on the other side and called that room Bedroom #2. This was easier to do because all of the mechanicals were already in that space (light, heater and windows). By shifting things around, we also achieved a huge wall to wall closet from inside. PERFECT!
Then we moved into the Single bedroom. We thought it was a big room with a small closet, so by creatively adding an L shaped wall and steal some footprint into the bedroom side, we were able to put a door on that new room and design it for the walk-in closet. Even after this, the bedroom still holds a queen size bed with 2 night stands, a TV on the wall, a sitting chair and plenty of room to walk around. This was done by rethinking the location for the bed and night stands.
The bathroom was gutted to make sure there was no leaks and rebuild from the ground up. We kept all of the plumbing where it was, added a new vanity, medicine cabinet, tiles and lighting and it was done.
From there, the rest of the unit had new flooring all throughout, paint, and lighting. After completion and walk through, this project was handed over back to the clients.
Execution and collaboration between all the trades were: Reggie and his team from Premier Interiors and Rohan from RD Mechanical Services.
p.s. Please see our website to see the video.
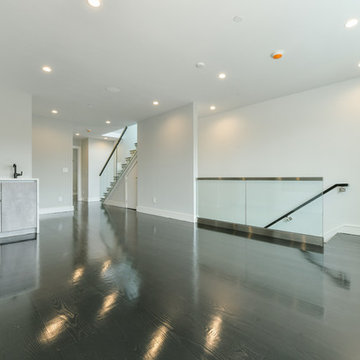 Systems Design & Integration, Inc.
We designed, prewired, installed, and programmed this 5 story brown stone home in Back Bay for whole house audio, lighting control, media room, TV locations, surround sound, Savant home automation, outdoor audio, motorized shades, networking and more. We worked in collaboration with ARC Design builder on this project.
This home was featured in the 2019 New England HOME Magazine.
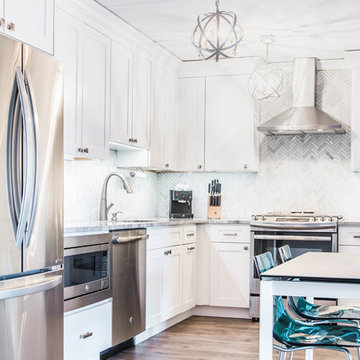 RAJ Kitchen and Bath, LLC
 “Full apartment design”.
IF you have not yet seen this apartment conversion before, we strongly urge you to go to the bottom left of this page and click on the short 2-minutes video. It would put a lot of things into perspective when you come back and continue reading this.
It is true we were literally handed the keys and told a list of things that they wanted to have happen and we were to go into the apartment, look at the space and come up with a design that would satisfy all of that need. UNTIL we showed up! The unit had really seen some better days but we knew we had to look past that and come up with a concept that would work for them.
The immediate challenges were centered around 3 big ideas:
1. Adding a second bedroom to the already small footprint
2. Figuring out a way to make the kitchen bigger, better and brighter
3. Creating a master room walk in closet
It’s always difficult to add new rooms into existing footprint without expanding out or up and not incurring any opportunity cost. In this case, that was exactly what we had to do. Item one and two above had to be tackled as one. We went ahead and switched out the location of the dining room and eliminating an area where there was a “nook” type eat-in area. By doing so, we were able to cut right into that footprint and change the layout of the kitchen.
That one move allowed us to dig into the kitchen design because it was now the main focal point in the apartment. It was no longer an option to keep it in that tiny hole where it was, so we had to ensure that this design was functional and aesthetically pleasing at the same time. By adding the table into the space where an Island typically would go, we were able to both cut cost and still provide a dining experience. The Table serves as an Island as well when cooking.
We then proceeded to block in the existing doorway to the dining room. By doing this, we were able to create a full room which allowed us to put a door on the other side and called that room Bedroom #2. This was easier to do because all of the mechanicals were already in that space (light, heater and windows). By shifting things around, we also achieved a huge wall to wall closet from inside. PERFECT!
Then we moved into the Single bedroom. We thought it was a big room with a small closet, so by creatively adding an L shaped wall and steal some footprint into the bedroom side, we were able to put a door on that new room and design it for the walk-in closet. Even after this, the bedroom still holds a queen size bed with 2 night stands, a TV on the wall, a sitting chair and plenty of room to walk around. This was done by rethinking the location for the bed and night stands.
The bathroom was gutted to make sure there was no leaks and rebuild from the ground up. We kept all of the plumbing where it was, added a new vanity, medicine cabinet, tiles and lighting and it was done.
From there, the rest of the unit had new flooring all throughout, paint, and lighting. After completion and walk through, this project was handed over back to the clients.
Execution and collaboration between all the trades were: Reggie and his team from Premier Interiors and Rohan from RD Mechanical Services.
p.s. Please see our website to see the video.
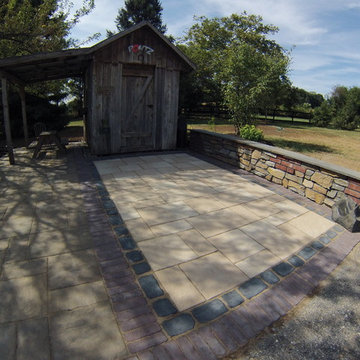
 C.E. Pontz Sons
Feast your eyes on our new Outdoor Living Display. The feature is located at our Creative Center on New Holland Pike in Lancaster, PA. This is the finished Product. We have documented the entire build from start to finish. Previous videos were shot in time-lapse during the duration of the build. Links to previous videos are at the bottom of the page.
The Display feature incorporates a little bit of the services we provide. We featured different aspects of outdoor living. The first thing to catch your eye is a fairly large-scale water feature. The water feature consist of a ecosystem pond. The water starts to flow from a spillway bowl fountain. The spillway pours into the bog filter. The water then flows down various cascading waterfalls. The waterfalls and pond were constructed out of 2 different types of boulders. We did this to show various options available. There is a gigantic boulder fountain that is incorporated into the pond as well. There is a skimmer in the pond the show functionality. The pond then flows over a zero edge waterfall into a large basin. Atop the basin is 3 fountains. 2 bubbling urn fountains as well as fire bowl fountain.
The patio area incorporates different styles and colors of pavers. Along with different styles of boarders. There is 2 seating walls on either side of the patio area. Each seating wall has a mixture of stone and brick veneer and topped with flagstone caps. There is a very unique shed next to the patio area. Surrounding the patio are we installed an outdoor audio system as well. This system cranks out some serious sound. Stop by and have a listen!
The entire project area is outfitted with landscape lighting. We incorporated up-lights, wall lights, path lights, and a couple spot lights. The entire water feature also has underwater lighting installed. Landscaping was installed around the project to finished it off. If you're in the Lancaster area be sure to stop by and check it out!!! Visitors are always welcome.
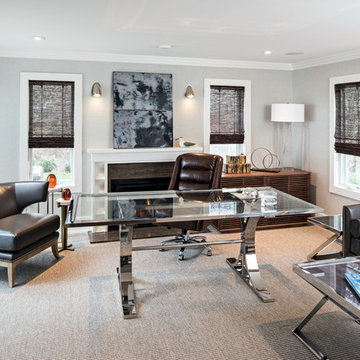 Systems Design & Integration, Inc.
In this house, we prewired and installed for whole house audio, home automation, outdoor audio, network, and surveillance. We worked in collaboration with International Builders on this project.
Photo credit to: Dan Cutrona
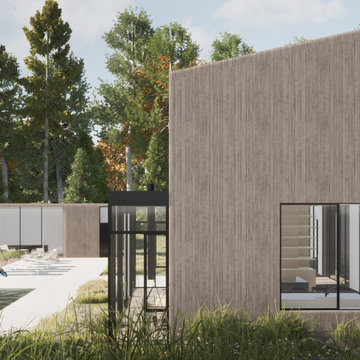
 Mechanism Architecture
The new South Cliff Residence features luxury amenities including a 40 foot lap pool, pool house, large terrace, home gym, completely private study, and a large creative studio space suited to the owners’ needs. Numerous glass panels stretch from the floor to the soaring twelve foot tall ceilings throughout the main level, and vaulted ceilings at the second level have been fine tuned to the owners’ preferences.
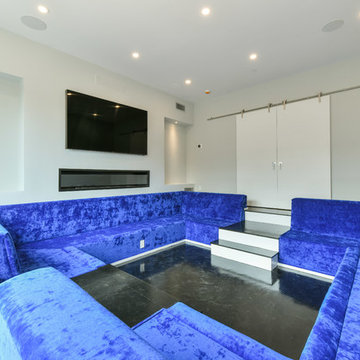 Systems Design & Integration, Inc.
We designed, prewired, installed, and programmed this 5 story brown stone home in Back Bay for whole house audio, lighting control, media room, TV locations, surround sound, Savant home automation, outdoor audio, motorized shades, networking and more. We worked in collaboration with ARC Design builder on this project.
This home was featured in the 2019 New England HOME Magazine.
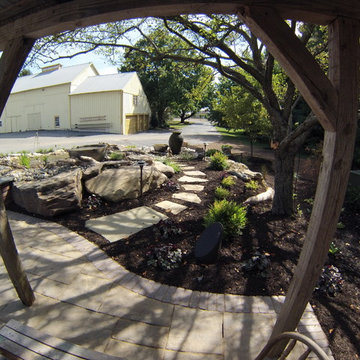 C.E. Pontz Sons
Feast your eyes on our new Outdoor Living Display. The feature is located at our Creative Center on New Holland Pike in Lancaster, PA. This is the finished Product. We have documented the entire build from start to finish. Previous videos were shot in time-lapse during the duration of the build. Links to previous videos are at the bottom of the page.
The Display feature incorporates a little bit of the services we provide. We featured different aspects of outdoor living. The first thing to catch your eye is a fairly large-scale water feature. The water feature consist of a ecosystem pond. The water starts to flow from a spillway bowl fountain. The spillway pours into the bog filter. The water then flows down various cascading waterfalls. The waterfalls and pond were constructed out of 2 different types of boulders. We did this to show various options available. There is a gigantic boulder fountain that is incorporated into the pond as well. There is a skimmer in the pond the show functionality. The pond then flows over a zero edge waterfall into a large basin. Atop the basin is 3 fountains. 2 bubbling urn fountains as well as fire bowl fountain.
The patio area incorporates different styles and colors of pavers. Along with different styles of boarders. There is 2 seating walls on either side of the patio area. Each seating wall has a mixture of stone and brick veneer and topped with flagstone caps. There is a very unique shed next to the patio area. Surrounding the patio are we installed an outdoor audio system as well. This system cranks out some serious sound. Stop by and have a listen!
The entire project area is outfitted with landscape lighting. We incorporated up-lights, wall lights, path lights, and a couple spot lights. The entire water feature also has underwater lighting installed. Landscaping was installed around the project to finished it off. If you're in the Lancaster area be sure to stop by and check it out!!! Visitors are always welcome.
 RAJ Kitchen and Bath, LLC
 “Full apartment design”.
IF you have not yet seen this apartment conversion before, we strongly urge you to go to the bottom left of this page and click on the short 2-minutes video. It would put a lot of things into perspective when you come back and continue reading this.
It is true we were literally handed the keys and told a list of things that they wanted to have happen and we were to go into the apartment, look at the space and come up with a design that would satisfy all of that need. UNTIL we showed up! The unit had really seen some better days but we knew we had to look past that and come up with a concept that would work for them.
The immediate challenges were centered around 3 big ideas:
1. Adding a second bedroom to the already small footprint
2. Figuring out a way to make the kitchen bigger, better and brighter
3. Creating a master room walk in closet
It’s always difficult to add new rooms into existing footprint without expanding out or up and not incurring any opportunity cost. In this case, that was exactly what we had to do. Item one and two above had to be tackled as one. We went ahead and switched out the location of the dining room and eliminating an area where there was a “nook” type eat-in area. By doing so, we were able to cut right into that footprint and change the layout of the kitchen.
That one move allowed us to dig into the kitchen design because it was now the main focal point in the apartment. It was no longer an option to keep it in that tiny hole where it was, so we had to ensure that this design was functional and aesthetically pleasing at the same time. By adding the table into the space where an Island typically would go, we were able to both cut cost and still provide a dining experience. The Table serves as an Island as well when cooking.
We then proceeded to block in the existing doorway to the dining room. By doing this, we were able to create a full room which allowed us to put a door on the other side and called that room Bedroom #2. This was easier to do because all of the mechanicals were already in that space (light, heater and windows). By shifting things around, we also achieved a huge wall to wall closet from inside. PERFECT!
Then we moved into the Single bedroom. We thought it was a big room with a small closet, so by creatively adding an L shaped wall and steal some footprint into the bedroom side, we were able to put a door on that new room and design it for the walk-in closet. Even after this, the bedroom still holds a queen size bed with 2 night stands, a TV on the wall, a sitting chair and plenty of room to walk around. This was done by rethinking the location for the bed and night stands.
The bathroom was gutted to make sure there was no leaks and rebuild from the ground up. We kept all of the plumbing where it was, added a new vanity, medicine cabinet, tiles and lighting and it was done.
From there, the rest of the unit had new flooring all throughout, paint, and lighting. After completion and walk through, this project was handed over back to the clients.
Execution and collaboration between all the trades were: Reggie and his team from Premier Interiors and Rohan from RD Mechanical Services.
p.s. Please see our website to see the video.
 Mediak Solutions
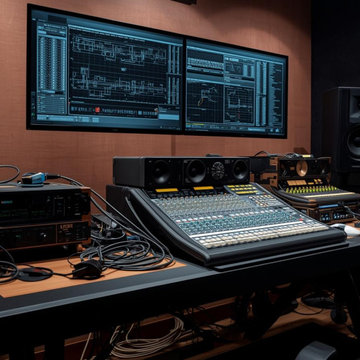
In the modern digital era, clear communication and seamless collaboration are essential for every type of organization. High-quality Audio-Video (AV) systems have become a key factor in creating efficient, interactive, and engaging environments. Media K Solutions provides expert AV integration services that are carefully designed to meet the needs of businesses, educational institutions, entertainment venues, and public spaces.
The company’s approach focuses on delivering complete solutions rather than simple equipment installations. Their team collaborates closely with each client to design systems that are not only functional but also scalable and adaptable to future technological advancements. Every project is built to improve productivity, enhance user experience, and simplify daily operations.
Media K Solutions specializes in a wide range of AV integration services, including:
Installation of high-performance audio, video, and control systems that deliver exceptional clarity and reliability.
Designing flexible AV configurations that can grow with the organization and adapt to evolving requirements.
Integrating new technologies with existing systems to maximize compatibility and protect prior investments.
Offering continuous maintenance and technical support to ensure long-term performance and system stability.
Through these carefully implemented solutions, Media K Solutions helps organizations create connected spaces that inspire collaboration, learning, and creativity. Whether setting up a conference room, classroom, auditorium, or entertainment facility, their expertise ensures smooth functionality and lasting quality.
For more information about their full range of services and project examples, visit their official website: https://mediaksolutions.com
 Systems Design & Integration, Inc.
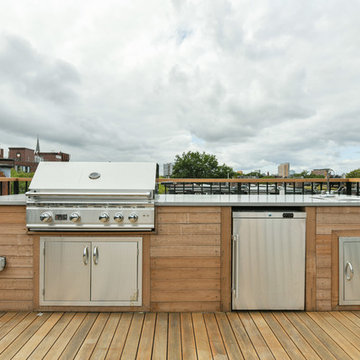
We designed, prewired, installed, and programmed this 5 story brown stone home in Back Bay for whole house audio, lighting control, media room, TV locations, surround sound, Savant home automation, outdoor audio, motorized shades, networking and more. We worked in collaboration with ARC Design builder on this project.
This home was featured in the 2019 New England HOME Magazine.
 RAJ Kitchen and Bath, LLC
 “Full apartment design”.
IF you have not yet seen this apartment conversion before, we strongly urge you to go to the bottom left of this page and click on the short 2-minutes video. It would put a lot of things into perspective when you come back and continue reading this.
It is true we were literally handed the keys and told a list of things that they wanted to have happen and we were to go into the apartment, look at the space and come up with a design that would satisfy all of that need. UNTIL we showed up! The unit had really seen some better days but we knew we had to look past that and come up with a concept that would work for them.
The immediate challenges were centered around 3 big ideas:
1. Adding a second bedroom to the already small footprint
2. Figuring out a way to make the kitchen bigger, better and brighter
3. Creating a master room walk in closet
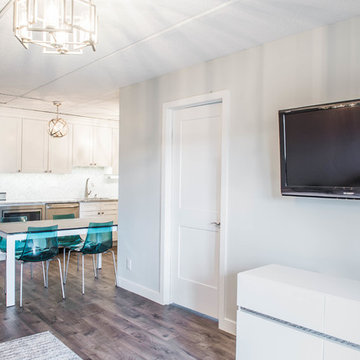
It’s always difficult to add new rooms into existing footprint without expanding out or up and not incurring any opportunity cost. In this case, that was exactly what we had to do. Item one and two above had to be tackled as one. We went ahead and switched out the location of the dining room and eliminating an area where there was a “nook” type eat-in area. By doing so, we were able to cut right into that footprint and change the layout of the kitchen.
That one move allowed us to dig into the kitchen design because it was now the main focal point in the apartment. It was no longer an option to keep it in that tiny hole where it was, so we had to ensure that this design was functional and aesthetically pleasing at the same time. By adding the table into the space where an Island typically would go, we were able to both cut cost and still provide a dining experience. The Table serves as an Island as well when cooking.
We then proceeded to block in the existing doorway to the dining room. By doing this, we were able to create a full room which allowed us to put a door on the other side and called that room Bedroom #2. This was easier to do because all of the mechanicals were already in that space (light, heater and windows). By shifting things around, we also achieved a huge wall to wall closet from inside. PERFECT!
Then we moved into the Single bedroom. We thought it was a big room with a small closet, so by creatively adding an L shaped wall and steal some footprint into the bedroom side, we were able to put a door on that new room and design it for the walk-in closet. Even after this, the bedroom still holds a queen size bed with 2 night stands, a TV on the wall, a sitting chair and plenty of room to walk around. This was done by rethinking the location for the bed and night stands.
The bathroom was gutted to make sure there was no leaks and rebuild from the ground up. We kept all of the plumbing where it was, added a new vanity, medicine cabinet, tiles and lighting and it was done.
From there, the rest of the unit had new flooring all throughout, paint, and lighting. After completion and walk through, this project was handed over back to the clients.
Execution and collaboration between all the trades were: Reggie and his team from Premier Interiors and Rohan from RD Mechanical Services.
p.s. Please see our website to see the video.
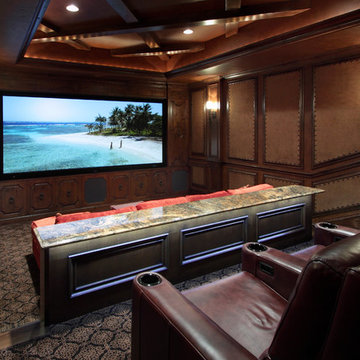
 UltraMedia, Inc.
Building this exceptional home cinema system in Westlake, TX was a pleasure from day one. Our clients have owned multiple home theaters, and wanted to step up the performance in this new media room. The construction of the room is heavily reinforced with 2x6s. The entire room has been insulated to keep the sound inside the room and minimize leakage to the rest of the house. The riser base for the back row of chairs was reinforced with wood screws, and was fully insulated. In addition, the walls have been sheetrocked with Quietrock. This treatment substantially keeps the sound from traveling between walls because of its high density coefficient. Because the media room is on the 2nd floor, a sound barrier was added to the floors to provide an additional layer of sound control within the room. The finished walls were treated with custom acoustic panels from Auralex. We applied absorptive, reflective and diffusive treatments throughout the room to create a well-balanced acoustic environment for music and movies. The interior designer brought in a faux painter to create a leather-like texture on the walls. She very creatively faux painted the acoustic cloth panels to match the leather look and feel of the room. A
7.2 complement of Triad speakers are optimally located within the room. The front three LCR speakers are positioned behind an acoustically transparent Stewart video screen. The four surround speakers are located in a horseshoe-shaped configuration and fully envelope the listener with all the subtle (and not-so-subtle) special effects. Two Triad Gold subwoofers are placed in the corners and are dialed into the room for maximum output and tautness of bass. Triad builds an in-wall speaker that is fully baffled which minimizes any sound loss through the walls, and the performance is outstanding.
The electronics featured in this media room are cutting edge. A Wolf Cinema projector with a Variscope lens allows us to set up the most popular aspect ratios and project a brilliant light on a 143" diagonal screen. We utilized the latest pre/pro from Integra as well as Class D amplification from Bel Canto. The Integra incorporates Audyssey digital correction circuitry, which measures the room’s properties/acoustics and maximizes the sound in the room. The sources include an Oppo Blu ray player, AM/FM, DirecTV HD and AppleTV. The entire system is controlled by an RTI touchscreen remote for easy, intuitive control. The sound is effortless and it is a match made in heaven.
The room consists of two rows of seating. The front row is a very comfortable pit seating group and the second row utilizes leather theater chairs. All of this leads to a well-appointed, acoustically superior media room.
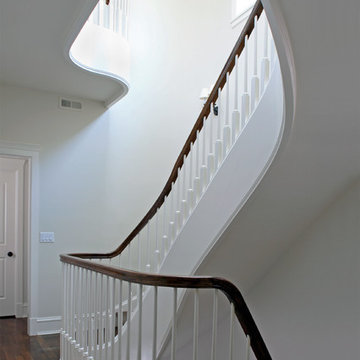
 Middlefork Luxury Home Builders
This brick and limestone, 6,000-square-foot residence exemplifies understated elegance. Located in the award-wining Blaine School District and within close proximity to the Southport Corridor, this is city living at its finest!
The foyer, with herringbone wood floors, leads to a dramatic, hand-milled oval staircase; an architectural element that allows sunlight to cascade down from skylights and to filter throughout the house. The floor plan has stately-proportioned rooms and includes formal Living and Dining Rooms; an expansive, eat-in, gourmet Kitchen/Great Room; four bedrooms on the second level with three additional bedrooms and a Family Room on the lower level; a Penthouse Playroom leading to a roof-top deck and green roof; and an attached, heated 3-car garage. Additional features include hardwood flooring throughout the main level and upper two floors; sophisticated architectural detailing throughout the house including coffered ceiling details, barrel and groin vaulted ceilings; painted, glazed and wood paneling; laundry rooms on the bedroom level and on the lower level; five fireplaces, including one outdoors; and HD Video, Audio and Surround Sound pre-wire distribution through the house and grounds. The home also features extensively landscaped exterior spaces, designed by Prassas Landscape Studio.
This home went under contract within 90 days during the Great Recession.
Featured in Chicago Magazine: http://goo.gl/Gl8lRm
Jim Yochum
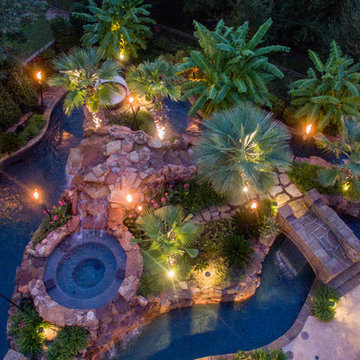
 Mike Farley Pool Designer, SWD, ASLA
Texas swimming pool designer Mike Farley takes you to the design of a Colleyville residential Lazy River project that has already won multiple awards and was featured on HGTV "Cool Pools". This pool has it all - outdoor kitchen, multiple waterfalls, rain falls, bridges, an elevated spa on an island surrounded by the river, basketball, luxury cave, underwater speakers, and they converted a stall of the garage to make a bathroom with a dry sauna & walkin dual shower. Project is designed by Mike Farley and constructed by Claffey Pools. Check out Mike's Pool Tour Video series at FarleyPoolDesigns.com. Photo by Laura Farley
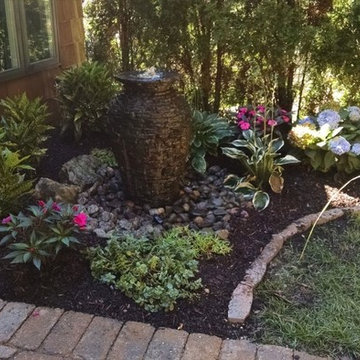
 Deck and Patio Company "Outdoor Living Experts"
This photo is one such garden fountain that we added for clients who had recently moved to a new home.
When working at their property, one of our team members mentioned that it felt like the garden was missing something — a feature that would offer both the sound and relaxing sight of water movement.
The clients agreed that a garden fountain would be an ideal finishing touch in such limited space.
And here’s a 5-second video for you to hear the water music of that installation:
https://www.youtube.com/watch?feature=yout&v=QqOIZuOld_Y
www,deckandpayio.com
18