
Search results for "Credentials" in Home Design Ideas
 Kebony
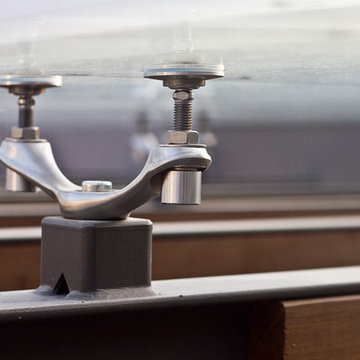
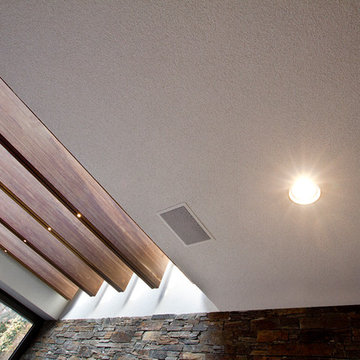
M-S Pro Architects announce the completion of an indoor swimming pool in a state-of-the-art, single storey family home set in a picturesque location on the outskirts of Bratislava - one of Europe’s youngest capital cities. Kebony, a beautiful wood recommended by leading architects, was chosen to craft the ceiling of the swimming pool, which is designed to emulate rippling waves as well as for the terrace deck and structural beams.
Sustainability and a desire to recreate the close proximity often seen between wood and water in the natural environment were primary focuses in the design of this project. This led a requirement for a low maintenance wood, compatible humidity and with advanced durability, for the swimming pool ceiling. In addition, a high level of precision when cutting the wood was required in order to achieve the desired appearance of waves.
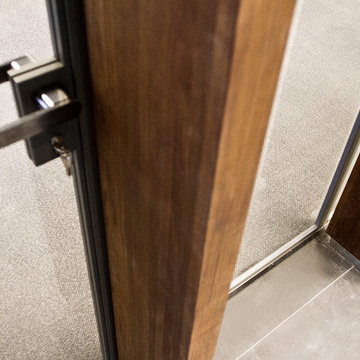
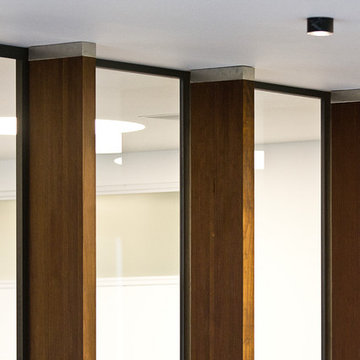
Supplied by Leading Market, Kebony was carefully selected for the pool ceiling, which consists of 490 lamellae of timber, due to its versatility, durability and environmental credentials. Kebony was also installed throughout the exterior of this property, both for the spacious outdoor terrace and the exterior and interior beams. One of the reasons to choose Kebony was the unified look of wood in all these different applications.
Developed in Norway, the patented Kebony technology uses an environmentally friendly process, which permanently enhances the properties of sustainable softwood with a bio-based liquid derived from agricultural crop waste. By polymerising the wood’s cell wall with furfuryl alcohol, the wood gains greatly improved durability and dimensional stability, giving it characteristics similar to those of tropical hardwood. In creating a wood with comparable properties to tropical hardwood that can be grown in a FSC certified, sustainably managed forest, the demand for tropical woods is reduced, allowing timber to once again be an important part of sustainable construction.
Tomáš Hubinský, Lead Architect at M-S Pro, commented: “From conception through to completion, the creation of this ceiling has been a real feat. Despite the challenges faced by such an intricate design, Kebony was the perfect material to convey our desired effect of waves rippling along the ceiling. We will continue to incorporate Kebony into our interior and exterior designs, with wood fast becoming the first choice material for all architects.”
Mette Valen, Sales Manager Norway at Kebony, explained: “The distinctive nature of this design cleverly portrays the capability of Kebony, demonstrating both the aesthetic and performance qualities of the product. We would be honoured to work with M-S Pro in the future and look forward to seeing how they utilise Kebony in their future projects.”
 Kebony
M-S Pro Architects announce the completion of an indoor swimming pool in a state-of-the-art, single storey family home set in a picturesque location on the outskirts of Bratislava - one of Europe’s youngest capital cities. Kebony, a beautiful wood recommended by leading architects, was chosen to craft the ceiling of the swimming pool, which is designed to emulate rippling waves as well as for the terrace deck and structural beams.
Sustainability and a desire to recreate the close proximity often seen between wood and water in the natural environment were primary focuses in the design of this project. This led a requirement for a low maintenance wood, compatible humidity and with advanced durability, for the swimming pool ceiling. In addition, a high level of precision when cutting the wood was required in order to achieve the desired appearance of waves.
Supplied by Leading Market, Kebony was carefully selected for the pool ceiling, which consists of 490 lamellae of timber, due to its versatility, durability and environmental credentials. Kebony was also installed throughout the exterior of this property, both for the spacious outdoor terrace and the exterior and interior beams. One of the reasons to choose Kebony was the unified look of wood in all these different applications.
Developed in Norway, the patented Kebony technology uses an environmentally friendly process, which permanently enhances the properties of sustainable softwood with a bio-based liquid derived from agricultural crop waste. By polymerising the wood’s cell wall with furfuryl alcohol, the wood gains greatly improved durability and dimensional stability, giving it characteristics similar to those of tropical hardwood. In creating a wood with comparable properties to tropical hardwood that can be grown in a FSC certified, sustainably managed forest, the demand for tropical woods is reduced, allowing timber to once again be an important part of sustainable construction.
Tomáš Hubinský, Lead Architect at M-S Pro, commented: “From conception through to completion, the creation of this ceiling has been a real feat. Despite the challenges faced by such an intricate design, Kebony was the perfect material to convey our desired effect of waves rippling along the ceiling. We will continue to incorporate Kebony into our interior and exterior designs, with wood fast becoming the first choice material for all architects.”
Mette Valen, Sales Manager Norway at Kebony, explained: “The distinctive nature of this design cleverly portrays the capability of Kebony, demonstrating both the aesthetic and performance qualities of the product. We would be honoured to work with M-S Pro in the future and look forward to seeing how they utilise Kebony in their future projects.”
 Kebony
M-S Pro Architects announce the completion of an indoor swimming pool in a state-of-the-art, single storey family home set in a picturesque location on the outskirts of Bratislava - one of Europe’s youngest capital cities. Kebony, a beautiful wood recommended by leading architects, was chosen to craft the ceiling of the swimming pool, which is designed to emulate rippling waves as well as for the terrace deck and structural beams.
Sustainability and a desire to recreate the close proximity often seen between wood and water in the natural environment were primary focuses in the design of this project. This led a requirement for a low maintenance wood, compatible humidity and with advanced durability, for the swimming pool ceiling. In addition, a high level of precision when cutting the wood was required in order to achieve the desired appearance of waves.
Supplied by Leading Market, Kebony was carefully selected for the pool ceiling, which consists of 490 lamellae of timber, due to its versatility, durability and environmental credentials. Kebony was also installed throughout the exterior of this property, both for the spacious outdoor terrace and the exterior and interior beams. One of the reasons to choose Kebony was the unified look of wood in all these different applications.
Developed in Norway, the patented Kebony technology uses an environmentally friendly process, which permanently enhances the properties of sustainable softwood with a bio-based liquid derived from agricultural crop waste. By polymerising the wood’s cell wall with furfuryl alcohol, the wood gains greatly improved durability and dimensional stability, giving it characteristics similar to those of tropical hardwood. In creating a wood with comparable properties to tropical hardwood that can be grown in a FSC certified, sustainably managed forest, the demand for tropical woods is reduced, allowing timber to once again be an important part of sustainable construction.
Tomáš Hubinský, Lead Architect at M-S Pro, commented: “From conception through to completion, the creation of this ceiling has been a real feat. Despite the challenges faced by such an intricate design, Kebony was the perfect material to convey our desired effect of waves rippling along the ceiling. We will continue to incorporate Kebony into our interior and exterior designs, with wood fast becoming the first choice material for all architects.”
Mette Valen, Sales Manager Norway at Kebony, explained: “The distinctive nature of this design cleverly portrays the capability of Kebony, demonstrating both the aesthetic and performance qualities of the product. We would be honoured to work with M-S Pro in the future and look forward to seeing how they utilise Kebony in their future projects.”
Find the right local pro for your project
 Kebony
M-S Pro Architects announce the completion of an indoor swimming pool in a state-of-the-art, single storey family home set in a picturesque location on the outskirts of Bratislava - one of Europe’s youngest capital cities. Kebony, a beautiful wood recommended by leading architects, was chosen to craft the ceiling of the swimming pool, which is designed to emulate rippling waves as well as for the terrace deck and structural beams.
Sustainability and a desire to recreate the close proximity often seen between wood and water in the natural environment were primary focuses in the design of this project. This led a requirement for a low maintenance wood, compatible humidity and with advanced durability, for the swimming pool ceiling. In addition, a high level of precision when cutting the wood was required in order to achieve the desired appearance of waves.
Supplied by Leading Market, Kebony was carefully selected for the pool ceiling, which consists of 490 lamellae of timber, due to its versatility, durability and environmental credentials. Kebony was also installed throughout the exterior of this property, both for the spacious outdoor terrace and the exterior and interior beams. One of the reasons to choose Kebony was the unified look of wood in all these different applications.
Developed in Norway, the patented Kebony technology uses an environmentally friendly process, which permanently enhances the properties of sustainable softwood with a bio-based liquid derived from agricultural crop waste. By polymerising the wood’s cell wall with furfuryl alcohol, the wood gains greatly improved durability and dimensional stability, giving it characteristics similar to those of tropical hardwood. In creating a wood with comparable properties to tropical hardwood that can be grown in a FSC certified, sustainably managed forest, the demand for tropical woods is reduced, allowing timber to once again be an important part of sustainable construction.
Tomáš Hubinský, Lead Architect at M-S Pro, commented: “From conception through to completion, the creation of this ceiling has been a real feat. Despite the challenges faced by such an intricate design, Kebony was the perfect material to convey our desired effect of waves rippling along the ceiling. We will continue to incorporate Kebony into our interior and exterior designs, with wood fast becoming the first choice material for all architects.”
Mette Valen, Sales Manager Norway at Kebony, explained: “The distinctive nature of this design cleverly portrays the capability of Kebony, demonstrating both the aesthetic and performance qualities of the product. We would be honoured to work with M-S Pro in the future and look forward to seeing how they utilise Kebony in their future projects.”
 Kebony
M-S Pro Architects announce the completion of an indoor swimming pool in a state-of-the-art, single storey family home set in a picturesque location on the outskirts of Bratislava - one of Europe’s youngest capital cities. Kebony, a beautiful wood recommended by leading architects, was chosen to craft the ceiling of the swimming pool, which is designed to emulate rippling waves as well as for the terrace deck and structural beams.
Sustainability and a desire to recreate the close proximity often seen between wood and water in the natural environment were primary focuses in the design of this project. This led a requirement for a low maintenance wood, compatible humidity and with advanced durability, for the swimming pool ceiling. In addition, a high level of precision when cutting the wood was required in order to achieve the desired appearance of waves.
Supplied by Leading Market, Kebony was carefully selected for the pool ceiling, which consists of 490 lamellae of timber, due to its versatility, durability and environmental credentials. Kebony was also installed throughout the exterior of this property, both for the spacious outdoor terrace and the exterior and interior beams. One of the reasons to choose Kebony was the unified look of wood in all these different applications.
Developed in Norway, the patented Kebony technology uses an environmentally friendly process, which permanently enhances the properties of sustainable softwood with a bio-based liquid derived from agricultural crop waste. By polymerising the wood’s cell wall with furfuryl alcohol, the wood gains greatly improved durability and dimensional stability, giving it characteristics similar to those of tropical hardwood. In creating a wood with comparable properties to tropical hardwood that can be grown in a FSC certified, sustainably managed forest, the demand for tropical woods is reduced, allowing timber to once again be an important part of sustainable construction.
Tomáš Hubinský, Lead Architect at M-S Pro, commented: “From conception through to completion, the creation of this ceiling has been a real feat. Despite the challenges faced by such an intricate design, Kebony was the perfect material to convey our desired effect of waves rippling along the ceiling. We will continue to incorporate Kebony into our interior and exterior designs, with wood fast becoming the first choice material for all architects.”
Mette Valen, Sales Manager Norway at Kebony, explained: “The distinctive nature of this design cleverly portrays the capability of Kebony, demonstrating both the aesthetic and performance qualities of the product. We would be honoured to work with M-S Pro in the future and look forward to seeing how they utilise Kebony in their future projects.”
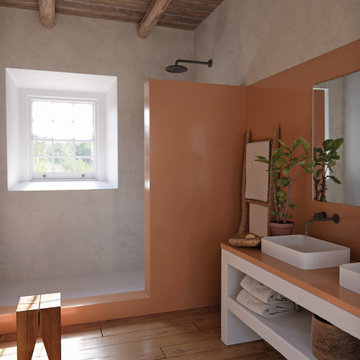
 Cosentino Canada
We present the first Carbon Neutral collection by Silestone®. A commitment to sustainability in which we reduce and offset the emissions of the manufacturing process with reforestation projects. Sunlit Days is inspired by the evocative Mediterranean shades of a unique lifestyle.
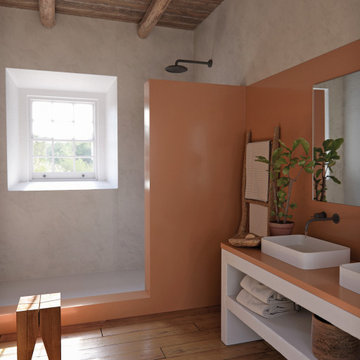
 Cosentino IL
אנו מציגים את קולקציית Carbon Neutral הראשונה של Silestone®. מחויבות לקיימות שבה אנו מפחיתים ומקזזים את פליטות תהליך הייצור באמצעות פרויקטים של ייעור מחדש.
Sunlit Days מעוצב בהשראת הגוונים הים תיכוניים המעוררים של סגנון חיים ייחודי.

 Talon Construction Inc.
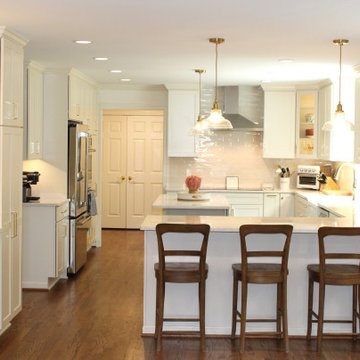
Finding a reputable contractor to design and build your kitchen remodel in Maryland with quality results involves several steps. Here are some general guidelines to help you find the right professional for your project:
1. Ask for Recommendations: Start by asking friends, family, neighbors, or colleagues who have recently completed kitchen remodels for recommendations. Personal referrals can be a valuable source of trustworthy contractors.
2. Check Online Reviews: Websites like Yelp, Angie's List, and Google Reviews can provide insights into the experiences of previous clients. Look for contractors with consistently positive feedback.
3. Check Credentials: Verify that the contractor has the necessary licenses and insurance to work in Maryland. You can typically check this information on your state's licensing board website.
4. Ask for References: Request references from the contractor and contact previous clients to inquire about their experiences. Visit some of their completed projects if possible.
5. Review Portfolios: Examine the contractor's portfolio of past kitchen remodels. Look for examples of work that match your style and preferences.
6. Check for Permits: Ensure that the contractor will handle any necessary permits and inspections for your remodel. Avoid contractors who suggest bypassing required permits, as this can lead to legal and safety issues.
7. Discuss Communication: Clear communication is crucial throughout the project. Discuss how the contractor will keep you updated on progress and address any concerns or changes during the remodel.
8. Get Everything in Writing: Never rely solely on verbal agreements. Ensure that all project details, warranties, and expectations are documented in a written contract.
9. Check for Red Flags: Be wary of contractors who pressure you into making quick decisions, lack a physical business address, or have a history of disputes or legal issues.
10. Trust Your Instincts: Choose a contractor you feel comfortable working with. Trust your instincts and select someone who listens to your ideas and concerns.
11. Visit Completed Projects: If possible, visit some of the contractors’ completed kitchen remodels to assess the quality of their work in person.
Once you've completed your due diligence and gathered all the necessary information, you'll be better equipped to make an informed decision about which contractor to hire for your kitchen remodel in Maryland. Remember that quality results often come from working with experienced, licensed professionals who prioritize clear communication and transparency throughout the project.
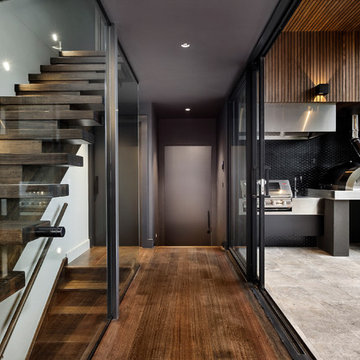
 Bagnato Architecture & Interiors
Hallway link showing openable sliding doors from outside BBQ Alfresco area to inside.
Axiom Photography
Inspiration for a contemporary patio remodel in Melbourne
Inspiration for a contemporary patio remodel in Melbourne
 Talon Construction Inc.
Designing and building a kitchen addition is a complex process that involves multiple steps and considerations. Here is a general outline to help you get started on your kitchen addition project:
Define Your Goals and Budget:
• Determine the purpose of the kitchen addition. Is it for more cooking space, a dining area, or a combination of both?
• Establish a realistic budget for your project. Consider all costs, including construction, permits, materials, and furnishings.
Hire a Design Professional:
• Seek the services of a design build company who specializes in kitchen additions.
• Discuss your vision, needs, and budget with the design professional to create a design concept.
Site Evaluation:
• Assess the existing space and structural condition of your home to ensure it can support the addition.
• Consider factors like zoning regulations, setbacks, and building codes.
Design Development:
• Collaborate with your design professional to refine the concept, including the layout, size, and architectural style.
• Choose materials, finishes, and fixtures that fit your design and budget.
Obtain Permits:
• Consult with your local design build contractor to determine the necessary permits and approvals.
• Prepare and submit all required documents, including architectural drawings and engineering plans.
Create Construction Documents:
• Work with your design build professional to develop detailed construction drawings and specifications.
• These documents will serve as a guide for contractors during construction.
Hire a design build contractor:
• Check references, credentials, and licenses before selecting a contractor.
• Sign a detailed contract that outlines the scope of work, timeline, and payment schedule.
Construction Phase:
• Demolition: If needed, remove any existing structures or walls.
• Foundation: Construct the foundation for the addition.
• Framing: Build the structural framework of the addition.
• Plumbing, Electrical, and HVAC: Install or update utilities as required.
• Insulation: Ensure proper insulation for energy efficiency.
• Drywall and Finish Work: Complete the walls and ceilings.
• Flooring and Cabinetry: Install flooring and kitchen cabinets.
• Appliances and Fixtures: Add appliances, plumbing fixtures, and lighting.
• Paint and Finish: Apply paint and finishes to achieve the desired look.
• Final Inspection: Schedule inspections to ensure compliance with building codes.
Final Inspections and Approvals:
• Arrange for final inspections to ensure the addition meets all safety and code requirements.
• Obtain any necessary certificates of occupancy or compliance.
Move In and Enjoy:
• Once all inspections and approvals are received, you can move into your new kitchen addition and start enjoying it.
Remember that every kitchen addition project is unique, so adapt this outline to your specific needs and circumstances. Consulting with professionals and obtaining the required permits and inspections is crucial to a successful and safe project.
 Talon Construction Inc.
Designing and building a kitchen addition is a complex process that involves multiple steps and considerations. Here is a general outline to help you get started on your kitchen addition project:
Define Your Goals and Budget:
• Determine the purpose of the kitchen addition. Is it for more cooking space, a dining area, or a combination of both?
• Establish a realistic budget for your project. Consider all costs, including construction, permits, materials, and furnishings.
Hire a Design Professional:
• Seek the services of a design build company who specializes in kitchen additions.
• Discuss your vision, needs, and budget with the design professional to create a design concept.
Site Evaluation:
• Assess the existing space and structural condition of your home to ensure it can support the addition.
• Consider factors like zoning regulations, setbacks, and building codes.
Design Development:
• Collaborate with your design professional to refine the concept, including the layout, size, and architectural style.
• Choose materials, finishes, and fixtures that fit your design and budget.
Obtain Permits:
• Consult with your local design build contractor to determine the necessary permits and approvals.
• Prepare and submit all required documents, including architectural drawings and engineering plans.
Create Construction Documents:
• Work with your design build professional to develop detailed construction drawings and specifications.
• These documents will serve as a guide for contractors during construction.
Hire a design build contractor:
• Check references, credentials, and licenses before selecting a contractor.
• Sign a detailed contract that outlines the scope of work, timeline, and payment schedule.
Construction Phase:
• Demolition: If needed, remove any existing structures or walls.
• Foundation: Construct the foundation for the addition.
• Framing: Build the structural framework of the addition.
• Plumbing, Electrical, and HVAC: Install or update utilities as required.
• Insulation: Ensure proper insulation for energy efficiency.
• Drywall and Finish Work: Complete the walls and ceilings.
• Flooring and Cabinetry: Install flooring and kitchen cabinets.
• Appliances and Fixtures: Add appliances, plumbing fixtures, and lighting.
• Paint and Finish: Apply paint and finishes to achieve the desired look.
• Final Inspection: Schedule inspections to ensure compliance with building codes.
Final Inspections and Approvals:
• Arrange for final inspections to ensure the addition meets all safety and code requirements.
• Obtain any necessary certificates of occupancy or compliance.
Move In and Enjoy:
• Once all inspections and approvals are received, you can move into your new kitchen addition and start enjoying it.
Remember that every kitchen addition project is unique, so adapt this outline to your specific needs and circumstances. Consulting with professionals and obtaining the required permits and inspections is crucial to a successful and safe project.
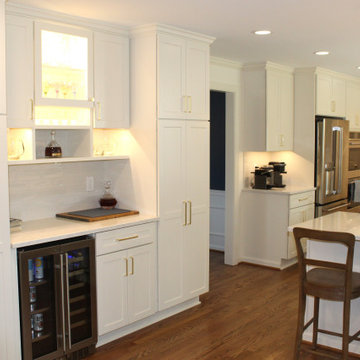 Talon Construction Inc.
Finding a reputable contractor to design and build your kitchen remodel in Maryland with quality results involves several steps. Here are some general guidelines to help you find the right professional for your project:
1. Ask for Recommendations: Start by asking friends, family, neighbors, or colleagues who have recently completed kitchen remodels for recommendations. Personal referrals can be a valuable source of trustworthy contractors.
2. Check Online Reviews: Websites like Yelp, Angie's List, and Google Reviews can provide insights into the experiences of previous clients. Look for contractors with consistently positive feedback.
3. Check Credentials: Verify that the contractor has the necessary licenses and insurance to work in Maryland. You can typically check this information on your state's licensing board website.
4. Ask for References: Request references from the contractor and contact previous clients to inquire about their experiences. Visit some of their completed projects if possible.
5. Review Portfolios: Examine the contractor's portfolio of past kitchen remodels. Look for examples of work that match your style and preferences.
6. Check for Permits: Ensure that the contractor will handle any necessary permits and inspections for your remodel. Avoid contractors who suggest bypassing required permits, as this can lead to legal and safety issues.
7. Discuss Communication: Clear communication is crucial throughout the project. Discuss how the contractor will keep you updated on progress and address any concerns or changes during the remodel.
8. Get Everything in Writing: Never rely solely on verbal agreements. Ensure that all project details, warranties, and expectations are documented in a written contract.
9. Check for Red Flags: Be wary of contractors who pressure you into making quick decisions, lack a physical business address, or have a history of disputes or legal issues.
10. Trust Your Instincts: Choose a contractor you feel comfortable working with. Trust your instincts and select someone who listens to your ideas and concerns.
11. Visit Completed Projects: If possible, visit some of the contractors’ completed kitchen remodels to assess the quality of their work in person.
Once you've completed your due diligence and gathered all the necessary information, you'll be better equipped to make an informed decision about which contractor to hire for your kitchen remodel in Maryland. Remember that quality results often come from working with experienced, licensed professionals who prioritize clear communication and transparency throughout the project.
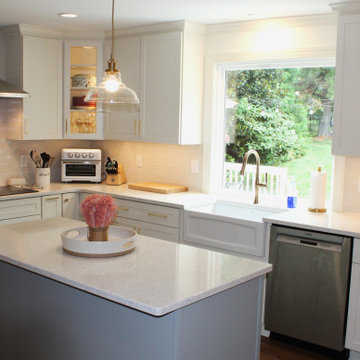 Talon Construction Inc.
Finding a reputable contractor to design and build your kitchen remodel in Maryland with quality results involves several steps. Here are some general guidelines to help you find the right professional for your project:
1. Ask for Recommendations: Start by asking friends, family, neighbors, or colleagues who have recently completed kitchen remodels for recommendations. Personal referrals can be a valuable source of trustworthy contractors.
2. Check Online Reviews: Websites like Yelp, Angie's List, and Google Reviews can provide insights into the experiences of previous clients. Look for contractors with consistently positive feedback.
3. Check Credentials: Verify that the contractor has the necessary licenses and insurance to work in Maryland. You can typically check this information on your state's licensing board website.
4. Ask for References: Request references from the contractor and contact previous clients to inquire about their experiences. Visit some of their completed projects if possible.
5. Review Portfolios: Examine the contractor's portfolio of past kitchen remodels. Look for examples of work that match your style and preferences.
6. Check for Permits: Ensure that the contractor will handle any necessary permits and inspections for your remodel. Avoid contractors who suggest bypassing required permits, as this can lead to legal and safety issues.
7. Discuss Communication: Clear communication is crucial throughout the project. Discuss how the contractor will keep you updated on progress and address any concerns or changes during the remodel.
8. Get Everything in Writing: Never rely solely on verbal agreements. Ensure that all project details, warranties, and expectations are documented in a written contract.
9. Check for Red Flags: Be wary of contractors who pressure you into making quick decisions, lack a physical business address, or have a history of disputes or legal issues.
10. Trust Your Instincts: Choose a contractor you feel comfortable working with. Trust your instincts and select someone who listens to your ideas and concerns.
11. Visit Completed Projects: If possible, visit some of the contractors’ completed kitchen remodels to assess the quality of their work in person.
Once you've completed your due diligence and gathered all the necessary information, you'll be better equipped to make an informed decision about which contractor to hire for your kitchen remodel in Maryland. Remember that quality results often come from working with experienced, licensed professionals who prioritize clear communication and transparency throughout the project.
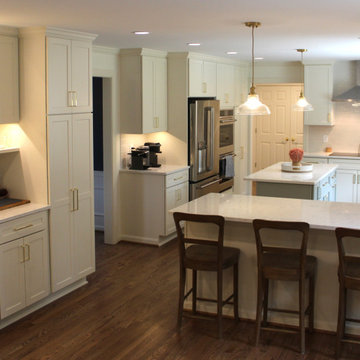 Talon Construction Inc.
Finding a reputable contractor to design and build your kitchen remodel in Maryland with quality results involves several steps. Here are some general guidelines to help you find the right professional for your project:
1. Ask for Recommendations: Start by asking friends, family, neighbors, or colleagues who have recently completed kitchen remodels for recommendations. Personal referrals can be a valuable source of trustworthy contractors.
2. Check Online Reviews: Websites like Yelp, Angie's List, and Google Reviews can provide insights into the experiences of previous clients. Look for contractors with consistently positive feedback.
3. Check Credentials: Verify that the contractor has the necessary licenses and insurance to work in Maryland. You can typically check this information on your state's licensing board website.
4. Ask for References: Request references from the contractor and contact previous clients to inquire about their experiences. Visit some of their completed projects if possible.
5. Review Portfolios: Examine the contractor's portfolio of past kitchen remodels. Look for examples of work that match your style and preferences.
6. Check for Permits: Ensure that the contractor will handle any necessary permits and inspections for your remodel. Avoid contractors who suggest bypassing required permits, as this can lead to legal and safety issues.
7. Discuss Communication: Clear communication is crucial throughout the project. Discuss how the contractor will keep you updated on progress and address any concerns or changes during the remodel.
8. Get Everything in Writing: Never rely solely on verbal agreements. Ensure that all project details, warranties, and expectations are documented in a written contract.
9. Check for Red Flags: Be wary of contractors who pressure you into making quick decisions, lack a physical business address, or have a history of disputes or legal issues.
10. Trust Your Instincts: Choose a contractor you feel comfortable working with. Trust your instincts and select someone who listens to your ideas and concerns.
11. Visit Completed Projects: If possible, visit some of the contractors’ completed kitchen remodels to assess the quality of their work in person.
Once you've completed your due diligence and gathered all the necessary information, you'll be better equipped to make an informed decision about which contractor to hire for your kitchen remodel in Maryland. Remember that quality results often come from working with experienced, licensed professionals who prioritize clear communication and transparency throughout the project.
 Talon Construction Inc.
Designing and building a kitchen addition is a complex process that involves multiple steps and considerations. Here is a general outline to help you get started on your kitchen addition project:
Define Your Goals and Budget:
• Determine the purpose of the kitchen addition. Is it for more cooking space, a dining area, or a combination of both?
• Establish a realistic budget for your project. Consider all costs, including construction, permits, materials, and furnishings.
Hire a Design Professional:
• Seek the services of a design build company who specializes in kitchen additions.
• Discuss your vision, needs, and budget with the design professional to create a design concept.
Site Evaluation:
• Assess the existing space and structural condition of your home to ensure it can support the addition.
• Consider factors like zoning regulations, setbacks, and building codes.
Design Development:
• Collaborate with your design professional to refine the concept, including the layout, size, and architectural style.
• Choose materials, finishes, and fixtures that fit your design and budget.
Obtain Permits:
• Consult with your local design build contractor to determine the necessary permits and approvals.
• Prepare and submit all required documents, including architectural drawings and engineering plans.
Create Construction Documents:
• Work with your design build professional to develop detailed construction drawings and specifications.
• These documents will serve as a guide for contractors during construction.
Hire a design build contractor:
• Check references, credentials, and licenses before selecting a contractor.
• Sign a detailed contract that outlines the scope of work, timeline, and payment schedule.
Construction Phase:
• Demolition: If needed, remove any existing structures or walls.
• Foundation: Construct the foundation for the addition.
• Framing: Build the structural framework of the addition.
• Plumbing, Electrical, and HVAC: Install or update utilities as required.
• Insulation: Ensure proper insulation for energy efficiency.
• Drywall and Finish Work: Complete the walls and ceilings.
• Flooring and Cabinetry: Install flooring and kitchen cabinets.
• Appliances and Fixtures: Add appliances, plumbing fixtures, and lighting.
• Paint and Finish: Apply paint and finishes to achieve the desired look.
• Final Inspection: Schedule inspections to ensure compliance with building codes.
Final Inspections and Approvals:
• Arrange for final inspections to ensure the addition meets all safety and code requirements.
• Obtain any necessary certificates of occupancy or compliance.
Move In and Enjoy:
• Once all inspections and approvals are received, you can move into your new kitchen addition and start enjoying it.
Remember that every kitchen addition project is unique, so adapt this outline to your specific needs and circumstances. Consulting with professionals and obtaining the required permits and inspections is crucial to a successful and safe project.
 Talon Construction Inc.
Designing and building a kitchen addition is a complex process that involves multiple steps and considerations. Here is a general outline to help you get started on your kitchen addition project:
Define Your Goals and Budget:
• Determine the purpose of the kitchen addition. Is it for more cooking space, a dining area, or a combination of both?
• Establish a realistic budget for your project. Consider all costs, including construction, permits, materials, and furnishings.
Hire a Design Professional:
• Seek the services of a design build company who specializes in kitchen additions.
• Discuss your vision, needs, and budget with the design professional to create a design concept.
Site Evaluation:
• Assess the existing space and structural condition of your home to ensure it can support the addition.
• Consider factors like zoning regulations, setbacks, and building codes.
Design Development:
• Collaborate with your design professional to refine the concept, including the layout, size, and architectural style.
• Choose materials, finishes, and fixtures that fit your design and budget.
Obtain Permits:
• Consult with your local design build contractor to determine the necessary permits and approvals.
• Prepare and submit all required documents, including architectural drawings and engineering plans.
Create Construction Documents:
• Work with your design build professional to develop detailed construction drawings and specifications.
• These documents will serve as a guide for contractors during construction.
Hire a design build contractor:
• Check references, credentials, and licenses before selecting a contractor.
• Sign a detailed contract that outlines the scope of work, timeline, and payment schedule.
Construction Phase:
• Demolition: If needed, remove any existing structures or walls.
• Foundation: Construct the foundation for the addition.
• Framing: Build the structural framework of the addition.
• Plumbing, Electrical, and HVAC: Install or update utilities as required.
• Insulation: Ensure proper insulation for energy efficiency.
• Drywall and Finish Work: Complete the walls and ceilings.
• Flooring and Cabinetry: Install flooring and kitchen cabinets.
• Appliances and Fixtures: Add appliances, plumbing fixtures, and lighting.
• Paint and Finish: Apply paint and finishes to achieve the desired look.
• Final Inspection: Schedule inspections to ensure compliance with building codes.
Final Inspections and Approvals:
• Arrange for final inspections to ensure the addition meets all safety and code requirements.
• Obtain any necessary certificates of occupancy or compliance.
Move In and Enjoy:
• Once all inspections and approvals are received, you can move into your new kitchen addition and start enjoying it.
Remember that every kitchen addition project is unique, so adapt this outline to your specific needs and circumstances. Consulting with professionals and obtaining the required permits and inspections is crucial to a successful and safe project.
 Talon Construction Inc.
Designing and building a kitchen addition is a complex process that involves multiple steps and considerations. Here is a general outline to help you get started on your kitchen addition project:
Define Your Goals and Budget:
• Determine the purpose of the kitchen addition. Is it for more cooking space, a dining area, or a combination of both?
• Establish a realistic budget for your project. Consider all costs, including construction, permits, materials, and furnishings.
Hire a Design Professional:
• Seek the services of a design build company who specializes in kitchen additions.
• Discuss your vision, needs, and budget with the design professional to create a design concept.
Site Evaluation:
• Assess the existing space and structural condition of your home to ensure it can support the addition.
• Consider factors like zoning regulations, setbacks, and building codes.
Design Development:
• Collaborate with your design professional to refine the concept, including the layout, size, and architectural style.
• Choose materials, finishes, and fixtures that fit your design and budget.
Obtain Permits:
• Consult with your local design build contractor to determine the necessary permits and approvals.
• Prepare and submit all required documents, including architectural drawings and engineering plans.
Create Construction Documents:
• Work with your design build professional to develop detailed construction drawings and specifications.
• These documents will serve as a guide for contractors during construction.
Hire a design build contractor:
• Check references, credentials, and licenses before selecting a contractor.
• Sign a detailed contract that outlines the scope of work, timeline, and payment schedule.
Construction Phase:
• Demolition: If needed, remove any existing structures or walls.
• Foundation: Construct the foundation for the addition.
• Framing: Build the structural framework of the addition.
• Plumbing, Electrical, and HVAC: Install or update utilities as required.
• Insulation: Ensure proper insulation for energy efficiency.
• Drywall and Finish Work: Complete the walls and ceilings.
• Flooring and Cabinetry: Install flooring and kitchen cabinets.
• Appliances and Fixtures: Add appliances, plumbing fixtures, and lighting.
• Paint and Finish: Apply paint and finishes to achieve the desired look.
• Final Inspection: Schedule inspections to ensure compliance with building codes.
Final Inspections and Approvals:
• Arrange for final inspections to ensure the addition meets all safety and code requirements.
• Obtain any necessary certificates of occupancy or compliance.
Move In and Enjoy:
• Once all inspections and approvals are received, you can move into your new kitchen addition and start enjoying it.
Remember that every kitchen addition project is unique, so adapt this outline to your specific needs and circumstances. Consulting with professionals and obtaining the required permits and inspections is crucial to a successful and safe project.
 Talon Construction Inc.
Designing and building a kitchen addition is a complex process that involves multiple steps and considerations. Here is a general outline to help you get started on your kitchen addition project:
Define Your Goals and Budget:
• Determine the purpose of the kitchen addition. Is it for more cooking space, a dining area, or a combination of both?
• Establish a realistic budget for your project. Consider all costs, including construction, permits, materials, and furnishings.
Hire a Design Professional:
• Seek the services of a design build company who specializes in kitchen additions.
• Discuss your vision, needs, and budget with the design professional to create a design concept.
Site Evaluation:
• Assess the existing space and structural condition of your home to ensure it can support the addition.
• Consider factors like zoning regulations, setbacks, and building codes.
Design Development:
• Collaborate with your design professional to refine the concept, including the layout, size, and architectural style.
• Choose materials, finishes, and fixtures that fit your design and budget.
Obtain Permits:
• Consult with your local design build contractor to determine the necessary permits and approvals.
• Prepare and submit all required documents, including architectural drawings and engineering plans.
Create Construction Documents:
• Work with your design build professional to develop detailed construction drawings and specifications.
• These documents will serve as a guide for contractors during construction.
Hire a design build contractor:
• Check references, credentials, and licenses before selecting a contractor.
• Sign a detailed contract that outlines the scope of work, timeline, and payment schedule.
Construction Phase:
• Demolition: If needed, remove any existing structures or walls.
• Foundation: Construct the foundation for the addition.
• Framing: Build the structural framework of the addition.
• Plumbing, Electrical, and HVAC: Install or update utilities as required.
• Insulation: Ensure proper insulation for energy efficiency.
• Drywall and Finish Work: Complete the walls and ceilings.
• Flooring and Cabinetry: Install flooring and kitchen cabinets.
• Appliances and Fixtures: Add appliances, plumbing fixtures, and lighting.
• Paint and Finish: Apply paint and finishes to achieve the desired look.
• Final Inspection: Schedule inspections to ensure compliance with building codes.
Final Inspections and Approvals:
• Arrange for final inspections to ensure the addition meets all safety and code requirements.
• Obtain any necessary certificates of occupancy or compliance.
Move In and Enjoy:
• Once all inspections and approvals are received, you can move into your new kitchen addition and start enjoying it.
Remember that every kitchen addition project is unique, so adapt this outline to your specific needs and circumstances. Consulting with professionals and obtaining the required permits and inspections is crucial to a successful and safe project.
 Talon Construction Inc.
Designing and building a kitchen addition is a complex process that involves multiple steps and considerations. Here is a general outline to help you get started on your kitchen addition project:
Define Your Goals and Budget:
• Determine the purpose of the kitchen addition. Is it for more cooking space, a dining area, or a combination of both?
• Establish a realistic budget for your project. Consider all costs, including construction, permits, materials, and furnishings.
Hire a Design Professional:
• Seek the services of a design build company who specializes in kitchen additions.
• Discuss your vision, needs, and budget with the design professional to create a design concept.
Site Evaluation:
• Assess the existing space and structural condition of your home to ensure it can support the addition.
• Consider factors like zoning regulations, setbacks, and building codes.
Design Development:
• Collaborate with your design professional to refine the concept, including the layout, size, and architectural style.
• Choose materials, finishes, and fixtures that fit your design and budget.
Obtain Permits:
• Consult with your local design build contractor to determine the necessary permits and approvals.
• Prepare and submit all required documents, including architectural drawings and engineering plans.
Create Construction Documents:
• Work with your design build professional to develop detailed construction drawings and specifications.
• These documents will serve as a guide for contractors during construction.
Hire a design build contractor:
• Check references, credentials, and licenses before selecting a contractor.
• Sign a detailed contract that outlines the scope of work, timeline, and payment schedule.
Construction Phase:
• Demolition: If needed, remove any existing structures or walls.
• Foundation: Construct the foundation for the addition.
• Framing: Build the structural framework of the addition.
• Plumbing, Electrical, and HVAC: Install or update utilities as required.
• Insulation: Ensure proper insulation for energy efficiency.
• Drywall and Finish Work: Complete the walls and ceilings.
• Flooring and Cabinetry: Install flooring and kitchen cabinets.
• Appliances and Fixtures: Add appliances, plumbing fixtures, and lighting.
• Paint and Finish: Apply paint and finishes to achieve the desired look.
• Final Inspection: Schedule inspections to ensure compliance with building codes.
Final Inspections and Approvals:
• Arrange for final inspections to ensure the addition meets all safety and code requirements.
• Obtain any necessary certificates of occupancy or compliance.
Move In and Enjoy:
• Once all inspections and approvals are received, you can move into your new kitchen addition and start enjoying it.
Remember that every kitchen addition project is unique, so adapt this outline to your specific needs and circumstances. Consulting with professionals and obtaining the required permits and inspections is crucial to a successful and safe project.
12