
Search results for "Damage" in Home Design Ideas

 Deskins Group LLC
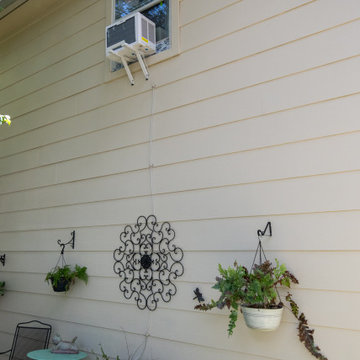
This siding repair started with a challenge: a poorly performing window unit had leaked down the side wall, destroying the remaining fiberboard siding. The lower half had already been replaced with Hardie siding, but the damage above called for a full upgrade. We removed the compromised material and installed new 12" Hardie Cedarmill siding to match. After a deep clean of the existing Hardie Plank and fresh coat of paint across the entire wall, the transformation is seamless—everything looks brand new.
We also helped install the new window unit and rerouted the drain line to prevent future water damage. It’s a small detail that makes a big difference in long-term performance.
✅ Why it matters: Fiber cement siding like Hardie offers superior durability, moisture resistance, and curb appeal—especially when installed with attention to drainage and detail.
? Serving Cypress, Tomball, and Northwest Houston, we specialize in siding upgrades that blend architectural integrity with hands-on craftsmanship.
? Check out the before-and-after in our gallery, and if your siding’s showing signs of wear—or if a leaky window unit has caused hidden damage—let’s talk. We’ll walk you through your options and deliver a solution that’s built to last.
? Ready for a refresh? Contact Deskins Siding & Exteriors today for a free consultation and see how thoughtful design can elevate your exterior.
 Tile Doctor Ltd
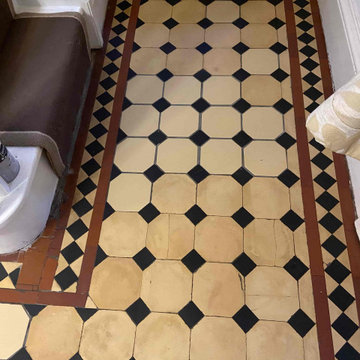
Detailed below is the restoration of a Victorian tiled hallway floor that we started back in June in Preston. Although we started in June there was so much damage to the subfloor and the tiles it took some time to complete, additionally, the client did not like the colour samples of the replacement tiles we had brought along and so decided to source their own which took some time.
Three months later with replacement tiles now sourced we were given the go ahead to start the restoration. The first day’s focus was cleaning the original floor using very coarse 100-grit and 200-grit Diamond pads fitted to a rotary buffer machine and applied to the floor using a strong dilution of Tile Doctor Remove and Go to add extra cleaning power. Tile edges were given special attention using a flex machine fitted with small diamond grit pads.
The floor was rinsed with water to remove the soil generated and this was followed up with an acid rinse using a 1:3 dilution of Tile Doctor Grout Clean Up. This last step in the cleaning process is especially recommend for old floors like this which don’t have a damp proof membrane and can suffer from efflorescence issues.
The next stage focused on repairing the floor and started by carefully knocking out all the broken and chipped tiles. We had previously estimated over 30 tiles needed replacing and so the client had bought two boxes, meaning I had plenty of spares to work with.
Before tiling however, the subfloor had suffered over the years and needed attention first. To deal with this the damaged areas were raked out, cleaned up and then back filled with rapid setting self-levelling screed from Mapie adhesives. Once the sub-base was fixed then we put the new tiles back in, they were not an exact match, about 5mm too short and lighter in tone, but the colour was pretty close.
Tiling an old Victorian floor like this can be a bit like dominoes as you move one out of place 2 decent ones come loose and then they also need refixing. Some of the tiles had hair line cracks in them and once they were loose, they just cracked in half. As such the 20 spare tiles that I thought were spare came into good use and I actually ended up using all of them. I could have done with a few more so it was decided to reset the last four broken tiles and grout them in. Luckily for me the client was very understanding about the nature of tile restoration and had accepted that there would be some imperfections and they were not expecting a new floor.
The Tiles were fixed down using Ultralite Rapid Flex (another product from Mapie) and then grouted using the same adhesive (not a grout, as they did not have grout back in the day, just cement and screed).
The floor was left this to cure overnight, and we came back the next day to finish the clean using a 200-grit diamond pad fitted to a buffing machine and lubricated with water, then one last acid rinse to get the tiles as clean as possible and remove any lingering grout haze. This last clean helps to blend the new tiles in with the original.
Before applying a protective sealer, the floor was left to dry for a couple of days, the tiles need to be thoroughly dry before sealing or you can end up with a patchy appearance.
For this floor with no damp proof membrane, it was important to use a fully breathable sealer that will allow moisture to rise through the tile and evaporate at the surface, so Tile Doctor Colour Grow was chosen. This is a good choice for old floors like this as its fully breathable, head wearing, and it contains a colour enhancer that improves the overall appearance of the tile.
Three coats of Tile Doctor Colour Grow which is a fully breathable, colour enhancing sealer hat works by soaking into the pores of the tile protecting it from within. It has a matt finish, and it works really well with all clay tiles and is ideal for these types of floors.
You can probably spot the lighter coloured tiles in the after photos on this page, however it’s a very subtle difference and I think they have blended in quite well with the original. Certainly, my client was very pleased with the newly restored floor, its completely transformed from when we first visited the client, and the floor has now gained character and history. For aftercare we recommend Tile Doctor Neutral Cleaner, its an effective pH neutral product that is compatible with the new sealer.
Russell Taylor
Lancashire Tile Doctor
Find the right local pro for your project

 Built by Josh LLC
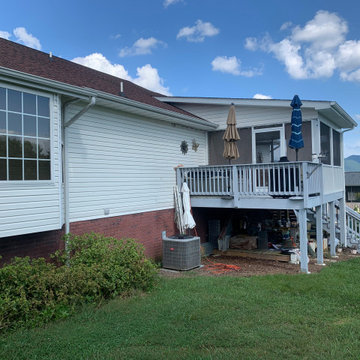
Hail damage complete! The vinyl siding got busted apart from a hail storm about 4 months ago in Jonesborough. We stripped the siding and added TYVEC home wrap in the damaged areas then waited about three months for siding to come in. Siding order come in and after two days we finished it up


 NYTDR New York Total Damage Restoration
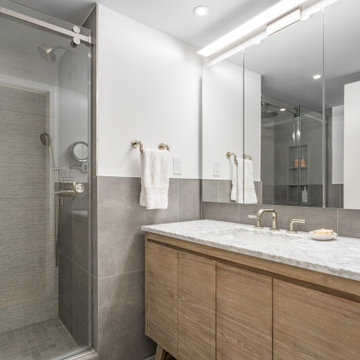
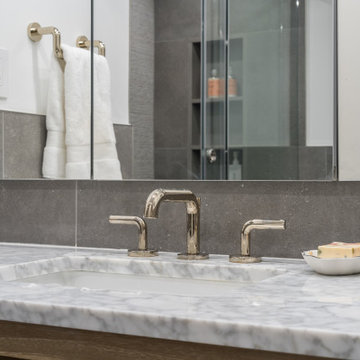
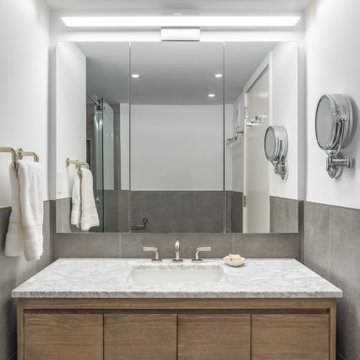
A close-up of the vanity highlights the polished marble countertop and undermount sink. The brushed nickel faucet complements the natural tones of the wood vanity, creating a timeless pairing of texture and finish.

 NYTDR New York Total Damage Restoration
Here, the walk-in shower features textured wall tile for depth and slip-resistant mosaic flooring for safety. We continued the large gray porcelain tile throughout the walls and floor, creating a cohesive, low-maintenance space. This project highlights how we transform insurance-covered repairs into lasting upgrades.
 King Electrical Services, Inc.
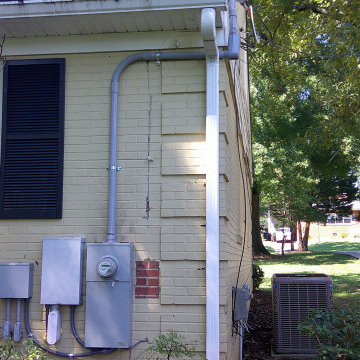
Showcasing a transformative fire damage repair project in Greensboro, NC, this before and after gallery highlights King Electrical Services, Inc.'s expertise in electrical restoration. Our electricians in Greensboro, NC replaced a damaged meter and electrical panel, restoring safety and functionality to the home. Our skilled electricians ensured code-compliant upgrades with precision. Serving Greensboro, High Point, Winston-Salem, and the remaining Triad area, King Electrical Services, Inc. specializes in fire damage repair, electrical panel replacement, and emergency electrical services.
 Village Home Stores
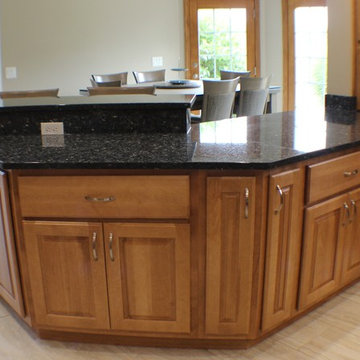
An outside corner cabinet pivots this peninsula out toward the Great Room and slide-out shelves inside of large base cabinets maximize storage.
Inspiration for a mid-sized timeless u-shaped ceramic tile open concept kitchen remodel in Chicago with an undermount sink, raised-panel cabinets, light wood cabinets, granite countertops, stainless steel appliances and an island
Inspiration for a mid-sized timeless u-shaped ceramic tile open concept kitchen remodel in Chicago with an undermount sink, raised-panel cabinets, light wood cabinets, granite countertops, stainless steel appliances and an island
 NYTDR New York Total Damage Restoration
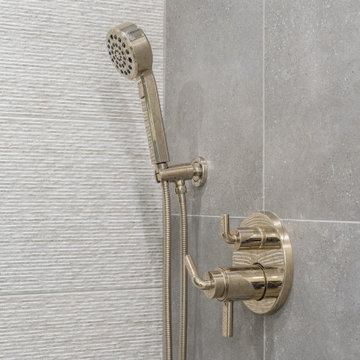
This detail shot showcases the handheld shower head and fixtures in brushed nickel, set against a mix of textured and smooth porcelain tiles. Every element was chosen for both durability and modern appeal, making the shower practical yet refined.
 NYTDR New York Total Damage Restoration
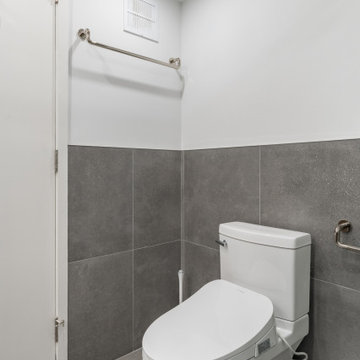
We reimagined the toilet area with a minimal, streamlined design. Large porcelain tiles provide durability and water resistance, while simple brushed nickel accessories maintain a cohesive modern look.
26