
Search results for "Deep cleaning" in Home Design Ideas
Find the right local pro for your project

Sponsored
Columbus, OH

Hope Restoration & General Contracting
Columbus Design-Build, Kitchen & Bath Remodeling, Historic Renovations

 Tile Doctor Ltd
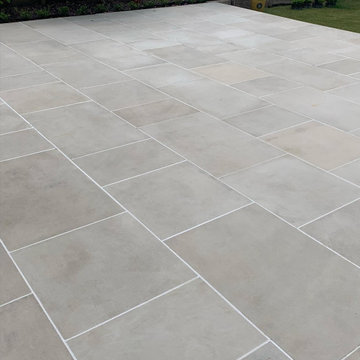
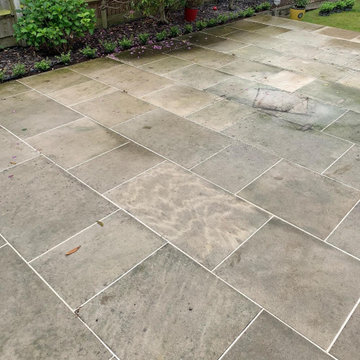
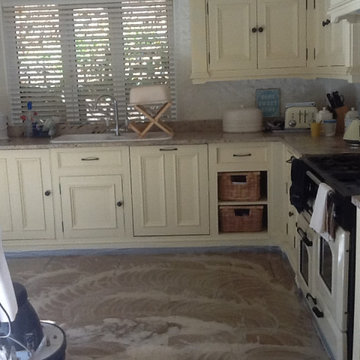
This is a large 17.2 m2 Sandstone Floor installed throughout the living and kitchen areas of a property in the beautiful village of Disley close to Lyme Park which is run by the National Trust. The floor had been installed four years ago and my client was unhappy with the original sealer which hadn’t lasted very long. Without the protection of a sealer dirt had become ingrained in the pores of the stone which was now difficult to clean. Another issue was the rough nature of the Sandstone meant it was impossible to mop as it shreds the mop! As a result, the floor was mainly cleaned with a hoover which was not ideal, especially in a kitchen.
I went over to survey the floor and before quoting I ran a small test clean in the kitchen which took the floor back to its natural pale colour and really showed how dirty the floor had become. Test cleans are great as it helps me to formulate an effective cleaning plan and provide an accurate quote. My client was impressed with the result and so I was booked to come back and deep clean and then reseal the whole floor. Due to its size I estimated the floor would take two days to deep clean and a further day to apply a new sealer, so three days in total.
Working in large sections I started by cleaning the floor and stripping off the old sealer with a strong dilution of Tile Doctor Remove and Go which is a coatings remover that is safe to use on stone. The solution was left to soak into the pores of the Sandstone for ten minutes before being worked in with a 200-grit diamond pad fitted to a rotary floor machine. This action not only removed the old sealer and cleaned the floor but the 200-grit pad being vey coarse removed a lot of the roughness from the surface of the Sandstone so it shouldn’t shred any more mops.
After rinsing the floor with water and removing the slurry with a wet vacuum I set about cleaning the grout with Tile Doctor Pro-Clean worked into the grout line with a stiff brush and assisted with steam from a professional steam cleaner with a grout attachment. Once done the floor was rinsed and extracted again to remove the soil from the grouting. There was also an area near one of the doors where the grout had become loose and needed replacing so I made up a batch of matching grout and filled this in. The floor was then left overnight to dry with assistance from a couple of air movers.
I returned the next day to finish the floor by applying a sealer. First, I double checked the floor was dry with the damp meter. The readings confirmed the air movers had done a good job and that the floor was within the accepted parameters, so I was ready to seal. The sealer I chose was Tile Doctor Seal and Go which being water based doesn’t leave a smell as it dries, it really works well on Sandstone and adds a nice subtle sheen to the stone.
Once finished the floor looked much cleaner, lighter in colour overall more inviting, you could even see the fossils in some of the tiles.
The surface was also smoother so the customer should find cleaning with a mop much easier in future. On that subject its worth pointing out that owners of sealed floors should always use a neutral pH tile cleaner on their floors as most supermarket products are simply too strong and will prematurely strip the sealer off a tile if used repeatedly. Tile Doctor sell a product called Tile Doctor Neutral Cleaner which is ideal for cleaning sealed Sandstone floors like this one.
My client was really happy with the results and sent me a message later saying: “the floor looks amazing!”
Kamila Logonzy
East Cheshire Tile Doctor
 Kathleen Bost Architecture + Design
Drew Kelly
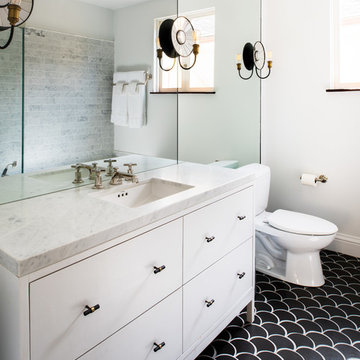
Example of a transitional 3/4 gray tile and subway tile black floor bathroom design in San Francisco with flat-panel cabinets, white cabinets, a two-piece toilet, white walls, an undermount sink and white countertops
Example of a transitional 3/4 gray tile and subway tile black floor bathroom design in San Francisco with flat-panel cabinets, white cabinets, a two-piece toilet, white walls, an undermount sink and white countertops
 Tile Doctor Ltd
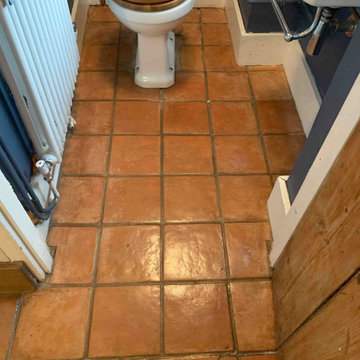
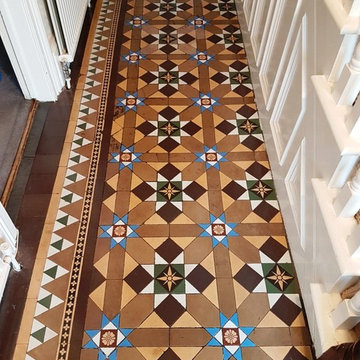
Shipley is a town in West Yorkshire that was heavily shaped by the Industrial Revolution and the Victorian period. It became particularly well-known for its textile industry and some of the original mills in which textiles were manufactured still survive in the town today. Being in West Yorkshire, Shipley is also part of what is commonly known as ‘Brontë country’ – once home to the famous Brontë sisters.
Many Victorian era properties still survive in the area too and all too often the original Victorian tiled floors contained within are not well maintained. I recently visited a customer in Shipley who had a Victorian tiled hallway that was in need of a deep clean and seal. What’s more, the customer told me that there were around 20 loose tiles in the hallway that would need to be reinstalled.
On the first day, I started by refitting the 20 loose tiles in the hallway. The problem however was a lot worse than originally thought and, in the end, I had to take up 108 tiles, so I could rebuild the base of the floor, and then relay them. This process took up most of the day but at least the adhesive and grout would be set in time for cleaning the next day.
On day two I focused on deep cleaning the tiles and removing any remaining sealer by applying a strong dilution of Tile Doctor Pro-Clean. Pro-Clean is a strong alkaline heavy-duty tile and grout cleaner that serves the purpose of both cleaning the stone and when used in a strong dilution will strip off sealers.
I applied the Pro Clean liberally across the length of the hallway and left it to soak into the tiles for about twenty minutes. This allows the product time to breakdown the sealer and dirt before being scrubbed in with a black scrubbing pad.
Special attention had to be paid to parts of the floor which had suffered paint splashes from previous decoration. I was also surprised to find that there were even some chewing gum stains marking the tiles. These were removed using the combination of a steam cleaner, more Pro-Clean and the careful use of a handheld scraper.
The floor was then given a thorough rinse with fresh water and then dried as much as possible with a wet vacuum. It was then also left to dry off overnight.
Upon returning to the property the next day I checked for any moisture issues with a damp tester. Thankfully, the floor proved dry and I could proceed with sealing the tiles which was done using four coats of Tile Doctor Seal and Go that leaves a deep satin finish that the customer had requested.
Nigel Stoker
North West Yorkshire Tile Doctor




Sponsored
Columbus, OH

Wannemacher Interiors
Customized Award-Winning Interior Design Solutions in Franklin Cnty OH
 Heikes Hygienics- Cleaning & Sanitation
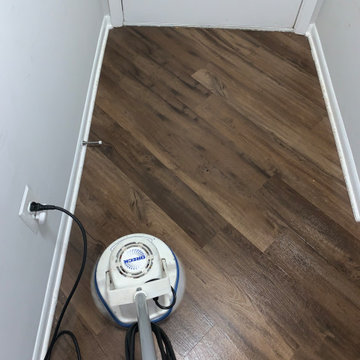
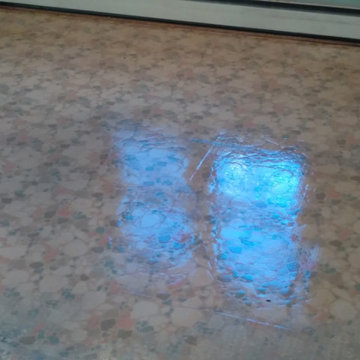
Carpet was removed along with debris. Floor was then swept, mopped, cleaned, and polished.
Home design - small rustic home design idea in Other
Home design - small rustic home design idea in Other

 Tile Doctor Ltd
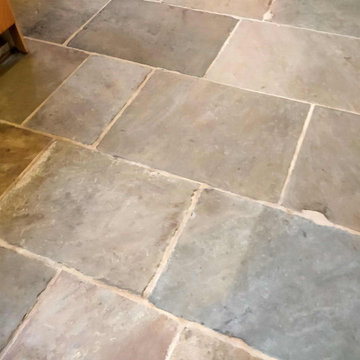
The owner of this period cottage in the old market town of Tadcaster near Leeds, had what was once a beautiful Yorkshire stone floor in the kitchen. It has been a long time since it had been given a proper clean so over the years and with the Kitchen being a high traffic area the whole floor including the grout had darkened and he now wanted it refurbished in time for Christmas.
I visited the property to assess what needed to be done and could see straight away that any protective sealer that was once on the floor had long since worn off. In fact, it was so consistently dirty with years of built-up grease and dirt I had to wonder if one had ever been applied.
I explained what the floor needed was a really deep intensive clean and then a sealer applied to make it easy to keep clean. The problem with most tile and stone is its porosity and if left unprotected dirt easily becomes lodged into its pores making cleaning a struggle.
To prove the difference that can be achieved and to allow me to work out a process on which I could base an accurate quote I ran a test clean on part of the kitchen floor. The test clean went very well, the difference was remarkable, and the cleaned section really stood out. Pleased with the potential of a clean floor they accepted my quote, and we pencilled a date in the diary.
I returned on the appointed date and began by removing the kickboards from under the kitchen units to protect them from splashing. Next, I set about spaying the floor with a strong dilution of Tile Doctor Pro-Clean, this is a purpose made tile and grout cleaner that eats into the grease and dirt so it can be removed. This product works best if you leave it for ten minutes before scrubbing in using a heavy-duty machine fitted with a heavy-duty brush. The soil released from the floor was then extracted using a wet vacuum.
The Pro-Clean did a good job on the grout however it was clear something stronger was required to really get the stone clean, so I stepped up a gear and applied Tile Doctor Remove and Go using the same process as before. This is a really good product for removing deeply ingrained grease and dirt.
The final step of the cleaning process was to give the stone and acid wash using Tile Doctor Grout Clean-Up to remove old grout haze and other mineral deposits; additionally, being an acidic product, it counters the alkaline cleaning products used earlier neutralising the pH level of the floor and leaving it ready for sealing.
Before sealing I like to discuss the different products available and the finishes they can provide. In this case my clients’ main concerns were that they wanted the stone to look natural and easy to maintain going forward.
With this in mind, Tile Doctor Seal & Go Extra was chosen, it’s a modern acrylic-based sealer that brings out the natural colours in the stone and gives a very slight smooth finish. The protection it provides will prevent dirt becoming ingrained int the pores of the stone and ensure the floor is easier to maintain. Several coats were applied, until we achieved the required finish.
The deep cleaning process and fresh sealer transformed the stone floor bringing out its original beauty and my customer couldn’t believe the difference in the floor and was highly delighted.
For aftercare I gave the client a bottle of Tile Doctor Neutral Cleaner, this product is pH neutral so it will clean the floor but won’t damage the sealer. Often people use household cleaners for cleaning tiled floors, but due to the strong chemicals they contain, they can do more harm than good by slowly stripping away the protective sealer and taking the floor back to square one. Tile Doctor Neutral Tile Cleaner is reasonably priced, and the concentrated formula means a small amount goes a long way so it’s well worth using.
This was a pleasurable job for me as it was good to see the floor transform from dull and lifeless to clean and showing the natural colour and beauty of the York stone, and always lovely to have another satisfied client.
Simon Testa
North East Yorkshire Tile Doctor


 Tile Doctor Ltd
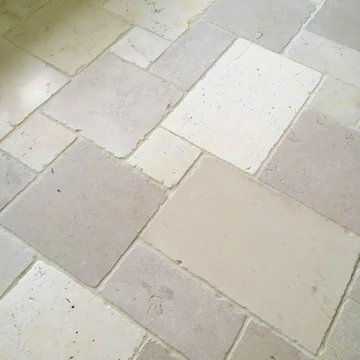
This Limestone tiled floor had been installed in the kitchen of a property in Teddington three years before and due to the use of the wrong cleaning product was now stripped of its protective sealer. Limestone like any natural stone is porous and without a sealer in place dirt becomes trapped in the stone making it very difficult to keep clean. The property was close to Bushy Park situated in South West London on the North bank of the Thames which is only about seven miles from my base in Shepperton.
I discovered all of this after visiting the property to quote for deep cleaning and resealing the floor. It turns out they have been using Flash multi-surface & floor cleaner which has an acidic pH of 10.3, compare this to Tile Doctor Remove and Go which we use to strip sealers off floors and has a pH of 12. Needless to say, this was not the right product to use and the old sealer had been completely stripped off the floor and probably within the first few months.
On top of this our customer had 3 children and a dog running in and out of the garden and was therefore transferring quite a lot of dirt into the stone. After surveying the floor, I discussed the renovation process with the customer which would take two days and include a deep clean of the Limestone followed by the application of a sealer to ensure it did not hold onto the dirt. They were after a sheen finish for the floor and were keen to have natural brown and cream variations in the stone highlighted. We agreed a price for the work and booked a date for the work to start.
To start with, we machine scrubbed the floor with Tile Doctor Pro-Clean to break down the dirt and release it from the stone. We find the best process is to spray the Pro-Clean onto the floor first and then leave to dwell for ten minutes before scrubbing. It’s not long before the cleaning solution turns dark with the dirt released from the pores of the stone and this soil is then rinsed with water and vacuumed off the floor with a low-pressure hard floor cleaning machine.
Following the cleaning, we honed the Limestone using a sequence of 800, 1500 and finally 3000-grit Tile Doctor Burnishing Pads. The pads are applied with water to lubricate and the slurry generated is rinsed off the floor as before. This burnishing process brings up the natural sheen of the stone and tightens up its pores prior to sealing. I left the floor overnight to allow it to dry out.
The next day I returned to the property and checked the floor for moisture using a damp meter. The readings were fine, so I proceeded with the application of the sealer for which I used two coats of Tile Doctor Colour Grow. This is an impregnating sealer that enhances the colours and contrast on the stone while protecting it against future soiling and spillages. It gave a lovely sheen finish to the floor as requested by the customer.
As you can see from the pictures the process made a huge difference to the floor which now looks lighter and brighter, certainly the customer was more than happy. Before leaving I recommended, they should clean the floor using Tile Doctor Stone Soap, this is a pH neutral product that will ensure the seal does not get broken down like it previously had using the household cleaners. It is gentle enough to use every day if you wish is designed to help maintain the patina of the burnished stone.
Jonathan Oldham
South Middlesex Tile Doctor
 Browning Architects Ltd
David Butler
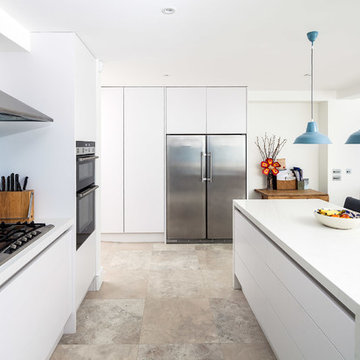
Trendy l-shaped kitchen photo in London with flat-panel cabinets, white cabinets, blue backsplash, stainless steel appliances and an island
Trendy l-shaped kitchen photo in London with flat-panel cabinets, white cabinets, blue backsplash, stainless steel appliances and an island
 Jim Deen/Kitchen Kraft
John Evans
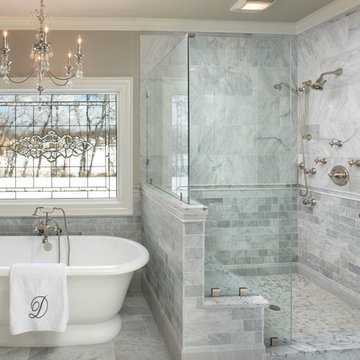
Inspiration for a timeless white tile and marble tile bathroom remodel in Columbus with gray walls
Inspiration for a timeless white tile and marble tile bathroom remodel in Columbus with gray walls
18