
Search results for "Deep cleaning" in Home Design Ideas

Find the right local pro for your project
 Heikes Hygienics- Cleaning & Sanitation
Floor was abondoned for decades and needed thorough cleaning. Floor was swept, mopped, cleaned, treated, scrubbed, and polished.
Inspiration for a mid-sized rustic linoleum floor kitchen remodel in Other with laminate countertops and a peninsula
Inspiration for a mid-sized rustic linoleum floor kitchen remodel in Other with laminate countertops and a peninsula


 Tile Doctor Ltd
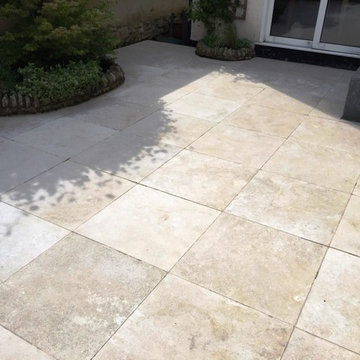
This was a job I did earlier in May this year where I was asked to clean this lovely Limestone patio installed at the rear of a house in Haddenham near Thame on the Oxfordshore borders which had succumbed to the ravages of the English winter weather and was far from looking its best.
As a Tile Doctor and carpet technician I have invested a lot in powerful high pressure machinery that can make light work of interior and exterior installations so taking on this patio was not a problem and it was nice to work outside for a change.
On arrival I set-up the high pressure equipment and then proceeded to pressure wash the patio in order to get the worst of the dirt out of the tile. Then I soaked the tiles in a strong dilution of Tile Doctor Pro-Clean which was left to dwell for thirty minutes. The next process was to use a deck brush to scrub the cleaner into the stubborn areas and then rinse the patio with clean water which was then removed using a wet vacuum. After letting it dry I then had to re clean the worst areas again following the same process until I was satisfied with the condition of the tile.
The patio soon dried in the warm sun and later that day I was able to seal it using a couple of coats of Tile Doctor Colour Grow which is a colour enhancing impregnating sealer that can be used internally and externally, it works really on Limestone and did well to bring out the natural colours in the stone.


 Tile Doctor Ltd
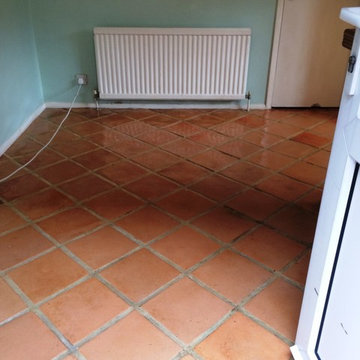
This was a rather dirty Terracotta kitchen floor located at a house in Winchmore Hill in Buckinghamshire, not to be confused with the Winchmore Hill in London. The sealer on the tiles had worn off some time ago and now the dirt was becoming trapped in the pores of the Terracotta making it impossible to clean.
Deep Cleaning Terracotta Tile
To deep clean into the pores of the Terracotta a diluted solution of Tile Doctor Pro Clean, which is a strong tile cleaner sage to use on tiled floors, was applied to kitchen floor and left to soak in for around ten minutes. Then with the aid of a commercial rotary machine the solution was scrubbed into the tiles to release the many years of accumulated ingrained soiling which was removed from the floor using a wet vacuum.
Although this deep cleaned the tile the grout lines needed further attention and were treated with Tile Doctor Grout Clean-up solution and then washed down with fresh water which was removed with a wet vacuum.
There was still evidence of sealer remaining on the floor in some areas so the next step in the process was to apply Tile Doctor Remove and Go again working it into the tile using a scrubbing pad fitted to a rotary machine. Remove and Go as its name suggests is used to remove waxes and sealants from tile and stone. It certainly did the job and once the resultant slurry was vacuumed up and the floor given a final rinse to remove any chemicals used in the process the floor was looking much cleaner and left to dry overnight ready for our return
Sealing Terracotta Tile
The next day came back to do the sealing and checked the floor first for any spots we might had missed and also to ensure it had dried sufficiently. Tile Doctor Seal and Go was then applied in coats to fully seal the floor. As well as adding protection Seal and Go adds a nice subtle satin finish to Terracotta and being water based it doesn’t give off an odour when it’s drying.
 Tile Doctor Ltd
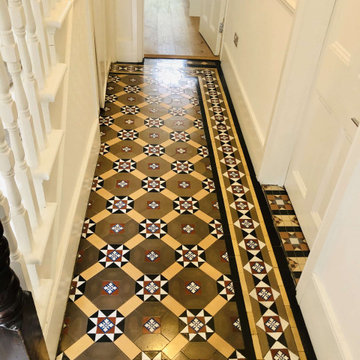
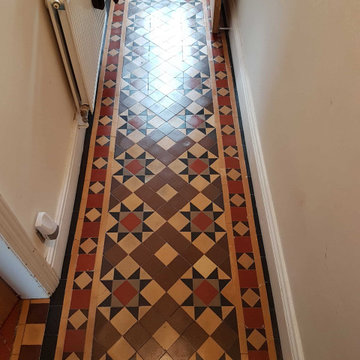
This customer had just moved into a property in Chesham around eighteen months ago. During that time, they had completely renovated the property and in the process had pulled up the hallway carpet to discover a lovely Victorian tiled floor which appeared to be in good condition but very dirty. Period features like these can add a lot of value to a house these days and so they decided to investigate having it professionally cleaned and contacted me for a quote.
Although I can give some indication of price over the phone you never know exactly what to expect so my preference is to visit the property a conduct a test clean. It’s a little trickier to do this now due to COVID-19 but using a combination of PPE, maximum ventilation and social distancing measures I was able to work on the floor. The tiles were in good order with no replacements needed so my focus would be removing carpet adhesive and ingrained dirt. The test went well, and I followed up with a quotation which was accepted, and a date arranged to do the work.
I had worked out previously that the quickest was to deep clean the floor and remove the glue and any old seal was to apply Tile Doctor Remove and Go which as its name suggests is a coatings removed designed for Tiled floors. My method was to spray strong a dilution of Remove and Go onto the Victorian tiles and leave it to soak in for fifteen minutes. Then it was scrubbed in with a black scrubbing pad fitted to a rotary machine. The soil was rinsed off using a minimal of water and extracted with a wet vacuum.
Once the floor had dried, I inspected the tiles and could see more work would be needed to get the white tiles really sparkling. For this I went over the floor using a 200-grit resurfacing pad using water to lubricate the process, I also used handheld burnishing blocks of different grits to do the edges. With this extra effort and another rinse with water to remove the soil the floor looked great, and so I left for the day so it could dry out ready for sealing.
I came back the next day and started by taking moisture readings with a damp meter to ensure the tiles were dry and ready for sealing. This is important as you don’t want to apply sealer to a damp tile and old floors can suffer from damp issues due to the lack of a damp proof membrane.
All was well with the floor, so I was able to move straight onto sealing which started with the application of a single coat of Tile Doctor Colour Grow. This is an impregnating sealer that soaks into the pores of the tile enhancing colour and adding protection. Once this had dried, I followed up with another seven coats of Tile Doctor Seal and Go which adds further protection and leaves a nice subtle sheen to the tiles. This product works really well on old Victorian Tiles like these and being water based it doesn’t leave a smell as it dries.
Andrew Newstead
South Buckinghamshire Tile Doctor
 Tile Doctor Ltd
This client had just moved into a property in York and having pulled back the old carpet revealed a lovely old period Victorian tiled floor she didn’t know existed when she bought the house!
I went over at the beginning of this year to survey the floor and could see that fortunately, no glue or carpet grips had been used to secure the carpet; additionally the floor was in good physical condition considering its age with no cracks or loose tiles. The tiles were however very dusty and dirty with ingrained dirt and so had probably been covered with carpet for a very long time. The hallway was quite dark I’m afraid with little natural light so apologies for the photographs.
With old houses like this you never know what you are going to find so whilst I was there surveying the floor, I took some moisture readings with a damp meter on the floors and walls. The readings came back low so no sign of damp which was a relief to the owner.
We agreed a price for the work, and I arranged to come back the following week.
I must admit I do like York, its steeped in history and famous for its Cathedral and Viking museum. The houses in the city have loads of character and period features like this floor are quite common.
I deep cleaned the floor with a strong 1:3 dilution of Tile Doctor Pro-Clean worked in with a black scrubbing pad fitted to a rotary machine. Initially the solution was left to soak into the tile before being agitated by the machine. The soil was then rinsed off with minimal water and then extracted with a wet vacuum.
I followed this up with an Acid Wash using Tile Doctor Acid Gel to further clean up the tiles and help inhibit any potential efflorescent salt issues which are common in floors of this age due to the absence of the damp proof membrane. The floor was given a further rinse and extraction and allowed to dry out fully overnight. I needed the floor to be dry for the next day so it could be sealed.
I came back the next day and started by taking more damp readings which showed similar readings to the day before. Given the low readings I was able to move straight onto sealing which was done using four coats of Tile Doctor Seal and Go. This product works really well on old Victorian Tiles like these and being water based it doesn’t leave a smell as it dries.
Once the final coat of sealer had dried there was a significant improvement in the appearance of the floor which was much appreciated by client who was very happy with the end result.
For aftercare I recommended the use of Tile Doctor Neutral Tile Cleaner to maintain the floor, it has a nice fresh smell and can be used regularly due to its pH neutral nature which won’t prematurely erode the sealer like stronger bleach based cleaners.
Nigel Stoker
North West Yorkshire Tile Doctor
 mdt design
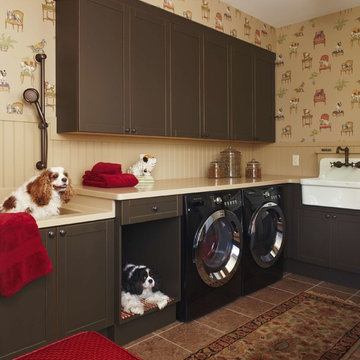
Elegant brown floor laundry room photo in Detroit with a farmhouse sink, shaker cabinets, dark wood cabinets, beige walls and a side-by-side washer/dryer
 Velvo - Carpet And Upholstery Cleaning
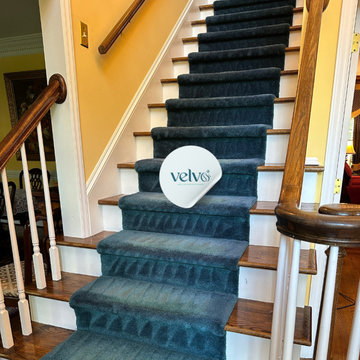
We performed a deep cleaning on the staircase carpet to remove stains, accumulated dirt, and revitalize the fibers. Our cleaning process eliminates odors, increases carpet durability, and leaves the staircase looking refreshed. Ideal for high-traffic areas and perfect for keeping your home or business environment clean and inviting.
 Coddington Design
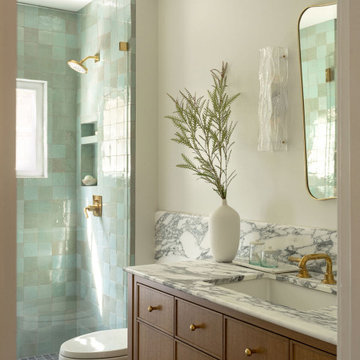
Transitional blue tile and mosaic tile single-sink bathroom photo in San Francisco with medium tone wood cabinets, beige walls, marble countertops, white countertops, a niche and a freestanding vanity

 Jonathan Raith Inc.
Nantucket Architectural Photography
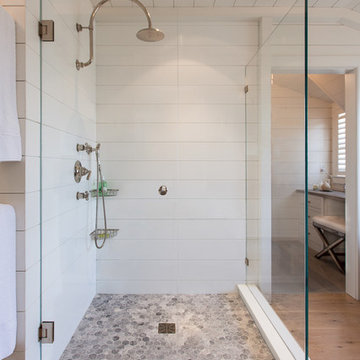
Bathroom - large coastal master white tile and ceramic tile light wood floor bathroom idea in Boston with white walls
Bathroom - large coastal master white tile and ceramic tile light wood floor bathroom idea in Boston with white walls
 Colonna + Co Interiors
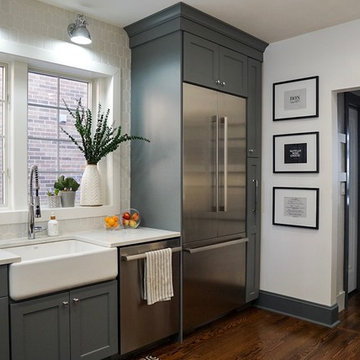
Example of a mid-sized transitional dark wood floor and brown floor kitchen design in Chicago with a farmhouse sink, quartz countertops, white backsplash, cement tile backsplash, stainless steel appliances, white countertops, shaker cabinets and gray cabinets
 Organic Cleaning Marin
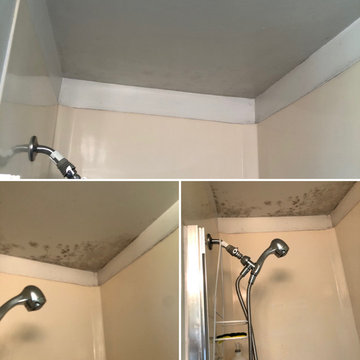
we clean mold and mildew from walls
Inspiration for a craftsman bathroom remodel in Other
Inspiration for a craftsman bathroom remodel in Other
 Donald Lococo Architects
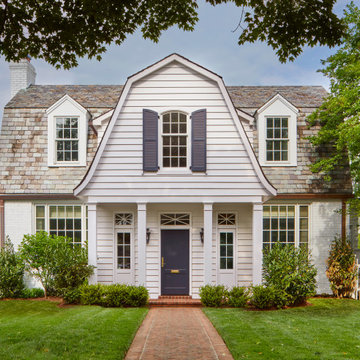
This minute addition reimagined the entry of a St. Martins home into a gracious gesture, motivated by acute space constraints that rendered moving furniture to the second floor impossible. A focal aspect of the 221 square-foot addition is its stairway. Beyond its newel post, the railing ribbons up to the second floor, bridging over the doorway. The resulting open space, canopied above the foyer contributes to an airy atmosphere, allowing natural light to sprawl throughout the entry space and to the private second-floor family area. The new windows further add buoyancy and sunlight. The addition also provided an opportunity to move the powder room to a more discreet location adjacent to the dining room. On the outside of the home, the entry addition introduces a gambrel form, drawing from and repurposing the design of the original structure. Despite its modest size, the addition transformed the entry of the home and its first impression, communicating openness and warmth within first acquainting steps.
Sponsored
Columbus, OH

Wannemacher Interiors
Customized Award-Winning Interior Design Solutions in Franklin Cnty OH

 Tile Doctor Ltd
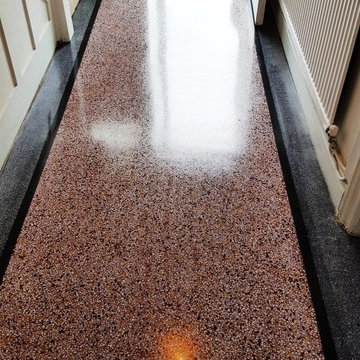
Terrazzo is a quite a bit different from the natural stone floors we most commonly work with. It’s a type of flooring material that was made popular by Venetian builders in Italy in the 1920s, but is ultimately descended from styles of design that date back hundreds of years. A typical Terrazzo floor consists of chips of marble or granite set in concrete and polished to result in a smooth surface.
This Terrazzo floor, installed in the hallway of a property in Bridgend, South Wales, was in relatively good physical condition, but it had clearly lost its shine due to the build-up of dirt and muck over the years. In fact, it was first installed in around 1940! The owner was keen to have it rejuvenated to its best possible condition, so they asked me to come in to see what I could do.
My first course of action was to apply Tile Doctor Pro Clean liberally across the floor and leave it to dwell for a short period. This is a high alkaline cleaner that is designed to deal with light to moderate soil build-up, and to strip away any old sealer remaining on the floor. I scrubbed the product in using a black pad fitted to a rotary machine and vacuumed up the resulting cleaning with a wet-vac machine.
Next, to restore the shine to the floor, I undertook a process known as burnishing, which involves the application of diamond encrusted polishing pads. We will typically start with a Coarse grit pad to level off any uneven areas of the floor and grind down any particularly stubborn marks and stains. Then, we gradually refine the polish on the floor using Medium and Fine grit pads. A small amount of water is used as lubrication with each pad.
After I had finished applying the first three pads in our four-pad system, I gave the floor a thorough rinse and left it to dry overnight.
I returned to the property the next day and immediately ran some damp tests to check for excess moisture issues, which one might expect with an old floor like this one. Thankfully, the floor proved dry – and I could finish the burnishing process with the fourth and final Very Fine diamond encrusted burnishing pad, which achieved a beautiful shine finish.
Finally, I sealed the floor with three coats of Tile Doctor Colour Grow, an impregnating sealer which provides robust protection and enhances the coloured patterns in the Terrazzo.
As you can see from the photos above, the floor is looking so much more colourful and bright after a deep clean, polish and a fresh seal. The customer was over the moon!
Julian Iancono
South East Wales Tile Doctor
 Deep Cleaning Pressure Washing LLC
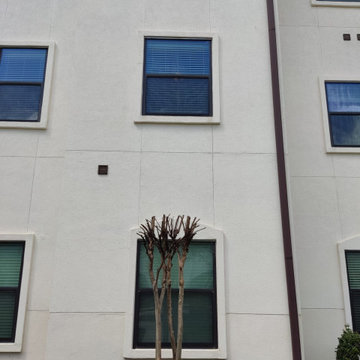
..and after the cleaning. You can get amazing results in a couple of hours.
Trendy home design photo in Houston
Trendy home design photo in Houston
17