
Search results for "Deep cleaning" in Home Design Ideas
 Tile Doctor Ltd
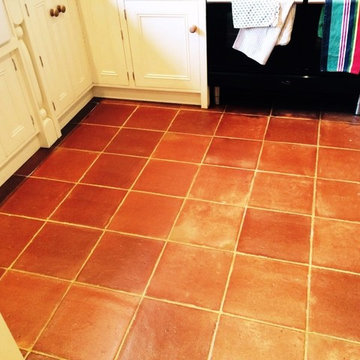
This customer in Henfield was contemplating digging up her Terracotta kitchen floor and replacing it, the tiles were ingrained with dirt which had proved impossible to remove and as a consequence were left looking flat, dull and very un-appealing. Additionally she had an elderly dog that had been ill several times in the corner area and she really struggled to make it look decent again. Following a quick test I was able to persuade her to try a clean and re-seal first.
The first step was to deep clean the floor to remove the ingrained dirt and any previous sealers. As well as the dog I had two rugby playing sons to deal with so to make it easier for the family I split the floor up into areas and worked on one area at a time.
The tiles were first soaked in a strong solution of Tile Doctor Pro-Clean before scrubbing it into the tile and grout with a black pad fitted to a buffing machine. The tiles were rinsed, the now dirty cleaning solution extracted and the process repeated until I was happy that the Pro-Clean had done its trick and the floor was as clean as it could be.
The Terracotta tiles now looked clean but completely washed out so I assured the customer that once the tiles had been sealed the colour would return and more. Unsealed Terracotta marks easily so given I left the customer dust sheets to walk on.
I returned after two days to ensure any moisture had left the tile and proceeded to seal with six coats of Tile Doctor Pro-Seal which is highly recommended for use in food preparation areas and gives a high gloss finish whilst providing maximum stain protection. As each coat takes 40 minutes to dry I took the opportunity to clean her slate front door step as well.
The customer was very happy with the finished floor and I’m glad to report she has decided to keep the floor.
 Tile Doctor Ltd
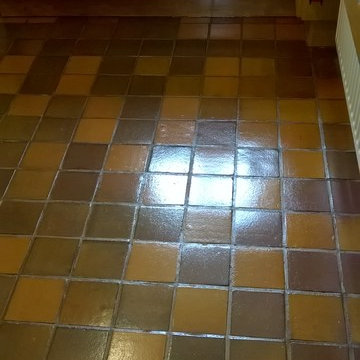
This Quarry tiled kitchen floor was in very good condition, with no cracked or broken tiles. However, my customer, who lives in the town of Tutbury, near Burton-on-Trent, was keen to boost the condition of the tiles further through professional maintenance, including a deep clean and a fresh seal to restore the sheen to the Quarry. NB, did you know it’s estimated that Tutbury has actually been inhabited for 3000 years, having once been the site of an Iron Age hill fort, this house of course was a lot more recent.
To clean the tiles, I chose to use our tried and trusted alkaline cleaner, Tile Doctor Pro Clean. We use Pro Clean on most types of natural stone floor, including Quarry, Slate, and Victorian. I applied Pro Clean liberally across the floor and left it to dwell for a short period, giving it time to seep into the tile to get underneath and lift out any ingrained dirt. The cleaner was then agitated using a scrubbing pad fitted to a rotary machine to remove the dirt and other general muck.
I then rinsed the floor with cold water and soaked up the resulting slurry with a wet-vac machine. Some areas of the floor proved to be quite stubborn to clean, so in these areas the cleaning process was repeated until satisfactory results were achieved. Finally, the floor was given another rinse and left to dry off overnight.
The next day I returned to the property and checked that the floor was ready to seal by running several damp tests, with the results indicating that was no excess moisture remaining on the tiles. We carry out these tests before sealing because moisture can cloud the sealer and prevent it from properly protecting the tiles.
My choice of sealer was Tile Doctor Seal & Go, a cost effective topical sealer that builds up a robust layer of protection on the surface of the floor and provides a durable sheen finish that, as you can see from the photographs, really lifts the appearance of the tiles.
It’s a fact that any sealed tiled floor will need to be regularly maintained as sealers do wear off over time, especially in the high traffic areas, and this is when the floor starts to lose its appearance as dirt becomes trapped in the pores of the stone. The life of the sealer can be extended however by ensuring you only clean the floor with a PH Neutral cleaner.
Trevor Preeece
 Tile Doctor Ltd
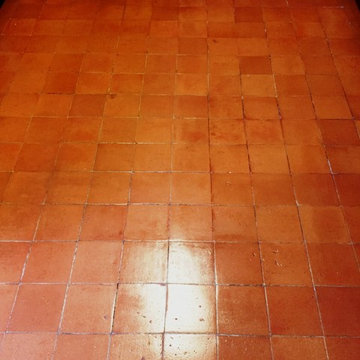
Not too long ago I visited a client who had just moved into a lovely old cottage in Milton, Oxfordshire. She wanted to restore many of the antique features of the building, including a fantastic Quarry tiled floor in the kitchen.
Quarry is typically a robust, hard wearing stone, but in a high traffic area like a kitchen, the tiles will need regular maintenance. These tiles clearly hadn’t seen a thorough clean and fresh seal in a long time, and so I was called in to provide just that.
On the first day of work, I gave the Quarry tiles a deep clean using a strong solution of Tile Doctor Pro-Clean and water. Pro-Clean is a versatile alkaline cleaner that also helps to break down any old and no longer effectual sealer remaining on the tiles.
The solution was applied evenly to the floor and left to dwell for half an hour, allowing time for it to seep into the stone to get underneath and lift out the ingrained dirt. I then removed the dirt by agitating the solution with a scrubbing pad fitted to a rotary floor scrubber. I worked in small sections at first, and gradually finished the entire floor.
After completing the initial clean, I rinsed away the soiled solution and vacuumed up the excess moisture using a wet-vac machine. I then scrubbed the floor an acid wash using a dilution of Tile Doctor Grout Clean-Up to remove grout smears and other mineral type deposits. The resulting solution was then removed in a similar fashion using a wet-vac.
The final step in the cleaning process was to rinse the floor with Tile Doctor pH Neutral Cleaner to remove any trace of product helps to tackle any remaining dirt and reset the pH balance of the tiles before sealing.
After leaving the floor to dry overnight, I returned the next day to the house to seal the floor with Tile Doctor Seal & Go, a water-based topical sealer which gives the floor an aesthetically pleasing sheen and a robust surface seal.
The photos demonstrate the results better than this short account can, needless to say the floor is now transformed.
Barry Woodward
Oxfordshire Tile Doctor
Find the right local pro for your project
 Tile Doctor Ltd
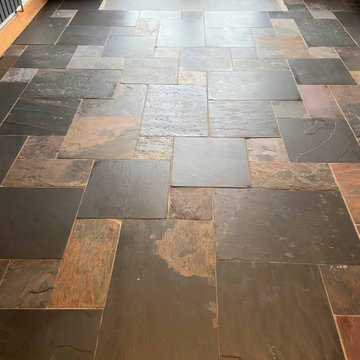
The pictures below are of Chinese Slate floor in the Kitchen of a property in the small village of Clifton just south of Penrith. We often get asked what the difference is between Rough and Semi Riven Slate, and this floor was a mixture of both.
If you look closely at the pictures and check out the darker parts of the floor you will see these smoother Semi Riven Slate, whereas the light copper-coloured parts of the floor were of the rougher textured variety. It’s not that unusual for stone to be mixed in this fashion as it can be supplied from different quarries in order to achieve a particular look.
The blend of different slates makes little difference when it comes to cleaning as the process is essentially the same. I would advise though if you intend to clean the floor using a mop then you should opt for Semi Riven Slate as Rough Slate can shred your mops and make it harder to maintain. We tend to use industrial floor buffing machines which work well on both surfaces so are less effected.
There was a bit of wax on this floor so to remove this Tile Doctor Wax Away was applied. The product was left to stand for fifteen minutes before being scrubbed into the stone, rinsed and then the soil extracted with a wet vacuum.
We then finished the cleaning with an Acid Rinse which involves scrubbing the Slate with Tile Doctor Grout Clean-up. This not only works well at cleaning up the stone and grout but also neutralises the alkaline pH left over from using Wax Away. I am very wary of the pH level of the floor as it could have an impact on the new sealer, giving the floor an acid rinse before sealing also ensures a better bond with the sealer.
Naturally, you can’t leave a strong product like Grout Clean-up on the Stone for long as it could etch the surface so once done the floor was thoroughly rinsed with water and extracted again with a wet vacuum. A mop and bucket and lots of sponges won’t do the job on a large area like this.
Once we finished the clean, we left it to dry off overnight and came back the next day to apply the sealer. We were originally going to apply a satin finish sealer, but the client had a big dog with sharp claws which could of scratched and marked the sealer so decided against it. I advised the client to use an Impregnating sealer called Tile Doctor Colour Grow, which lifts the natural colours in the stone, but is not a topical shiny sealer as the seal soaks into the Slate and leaves a a nice matt finish instead. Only two coats of sealer were needed, and the floor looked like new again.
My client was very happy with the difference in the appearance of the stone and how much cleaner the grout was, so much so they the following feedback for us, which is always appreciated.
“Totally impressed with the team they couldn’t have been more professional and even left me with some cleaner. My horrible 12 year old slate tiles look fabulous”
As usual we left a free bottle of Tile Doctor Neutral Tile Cleaner for aftercare, it’s very important not to undo all that hard work by using a product which will damage the seal, using a pH neutral cleaner will keep the seal looking sharp and fresh for years to come.
Heidi Taylor
North Cumbria Tile Doctor

 Fresh & Flawless Cleaning
This project came to us through a family referral. The homeowner's daughter had been a Fresh & Flawless client and was so happy with the results that she referred her mother when it was time for a proper deep clean on her Dallas Road home.
Dallas Road is one of Victoria's most sought-after addresses, running along the waterfront in the heart of James Bay, and this home deserved a clean that matched the standard of the neighbourhood.
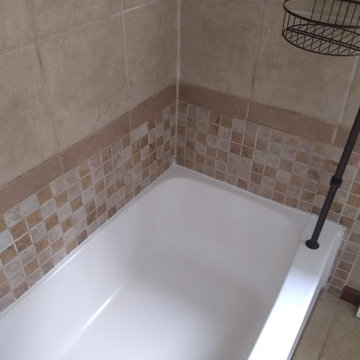
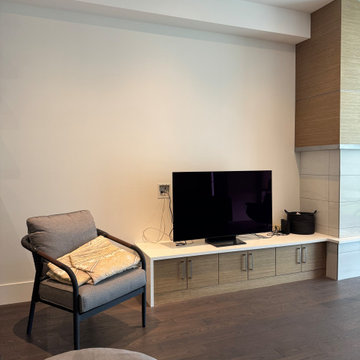
Our team completed a full deep clean covering every room in detail. That included thorough attention to baseboards, door frames, window sills, ceiling fans, blinds, cabinet exteriors, appliance exteriors, bathroom grout and fixtures, light switches, and all the areas that tend to be overlooked in a routine clean. Every surface was treated with care and the right products for the finish.
The homeowner was thrilled with the results and has since become a regular Fresh & Flawless client.
Fresh & Flawless offers premium residential cleaning across Greater Victoria including James Bay, Fairfield, Oak Bay, Saanich, and surrounding areas. We specialize in deep cleans, standard maintenance cleans, and move in/out cleaning for homeowners who expect the details to be done right.
 Tile Doctor Ltd
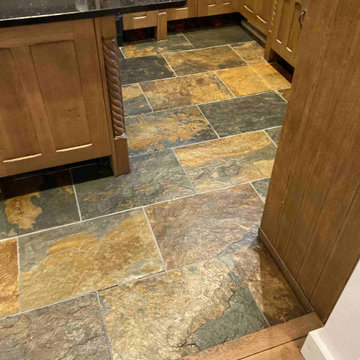
This Multi-Coloured Slate floor looks nice in the Kitchen of this property in Hythe, however due to the riven surface of the tile and the deep grout lines my customer had struggled to keep it clean. Additionally, the Slate has lost all of its lustre over the years since it had been installed and it was now due a deep clean and reseal.
The combination of durability and price makes Slate a popular choice for floor covering, it is also available in a number of colours, ranging from plain black to a more diverse array of shades. Like any natural stone floor though it need sealing to keep the dirt out of the pores of the stone however sealers wear off with use
Hythe by the way is a lovely medieval coastal market town with its own beach on the edge of Romney Marsh and close to Folkestone.
Before starting I removed the kickboards underneath the kitchen units and protected the exposed woodwork with a thin film. To deep clean the Slate floor and remove any remaining sealer I applied Tile Doctor Remove and Go and left it to soak in for ten minutes before scrubbing it in with a light carbide brush. As well as removing the old sealer this process releases the dirt from the pores of the stone and brings it to the surface where it can be extracted.
I have probably mentioned this before, but I’ve invested in a powerful van mounted pressure extraction system for removing the dirt, old sealer and emulsified soils released from the stone. The system works by applying water at high pressure on the floor via a spinner tool and then simultaneously extracts the waste under suction back to a grey water tank on the van. From the customers point of view, it makes light work of cleaning the floor and more importantly leaves the floor dry and leaves no mess.
Having a dry floor at this stage is important as it means I can usually seal the floor on the same day. Its not a good idea to apply a sealer to damp floor as it will affect the way it cures and lead to an undesirable finish. The way to make sure the floor its dry is to use a moisture meter and take readings in several places around the floor. You can use an air mover to improve drying times however older floors can take a very long time to dry and for those I tend to book another day to apply the sealer.
With the floor dry I set about applying the first of two coats of Tile Doctor X-Tra Seal which provides both a hardwearing sheen to the slate as well as enhancing its natural colourings. It has strong water repellency characteristics which makes it ideal for use in a kitchen where spillages are quite common.
This was quite a small kitchen, so the work was completed in one day. My client was amazed at the transformation and grateful for our advice on continued maintenance which for this floor I recommended the use of Tile Doctor Stone Soap for daily cleaning.
Michael Conlon
South Kent Tile Doctor


 Tile Doctor Ltd
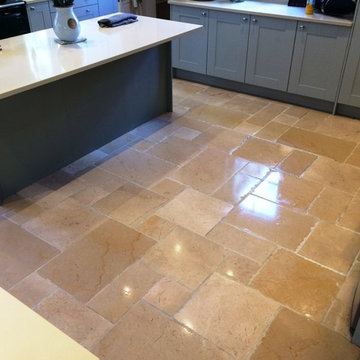
Earlier this year I was contacted by a lady in Icklesham which is a small village near Hastings. My client requested a deep clean for her Limestone tiled kitchen floor which had, over time, become quite dirty, with the grout in particular being very much worse for wear. Limestone is a popular choice for tiled floors however it needs to be sealed to ensure dirt doesn’t get into the pores of the stone otherwise it becomes difficult to clean and if the sealer is not maintained it will wear down and the floor will lose its protection especially in high traffic areas such as kitchens.
Cleaning a Limestone tiled kitchen floor
My product of choice for cleaning this floor was Tile Doctor Pro-Clean, which I found to be particularly effective in lifting ingrained dirt out of the grout. I used a stiff grout brush to work the solution of Pro-Clean diluted with warm water to work the cleaner deep into the grout. I also used a buffing machine fitted with a scrubbing pad and more Pro-Clean to lift the dirt out of the Limestone tiles. It wasn’t long before the dirty grout lines began to disappear, and the floor was well on its way to looking great again.
Once I’d also cleaned the nearby utility room, bathroom and cloakroom in a similar manner, I gave the floor a thorough rinse with fresh water before using a wet-dry vac machine to remove the soiled water from the surface of the tiles. I removed as much moisture from the Limestone tile and grout as possible to speed up the drying process as it’s important to ensure a stone floor is bone dry before sealing it as any excess moisture will compromise the sealer.
Applying Tile Doctor Colour Grow sealer to Limestone tiles
I left the floor for three days to dry before returning and used a damp meter on my return to confirm the floor was in-deed dry, spring had arrived and the sunshine really helped. My choice of sealer for the Limestone tiles was Tile Doctor Colour Grow, a product which soaks into the pores of the stone to enhance the colour of tiles whilst also providing durable protection. In this case two coats of Colour Grow were applied and as you can see from the photographs this really did bring out the fantastic natural colours in the Limestone and exaggerate the shading. At the same time, the added surface protection will help the floor stay looking great for longer, even with a lot of usage.
When she returned from dog walking, my client was so pleased with the final result that she almost screamed the house down! She was so pleased, in fact, that she promised to have me return every year to ensure her floor was maintained to a high standard. I was also really happy with my work, particularly in terms of getting the grout into far better condition than it had been before.






 Home support
Carpet Cleaning Methods in Singapore
Is your house full of rugs made of different fabrics? And, are you confused about its cleaning methods? This confusion is easy to happen when there are several rugs in your home. In those situations, consulting carpet cleaning services in Singapore is the best solution for you.
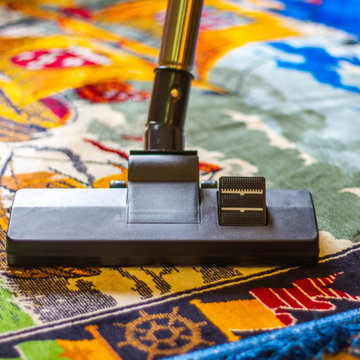
Different carpet fabrics require different cleaning methods to be applied, as applying a single method can damage the texture and appearance of the carpet. So, here in this blog, we will discuss the different types of carpet fabrics and the cleaning methods used by the best carpet cleaning company.
Different carpet fabrics require different cleaning methods to be applied
Different carpet fabrics require different cleaning methods to be applied
4 Types of carpets and best cleaning method
Synthetic Carpets: Synthetic carpets are found in most households as they are abundant in the market. They are easy to maintain and need to be cleaned regularly because dusting is quick on such fabrics. For cleaning of synthetic carpets, you can contact cheap carpet cleaning in Singapore, as the frequency of cleaning is high. Also, the method adopted for cleaning synthetic carpets usually involves dry-chem cleaning or soap-free cleaning methods.
Wool Carpets: Wool carpets can stain and collect dust easily, but you shouldn’t clean them with soap and water. Wool has excellent water absorption and takes a long time to dry completely. Therefore, to clean wool carpets, it is better to consult a professional carpet cleaner, as they have a better knowledge of applying the right cleaning method. Usually, the dry cleaning method is applied to make the carpet faster and cleaner.
Polyester Carpets: Polyester is one of the forms of synthetic fabric that has been one of the most popular carpet fabrics for a long time. This fabric is known for its luxurious feel and comes in a variety of colors. These mats are hydrophobic and stain resistant, however, they are not very durable, especially when exposed to the sun. Therefore, you should not apply the usual soap and water cleaning method to this fabric but entrust the task to professionals.
Berber Carpets: Berber carpets give you a soft, comfortable feeling when you step on them, and with this carpet fabric you need to wash it often because the dust treatment process happens quickly. Weekly vacuuming is recommended along with professional deep cleaning every three months. To clean Berber carpets, you can choose the regular soap and water method, but be careful with rubbing as it can damage the fabric texture.
Conclusion
Ocean Cleans Singapore we provide the best cleaning service in Singapore. With our 20 years of experience, you’ll enjoy the luxury of deep-cleaned rugs at an incredible price. We have extensive knowledge of different carpet fabrics and use the most appropriate and advanced cleaning technology and methods. So, to enjoy the pleasure of having clean carpets at your residence, feel free in availing our excellent services!






Sponsored
Columbus, OH

Hope Restoration & General Contracting
Columbus Design-Build, Kitchen & Bath Remodeling, Historic Renovations
 Tile Doctor Ltd
My client had recently moved into a bungalow in Godalming where they inherited the Limestone tiled kitchen floor pictured below. The previous owner had not looked after the floor very well and by the time they moved in it was pretty filthy. Limestone is a natural but porous stone where, unless sealed, attracts dirt into its tiny holes and as you would expect Cream Limestone shows the dirt easily. The protective seal had long since worn off this floor and was now ingrained with dirt it was now looking permanently dirty.
Before quoting I conducted a small test clean to work out the best method to renovate the stone and this also gives the client a good idea of how the floor will look after its finished. They were delighted with the initial result and happy with my quote gave me the go ahead.
On arrival first I helped the customer remove his tables and chairs and I then set about tapping up the plinths in the kitchen and the skirtings to protect them from cleaning solutions and equipment. The cleaning equipment I have invested in works more efficiently in open spaces, so it’s worth spending time at the beginning preparing the area first.
Next, I used a deck brush to apply a mixture of water and Tile Doctor Pro-Clean to the dirtiest tiles. Tile Doctor Pro-Clean works well when left to dwell for ten minutes or so. I also applied the same product to the grout over half the room so it could get a head start breaking down the dirt. Then using a stiff brush, I scrubbed the grout clean. Once it was worked loose, I extracted the now dirty solution with a wet vacuum.
With the grout clean I turned my attention back to the tiles with where the Pro-Clean had been left to soak in. Giving them a quick brush, I noted that what appeared to be permanently ingrained dirt had now come loose. To get the tiles really clean I used a 17″ rotary machine fitted with diamond encrusted buffer pads. This removes the tiny dots of dirt on the stone and with it comes any existing sealer and dirt.
A set of four burnishing pads were used, starting with a 400-grit, and finishing with a 3000-grit pad. The first 400-grit pad is coarse, and the grits become smoother as you work through the set. Water is used to lubricate the process and the released dirt is extracted in-between using the wet vacuum mentioned earlier. This process does take time but by the end of day one the floor was looking a lot better.
The next step is sealing however the floor needs to be bone dry for that, so I left a couple of industrial fans in place and left the Limestone to dry off overnight.
Returning the following day my first job was to ensure the floor was dry by taking multiple moisture readings with a damp meter. The readings were good, so I was able to make a start applying the sealer which for this floor was Tile Doctor Ultra Seal.
Ultra-Seal is an impregnating sealer that soaks into those small holes in the stone I mentioned earlier, I occupies the pores thus preventing dirt from becoming ingrained. The other feature of this sealer is it doesn’t change the appearance or colour of the stone leaving it with a very natural finish. Two coats of sealer were applied, leaving the seal to dry between each coat.
After the final coat was dried, I gave it a final polish with a soft nylon pad and the floor was finished. Before leaving we discussed after care which for this floor, I recommended Tile Doctor Stone Soap and I requested that the customer to stay out of the kitchen for a couple of hours while the sealer cured. They were over the moon with the new floor and could not believe the difference it had made to their kitchen.
Rupert Mcleod
West Surrey Tile Doctor


7