
Search results for "Demonstrate" in Home Design Ideas
 Living Stone Design + Build
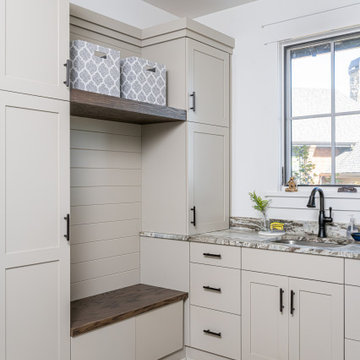
 A thoughtfully designed laundry room that combines practicality with mountain modern elegance. The space features efficient storage solutions and premium appliances while maintaining Living Stone's commitment to sustainable building practices. This well-appointed utility space demonstrates how functional areas can be both beautiful and energy-efficient.
 DLA Architecture
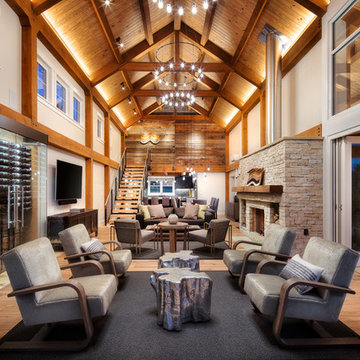
Living room - rustic open concept medium tone wood floor and brown floor living room idea in Other with beige walls
 Richard Harp Homes, Inc.
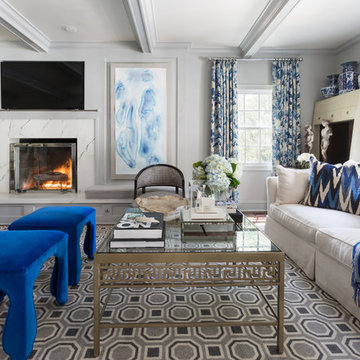
Living room - transitional enclosed medium tone wood floor and brown floor living room idea in Little Rock with gray walls, a standard fireplace, a stone fireplace and a wall-mounted tv
Find the right local pro for your project
 IKB Design & Construction
Joel Bartlett
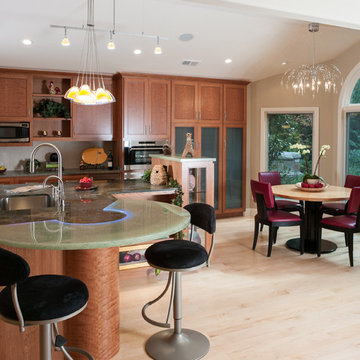
Trendy light wood floor eat-in kitchen photo in San Francisco with an undermount sink, medium tone wood cabinets, granite countertops and stainless steel appliances
Trendy light wood floor eat-in kitchen photo in San Francisco with an undermount sink, medium tone wood cabinets, granite countertops and stainless steel appliances
 White Crane Construction
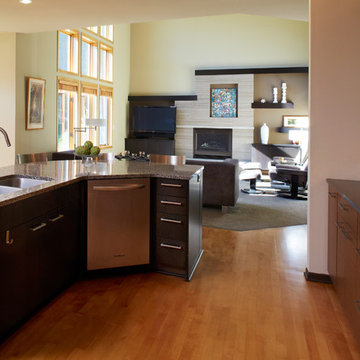
Cohesively updating and modernizing this home built in the 1990s were the goal in this remodel. Several elements throughout the house like the traditional golden oak original stair railing in the main entry were too colonial for the homeowner as their taste was trending more modern. The golden oak used on trim, fireplace mantle, and baseboards trapped this home in a time warp. The original Kitchen had cabinetry with a traditional door style, painted cabinets, and laminate countertops which also caused it to look dated. The clients expressed a desire to integrate more modern elements into their home in a cost effective way without having to rip everything down to the studs. Our design/build team proposed and executed many elegant cost effective design solutions that involved changing paint, cabinetry, finishes, and fixtures to achieve the desired modern feeling throughout the home.
The Kitchen was completely remodeled. The traditional cabinetry was replaced by new frameless Décor cabinets with slab doors and drawers in a beautiful exotic walnut veneer with horizontal graining and soft closing hardware. To enhance the existing structure functionally the built in desk space in the Kitchen was removed and replaced by pantry cabinetry creating improved storage and flow in the new kitchen. The new large Cherry island, also by Décor, was finished in a dark charcoal stain and topped with a solid surface Cambria quartz countertop in Kingston which features a modern mix of black, white and olive tones. For the perimeter countertops Cambria Oakhampton was selected for its complimentary sleek dark chocolate color. Innovative use of materials was demonstrated by cutting linear strips of a pre-sheeted horizontal grey glass mosaic tile, staggering it, and running it vertically instead of horizontally on the backsplash. White Kitchen appliances were traded out for a more contemporary stainless steel.
The small original fireplace with oak mantle and brass trim seemed out of scale on the immense 2 story Living Room wall it inhabited. Superior craftsmanship was demonstrated by removing the original fireplace surround and replacing with a new larger fireplace surround which was tiled with a 6” x 20” warm taupe stone in a running bond patterned tile installed in a minimal horizontal stack bond pattern. The brass trim on the original firebox was updated with heat resistant high temperature paint in a bronze color. Slabs of Indiana Limestone were installed at the hearth and atop the firebox to create interest and texture. New Décor charcoal stained cabinets for media storage and large floating shelves were integrated into the new fireplace surround design creating an interesting asymmetrical scale appropriate hearth and TV area for the room. New modern satin nickel ceiling fan, bronze wall sconces, and grey textured carpeting were selected for the Living Room to compliment the new tile and woodwork of the fireplace surround.
Photography: Jill Greer
Photography: Jill Greer
 Dirt Diva Designs
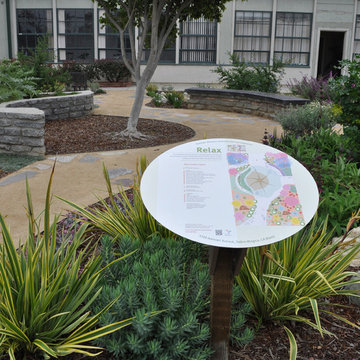
This demonstration garden is number two out of three located at the Santa Monica Airport. It is meant to show homeowners how to install a sustainable garden that is functional and looks beautiful.
 Techo-Bloc
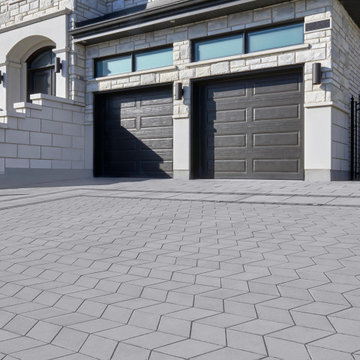
This modern landscape design was inspired by a variety of our products to create the ultimate luxurious curb appeal!
This driveway was designed with our Diamond paver! Inspired by the geometric patterns of which contemporary interior decors are currently made, the Diamand paver is used to produce similar effects on the exterior. This modern style product, which combines a diamond shape with various colors and finishes to demonstrate great creativity, is one of the pavers offering the most versatility.

 Roots First Design
The Garage Apartments in Asheville, NC demonstrate how even a small roof can make a big impact on the ecological health of the city. The new plantings are the first step in developing a dynamic urban community that supports native pollinator populations, reduces heat island effect and allows the rain that falls at this spot to infiltrate and evapotranspire more like it would in nature.
The living roof also demonstrates how leftover spaces in the city can be reimagined and reinvigorated. The plantings were designed to support native plants in a very intentional way, creating a pocket of beauty in an unexpected place.
 Cure Design Group
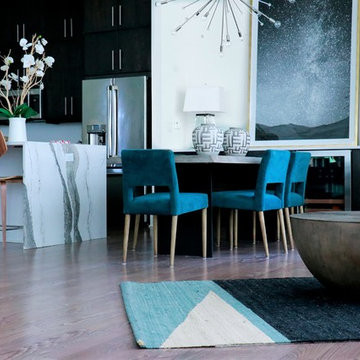
Stunning open, fresh and clean high rise condo renovation does not disappoint. Our clients wanted a chic urban oasis they could call home. Featuring multiple lounge spaces, open to the modern kitchen and waterfall edge 10 foot marble island. This space is truly unique.
 Charter Oak Landscape Development
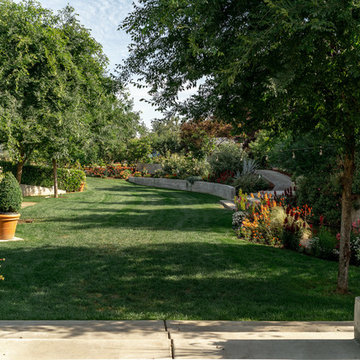
What started out as demonstration gardens with rambling paths and open gathering spaces and transformed into a magical outdoor venue. We have had the please of designing and installing the initial concept, along with the modifications throughout the years to meet the ever changing needs of this space.
 Gappsi
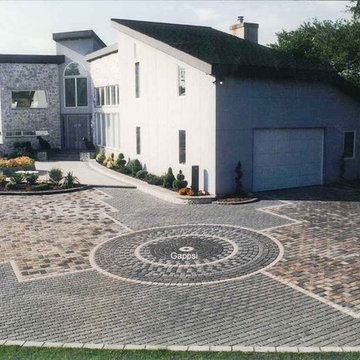
Award Presented to Giuseppe Abbrancati/Gappsi. Location West Babylon, NY
Formal graphics and a stone-like appearance in many ways make the driveway the main attraction at this waterside residence with boat docks. Exquisite detailing demonstrates the skills of the combined designer and paver installation contractor. All pavers were Nicolock 2 3/8 in. (60 mm) thick and placed over a 9 in. (225 mm) thick of compacted aggregate made of crush, recycled concrete.
Throwback Back Time 1995
 Roots First Design
The Garage Apartments in Asheville, NC demonstrate how even a small roof can make a big impact on the ecological health of the city. The new plantings are the first step in developing a dynamic urban community that supports native pollinator populations, reduces heat island effect and allows the rain that falls at this spot to infiltrate and evapotranspire more like it would in nature.
The living roof also demonstrates how leftover spaces in the city can be reimagined and reinvigorated. The plantings were designed to support native plants in a very intentional way, creating a pocket of beauty in an unexpected place.
 Tile Doctor Ltd
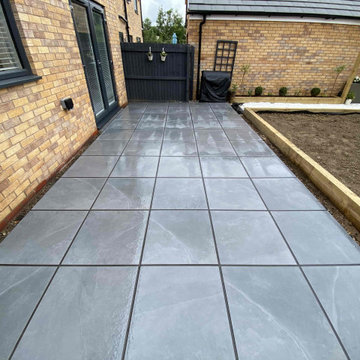
Earlier this summer I was called out to this job in the garden of a house in the city of Ely to inspect a freshly laid porcelain tiled patio with grout haze issues. The builder who had installed the patio hadn’t removed all the grout from the textured surface of the tile before it had dried. This was probably due to the hot weather which reduces drying times and has caught many tilers out. Multiple repeat visits by the builder trying followed who spent countless hours trying to remove the grout haze, unfortunately due to the textured surface of the tile he was unable to remove it and the patio was left looking awful.
Like the builder we are increasingly finding modern grouts, which although more durable, are very difficult to remove. Fortunately belonging to the Tile Doctor network, I had already been made aware of this problem and was able to offer a solution.
I arranged to pay the property a visit to demonstrate a potential solution and quote for resolving the issues. Even though the grout haze was indeed difficult to remove it wasn’t impossible if you know how. The demonstration came out well and relieved that they had finally found a solution to the problem booked me in to get the work carried out.
On my return I started with the application of a strong dilution of Tile Doctor Grout Clean-Up. This product is ideal for removing grout haze or smears as they often referred to; however, being acidic we don’t recommend it for use on every surface so if your using it yourself do check the label first. I left it to soak in for ten minutes before being agitated with a black scrubbing pad fitted to a rotary buffer
The weather was good, so it wasn’t a problem working outside and once all the grout smears were removed, I finished off by giving the whole patio a high-pressure rinse. I use a van mounted rinse/extraction system for this that applies warm water at high pressure onto the patio to dislodge dirt and then extracts the waste into a separate tank in the vehicle. It was an expensive investment but makes light work of jobs like this.
It took around four to five cleans to complete the job, by the late afternoon the grout haze was gone, and the porcelain patio looked completely transformed. It was quite a warm day, so the patio soon dried allowing my client to use it later that day. I should mention that this variety of Porcelain tiles were not the micro porous type and therefore did not need to be sealed.
Relieved the problem was finally resolved and happy with the result my client left the following feedback:
Amazing service, they were able to provide us with a quote and demo before we agreed to work. We are so happy with the results we have as our patio slabs looked ruined to the eye but the Tile Doctor managed to get them looking brand new.
Tom Conlon
Cambridge Tile Doctor
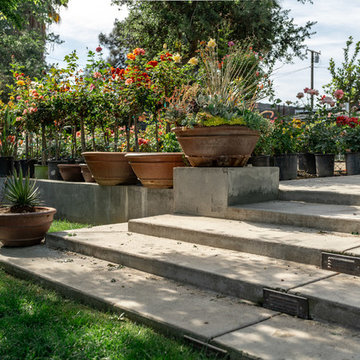
 Charter Oak Landscape Development
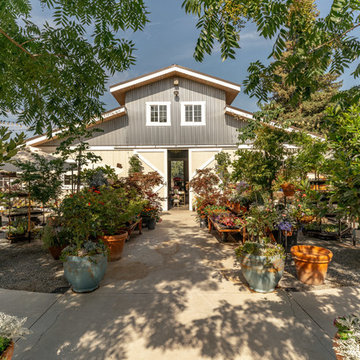
What started out as demonstration gardens with rambling paths and open gathering spaces and transformed into a magical outdoor venue. We have had the please of designing and installing the initial concept, along with the modifications throughout the years to meet the ever changing needs of this space.
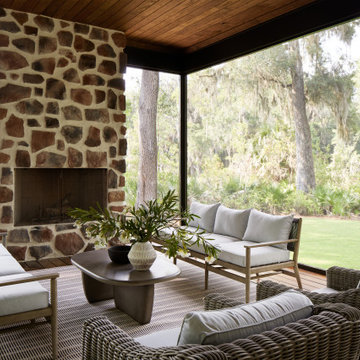
 Charter Oak Landscape Development
What started out as demonstration gardens with rambling paths and open gathering spaces and transformed into a magical outdoor venue. We have had the please of designing and installing the initial concept, along with the modifications throughout the years to meet the ever changing needs of this space.

 Tile Doctor Ltd
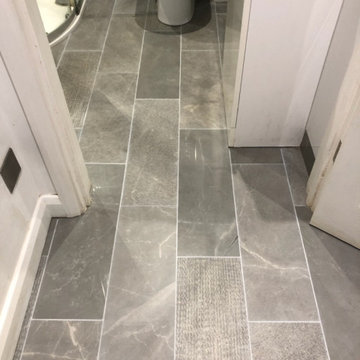
The pictures below detail the renovation of a Porcelain Tiled Floor I completed at a property in Ipswich. Installed throughout the Kitchen and into the adjacent WC the porcelain tile and grout were in a very dirty state and the client was desperate to get them clean. The situation wasn’t helped by their two dogs with grubby paws. She had tried all the usual household cleaners she could find, and nothing seemed to work. Unfortunately, household cleaners can make the problem worse due the strong chemicals they contain.
I visited the property to survey the floor and was able to reassure the client that although the grout was heavily stained it could be renovated by recolouring it with a Tile Doctor Grout Colourant. I was confident we would soon be able to get the floor looking great again and demonstrated the process I would use on a small part of the floor. The demonstration went well and happy with the result we agreed a date for my return the following week to complete the work which should be completed in a single day.
Returning on the agreed date we started by protecting the by applying a clear silicone sealant to the MDF skirting boards and kitchen base units. We left this to dry for an hour before proceeding with the cleaning.
The Porcelain tile and grout was cleaned with a strong dilution of Tile Doctor Pro-Clean using 3 parts cleaner to 5 parts water. The solution was applied to the tile and grout and then left to soak in for ten minutes before being worked in using a rotary machine fitted with a Black Scrubbing Pad. Tile Doctor Pro-Clean is a concentrated, multi-purpose high-alkaline cleaner which is designed for deep cleaning tile, stone and grout of dirt and grease and can also remove sealers.
Pads can struggle to reach into the recesses of the grout line so once I was finished with the tile, I hand scrubbed the grout with a wire brush. The floor was then rinsed with water and the resultant slurry extracted off the floor with wet vacuum.
The floor took about three hours to deep clean which was just the right timing for us to have lunch whilst the floor dried. The grout was much improved by the cleaning process but as suspected there were too many deep-seated stains to be able to guarantee a consistent finish. So as previously agreed with the client we set about colouring the grout using a light grey colourant. This took most of the afternoon as there was a lot of grout.
The Porcelain tiles were the non-porous type that won’t take a sealer and the colourant acts as a barrier over the grout protecting it and making it easy to clean so once I was done colouring there was no need to apply a sealer.
My client was relieved to have the floor looking clean and presentable again. For aftercare I recommended that moving forward it would be best to use Tile Doctor Neutral Tile Cleaner which is a pH neutral cleaner. This will ensure that with regular cleaning the floor will keep clean and the grout won’t be compromised by overly strong products.
Bruce Copping
Suffolk Tile Doctor
 Charter Oak Landscape Development
What started out as demonstration gardens with rambling paths and open gathering spaces and transformed into a magical outdoor venue. We have had the please of designing and installing the initial concept, along with the modifications throughout the years to meet the ever changing needs of this space.
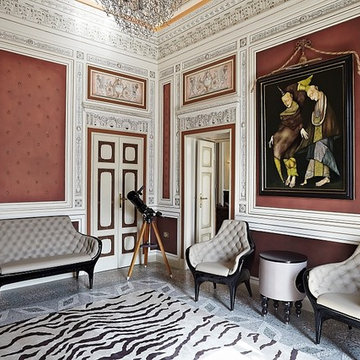
 Ethnic Chic - Home Couture
Leather sofa and chairs by BD Barcelona Design.
Ethnic Chic - Home Couture
Elegant home design photo in Amsterdam
Elegant home design photo in Amsterdam
 Tile Doctor Ltd
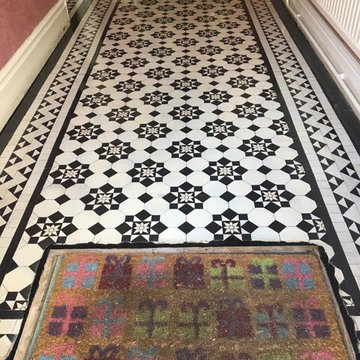
I was contacted by a professional couple who were despairing over the state of their Victorian tiled hallway floor which was dull and uninviting. The property was in Newport which is on the south east side of Wales around twelve miles east of the bustling city of Cardiff.
I went over to visit the property which was a beautiful Victorian period terrace house nestled amongst other properties of a similar age properties. The couple wanted their Victorian hallway floor to be brought back to life, so I demonstrated the cleaning process I intended to use on a small part of the floor. Immediately it had the desired effect and the floor looked much cleaner. I could see that there were no structural issues with the floor and the test clean proved it was just ingrained dirt that was the problem. The clients were happy with the result of the demonstration and subsequent quote, so we arranged a suitable date to come back and complete the work.
When I arrived, I started by protecting the skirting boards with tape and then set about giving the Victorian tiles a deep clean. I applied a combination of Tile Doctor Pro-Clean and Remove and Go leaving it to dwell for a short time to allow the products to soak into the pores of the tiles and start breaking down the ingrained dirt. After about ten minutes I scrubbed the floor with black scrubbing pad attached to a rotary floor buffer which released the years of grime and dirt. The floor was then rinsed with water and the soil removed using a wet vacuum. I repeated the process to ensure the floor was as clean as possible.
A further inspection of the Victorian tiles revealed a few stubborn marks which were dealt with using handheld diamond burnishing blocks. These are also handy for getting into the corners of the floor which were difficult to reach with the rotary machine. The floor was then left overnight to dry out.
The following day I returned, and I checked the floor was dry using a moisture meter to ensure it was dry. Once I was happy, I started to seal the floor with Tile Doctor Seal & Go which is a water-based sealer that works well on Victorian tiles. Several coats were applied building up layers to produce a stunning satin finish.
Once I had finished the floor was looking so much cleaner and brighter and the addition of the sealer will protect the floor from dirt and keep it looking good for some time to come. My clients were over the moon with the floor!
For aftercare I recommend Tile Doctor Neutral Tile Cleaner, which unlike the stronger products you find in supermarkets is ideal for cleaning sealed floors and will ensure the sealer stays in good condition.
Paul Wales
Monmouthshire Tile Doctor
19