
Search results for "Develop successful" in Home Design Ideas
 Talon Construction Inc.
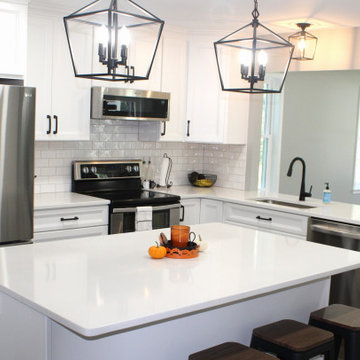
Designing and building a kitchen addition is a complex process that involves multiple steps and considerations. Here is a general outline to help you get started on your kitchen addition project:
Define Your Goals and Budget:
• Determine the purpose of the kitchen addition. Is it for more cooking space, a dining area, or a combination of both?
• Establish a realistic budget for your project. Consider all costs, including construction, permits, materials, and furnishings.
Hire a Design Professional:
• Seek the services of a design build company who specializes in kitchen additions.
• Discuss your vision, needs, and budget with the design professional to create a design concept.
Site Evaluation:
• Assess the existing space and structural condition of your home to ensure it can support the addition.
• Consider factors like zoning regulations, setbacks, and building codes.
Design Development:
• Collaborate with your design professional to refine the concept, including the layout, size, and architectural style.
• Choose materials, finishes, and fixtures that fit your design and budget.
Obtain Permits:
• Consult with your local design build contractor to determine the necessary permits and approvals.
• Prepare and submit all required documents, including architectural drawings and engineering plans.
Create Construction Documents:
• Work with your design build professional to develop detailed construction drawings and specifications.
• These documents will serve as a guide for contractors during construction.
Hire a design build contractor:
• Check references, credentials, and licenses before selecting a contractor.
• Sign a detailed contract that outlines the scope of work, timeline, and payment schedule.
Construction Phase:
• Demolition: If needed, remove any existing structures or walls.
• Foundation: Construct the foundation for the addition.
• Framing: Build the structural framework of the addition.
• Plumbing, Electrical, and HVAC: Install or update utilities as required.
• Insulation: Ensure proper insulation for energy efficiency.
• Drywall and Finish Work: Complete the walls and ceilings.
• Flooring and Cabinetry: Install flooring and kitchen cabinets.
• Appliances and Fixtures: Add appliances, plumbing fixtures, and lighting.
• Paint and Finish: Apply paint and finishes to achieve the desired look.
• Final Inspection: Schedule inspections to ensure compliance with building codes.
Final Inspections and Approvals:
• Arrange for final inspections to ensure the addition meets all safety and code requirements.
• Obtain any necessary certificates of occupancy or compliance.
Move In and Enjoy:
• Once all inspections and approvals are received, you can move into your new kitchen addition and start enjoying it.
Remember that every kitchen addition project is unique, so adapt this outline to your specific needs and circumstances. Consulting with professionals and obtaining the required permits and inspections is crucial to a successful and safe project.
 Talon Construction Inc.
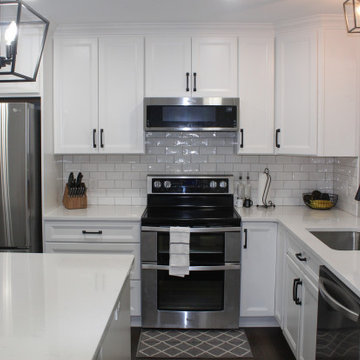
Designing and building a kitchen addition is a complex process that involves multiple steps and considerations. Here is a general outline to help you get started on your kitchen addition project:
Define Your Goals and Budget:
• Determine the purpose of the kitchen addition. Is it for more cooking space, a dining area, or a combination of both?
• Establish a realistic budget for your project. Consider all costs, including construction, permits, materials, and furnishings.
Hire a Design Professional:
• Seek the services of a design build company who specializes in kitchen additions.
• Discuss your vision, needs, and budget with the design professional to create a design concept.
Site Evaluation:
• Assess the existing space and structural condition of your home to ensure it can support the addition.
• Consider factors like zoning regulations, setbacks, and building codes.
Design Development:
• Collaborate with your design professional to refine the concept, including the layout, size, and architectural style.
• Choose materials, finishes, and fixtures that fit your design and budget.
Obtain Permits:
• Consult with your local design build contractor to determine the necessary permits and approvals.
• Prepare and submit all required documents, including architectural drawings and engineering plans.
Create Construction Documents:
• Work with your design build professional to develop detailed construction drawings and specifications.
• These documents will serve as a guide for contractors during construction.
Hire a design build contractor:
• Check references, credentials, and licenses before selecting a contractor.
• Sign a detailed contract that outlines the scope of work, timeline, and payment schedule.
Construction Phase:
• Demolition: If needed, remove any existing structures or walls.
• Foundation: Construct the foundation for the addition.
• Framing: Build the structural framework of the addition.
• Plumbing, Electrical, and HVAC: Install or update utilities as required.
• Insulation: Ensure proper insulation for energy efficiency.
• Drywall and Finish Work: Complete the walls and ceilings.
• Flooring and Cabinetry: Install flooring and kitchen cabinets.
• Appliances and Fixtures: Add appliances, plumbing fixtures, and lighting.
• Paint and Finish: Apply paint and finishes to achieve the desired look.
• Final Inspection: Schedule inspections to ensure compliance with building codes.
Final Inspections and Approvals:
• Arrange for final inspections to ensure the addition meets all safety and code requirements.
• Obtain any necessary certificates of occupancy or compliance.
Move In and Enjoy:
• Once all inspections and approvals are received, you can move into your new kitchen addition and start enjoying it.
Remember that every kitchen addition project is unique, so adapt this outline to your specific needs and circumstances. Consulting with professionals and obtaining the required permits and inspections is crucial to a successful and safe project.
 Talon Construction Inc.
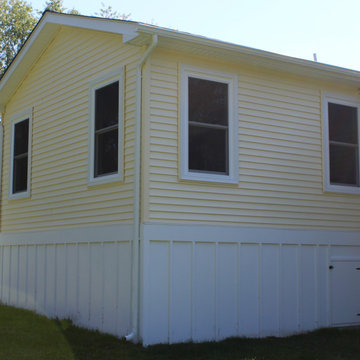
Designing and building a kitchen addition is a complex process that involves multiple steps and considerations. Here is a general outline to help you get started on your kitchen addition project:
Define Your Goals and Budget:
• Determine the purpose of the kitchen addition. Is it for more cooking space, a dining area, or a combination of both?
• Establish a realistic budget for your project. Consider all costs, including construction, permits, materials, and furnishings.
Hire a Design Professional:
• Seek the services of a design build company who specializes in kitchen additions.
• Discuss your vision, needs, and budget with the design professional to create a design concept.
Site Evaluation:
• Assess the existing space and structural condition of your home to ensure it can support the addition.
• Consider factors like zoning regulations, setbacks, and building codes.
Design Development:
• Collaborate with your design professional to refine the concept, including the layout, size, and architectural style.
• Choose materials, finishes, and fixtures that fit your design and budget.
Obtain Permits:
• Consult with your local design build contractor to determine the necessary permits and approvals.
• Prepare and submit all required documents, including architectural drawings and engineering plans.
Create Construction Documents:
• Work with your design build professional to develop detailed construction drawings and specifications.
• These documents will serve as a guide for contractors during construction.
Hire a design build contractor:
• Check references, credentials, and licenses before selecting a contractor.
• Sign a detailed contract that outlines the scope of work, timeline, and payment schedule.
Construction Phase:
• Demolition: If needed, remove any existing structures or walls.
• Foundation: Construct the foundation for the addition.
• Framing: Build the structural framework of the addition.
• Plumbing, Electrical, and HVAC: Install or update utilities as required.
• Insulation: Ensure proper insulation for energy efficiency.
• Drywall and Finish Work: Complete the walls and ceilings.
• Flooring and Cabinetry: Install flooring and kitchen cabinets.
• Appliances and Fixtures: Add appliances, plumbing fixtures, and lighting.
• Paint and Finish: Apply paint and finishes to achieve the desired look.
• Final Inspection: Schedule inspections to ensure compliance with building codes.
Final Inspections and Approvals:
• Arrange for final inspections to ensure the addition meets all safety and code requirements.
• Obtain any necessary certificates of occupancy or compliance.
Move In and Enjoy:
• Once all inspections and approvals are received, you can move into your new kitchen addition and start enjoying it.
Remember that every kitchen addition project is unique, so adapt this outline to your specific needs and circumstances. Consulting with professionals and obtaining the required permits and inspections is crucial to a successful and safe project.
Find the right local pro for your project
 Talon Construction Inc.
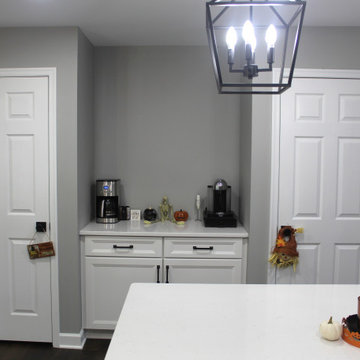
Designing and building a kitchen addition is a complex process that involves multiple steps and considerations. Here is a general outline to help you get started on your kitchen addition project:
Define Your Goals and Budget:
• Determine the purpose of the kitchen addition. Is it for more cooking space, a dining area, or a combination of both?
• Establish a realistic budget for your project. Consider all costs, including construction, permits, materials, and furnishings.
Hire a Design Professional:
• Seek the services of a design build company who specializes in kitchen additions.
• Discuss your vision, needs, and budget with the design professional to create a design concept.
Site Evaluation:
• Assess the existing space and structural condition of your home to ensure it can support the addition.
• Consider factors like zoning regulations, setbacks, and building codes.
Design Development:
• Collaborate with your design professional to refine the concept, including the layout, size, and architectural style.
• Choose materials, finishes, and fixtures that fit your design and budget.
Obtain Permits:
• Consult with your local design build contractor to determine the necessary permits and approvals.
• Prepare and submit all required documents, including architectural drawings and engineering plans.
Create Construction Documents:
• Work with your design build professional to develop detailed construction drawings and specifications.
• These documents will serve as a guide for contractors during construction.
Hire a design build contractor:
• Check references, credentials, and licenses before selecting a contractor.
• Sign a detailed contract that outlines the scope of work, timeline, and payment schedule.
Construction Phase:
• Demolition: If needed, remove any existing structures or walls.
• Foundation: Construct the foundation for the addition.
• Framing: Build the structural framework of the addition.
• Plumbing, Electrical, and HVAC: Install or update utilities as required.
• Insulation: Ensure proper insulation for energy efficiency.
• Drywall and Finish Work: Complete the walls and ceilings.
• Flooring and Cabinetry: Install flooring and kitchen cabinets.
• Appliances and Fixtures: Add appliances, plumbing fixtures, and lighting.
• Paint and Finish: Apply paint and finishes to achieve the desired look.
• Final Inspection: Schedule inspections to ensure compliance with building codes.
Final Inspections and Approvals:
• Arrange for final inspections to ensure the addition meets all safety and code requirements.
• Obtain any necessary certificates of occupancy or compliance.
Move In and Enjoy:
• Once all inspections and approvals are received, you can move into your new kitchen addition and start enjoying it.
Remember that every kitchen addition project is unique, so adapt this outline to your specific needs and circumstances. Consulting with professionals and obtaining the required permits and inspections is crucial to a successful and safe project.

 Moderne Builders
Gorgeous master bath with dramatic retro "wave" tile. Peak Photography
Example of a 1950s bathroom design in Los Angeles
Example of a 1950s bathroom design in Los Angeles
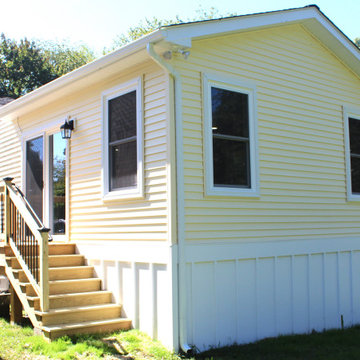 Talon Construction Inc.
Designing and building a kitchen addition is a complex process that involves multiple steps and considerations. Here is a general outline to help you get started on your kitchen addition project:
Define Your Goals and Budget:
• Determine the purpose of the kitchen addition. Is it for more cooking space, a dining area, or a combination of both?
• Establish a realistic budget for your project. Consider all costs, including construction, permits, materials, and furnishings.
Hire a Design Professional:
• Seek the services of a design build company who specializes in kitchen additions.
• Discuss your vision, needs, and budget with the design professional to create a design concept.
Site Evaluation:
• Assess the existing space and structural condition of your home to ensure it can support the addition.
• Consider factors like zoning regulations, setbacks, and building codes.
Design Development:
• Collaborate with your design professional to refine the concept, including the layout, size, and architectural style.
• Choose materials, finishes, and fixtures that fit your design and budget.
Obtain Permits:
• Consult with your local design build contractor to determine the necessary permits and approvals.
• Prepare and submit all required documents, including architectural drawings and engineering plans.
Create Construction Documents:
• Work with your design build professional to develop detailed construction drawings and specifications.
• These documents will serve as a guide for contractors during construction.
Hire a design build contractor:
• Check references, credentials, and licenses before selecting a contractor.
• Sign a detailed contract that outlines the scope of work, timeline, and payment schedule.
Construction Phase:
• Demolition: If needed, remove any existing structures or walls.
• Foundation: Construct the foundation for the addition.
• Framing: Build the structural framework of the addition.
• Plumbing, Electrical, and HVAC: Install or update utilities as required.
• Insulation: Ensure proper insulation for energy efficiency.
• Drywall and Finish Work: Complete the walls and ceilings.
• Flooring and Cabinetry: Install flooring and kitchen cabinets.
• Appliances and Fixtures: Add appliances, plumbing fixtures, and lighting.
• Paint and Finish: Apply paint and finishes to achieve the desired look.
• Final Inspection: Schedule inspections to ensure compliance with building codes.
Final Inspections and Approvals:
• Arrange for final inspections to ensure the addition meets all safety and code requirements.
• Obtain any necessary certificates of occupancy or compliance.
Move In and Enjoy:
• Once all inspections and approvals are received, you can move into your new kitchen addition and start enjoying it.
Remember that every kitchen addition project is unique, so adapt this outline to your specific needs and circumstances. Consulting with professionals and obtaining the required permits and inspections is crucial to a successful and safe project.
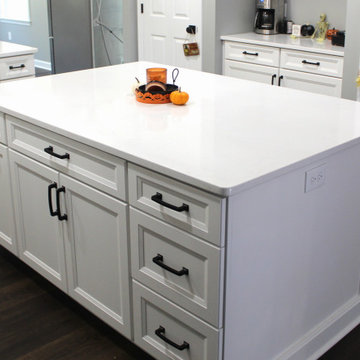 Talon Construction Inc.
Designing and building a kitchen addition is a complex process that involves multiple steps and considerations. Here is a general outline to help you get started on your kitchen addition project:
Define Your Goals and Budget:
• Determine the purpose of the kitchen addition. Is it for more cooking space, a dining area, or a combination of both?
• Establish a realistic budget for your project. Consider all costs, including construction, permits, materials, and furnishings.
Hire a Design Professional:
• Seek the services of a design build company who specializes in kitchen additions.
• Discuss your vision, needs, and budget with the design professional to create a design concept.
Site Evaluation:
• Assess the existing space and structural condition of your home to ensure it can support the addition.
• Consider factors like zoning regulations, setbacks, and building codes.
Design Development:
• Collaborate with your design professional to refine the concept, including the layout, size, and architectural style.
• Choose materials, finishes, and fixtures that fit your design and budget.
Obtain Permits:
• Consult with your local design build contractor to determine the necessary permits and approvals.
• Prepare and submit all required documents, including architectural drawings and engineering plans.
Create Construction Documents:
• Work with your design build professional to develop detailed construction drawings and specifications.
• These documents will serve as a guide for contractors during construction.
Hire a design build contractor:
• Check references, credentials, and licenses before selecting a contractor.
• Sign a detailed contract that outlines the scope of work, timeline, and payment schedule.
Construction Phase:
• Demolition: If needed, remove any existing structures or walls.
• Foundation: Construct the foundation for the addition.
• Framing: Build the structural framework of the addition.
• Plumbing, Electrical, and HVAC: Install or update utilities as required.
• Insulation: Ensure proper insulation for energy efficiency.
• Drywall and Finish Work: Complete the walls and ceilings.
• Flooring and Cabinetry: Install flooring and kitchen cabinets.
• Appliances and Fixtures: Add appliances, plumbing fixtures, and lighting.
• Paint and Finish: Apply paint and finishes to achieve the desired look.
• Final Inspection: Schedule inspections to ensure compliance with building codes.
Final Inspections and Approvals:
• Arrange for final inspections to ensure the addition meets all safety and code requirements.
• Obtain any necessary certificates of occupancy or compliance.
Move In and Enjoy:
• Once all inspections and approvals are received, you can move into your new kitchen addition and start enjoying it.
Remember that every kitchen addition project is unique, so adapt this outline to your specific needs and circumstances. Consulting with professionals and obtaining the required permits and inspections is crucial to a successful and safe project.
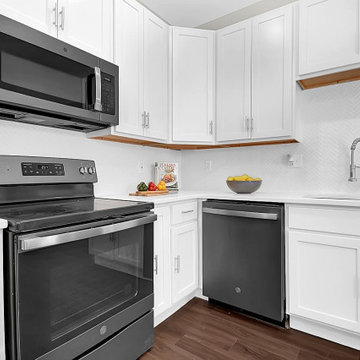
Sponsored
Columbus, OH
We Design, Build and Renovate

CHC & Family Developments
Industry Leading General Contractors in Franklin County, Ohio
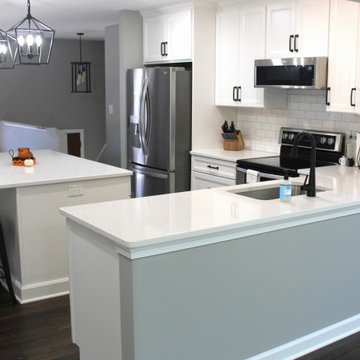 Talon Construction Inc.
Designing and building a kitchen addition is a complex process that involves multiple steps and considerations. Here is a general outline to help you get started on your kitchen addition project:
Define Your Goals and Budget:
• Determine the purpose of the kitchen addition. Is it for more cooking space, a dining area, or a combination of both?
• Establish a realistic budget for your project. Consider all costs, including construction, permits, materials, and furnishings.
Hire a Design Professional:
• Seek the services of a design build company who specializes in kitchen additions.
• Discuss your vision, needs, and budget with the design professional to create a design concept.
Site Evaluation:
• Assess the existing space and structural condition of your home to ensure it can support the addition.
• Consider factors like zoning regulations, setbacks, and building codes.
Design Development:
• Collaborate with your design professional to refine the concept, including the layout, size, and architectural style.
• Choose materials, finishes, and fixtures that fit your design and budget.
Obtain Permits:
• Consult with your local design build contractor to determine the necessary permits and approvals.
• Prepare and submit all required documents, including architectural drawings and engineering plans.
Create Construction Documents:
• Work with your design build professional to develop detailed construction drawings and specifications.
• These documents will serve as a guide for contractors during construction.
Hire a design build contractor:
• Check references, credentials, and licenses before selecting a contractor.
• Sign a detailed contract that outlines the scope of work, timeline, and payment schedule.
Construction Phase:
• Demolition: If needed, remove any existing structures or walls.
• Foundation: Construct the foundation for the addition.
• Framing: Build the structural framework of the addition.
• Plumbing, Electrical, and HVAC: Install or update utilities as required.
• Insulation: Ensure proper insulation for energy efficiency.
• Drywall and Finish Work: Complete the walls and ceilings.
• Flooring and Cabinetry: Install flooring and kitchen cabinets.
• Appliances and Fixtures: Add appliances, plumbing fixtures, and lighting.
• Paint and Finish: Apply paint and finishes to achieve the desired look.
• Final Inspection: Schedule inspections to ensure compliance with building codes.
Final Inspections and Approvals:
• Arrange for final inspections to ensure the addition meets all safety and code requirements.
• Obtain any necessary certificates of occupancy or compliance.
Move In and Enjoy:
• Once all inspections and approvals are received, you can move into your new kitchen addition and start enjoying it.
Remember that every kitchen addition project is unique, so adapt this outline to your specific needs and circumstances. Consulting with professionals and obtaining the required permits and inspections is crucial to a successful and safe project.

 Moss Yaw Design studio
Engineered cedar siding creates beautiful gray-blue tones at the exterior of the home, while adding a textural element to activate the simple exterior design.
 Patagonia Development, LLC
PROJECT SCOPE & OBJECTIVES
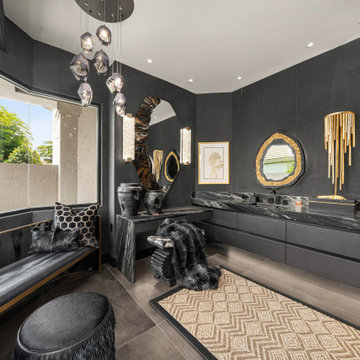
The homeowners are avid admirers of the Versace lifestyle and aesthetic and challenged our team to create a highly personalized primary suite that embodied the drama, sophistication, glamour, and artistic expression associated with the iconic fashion house. The objective was not simply to renovate an aging bathroom, but to completely reimagine the entire primary suite experience—including both the bathroom and adjoining walk-in closet—as a luxury wellness and dressing retreat.
The existing bathroom and closet featured traditional finishes, compartmentalized spaces, builder-grade storage solutions, and a dated design vocabulary that no longer reflected the homeowners’ tastes or lifestyle. The scope of work included a complete demolition and redesign of the primary bathroom and custom walk-in closet, encompassing all finishes, cabinetry, plumbing fixtures, lighting, architectural details, decorative elements, custom storage systems, and specialty millwork.
The design intent centered on creating a bold, immersive environment utilizing dramatic monochromatic tones, custom fabricated elements, statement lighting, oversized stone applications, curated artwork, and a sophisticated interplay of texture and materiality. Every component was carefully selected to contribute to a cohesive luxury experience where the bathroom and closet function as a unified extension of one another.
The resulting design transformed a conventional primary suite into a highly customized sanctuary that reflects the owners’ passion for fashion, art, luxury, and contemporary design.
PROJECT CHALLENGES
One of the primary challenges was translating the essence of the Versace brand into a residential environment without creating a literal or themed interpretation. The goal was to capture the emotion, elegance, and drama associated with high fashion while ensuring the spaces remained timeless, refined, and highly functional.
Another significant challenge involved balancing a predominantly dark color palette throughout both the bathroom and dressing room environments. Dark materials can easily feel heavy or oppressive if not carefully executed. Particular attention had to be given to lighting design, material selection, visual layering, and texture to ensure the spaces remained inviting while maintaining their dramatic character.
The walk-in closet presented its own unique design challenge. The owners desired a dressing room that would function as an extension of the luxury bathroom experience rather than a separate utilitarian storage area. The challenge was to transform a standard builder-grade closet into a sophisticated fashion-inspired environment capable of displaying clothing, handbags, accessories, and collectibles in a manner consistent with the overall design vision.
Additionally, the project required the successful integration of numerous statement elements—including oversized stone surfaces, custom lighting installations, decorative mirrors, artwork, architectural wall treatments, bespoke cabinetry, and specialty storage systems—while maintaining visual harmony and preventing the space from feeling overly busy or cluttered.
PROJECT SOLUTIONS
To achieve the desired aesthetic, our team developed a comprehensive design strategy centered around contrast, texture, craftsmanship, and visual drama. A sophisticated palette of charcoal, black, graphite, and metallic gold tones was employed throughout the suite, creating an atmosphere reminiscent of luxury hospitality environments and haute couture fashion houses.
The focal point of the bathroom became the sculptural freestanding soaking tub positioned on a custom stone platform with LED lighting and framed by an oversized feature wall clad in dramatically veined stone. This installation establishes an immediate sense of luxury and serves as the visual anchor of the entire suite.
The walk-in closet was reimagined as a boutique-inspired dressing room featuring custom-designed black oak cabinetry, integrated LED lighting, specialty display shelving, illuminated storage niches, custom accessory organization, and a central dressing vanity. The design intentionally blurs the line between residential closet and luxury retail environment, allowing fashion, accessories, and personal collections to become part of the overall design composition.
To offset the darker finishes throughout both spaces, layered lighting was incorporated using recessed illumination, integrated LED accents, decorative fixtures, display lighting, and reflective surfaces. These elements create depth and dimension while highlighting the richness of the materials and craftsmanship.
Custom fabricated cabinetry, oversized stone surfaces, designer mirrors, curated artwork, architectural wall treatments, and carefully selected decorative elements were utilized throughout the suite to create a fully immersive environment where every detail contributes to a unified design narrative.
The completed project successfully transformed a dated primary suite into an extraordinary luxury retreat that merges the worlds of fashion, hospitality, wellness, and residential design. The result is a highly personalized environment that reflects the homeowners’ lifestyle while demonstrating exceptional craftsmanship, innovative design thinking, and meticulous execution.

 Wolfgang Pichler Design Inc.
A vacant, worn office space should be transformed into a show apartment / showroom. The existing space had been used as an office structure since the 1960s. Located on the 4th floor of a ten-floor reinforced concrete skeleton, the area is already high enough to receive a great amount of light, which is particularly noticeable at dawn and dusk: sunrises and sunsets conjure up the most spellbinding blends of light.
The existing structure and also the technical equipment were completely outdated and needed to be completely rebuilt: suspended ceilings were removed and walls changed. The result is a modern city apartment of almost 100 m2 (about 1,070 sqft) – divided into a large living space, 2 rooms, 1 bathroom, 1 powder room and 1 utility room. The existing window facades could not be changed, but they are part of the concept anyway, namely to bring as much light as possible into the room. A controlled ventilation system ensures optimal air quality even with closed windows. The central kitchen element serves as a kind of separation of the living area and the dining area. Here customers and guests are served, people communicate, cook together, drink a glass of wine. Clients experience living.
The rough reinforced concrete ribbed slaps were uncovered and painted white to give the room more height, which is accentuated by the lighting concept with ceiling-mounted spotlights. The dark oak floor creates a successful contrast to the brightly designed rooms. The wittily positioned pedestal areas hide all technical elements, such as the supply air openings of the living room ventilation. Flush-fitting door elements in the walls with a chalked brick look show in detail the special feature of the room. The central wall elements were deliberately not pulled up to the ceiling, but are separated by a glass element to show the continuity of the construction.
Most of the furniture was designed by Wolfgang Pichler. Within the course of this project he was able to implement his holistic approach in the field of construction technology, architecture and furniture design and skillfully combine it with design classics. Scandinavian classics can be found in the concept just as much as pieces he collected during his career and furniture he developed for the company VITEO, which he founded in 2002. The project illustrates the added value of an architectural holistic approach.

 Eldorado Stone
Greg Pinn, Vice President of Pinn Brothers Fine Homes of San Jose, California, brought his dream to fruition with the completion of his own French Country Chateau. The level of quality and the attention to detail found in every aspect of his residence is a tribute to the craftsmanship of the professionals who helped build it as well as the beautiful materials that made it possible. When selecting the stone and brick for the home’s exterior, Pinn and his fellow builders contructed a full-scale wall that had four different mockups of various stone profiles and colors before finalizing their selection. Upon taking all the possibilities into consideration, Eldorado’s Fieldledge and Limestone profiles in addition to the Bracciano RomaBrick proved to be just the product their team was looking for, all of which were installed using an overgrout technique.
Having worked with Eldorado exclusively for close to 10 years on all of his projects, Pinn had Eldorado in mind when the architectural plans were in the beginning stages of development and felt confident from the get-go that Eldorado would be their stone and brick of choice.
By working with Eldorado, Pinn was able to implement the look of natural stone in several places throughout the home. There was extensive use of both stone and brick on the retaining walls of his yard, around the pook, the outdoor living space, and on all the chimney stacks. He also dressed the majority of the home’s exterior in Eldorado’s stone and brick because of its affordability and ease of installation versus natural stone. An added bonus was that Pinn won’t have difficulty finding similar stones if need be like he would using stone from a quarry. He can rely on the consistency and availability of Eldorado, regardless of the amount of time that goes by. According to Pinn, Eldorado Stone made all the difference in the success of creating his very own French Country Chateau.
Eldorado Stone Profile Featured: Austin Cream Limestone (20%), Custom Large Fieldledge (20%) and Custom Fieldledge (60%), both in Austin Cream color with an overgrout technique
Eldorado Brick Profile Featured: Bracciano RomaBrick with an overgrout technique
Builder: Pinn Brothers Fine Homes, San Jose, CA
Architect: Knitter & Associates, Newport Beach, CA
Website: www.knitter.com
Landscape Architect: Robert Mowat & Associates, San Francisco, CA
Website: www.rmalandscape.com
Mason: San Marino Masonry, Anaheim, CA
Website: www.vecompanies.com
Design Consultant: Marni Leis, San Francisco, CA

 Rae Muranski
Embarking on a new journey with a client is always an exciting and inspiring time for Moderne Living. Building a relationship and translating our clients' vision calls for trust, collaboration and guidance, and it's a role we take immense pleasure and pride in fulfilling.
Moderne Living was recently commissioned to carry out a transitional design project for a North Carolina home, which on the face of it could have presented obvious challenges due to the geographical difference. Not believing that distance should be an issue, we rose to the challenge. Through careful consultation, the client revealed their vision, in turn guiding our choices on their behalf. This led us to select the Euforia range by Montbel, whose design ethos encapsulates tradition, innovation and dynamism.
We set out by developing a relationship with the client through telephone conversations, an investment in time that was absolutely crucial in contributing to the success of the project. Using the client's descriptions, ideas and floor plan, along with the talents of our designer, we were able to understand, give shape to and define the vision the client had in mind for their home.
We chose Euforia dining chairs, armchairs and stools because their collections offer modern elegance perfectly balanced with supreme comfort. The range takes the best of classical design and reimagines it with character, flair and modern touches. Euforia blends traditional design hallmarks including tufting (buttoned upholstery) with familiar silhouettes, solid wood frames and upholstered seats and backs. Color options are varied with neutral tones or rich, bold shades. Modern details such as chrome footrests reminds us of the harmony that can be achieved when you blend the contemporary and classic.
Each new client brings with them an ideal for their home, be it on a small or larger scale, and this helps shape our approach to each client and project. We understand that our clients' visions and ideals for their home are as diverse and individual as they are, calling for Moderne Living to offer and deliver diversified styles.
As we look back on this project, what we will take away from the experience is not only the professional and personal satisfaction of realizing the client's vision, and doing so without the benefit of visiting the space, but also the experience of being able to draw on what inspires us. Delivering a diversity of styles for our clients, be it contemporary, transitional or modern, remains a great source of creative energy, and continues to inspire and motivate us in our work.
Sponsored
Columbus, OH
We Design, Build and Renovate
CHC & Family Developments
Industry Leading General Contractors in Franklin County, Ohio
 Kansas City Masonry /City Of Fountains
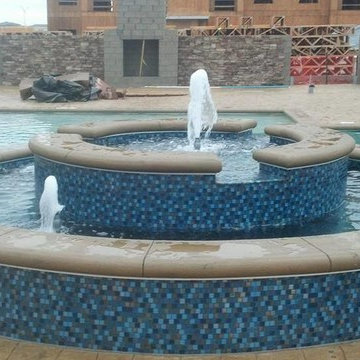
We Install Kansas City Water FeatureS,Water Walls & Waterfalls Kansas City Bubble Wall Panels
Rain Curtain Water Features landscape
Rain Curtain Waterfalls Kansas City
Bubble Wall Panels
Wall Mounted Water Walls
Acrylic Water Walls
Glass & Mirror Waterfalls
Stainless Steel Waterfalls Kansas City
Copper Water Walls
Stone & Tile Water Walls
Water Feature Displays
Bubble Tubes & Columns
Reflection Pools Kansas City
Aquariums
Water Sculptures & Art Kansas City
 Wolfgang Pichler Design Inc.
A vacant, worn office space should be transformed into a show apartment / showroom. The existing space had been used as an office structure since the 1960s. Located on the 4th floor of a ten-floor reinforced concrete skeleton, the area is already high enough to receive a great amount of light, which is particularly noticeable at dawn and dusk: sunrises and sunsets conjure up the most spellbinding blends of light.
The existing structure and also the technical equipment were completely outdated and needed to be completely rebuilt: suspended ceilings were removed and walls changed. The result is a modern city apartment of almost 100 m2 (about 1,070 sqft) – divided into a large living space, 2 rooms, 1 bathroom, 1 powder room and 1 utility room. The existing window facades could not be changed, but they are part of the concept anyway, namely to bring as much light as possible into the room. A controlled ventilation system ensures optimal air quality even with closed windows. The central kitchen element serves as a kind of separation of the living area and the dining area. Here customers and guests are served, people communicate, cook together, drink a glass of wine. Clients experience living.
The rough reinforced concrete ribbed slaps were uncovered and painted white to give the room more height, which is accentuated by the lighting concept with ceiling-mounted spotlights. The dark oak floor creates a successful contrast to the brightly designed rooms. The wittily positioned pedestal areas hide all technical elements, such as the supply air openings of the living room ventilation. Flush-fitting door elements in the walls with a chalked brick look show in detail the special feature of the room. The central wall elements were deliberately not pulled up to the ceiling, but are separated by a glass element to show the continuity of the construction.
Most of the furniture was designed by Wolfgang Pichler. Within the course of this project he was able to implement his holistic approach in the field of construction technology, architecture and furniture design and skillfully combine it with design classics. Scandinavian classics can be found in the concept just as much as pieces he collected during his career and furniture he developed for the company VITEO, which he founded in 2002. The project illustrates the added value of an architectural holistic approach.
 Wolfgang Pichler Design Inc.
A vacant, worn office space should be transformed into a show apartment / showroom. The existing space had been used as an office structure since the 1960s. Located on the 4th floor of a ten-floor reinforced concrete skeleton, the area is already high enough to receive a great amount of light, which is particularly noticeable at dawn and dusk: sunrises and sunsets conjure up the most spellbinding blends of light.
The existing structure and also the technical equipment were completely outdated and needed to be completely rebuilt: suspended ceilings were removed and walls changed. The result is a modern city apartment of almost 100 m2 (about 1,070 sqft) – divided into a large living space, 2 rooms, 1 bathroom, 1 powder room and 1 utility room. The existing window facades could not be changed, but they are part of the concept anyway, namely to bring as much light as possible into the room. A controlled ventilation system ensures optimal air quality even with closed windows. The central kitchen element serves as a kind of separation of the living area and the dining area. Here customers and guests are served, people communicate, cook together, drink a glass of wine. Clients experience living.
The rough reinforced concrete ribbed slaps were uncovered and painted white to give the room more height, which is accentuated by the lighting concept with ceiling-mounted spotlights. The dark oak floor creates a successful contrast to the brightly designed rooms. The wittily positioned pedestal areas hide all technical elements, such as the supply air openings of the living room ventilation. Flush-fitting door elements in the walls with a chalked brick look show in detail the special feature of the room. The central wall elements were deliberately not pulled up to the ceiling, but are separated by a glass element to show the continuity of the construction.
Most of the furniture was designed by Wolfgang Pichler. Within the course of this project he was able to implement his holistic approach in the field of construction technology, architecture and furniture design and skillfully combine it with design classics. Scandinavian classics can be found in the concept just as much as pieces he collected during his career and furniture he developed for the company VITEO, which he founded in 2002. The project illustrates the added value of an architectural holistic approach.
 Wolfgang Pichler Design Inc.
A vacant, worn office space should be transformed into a show apartment / showroom. The existing space had been used as an office structure since the 1960s. Located on the 4th floor of a ten-floor reinforced concrete skeleton, the area is already high enough to receive a great amount of light, which is particularly noticeable at dawn and dusk: sunrises and sunsets conjure up the most spellbinding blends of light.
The existing structure and also the technical equipment were completely outdated and needed to be completely rebuilt: suspended ceilings were removed and walls changed. The result is a modern city apartment of almost 100 m2 (about 1,070 sqft) – divided into a large living space, 2 rooms, 1 bathroom, 1 powder room and 1 utility room. The existing window facades could not be changed, but they are part of the concept anyway, namely to bring as much light as possible into the room. A controlled ventilation system ensures optimal air quality even with closed windows. The central kitchen element serves as a kind of separation of the living area and the dining area. Here customers and guests are served, people communicate, cook together, drink a glass of wine. Clients experience living.
The rough reinforced concrete ribbed slaps were uncovered and painted white to give the room more height, which is accentuated by the lighting concept with ceiling-mounted spotlights. The dark oak floor creates a successful contrast to the brightly designed rooms. The wittily positioned pedestal areas hide all technical elements, such as the supply air openings of the living room ventilation. Flush-fitting door elements in the walls with a chalked brick look show in detail the special feature of the room. The central wall elements were deliberately not pulled up to the ceiling, but are separated by a glass element to show the continuity of the construction.
Most of the furniture was designed by Wolfgang Pichler. Within the course of this project he was able to implement his holistic approach in the field of construction technology, architecture and furniture design and skillfully combine it with design classics. Scandinavian classics can be found in the concept just as much as pieces he collected during his career and furniture he developed for the company VITEO, which he founded in 2002. The project illustrates the added value of an architectural holistic approach.
Sponsored
Columbus, OH
We Design, Build and Renovate
CHC & Family Developments
Industry Leading General Contractors in Franklin County, Ohio
 Cabinet IQ
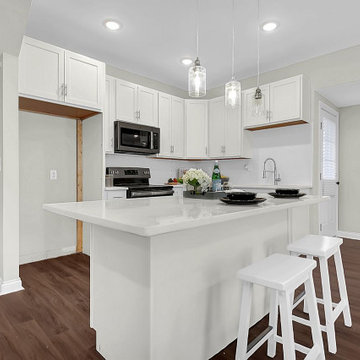
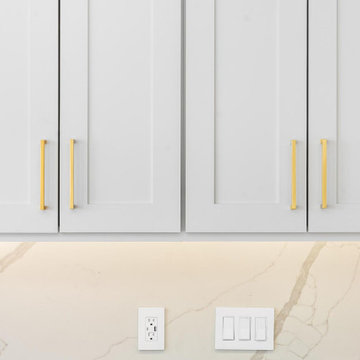
Our clients came to our North Showroom in Cedar Park, TX wanting to completely renovate the outdated cabinets and countertops in their newly purchased home. The flow of the kitchen was not aligning with their new family needs, and the style did not match their modern vision. The dated kitchen left a lot of unused space, and had pain points that disturbed the flow and symmetry of the space. We developed a design to take advantage of the room height, spacious area, and natural light from the bay window nook area.
Our designer Dave met with the clients in the showroom and discovered the needs and wants to make the kitchen remodel a success. After understanding the client’s vision and requirements, they begun the collaboration on their kitchen design. During this phase we concluded we could achieve the kitchen design with in-stock cabinets from Kitchen Cabinet Distributors (KCD), a national recognized in-stock cabinet provider. We could have chosen a custom kitchen cabinetry line, however KCD’s offerings were the perfect fit for the design and allowed for an opportunity to save some of the budget for full quartz backsplash vs. tile. Our designers help you navigate the different lines we carry and are thoughtful to not steer you to more than you need to succeed. The first order of business was to change the orientation of the island, and move its position to frame the new galley arrangement. This would allow for better egress around the island and prevent tight spaces for a busy new kitchen.
Secondly, now was the time to take advantage of the room height and install new stacked wall cabinets with clear glass panels on the top row. This made the kitchen renovation feel more grand, bright, and inviting. The glass provided opportunity to tie in the lighting scheme and lend more warmth to the design. Coupled with the toe kick and under cabinet lights in the base cabinets, the kitchen invites you in. Dave also took full advantage of the kitchen layout by using upper cabinets and no open shelving.
We also wanted to find a new home for the built-in microwave as a stainless hood was now going to frame the cooktop / oven combo. We modified the cabinet in the island to trim in a microwave, at the same time keeping it out of view from the living area. Building on this approach, we also took the trash bin out of the kitchen space and provided a dedicated double trash bin cabinet. Aesthetics were very important in this design.
 Cabinet IQ
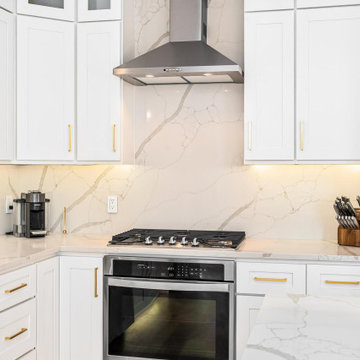
Our clients came to our North Showroom in Cedar Park, TX wanting to completely renovate the outdated cabinets and countertops in their newly purchased home. The flow of the kitchen was not aligning with their new family needs, and the style did not match their modern vision. The dated kitchen left a lot of unused space, and had pain points that disturbed the flow and symmetry of the space. We developed a design to take advantage of the room height, spacious area, and natural light from the bay window nook area.
Our designer Dave met with the clients in the showroom and discovered the needs and wants to make the kitchen remodel a success. After understanding the client’s vision and requirements, they begun the collaboration on their kitchen design. During this phase we concluded we could achieve the kitchen design with in-stock cabinets from Kitchen Cabinet Distributors (KCD), a national recognized in-stock cabinet provider. We could have chosen a custom kitchen cabinetry line, however KCD’s offerings were the perfect fit for the design and allowed for an opportunity to save some of the budget for full quartz backsplash vs. tile. Our designers help you navigate the different lines we carry and are thoughtful to not steer you to more than you need to succeed. The first order of business was to change the orientation of the island, and move its position to frame the new galley arrangement. This would allow for better egress around the island and prevent tight spaces for a busy new kitchen.
Secondly, now was the time to take advantage of the room height and install new stacked wall cabinets with clear glass panels on the top row. This made the kitchen renovation feel more grand, bright, and inviting. The glass provided opportunity to tie in the lighting scheme and lend more warmth to the design. Coupled with the toe kick and under cabinet lights in the base cabinets, the kitchen invites you in. Dave also took full advantage of the kitchen layout by using upper cabinets and no open shelving.
We also wanted to find a new home for the built-in microwave as a stainless hood was now going to frame the cooktop / oven combo. We modified the cabinet in the island to trim in a microwave, at the same time keeping it out of view from the living area. Building on this approach, we also took the trash bin out of the kitchen space and provided a dedicated double trash bin cabinet. Aesthetics were very important in this design.
 Cabinet IQ
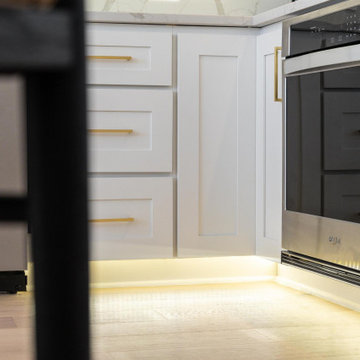
Our clients came to our North Showroom in Cedar Park, TX wanting to completely renovate the outdated cabinets and countertops in their newly purchased home. The flow of the kitchen was not aligning with their new family needs, and the style did not match their modern vision. The dated kitchen left a lot of unused space, and had pain points that disturbed the flow and symmetry of the space. We developed a design to take advantage of the room height, spacious area, and natural light from the bay window nook area.
Our designer Dave met with the clients in the showroom and discovered the needs and wants to make the kitchen remodel a success. After understanding the client’s vision and requirements, they begun the collaboration on their kitchen design. During this phase we concluded we could achieve the kitchen design with in-stock cabinets from Kitchen Cabinet Distributors (KCD), a national recognized in-stock cabinet provider. We could have chosen a custom kitchen cabinetry line, however KCD’s offerings were the perfect fit for the design and allowed for an opportunity to save some of the budget for full quartz backsplash vs. tile. Our designers help you navigate the different lines we carry and are thoughtful to not steer you to more than you need to succeed. The first order of business was to change the orientation of the island, and move its position to frame the new galley arrangement. This would allow for better egress around the island and prevent tight spaces for a busy new kitchen.
Secondly, now was the time to take advantage of the room height and install new stacked wall cabinets with clear glass panels on the top row. This made the kitchen renovation feel more grand, bright, and inviting. The glass provided opportunity to tie in the lighting scheme and lend more warmth to the design. Coupled with the toe kick and under cabinet lights in the base cabinets, the kitchen invites you in. Dave also took full advantage of the kitchen layout by using upper cabinets and no open shelving.
We also wanted to find a new home for the built-in microwave as a stainless hood was now going to frame the cooktop / oven combo. We modified the cabinet in the island to trim in a microwave, at the same time keeping it out of view from the living area. Building on this approach, we also took the trash bin out of the kitchen space and provided a dedicated double trash bin cabinet. Aesthetics were very important in this design.
30