
Search results for "Difficult water" in Home Design Ideas

 Steve Masley Consulting and Design
Jalapeño grown organically in a 7-gallon Smart Pot. This plant produced 69 jalapeños! Photo by Steve Masley
Example of an eclectic home design design in San Francisco
Example of an eclectic home design design in San Francisco
 KingPost Design and Construction
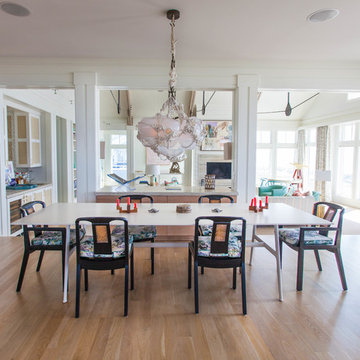
Large beach style light wood floor and brown floor dining room photo in Wilmington with white walls and no fireplace
 Randy Angell Designs
Photographs by Jimi Smith Photography
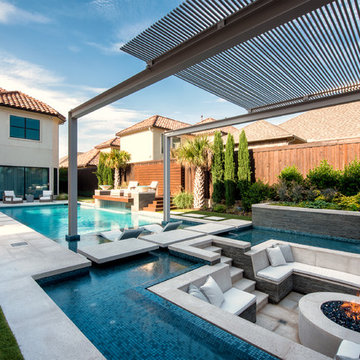
Large tuscan courtyard concrete paver and custom-shaped pool photo in Dallas
Large tuscan courtyard concrete paver and custom-shaped pool photo in Dallas
Find the right local pro for your project
 Pool Environments, Inc.
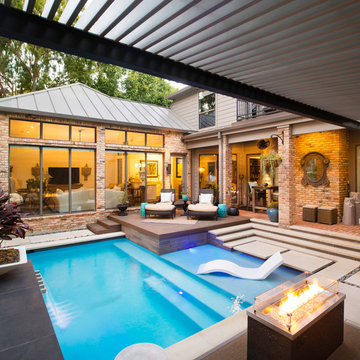
The client purchased this property with grand plans of renovating the entire place; from top to bottom, and from inside to outside. And while the inside canvas was very generous and even somewhat forgiving, the outside space would be anything but.
We wanted to squeeze in as much seating space as possible in their limited courtyard area, without encroaching on the already compact-sized pool. The first and most obvious solution was to get rid of the trees and shrubs that separated this house from its zero-lot-line neighbor. With the addition of Lueder limestone slabs, this alone would free up nearly 120 additional square feet, which happened to be the perfect amount of space for a mobile gas fire pit and sectional sofa. And all of this would make for the perfect place to enjoy the afternoon sunset with the implementation of a custom-built metal pergola standing above it all.
The next problem we saw was that around the patio area, there were too many levels of steps and stairs, which meant that it would have been difficult to have any sort of traditional furniture arrangement. Randy knew that it only made sense to bring in a wood deck that could be mated to the highest level of the patio, thus creating gaining the most continuous amount of flat space that the client was wanting. But even so, that flat space would be limited to a tight "L-shape" around the pool. And knowing this, the client decided that the larger space would be more valuable to them than the spa, so they opted to have a portion of the deck built over it in order to allow for a more generous amount of patio space.
And with the edge of the patio/deck dropping off almost 2 feet to the waterline, it now created the perfect opportunity to have a visually compelling raised wall that could be adorned with different hues of plank-shaped tiles. From inside the pool, the varying shades of brown were a great accent to the wood deck that sat just above.
However, the true visual crowning jewel of this project would end up being the raised back wall along the fence, fully encased in a large format, 24x24 slate grey tile, complete with a custom stainless steel, square-tube scupper bank, installed at just the right height to create the perfect amount of water noise.
But Randy wasn't done just yet. With two entirely new entertaining areas opened up at opposite ends of the pool, the only thing left to do now was to connect them. Knowing that he nor the client wanted to eliminate any more water space, he decided to bring a new traffic pattern right into the pool by way of two "floating", Lueder limestone stepper pads. It would be a visually perfect union of both pool and walking spaces.
The existing steps and walkways were then cut away and replaced with matching Lueder limestone caps and steppers. All remaining gaps were then filled with Mexican beach pebble, which helped to promote a very "zen-like" feel in this outdoor space.
The interior of the pool was coated with Wet Edge Primerastone "Blue Pacific Coast" plaster, and lit up with Pentair GloBrite LED pool lights.
In the end, the client ended up gaining the additional entertaining and seating space that they needed, and the updated, modern feel that they loved.
 Nico van der Meulen Architects
Photography by Barend Roberts and Victoria Pilcher
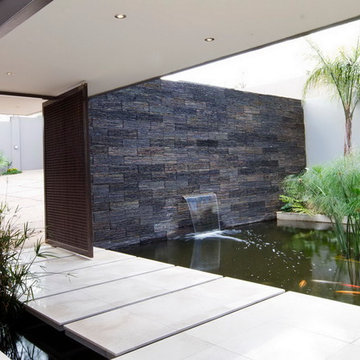
Entryway - contemporary entryway idea in Other
Entryway - contemporary entryway idea in Other
 Scott Lipscomb Landscape Architect (SLLA)
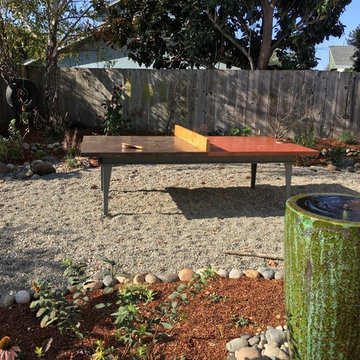
Another angle of the ping pong table. Also included in this picture is water fountain surrounded by river rock.
Photo Credit: Scott Lipscomb
Inspiration for a mid-sized contemporary full sun backyard gravel landscaping in Other for spring.
Inspiration for a mid-sized contemporary full sun backyard gravel landscaping in Other for spring.

Sponsored
Columbus, OH
Free consultation for landscape design!

Peabody Landscape Group
Franklin County's Reliable Landscape Design & Contracting

Photo: Matt Lavin, via Flickr, licensed under Creative Commons Attribution-ShareAlike 2.0 Generic
Cleome serrulata
Photo of a landscaping in Other.
Photo of a landscaping in Other.
 Dig Your Garden Landscape Design
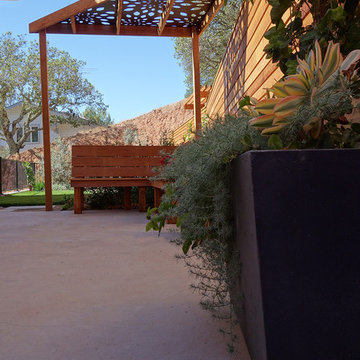
Napa, CA residence, adjacent to a steep rock hillside. My design solutions included a contemporary redwood horizontal fence to help screen the view of the hillside along with arbors for vines that help to break up the long narrow space. I designed a triangular-shaped pergola with decorative panels from "Parasoleil" that serves as an artful focal point while providing interesting shade patterns that casts its delightful shadow along fence and patio and bench below, changing its position as the sun moves throughout the day. The landscape design includes angular planting beds, concrete pavers surrounded by gravel and a small lower-water lawn for the family to enjoy. The photos show the just planted low-water plants, vines and olive trees and again after a couple of months. Drawings, Design and Photos © Eileen Kelly, Dig Your Garden Landscape Design
 Erdmann Exterior Designs
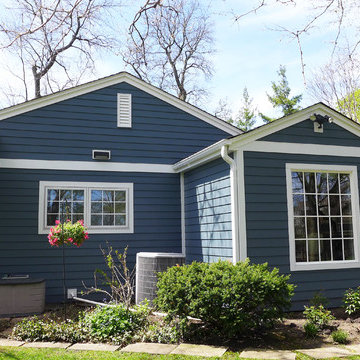
Beechworth Fiberglass/Wood Windows, James Hardie Siding in Evening Blue, James Hardie Trim in Arctic White
Small elegant blue one-story mixed siding gable roof photo in Chicago
Small elegant blue one-story mixed siding gable roof photo in Chicago
 Tile Doctor Ltd
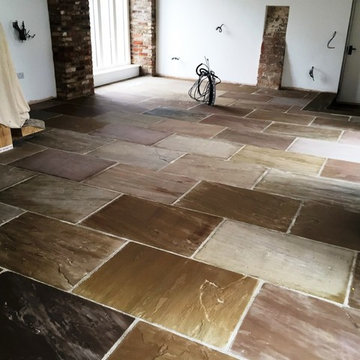
Yorkstone is a variety of Sandstone unique to Yorkshire, and is known for its hard wearing and durable qualities. It was first manufactured during medieval times, but is still used for a range of building and construction purposes including, of course, tiled floors in houses. Yorkstone comes in a variety of natural colours, depending on the mineral makeup of the stone, and means that the tiled floors often have a unique look to them.
This customer, living in the small Yorkshire town of Driffield is the lucky owner of a fantastic new Yorkstone tiled living room floor. Unfortunately, the floor had been installed by an independent builder, as opposed to a professional tiling company, and had been left with no sealer to ensure it would stay looking great for a long time to come. Over time, the lack of a sealer has allowed the dirt to become ingrained in the stone, making it increasingly difficult for the customer to keep the tiles clean. I was called in to bring completion to what was an unfinished job!
As you can see from the photographs, the entire floor was quite dusty and dull looking following the recent installation. To get the tiles clean, I mixed a strong 60-40 mix of Tile Doctor Pro Clean and clean water. Pro Clean is a reliable alkaline cleaner suitable for use on most natural stone floors, including Sandstone, Quarry, and Slate.
The cleaning solution was applied to the floor and left to dwell for 20 minutes, allowing it time to penetrate the stone. Then, using my 17” rotary machine fitted with a black scrubbing pad, I proceeded to deep clean the tiles, leaving them looking immediately cleaner and more vibrant. Any resulting cleaning residue was promptly soaked up using a wet vacuum.
The process was repeated in the more stubborn areas, and I gave the floor a final rinse with water and left it to dry. Typically, we would leave a 12 to 24 hour drying period, depending on whether there is a damp proof membrane installed. However, this floor had underfloor heating and so dried really quickly, allowing me to seal it on the same day.
The customer wished to have a matt, natural finish for the Yorkstone tiled living room, so I applied two coats of Tile Doctor Colour Grow, our impregnating sealer which offers a natural, no-sheen look for textured floors, while providing durable protection against ingrained dirt and stains.
As the name of the product suggests, Colour Grow contains colour intensifying properties which really helped to accentuate the rich variety of colours in the customer’s Yorkstone tiles. The results were fantastic and you can see from the water test we performed after the sealer dried how water now bubbles up on the surface of the stone.
Ronnie Phipps
East Yorkshire Tile Doctor
 Mike Farley Pool Designer, SWD, ASLA
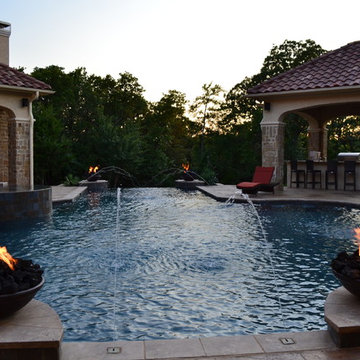
This Eclectic inspired home centers around the courtyard water feature. This feature was not designed to be subtle. Low profile focal points were required from views coming in all directions. The primary view from the entry provides a view down the center of Cannon jets and fire bowls over the vanishing edge. The reflective vanishing edge spa and led lights added to the visual accents. Floating steps connect the pool deck to the spa as well as floating pads cross the infinity two tiered basin. This allows minimal steps from cabana to porch terraces. The lower terrace captures the view as the water cascades down the copper spill edges. Pool barstools provide additional seating in the water adjacent to the cabana. Access was so difficult the pool shell was completed before the house foundation was started, The home changed owners at the framing stage and the selling point of this home was the courtyard water feature. Project designed by Mike Farley. Check out Mike's Reference Site at FarleyPoolDesigns.com
 Mike Farley Pool Designer, SWD, ASLA
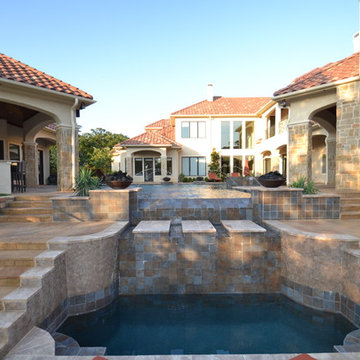
This Eclectic inspired home centers around the courtyard water feature. This feature was not designed to be subtle. Low profile focal points were required from views coming in all directions. The primary view from the entry provides a view down the center of Cannon jets and fire bowls over the vanishing edge. The reflective vanishing edge spa and led lights added to the visual accents. Floating steps connect the pool deck to the spa as well as floating pads cross the infinity two tiered basin. This allows minimal steps from cabana to porch terraces. The lower terrace captures the view as the water cascades down the copper spill edges. Pool barstools provide additional seating in the water adjacent to the cabana. Access was so difficult the pool shell was completed before the house foundation was started, The home changed owners at the framing stage and the selling point of this home was the courtyard water feature. Project designed by Mike Farley. Check out Mike's Reference Site at FarleyPoolDesigns.com
Sponsored
Columbus, OH
Free consultation for landscape design!
Peabody Landscape Group
Franklin County's Reliable Landscape Design & Contracting
 Mindy Khan
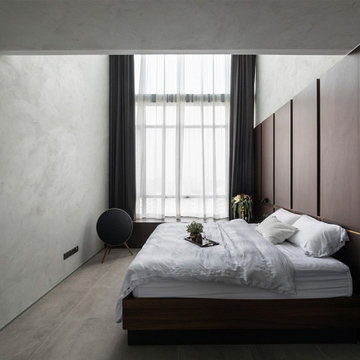
A renovation project doesn’t come cheap. Even if you have a lot of money, it is still considered practical that you set a budget when giving your landed house a makeover. The question is, what should you keep and what should you restore when doing a renovation project?
If you are keen on giving your landed house interior design an upgrade, planning early is considered crucial. That means you need to figure out the right budget, employ the right team, and identify a timeline for completion ahead of time.
During the planning stage, it is also vital that you identify which areas in your house to keep as is and which ones to repair and restore. If you need some beneficial guidance, here’s what some experts have to say:
Retain the existing flooring when it doesn’t have major cracks or damage
In landed house interior design, floors are not only considered the foundation of every landed home, they are also expected to be the most resilient. While it can be tempting to add floor embellishments like tiles to enhance your home’s aesthetic value, it shouldn’t be a priority if it does not have any massive damage or cracks.
This is especially true if you’re trying to keep your spending to a minimum. If anything, there are other options you can look into to keep your flooring attractive. For instance, ensure they are cleaned and polished regularly. You will not only make them look well-maintained, you will also help boost their longevity.
Replace plumbing fixtures when needed
Plumbing fixtures belong to a list of items in the house that are most exposed to wear and tear. Even when not in use, water passes through the pipes, faucets, and other bathroom and kitchen plumbing accessories.
Hard water also passes through plumbing fixtures. When the water has high mineral content, dried up water might create mineral deposits such as limestone, mildew, and rust.
These minerals are not only difficult to remove, they can also eventually eat into the metal and steel pipes. That being said, plumbing fixtures need to be replaced on a routine basis.
Also, a broken faucet or a leaking pipe will not only cause a possible disruption in the household, they can also cause some damage if not attended to right away. Save yourself from the headache by having them checked regularly and replaced right away when needed.
Always check the doors
Among the most underrated parts of the house are the doors. We open and close them several times a day. We sometimes bang them shut, leave them ajar, or let the breeze close them with a loud thud.
While they are often made to last for years, doors and their fixtures are also prone to warping. So it shouldn’t come as a surprise if one day you’ll discover you cannot close the door anymore because the door itself no longer fits and locks. To avoid a similar scenario, check your doors every now and then.
If the door itself doesn’t fit anymore, then ensure you include it in your renovation list. In addition, knobs and handles, including hinges, that are already deformed or no longer functional should be immediately replaced as well. Also, if your doorknob is prone to jamming or if your key no longer fits and turns, consider it your cue to have them replaced.
 Tile Doctor Ltd
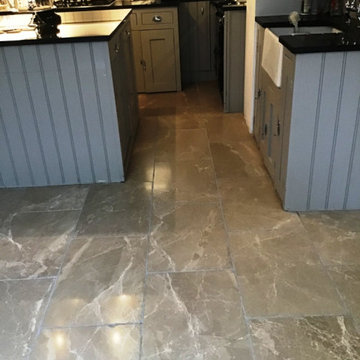
This Limestone tiled floor installed in a kitchen and family room at a property in Wellingborough is a great example of how this material can lose its appearance without a regular maintenance plan in place.
The customer called me as not only was she concerned that the floor had lost its lustre the grey grout had become very stained and almost black in heavy traffic areas, in fact my customer had originally asked about re-grouting but I was confident it could be cleaned.
I provided a quote which they were happy to accept.
The area was a nice wide 6 metre by 5 metre space and except for a few items of furniture that would need moving around there were relatively few obstacles. I reasoned the most efficient way to restore the polished appearance of the Limestone would be to use a set of diamond encrusted Burnishing Pads. These are fitted to a rotary machine and applied to the stone in sequence from coarse to smooth. It’s an effective process that cuts back the layer of dirt on the floor and then we build back up the polish.
We started burnishing the Limestone with a coarse 400-grit pad fitted to a rotary machine and applied with a little water for lubrication. The coarse pad is very good at removing dirt and old sealers from stone and once completed the resultant surface water and loose dirt is removed using a wet vacuum.
At this point I turned my attention to the badly stained grout lines, and applied a strong solution of Tile Doctor Pro-Clean which was scrubbed in along the grout lines using a stiff grout brush, this is necessary as the recessed nature of the grout makes it difficult for the rotary pads to reach it.
I then repeated the burnishing process with the medium 800-grit pad and fine 1500-grit pad, the 800-grit pad removes any small surface scratches and the 1500-grit further refines the look of the Limestone slowly restoring its polished appearance.
After the whole floor had been burnished in this way it was given a further rinse with water and the soil extracted as before. I then inspected the floor to see if more work would be needed.
I was not fully happy with how some of the grout lines had responded, some were still slightly stained, and some marks were visible in the high traffic areas. I had already discussed on my initial visit with the client that this might be the case and it was agreed between us that should this be the case I would apply a Tile Doctor Grout Colourant in Light Grey to recolour all the grout lines and achieve a uniform finish.
The stone and grout was still damp from cleaning and polishing, so I decided to leave the grout colouring until the following day.
On day two I started by grout recolouring all the grout lines, it’s a straight forward process but can be a little tedious where there is a lot of grout to cover. Once complete I allowed the grout colour to dry for a couple of hours before moving onto the next step.
The last pad to be applied in the stone burnishing process is the very fine 3000-grit polishing pad which is applied dry to the tiles using a small amount of water sprayed onto the floor and leaves the stone dry and with a polished silk finish.
The floor was then sealed using two coats of Tile Doctor Ultra Seal Sealant allowing the first coat to dry before applying the second. Ultra-Seal is an impregnating sealer that works by occupying the pores in the stone thereby preventing dirt from becoming ingrained there. It’s also a natural look sealer that doesn’t affect the appearance of the stone.
My customer was very happy with the transformation of her floor and provided the feedback copies below. In-fact she was so impressed with the results that she also used our services to restore the grout and silicon in one of her bathrooms.
“Phil was on time & easy to deal with and did an amazing job on my kitchen and bathroom floors and the carpets & sofa. No fuss, just a great job. Liz O.”
Phil Vissian
Northamptonshire Tile Doctor
 Tile Doctor Ltd
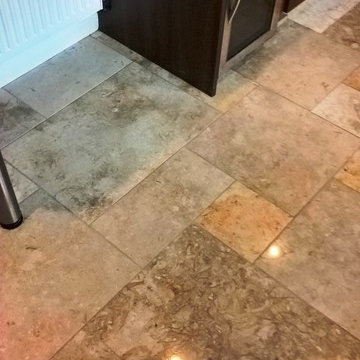
The photographs below are of a Polished limestone floor that had been installed in the Kitchen of a house in Cheltenham approximately eight years prior. The polish and sealer had worn off over that time allowing dirt to become ingrained into the pores of the stone making it difficult to clean.
This is a common problem with all types of porous stone and tile which need to be sealed to maintain their appearance. Sealers do wear down over time with use however and need to be maintained, this is why Tile Doctor have created a maintenance program whereby we pop by every 12 months to give the floor a light clean and top-up the sealer, it only takes a few hours, but it keeps your sealer in good condition.
Cheltenham by the way is a lovely town situated on the edge of the Cotswolds which is an area of Outstanding Natural Beauty. It has a racecourse and is well known for the mineral springs which were discovered here in 1716.
My first job was to protect the wooden kitchen units from any splashes by covering them some cotton sheets. Next, I set about restoring the Limestone’s appearance using a set of Burnishing Pads which is a form of polishing which involves the sequential application of four diamond encrusted pads of different grit levels.
The first pad applied is a Coarse 400 grit pad which is applied to the floor with a buffing machine and lubricated with water. This process grinds away the top layer of dirt and staining from the stone, along with any old sealer, the floor is then rinsed to remove the soil that is generated. I then move through the system, applying the Medium and then Fine pads using less and less water as you go but rinsing in-between and extracting the water with a wet-vac machine.
Once I was happy with the stone I scrubbed the grout lines to remove any soiling that the pads had failed to pick up. The floor was then given a final rinse and the wet vacuum used to extract as much moisture as possible. The floor was then left to dry out completely overnight.
The next day I gave the floor a polish with the Very Fine 3,000 grit diamond burnishing pad, this is applied using a technique we call a “spray burnish” due to the fact that very little water is used during its application.
The next step was to seal the stone using for which I used Tile Doctor Colour Grow which is an impregnating sealer that protects the stone from within by occupying its pores. Colour Grow also has the added benefit of intensifying the natural colours in the stone. The floor was then left to dry for an hour before I gave it one final dry polish using the Very Fine burnishing pad.
My customer was very happy with the final result and made the comment that they thought the floor looked brand new.
Malcolm Crowther
Gloucester Tile Doctor
 Tile Doctor Ltd
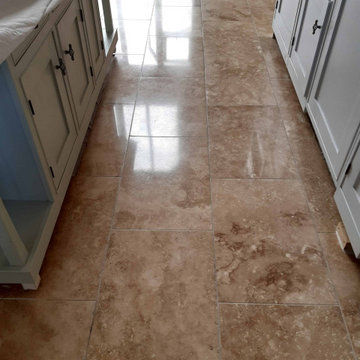
Located in Burgh Castle West of Great Yarmouth, this Travertine stone floor was a classic example of an incomplete installation. By incomplete I mean the tiler had done a fine job of laying and grouting the tiles but had left it at that and not sealed the stone. Natural stone like Travertine is porous and needs a sealer to stop dirt becoming ingrained in its pores, a sealer will also improve its appearance.
Without a sealer this floor now looked very dull, pale, rather damaged with pitting and heavily soiled with ingrained dirt. Pitting in stone like this is a natural feature of Travertine however it can be exacerbated with the use of acid cleaning products. This was a floor in urgent need of a face lift, and I was confident it could be transformed into a very beautiful floor.
I think it is true to say that most tilers will skilfully lay a floor for you but usually don’t have the knowledge, experience or equipment to finish the surface properly and when it comes to sealing many will recommend a product and suggest you take care of it yourself. Naturally if your find yourself in that position don’t insist the tiler does it, better to give us a call and have it done properly.
Our first job was to backfill the larger pits in the stone which as I mentioned are a natural feature of travertine material, but they can trap dirt and so its best if they are plugged with a suitably rigid filler. Also, if left alone the larger holes can quickly become larger as their edges crumble and break up leading to the entire tile becoming unstable. Replacing a tile in a floor like this is possible however its an extremely awkward job to do and it can be difficult to find an exact match for replacement.
Filling was done using a two-part, neutral cream-coloured polyester compound which gels in about fifteen minutes after addition of the catalyst. After this initial period, the excess product is trimmed off level with the surface of the tile before it sets harder than the stone itself in around sixty minutes. The fully cured compound can then be cut and machined as though it were part of the stone structure.
Our second job was to remove deep scratches caused by the unprotected feet of workmen’s ladders. This was done using Tile Doctor 50-grit and 100-grit diamond hand burnishing pads with a little water as a cutting medium. Shallower scratching present across the rest of the floor was removed using a Tile Doctor 200-grit soft milling pad driven by our Klindex 17″ rotary machine.
This abrasive action produces a fine slurry which was then rinsed with water and extracted using our 400psi Ninja machine in preparation for the next stage of the refinishing process. These machines were an expensive investment for our business however they are very robust and effective producing a good result that saves time.
Next task was to restore the polished appearance of the Travertine which was done using the application of a set of Tile Doctor burnishing pads. The process starts by applying a coarse 400-grit diamond pad, again fitted to the Klindex rotary machine. This cleans the tile and improves the matt finish left by the milling pad; again, the slurry was rinse-extracted before moving on to the next pad in the set. Next came the finer diamond polishing stages of 800 grit and 1500 grit, slurry being removed as before between the grades. By this time, all the scratches had been removed and the Travertine floor had visually pleasing even sheen across the whole surface. The last pad in the set is applied dry with a little water sprayed onto the tile so we left the area to dry out thoroughly overnight with the assistance of our large capacity dehumidifier.
Returning the following morning, we found that the floor had dried out perfectly and was ready to be vacuumed and spray burnished with the last pad in the set which is a 3000-grit very fine pad applied using a small amount of water sprayed from a trigger bottle resulting in a deep, rich shine across the floor surface.
Last step in the face lift was to seal the floor with a generous coat of Tile Doctor Ultra-Seal, a premium grade penetrating sealer recommended for use in Kitchens and food preparation areas. Having left the floor to soak up as much of the Tile Doctor Ultra-Seal as it could, the excess product was removed and the whole area allowed to dry completely with the assistance of our industrial air moving fan. Finally, the floor was spray buffed to a deep shine using a white maintenance pad.
The client was extremely pleased with our results and was amazed at the variation of colours within the stone which had never been visible previously.
Nick White
Norfolk Tile Doctor

 Randy Angell Designs
The client purchased this property with grand plans of renovating the entire place; from top to bottom, and from inside to outside. And while the inside canvas was very generous and even somewhat forgiving, the outside space would be anything but.
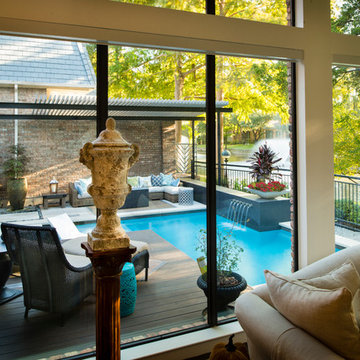
We wanted to squeeze in as much seating space as possible in their limited courtyard area, without encroaching on the already compact-sized pool. The first and most obvious solution was to get rid of the trees and shrubs that separated this house from its zero-lot-line neighbor. With the addition of Lueder limestone pavers, this new area alone would free up nearly 120 additional square feet, which happened to be the perfect amount of space for a mobile gas fire pit and sectional sofa. And this would make for the perfect place to enjoy the afternoon sunset with the implementation of a custom-built metal pergola standing above it all.
The next problem to overcome was the disconnected feel of the existing patio; there were too many levels of steps and stairs, which meant that it would have been difficult to have any sort of traditional furniture arrangement in their outdoor space. Randy knew that it only made sense to bring in a wood deck that could be mated to the highest level of the patio, thus creating and gaining the greatest amount of continuous, flat space that the client needed. But even so, that flat space would be limited to a very tight "L-shape" around the pool. And knowing this, the client decided that the larger space would be more valuable to them than the spa, so they opted to have a portion of the deck built over it in order to allow for a more generous amount of patio space.
And with the edge of the patio/deck dropping off almost 2 feet to the waterline, it now created the perfect opportunity to have a visually compelling raised wall that could be adorned with different hues of plank-shaped tiles. From inside the pool, the varying shades of brown were a great accent to the wood deck that sat just above.
However, the true visual crowning jewel of this project would end up being the raised back wall along the fence, fully encased in a large format, 24x24 slate grey tile, complete with a custom stainless steel, square-tube scupper bank, installed at just the right height to create the perfect amount of water noise.
But Randy wasn't done just yet. With two entirely new entertaining areas opened up at opposite ends of the pool, the only thing left to do now was to connect them. Knowing that he nor the client wanted to eliminate any more water space, he decided to bring a new traffic pattern right into the pool by way of two "floating", Lueder limestone stepper pads. It would be a visually perfect union of both pool and walking spaces.
The existing steps and walkways were then cut away and replaced with matching Lueder limestone caps and steppers. All remaining hardscape gaps were later filled with Mexican beach pebble, which helped to promote a very "zen-like" feel in this outdoor space.
The interior of the pool was coated with Wet Edge Primerastone "Blue Pacific Coast" plaster, and then lit up with the incredibly versatile Pentair GloBrite LED pool lights.
In the end, the client ended up gaining the additional entertaining and seating space that they needed, and the updated, modern feel that they loved.
 RetractableAwnings.com Inc.
PROJECT DESCRIPTION:
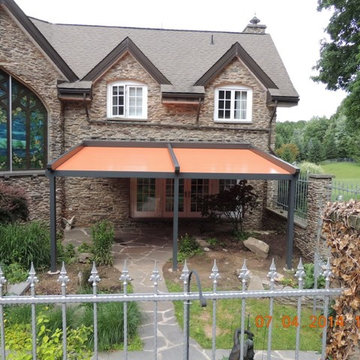
The client requested a large (19 foot wide by 15 foot projection) two-span retractable waterproof patio cover system to provide heavy rain, hail, heat, sun, glare and UV protection. This would allow our client to sit outside and enjoy their garden throughout the year, extending their outdoor entertainment space. For functionality they requested that water drain from the rear of the system into the front beam and down inside the right end post, exiting at the bottom from a tiny hole and draining into the flower beds thus preventing rain water from simply dropping off the front of the unit. The entire system used one continuous piece of fabric and one motor. The uprights and guides meet together at a smooth L-shaped angle, flush at the top for a perfectly smooth profile. The system has a Beaufort wind load rating Scale 10 (up to 63 mph) with the fabric fully extended and in use. A grey hood was also used to prevent rain water, debris and snow from collecting in the folds of fabric when not in use. A running profile from end to end in the rear of the unit was used to attach the Somfy RTS motor which is installed inside a motor safety box. Circular concrete footers were installed in the grassy area in front of the unit for mounting the 3 posts. To allow for a flat vertical mounting surface, a ledger board using pressure-treated wood was mounted the full 19-foot wall width, as the client’s house was made of uneven, thick stone.
PURPOSE OF THE PROJECT:
The client’s intention was for installation of a retractable waterproof patio cover system to provide heavy rain, hail, heat, sun, glare and UV protection for their backyard patio area.
What is unique or complex about the project?
This project was difficult for two main reasons: 1. Very large installation fasteners needed to be used to install through the above referenced ledger board and deep in to the stone structure of the house. 2. The motor cable needed to be placed through deeply drilled holes as the stone wall house wall is 15” thick. Drilling through en-even stone was definitely a challenge.
PROJECT RESULTS
The client was delighted with the results. The retractable patio cover system now makes it possible for the client to use a very large area in the rear of their house 24/7, 365 with the exclusion of snow. Since the client was very happy, they will be covering the ends, front and sides with our motorized vertical drop zippered awnings. Gable ends will also be covered with fixed fabric panels. Enclosing the entire area will allow the customer to heat the space in the winter and air condition the space in the summer.
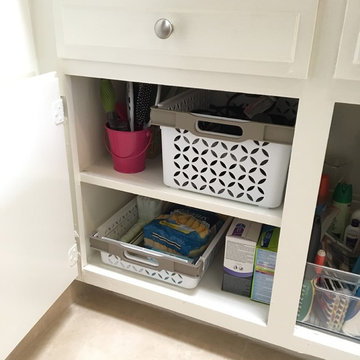
 Abbey Claire Professional Organizing
Lower left cabinet, after.
Bathroom - small contemporary bathroom idea in Los Angeles with raised-panel cabinets, white cabinets and solid surface countertops
Bathroom - small contemporary bathroom idea in Los Angeles with raised-panel cabinets, white cabinets and solid surface countertops
11